Losing precious memories can feel like a digital disaster. Whether it’s a deleted wedding album or a misplaced snapshot of a child’s first steps, the panic is real. However, as an expert in data recovery and SEO, I can tell you that “gone” doesn’t always mean “gone forever.” In this comprehensive guide, we will explore how to recover erased photos using professional strategies that maximize your chances of success.
Understanding Photo Deletion
What Happens When You Delete a Photo
When you delete a photo, it might feel like it’s gone forever—but that’s rarely the case. In reality, most devices don’t immediately erase the actual data. Instead, they simply mark the space as “available” for new files. This is a crucial concept in learning how to recover deleted photos. Think of it like removing a book from a library catalog without actually burning the book—it still exists until something else takes its place. This is why quick action is so important when trying to retrieve files.
Modern storage systems, whether on smartphones, computers, or memory cards, rely on file indexing rather than physical removal. When a file is deleted, its index entry is removed, but the underlying data remains intact until overwritten. This creates a window of opportunity for recovery, sometimes lasting minutes, days, or even weeks depending on usage. However, the more you use the device after deletion, the higher the chance that new data will overwrite those lost photos permanently. Understanding this concept changes everything. It shifts your mindset from panic to strategy. Instead of assuming your memories are gone, you realize you have a chance—if you act quickly and correctly.
Types of Photo Loss Scenarios
Not all photo loss situations are created equal. Some are simple and reversible, while others are more complex and require specialized tools. Common scenarios include accidental deletion, formatting a storage device, system crashes, virus attacks, and even physical damage. Each of these situations affects how recoverable your photos are.
Accidental deletion is the easiest to fix, especially if the file is still in a “Recently Deleted” or recycle bin folder. Formatting, on the other hand, can wipe entire storage systems, but even then, data often remains recoverable with the right software. Hardware failure introduces another level of complexity, where recovery may require professional intervention. Recognizing your specific scenario helps you choose the right recovery method. It’s like diagnosing a problem before fixing it—skip this step, and you risk making things worse instead of better.
Immediate Actions After Losing Photos
Why Timing Matters
Time is your biggest ally—or your worst enemy—when it comes to the process of how to recover erased photos. The moment you realize something is missing, every second counts. The longer you wait, the higher the chance that new data will overwrite your lost files, making recovery impossible.
Imagine spilling water on a document. The faster you react, the more readable it remains. The same principle applies here. Acting quickly preserves the integrity of your deleted data. This is especially critical for smartphones, where background apps constantly write new data to the flash memory.
What You Should Avoid Doing
Most people unknowingly make recovery harder by trying random fixes. To ensure you can successfully recover deleted photos, follow these “don’ts”:
- Do not download apps directly onto the device you are trying to recover from.
- Do not take new photos or videos.
- Do not restart the device repeatedly.
- Do not perform a factory reset.
Another common mistake is saving recovered files back to the same storage location. This can overwrite other recoverable data, creating a domino effect of loss. Always use a different storage medium when performing recovery. Think of your device as a crime scene. Every unnecessary action disturbs the evidence. The goal is to preserve as much data as possible until you can safely retrieve it.
Recovering Deleted Photos from Smartphones
Android Photo Recovery Methods
Using Google Photos Backup
If you use Android, your first stop should be Google Photos. Many users don’t realize that their photos are automatically backed up to the cloud. The “Trash” or “Bin” folder stores deleted photos for up to 60 days.
- Step 1: Open the Google Photos app on your Android device.
- Step 2: Tap Library at the bottom, then tap Bin (or Trash).
- Step 3: Touch and hold the photo you want to restore.
- Step 4: Tap Restore at the bottom. The photo will reappear in your gallery.
Using Data Recovery Apps
When backups fail, professional recovery apps become your next option. These tools scan your device’s storage for remnants of deleted files and attempt to reconstruct them. Some require root access, while others can function without it but may have limited capabilities. The effectiveness of these apps depends on how much new data has been written since deletion.
iPhone Photo Recovery Methods
Using Recently Deleted Folder
Apple devices make the task of how to recover erased photos straightforward with the “Recently Deleted” folder.
- Step 1: Open the Photos app.
- Step 2: Scroll down to the bottom of the “Albums” tab to find Recently Deleted.
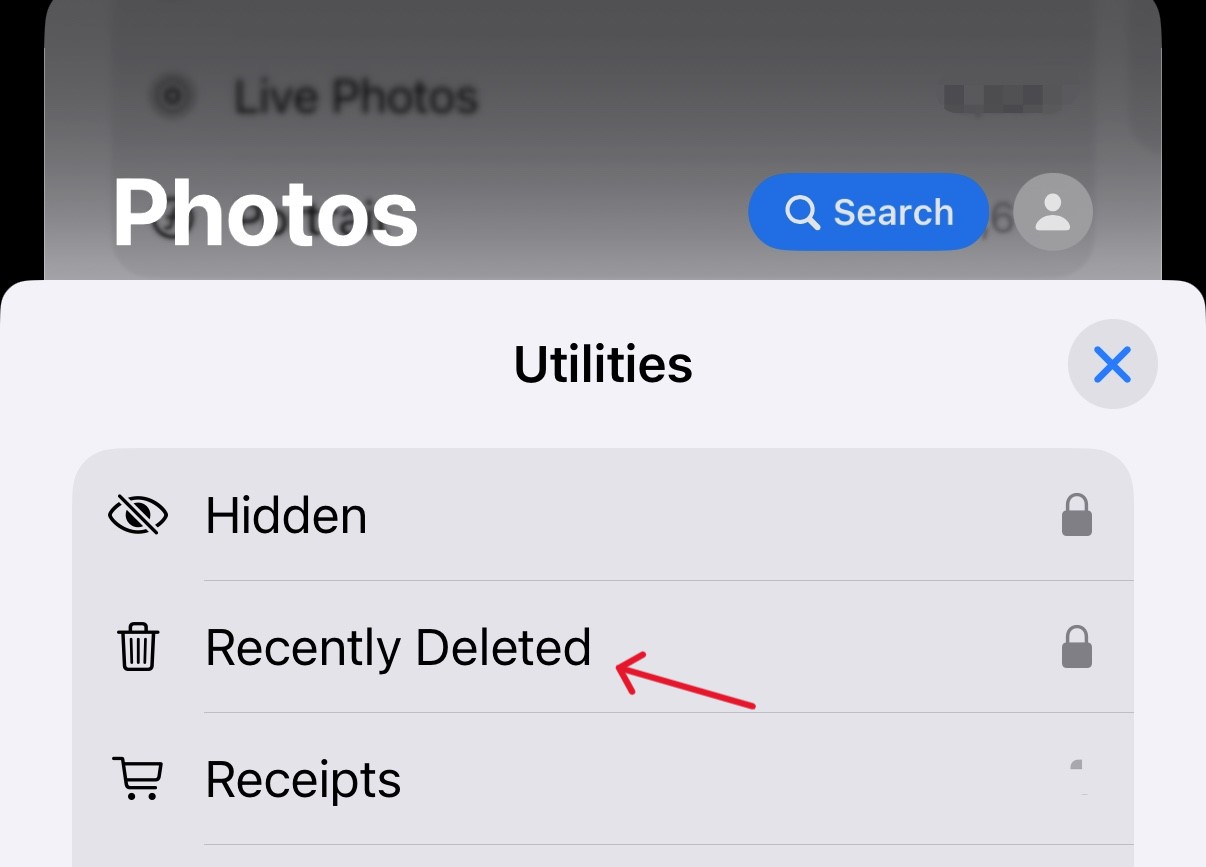
- Step 3: Authenticate using FaceID or TouchID.
- Step 4: Select the photos and tap Recover.
Using iCloud Backup
If the photo isn’t in the Recently Deleted folder, iCloud might still have it. Restoring from an iCloud backup can bring back lost photos, but it may also overwrite current data. This makes it a powerful yet risky option. To minimize data loss, you can use selective restore tools or preview backups before applying them. This ensures you recover only what you need without losing recent files.
The Professional Solution: PandaOffice Drecov
When standard folders and cloud backups fail, you need a robust, professional-grade tool. PandaOffice Drecov is a premier data recovery product designed to handle complex photo loss scenarios with a high success rate. It is particularly effective for those wondering how to recover erased photos from formatted drives or corrupted SD cards. This makes it an indispensable tool for a wide range of data loss scenarios, including:
- Accidental Desktop Deletions: Instantly retrieving files wiped from your local workspace.
- Disk Formatting Errors: Salvaging files from drives that have been completely wiped or reformatted.
- External Media Rescue: Recovering lost data from formatted or corrupted SD cards and USB flash drives.
- Sync Conflict Resolution: Reversing data loss caused by synchronization errors between your PC and the OneDrive cloud.
- Browser Metadata Recovery: Restoring lost Chrome bookmarks and other essential application data.”
⚠ Important: Never install the software on the drive where the photos were lost. Connect your device (SD card, phone, or external drive) to the computer using a stable USB cable.
Step-by-Step Guide to Using PandaOffice Drecov
Step 1: Select the Location.
Launch the software. You will see a list of available drives. Select the specific drive or partition where your erased photos were originally stored.

Step 2: Initiation of the Scan.
Click the “Scan” button. PandaOffice Drecov will perform a “Quick Scan” followed by a “Deep Scan.” The Deep Scan is essential for finding photos that have had their file headers damaged.

Warning: Do not disconnect the drive during the scan process, as this can lead to further file corruption.
Step 3: Preview and Filter.
One of the best features of Drecov is the preview function. You can filter results by file type (e.g., .jpg, .png, .raw) to quickly find your images. Browse the thumbnails to verify the integrity of the files.

Step 4: Secure Recovery.
Select the photos you wish to retrieve and click “Recover.”
Key Point: When prompted for a destination, choose a different drive (e.g., if recovering from an SD card, save the files to your PC desktop). This prevents overwriting the very data you are trying to save.
Recovering Photos from Computers
Windows Recovery Options
Windows users should check the Recycle Bin first. If it has been emptied, you can attempt to use File History.
- Step 1: Type “Restore your files with File History” in the taskbar search.
- Step 2: Look for the folder where your photos were stored.
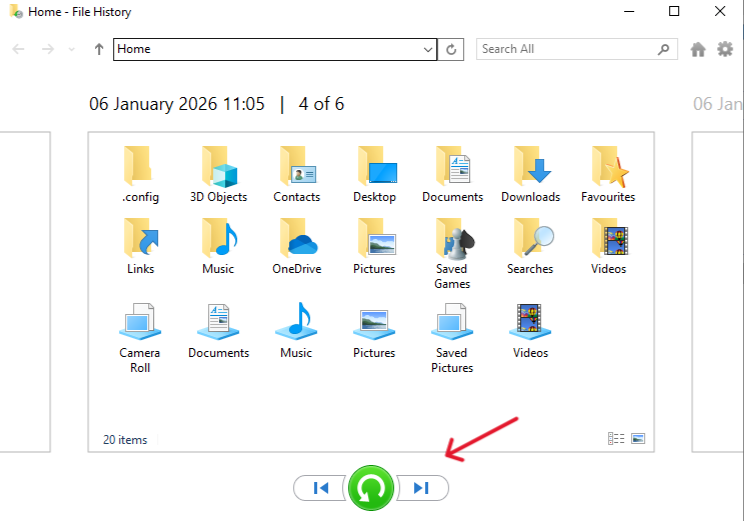
- Step 3: Use the arrows to see all the versions and click Restore.
Mac Recovery Options
Mac users have Time Machine. If you have this feature enabled, you can “enter” Time Machine and scroll through snapshots of your folders to find the exact moment before the deletion occurred. If you don’t have a backup, professional software like PandaOffice Drecov is your most reliable path forward.
Recovering Photos from External Storage
SD Cards and USB Drives
External storage devices are highly recoverable because they don’t overwrite data as quickly as smartphones. They use simpler file systems like FAT32 or exFAT. When you’re looking for how to recover erased photos from these devices, software-based scanning is almost always successful if the card hasn’t been physically snapped.
Camera Memory Cards
Digital cameras often store photos in RAW formats. Specialized tools like PandaOffice Drecov are built to recognize these specific file signatures (like .CR2, .NEF, or .ARW), making them superior to standard “undelete” utilities.
When Professional Recovery Is Needed
Sometimes, software isn’t enough. If your storage device makes clicking sounds, isn’t recognized by any computer, or has been submerged in water, you are dealing with physical failure. In these cases, software scans can actually cause more harm. You should contact a professional data recovery lab that operates in a “Clean Room” environment to manually extract the data from the platters or flash chips.
Preventing Future Photo Loss
Prevention is always better than recovery. To avoid searching for how to recover deleted photos in the future, implement the 3-2-1 Backup Rule:
- 3 Copies of Data: Have your original photos and two backups.
- 2 Different Media: Store backups on different devices (e.g., an external hard drive and a computer).
- 1 Offsite Copy: Keep one backup in the cloud (Google Photos, iCloud, or Dropbox).
Additionally, always “Eject” your USB drives safely and avoid using the “Cut” command when moving photos—use “Copy” and “Paste,” then delete the originals only after the transfer is verified.
How To Recover Erased Photos FAQs
1. Is it actually possible to recover erased photos after I emptied the trash?
Yes, it is usually possible. When you “erase” a photo and empty the Recycle Bin or Trash, the operating system doesn’t immediately destroy the data. Instead, it marks the space as “available” for new files. As long as you haven’t saved new data onto that specific part of the drive, recovery software like PandaOffice Drecov can find and reconstruct the original image.
2. Can I recover erased photos from an Android or iPhone without a backup?
Recovery without a backup is much more difficult on mobile devices due to file encryption and the “TRIM” command. However, you can still attempt recovery by connecting your phone to a computer and using professional desktop recovery software. For the best results, you should stop using the phone immediately to prevent the erased photos from being overwritten by app cache or system updates.
3. Does performing a “Quick Format” prevent me from recovering erased photos?
No, a Quick Format only deletes the “address book” (file system index) of the drive, not the actual photo data. If you have accidentally formatted a SD card or external hard drive, you can still learn how to recover erased photos by performing a “Deep Scan.” This process bypasses the broken index and searches for the unique file signatures of your images.
4. How long do I have to recover erased photos before they are gone forever?
There is no specific time limit, but there is a “usage limit.” Recovery depends entirely on whether the physical space occupied by the erased photos has been overwritten by new files. If you erase a photo and then download a large video file, the photo may be gone in seconds. If the drive remains idle, the photos could remain recoverable for months.
5. Why are some of my recovered photos grayed out or only partially visible?
This happens when the photo data has been partially overwritten. If a new file takes up even a small portion of the space where the old photo lived, the file structure becomes corrupted. While recovery software can often “pull” the remaining data, the image may appear distorted, pixelated, or cut in half. To avoid this, always recover files to a different drive than the one you are scanning.
Conclusion
Recovering erased photos isn’t just possible—it’s often easier than you think if you follow the right steps. Whether you’re using a smartphone, computer, or external storage, the methodology remains the same: stop using the device, check your backups, and use professional tools like PandaOffice Drecov if the files are missing from the trash.
By understanding the mechanics of data storage and acting with speed and precision, you can rescue your digital life from the brink of extinction. Your photos may feel lost, but with these expert strategies, they are likely just waiting to be mapped back into your collection.