


Losing precious memories from your camera or smartphone feels like a digital disaster. Whether you accidentally clicked “Delete All” or your device prompts a “format required” error, the panic is real. However, modern forensic technology ensures that a “deleted” file is rarely truly gone. This guide explores professional methods to recover deleted photos from an sd card using industry-leading protocols.
1. The Pre-Recovery Protocol: Triage and Diagnostics
Before you attempt to recover deleted photos from an sd card, you must identify the nature of the failure. Data loss falls into two categories: Logical (file system errors) and Physical (hardware failure).
- The Golden Rule: Cease all operations immediately. New data overwrites the sectors where your old images reside.
- Physical Check: If your computer fails to detect the card or reports an incorrect size, stop. DIY software may further damage a dying NAND flash chip.
- Write-Protection: Slide the physical lock switch on the side of your SD card to the “Lock” position to prevent accidental writes during the scan.
2. Step Zero: Creating a Sector-by-Sector Disk Image
Professional labs never work directly on the original card. They create a bit-stream image first. This protects your data if the card’s hardware fails mid-scan.
- Use a tool like Win32 Disk Imager to create an
.imgfile of the entire card. - Mount this image as a virtual drive on your workstation.
- Perform your search to recover deleted photos from an sd card on this copy, keeping the original card safe.
3. Four Elite Solutions to recover deleted photos from an sd card
Option 1: PandaOffice Drecov
PandaOffice Drecov excels at deep-sector analysis. It is a premier solution when you need to recover deleted photos from an sd card that has been formatted or contains fragmented professional RAW files.
Benefits of the Graphical Approach:
| Feature | Advantage Description |
| Universal Format Support | Supports the recovery of over 1,000 formats, including JPG, PNG, CR2, MP4, MOV, and DOCX. |
| Deep Scan Technology | Capable of retrieving files through sector-by-sector scanning, even if the partition table is missing. |
| Free Preview Function | Allows you to preview photos in full screen before recovery to ensure the files are intact and usable. |
| 100% Data Safety | Employs a “Read-Only” recovery process, ensuring no secondary damage or overwriting occurs on your original SD card. |
- Versatility: It recovers photos, videos, audio, compressed files (ZIP/RAR), and even system files like EXEs.
- Accidental deletion from your computer desktop.
- Files lost after emptying the Recycle Bin.
- Data loss from disk formatting.
- Accidental deletion or formatting of SD cards/U disks.
- Sync error occurring with deleted OneDrive files
- Restore deleted Chrome bookmarked
- Privacy First: All recovery happens locally on your machine, so you don’t have to worry about your private data leaking to the web.
- Step 1: Connection. Insert your card and launch the app. Select your drive under “External Devices.”
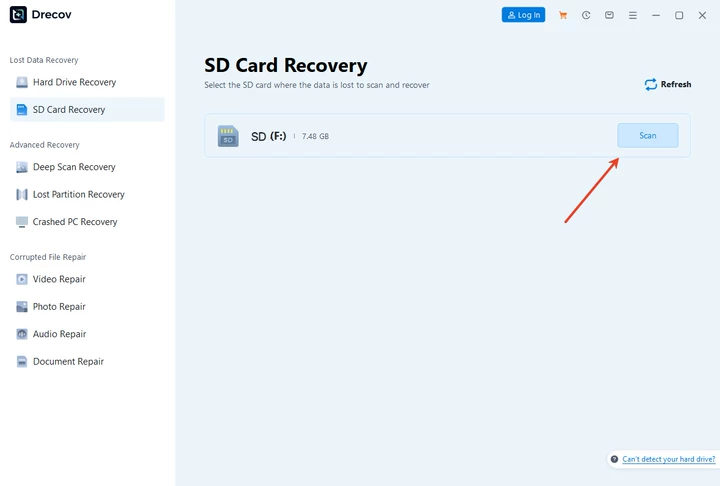
- Step 2: Dual-Scan. Click “Scan.” The software runs a Quick Scan for recent deletes and a Deep Scan for buried data.
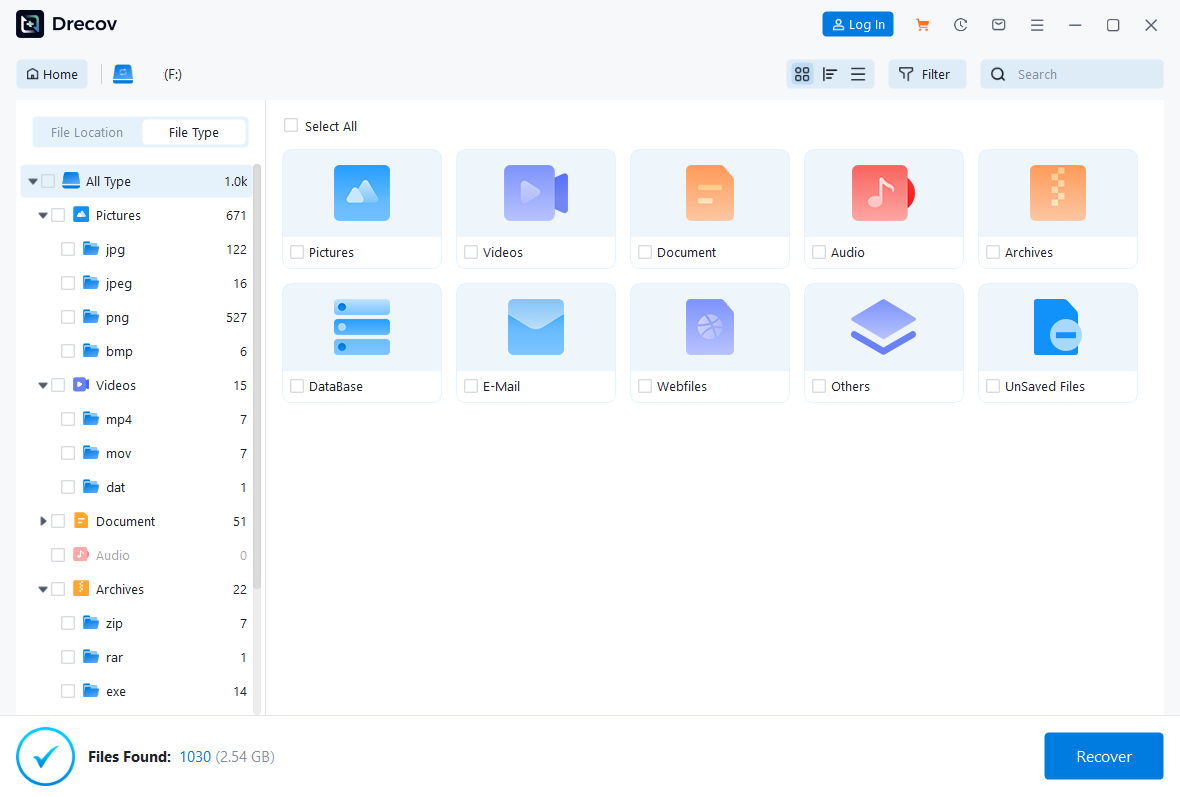
- Step 3: Filter. Use the sidebar to select “Pictures.” You can preview images in real-time without waiting for the full 100% completion.

- Step 4: Verification. Double-click a thumbnail to check for corruption.
- Step 5: Export. Click “Recover” and save the files to your PC’s local drive.
⚠️ CRITICAL WARNING: Never save recovered files back to the same SD card. This causes immediate and permanent data overwriting.
🎬 Need a Visual Walkthrough?
If you prefer a step-by-step visual demonstration, watch our comprehensive video tutorial below. This 1-minute guide covers everything from connecting your device to the final export, showing you exactly how to recover deleted photos from an sd card using the PandaOffice Drecov interface.
Option 2: SanDisk RescuePRO
Often bundled with SanDisk Extreme cards, this tool uses proprietary algorithms to recover deleted photos from an sd card and is particularly famous for its “fragmented video” reassembly.
- Step 1: Interface Selection. Open the app and choose “Recover Photos” or “Recover Video” from the main menu.

- Step 2: Drive Mapping. Select the drive letter corresponding to your SanDisk card.
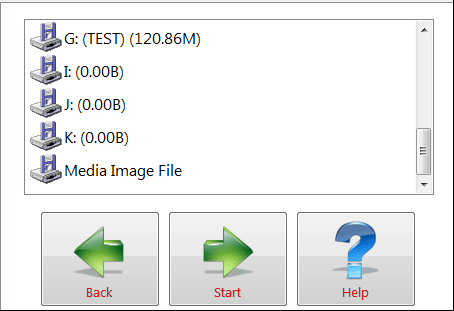
- Step 3: Signature Scan. Click “Start.” The tool will perform a raw signature search tailored for high-end camera sensors.
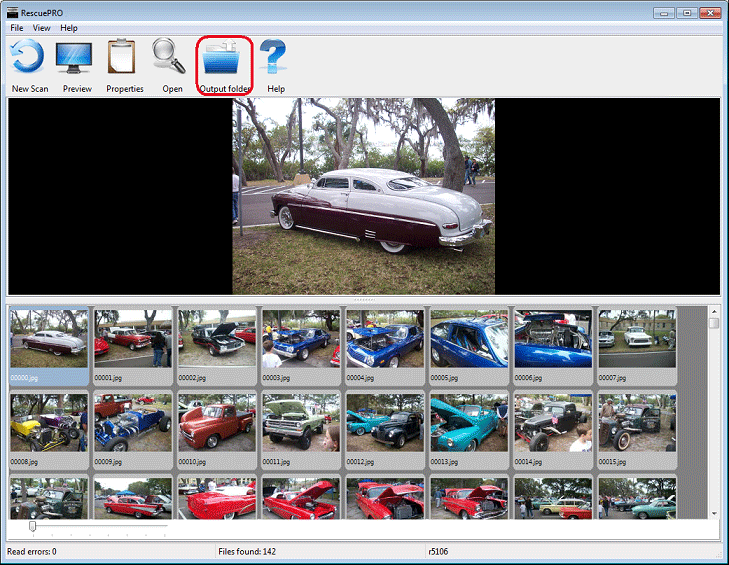
- Step 4: Output Review. Once finished, the tool saves files to a default “Recovered” folder on your desktop for inspection.
💡 PRO TIP: If the software asks for “Sector Range,” always select the “Start to End” to ensure no clusters are missed.
Option 3: Sony Memory Card File Rescue (The Sony Ecosystem Tool)
If you own a Sony SD, Tough, or MicroSD card, this free utility is highly effective at handling specialized formats like XAVC S 4K and Sony RAW (ARW).
- Step 1: Authentication. Enter your card’s model name and serial number on the Sony website to download the latest version.
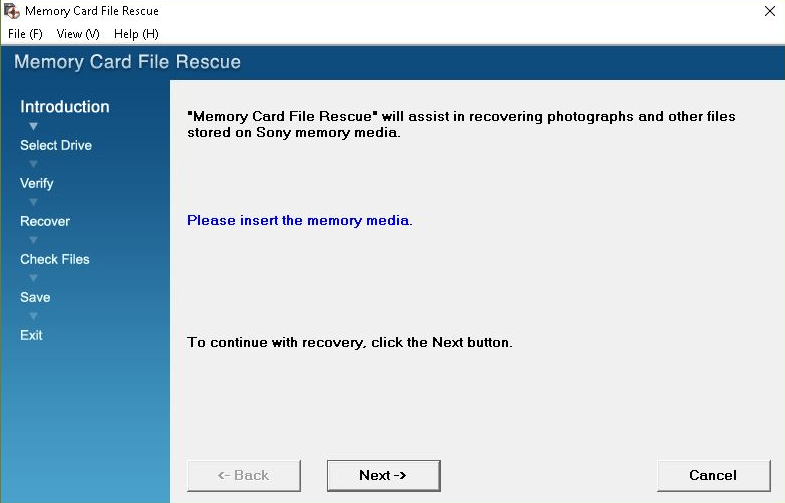
- Step 2: Target Selection. Launch the software and select your Sony card from the device list.
- Step 3: Intelligent Analysis. Click “Next” to begin the analysis. The software prioritizes Sony-specific metadata to reconstruct file structures.
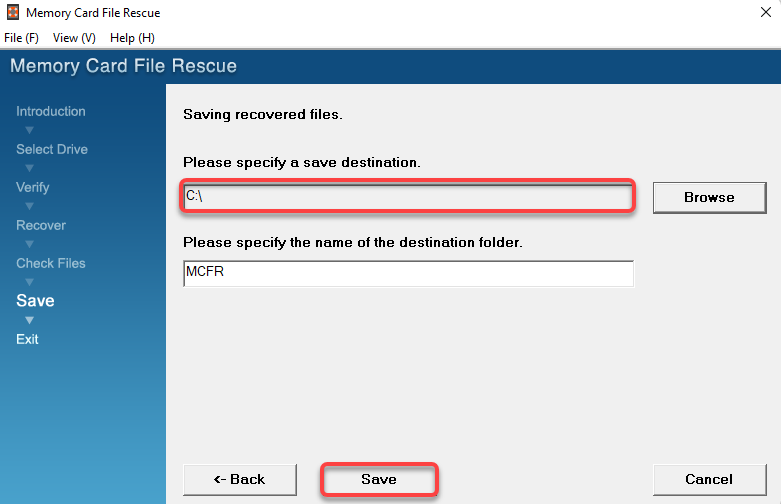
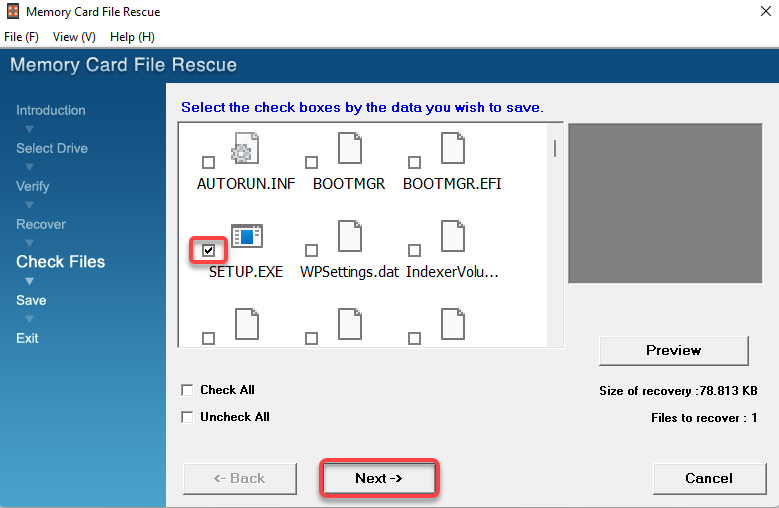
- Step 4: File Selection. Select the specific items you wish to save from the list of found files and click “Save.”
⚠️ ALERT: Ensure your laptop is plugged into power. A power failure during a Sony Deep Scan can result in a “RAW” file system error.
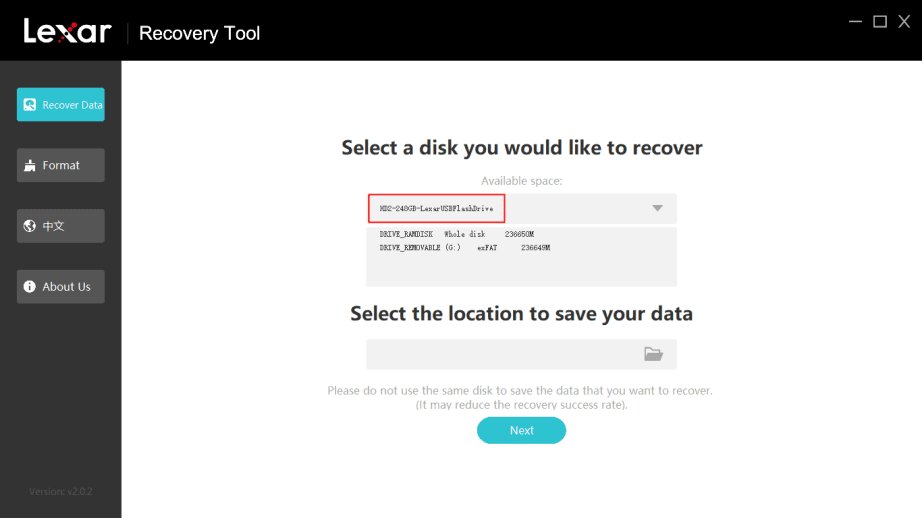
Option 4: Lexar Recovery Tool (The Streamlined Solution)
Lexar offers a simplified, lightweight utility to recover deleted photos from an sd card. It focuses on speed and ease of use for general accidental deletions.
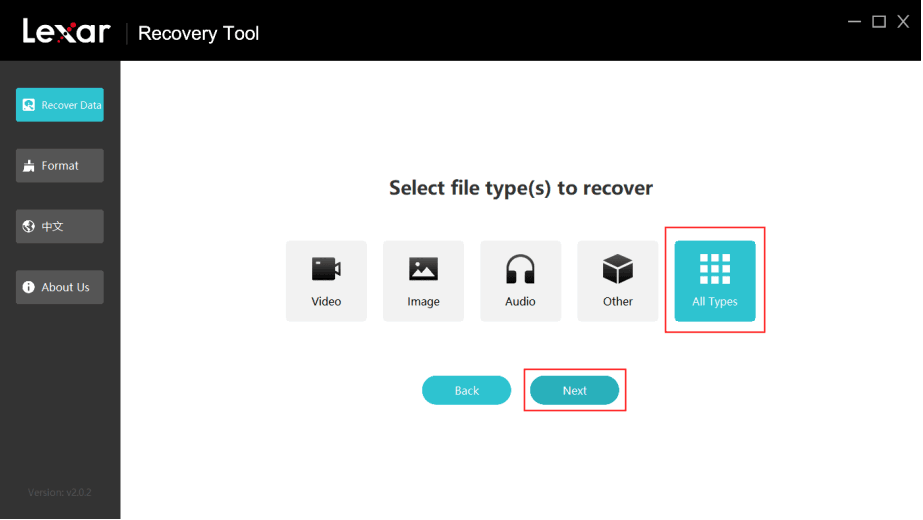
- Step 1: Launch. Open the utility and select your card from the dropdown menu.
- Step 2: Format Choice. Select the file system (usually FAT32 or exFAT) to help the software narrow its search logic.
- Step 3: Scanning. Hit the scan button. The progress bar will indicate the estimated time remaining based on card capacity.
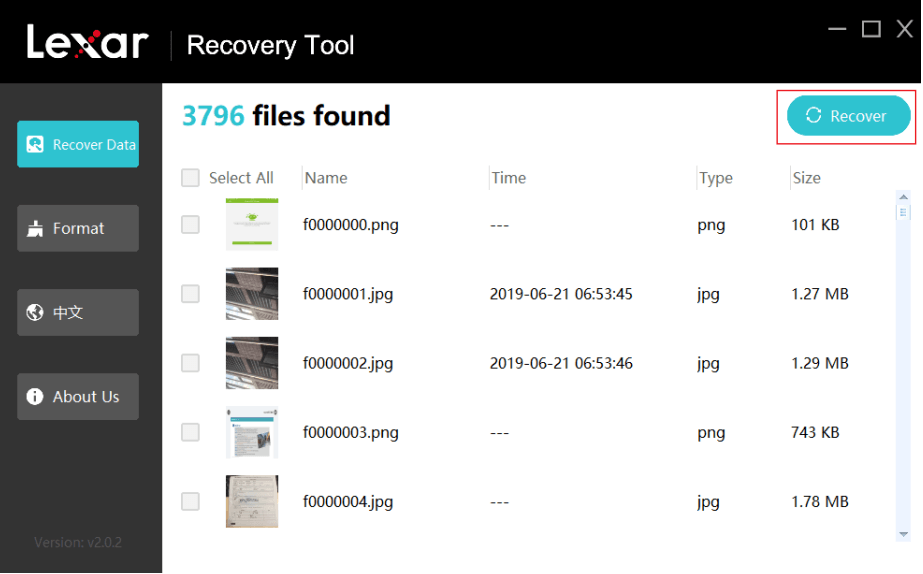
- Step 4: Retrieval. Mark the checkboxes for your missing photos and select a secure destination folder on your computer.
⚠️ WARNING: If the card becomes hot during the scan, pause the process and let it cool. Overheating is a common sign of internal NAND failure.
4. Technical Comparison of Professional Recovery Software
| Software | Best User Case | Key Strength | Ease of Use |
| PandaOffice Drecov | All-round professional use | Superior Deep Scan success rate | High (Intuitive GUI) |
| SanDisk RescuePRO | SanDisk Extreme/Video | Reassembles fragmented 4K video | Medium (Classic UI) |
| Sony File Rescue | Sony ARW/XAVC formats | Deep integration with Sony firmware | High (Free for owners) |
| Lexar Recovery | Lexar cards / Accidental delete | Extremely fast scanning speeds | High (Simple steps) |
5. Proactive Prevention: Protecting Your Digital Life
While knowing how to recover deleted photos from an sd card is vital, preventing loss is a more robust strategy.
- The 3-2-1 Rule: Maintain three copies of your data (original + two backups), use two different media types (SD card and Cloud), and keep one copy offsite.
- Format in Camera: Avoid deleting photos one by one on your PC. Always format the card within the camera menu to ensure the file system remains healthy.
- Card Rotation: Do not use one giant 512GB card. Use several smaller 64GB cards so that a single hardware failure doesn’t destroy an entire shoot.
- Replace Regularly: SD cards use flash memory with a limited number of write cycles. Replace your professional cards every 2–3 years regardless of apparent health.
6. Conclusion
To successfully recover deleted photos from an sd card, you must balance speed with caution. Most users find success by starting with a professional tool like PandaOffice Drecov or their card’s official manufacturer utility. If the data is critical and the card is physically unresponsive, always consult a professional laboratory instead of attempting repeated DIY scans.
Final Checklist:
- Check the integrity of recovered photos before re-formatting your SD card for use.
- Verify the health of your card reader and cable before scanning.
- Ensure your computer has enough free space to hold the recovered files.


