


Imagine this: you just returned from a perfect vacation, eagerly inserting your SD card into your computer to back up those priceless memories. Suddenly, a cold prompt pops up: “The drive needs to be formatted.” At that moment, your heart drops, and a wave of anxiety hits—a feeling we all know too well. Whether your camera displays a “Memory Card Error” or photos on your phone simply vanish, data loss happens in a flash.This guide will walk you through professional data recovery tools for sd cards and services. By using PandaOffice Drecov and other mainstream methods, you can learn how to rescue your lost memories like an expert.
Common Scenarios of SD Card Data Loss
Before you start the rescue process, identifying your specific situation helps you select the most effective data recovery tools for sd cards:
- Accidental Deletion (Human Error): You mistakenly hit “Delete All” while reviewing photos on your camera or organizing folders on your PC.
- Improper Ejection: Pulling out the card reader during data transfer often corrupts the file system, leading to “Inaccessible” errors.
- Disk Formatting: You accidentally clicked “Format Disk,” or a system error (like a RAW format) forced you to format the drive.
- Virus Attacks: After using a public computer, your files might turn into gibberish, shortcuts, or simply disappear.
- System Crashes: If your camera loses power during recording, the current video file often becomes corrupted and unplayable.
- File System Errors: Errors in file systems such as FAT32 and exFAT cause damage to the file directory, making data inaccessible normally.
How Data Recovery Works: The “Table of Contents” Logic
Think of your SD card like a giant library full of books. Each “book” is a file (a photo, a video, or a document). To find these books quickly, the library uses a Table of Contents (technically called a File System, like FAT32 or exFAT).
- When you save a file: The system writes the actual data (the pages of the book) onto a shelf and records its location in the Table of Contents.
- When you “Delete” a file: The computer does not actually go to the shelf and burn the book. Instead, it simply takes an eraser and wipes that entry out of the Table of Contents.
- The Result: The space where the file lived is now marked as “Free” or “Available.” To the computer, the file is gone, but the actual data (the pages) remains on the shelf until a new file is written over it.
The “Golden Rule” of Recovery
The most important thing to remember is that once the shelf space is reused, the old data is destroyed forever. This is why we insist that you stop using the SD card immediately after data loss. If you take new photos, the camera will write the new data directly onto the “Available” shelves where your old deleted photos still sit, permanently overwriting them.
Top-Tier SD Memory Card Restoration: PandaOffice Drecov
As a professional utility partnering with Microsoft Store and TechBullion, PandaOffice Drecov excels at handling “unopenable” or “garbled” files. It offers a high success rate while maintaining a simple workflow for non-technical users.
Benefits of the Graphical Approach:
- Cross-Platform Support: Drecov handles SD cards from Sony, Canon, and GoPro cameras which often use specialized FAT32 or exFAT configurations.
- Versatility: It recovers photos, videos, audio, compressed files (ZIP/RAR), and even system files like EXEs.
- Accidental deletion from your computer desktop.
- Files lost after emptying the Recycle Bin.
- Data loss from disk formatting.
- Accidental deletion or formatting of SD cards/U disks.
- Sync error occurring with deleted OneDrive files
- Privacy First: All recovery happens locally on your machine, so you don’t have to worry about your private data leaking to the web.
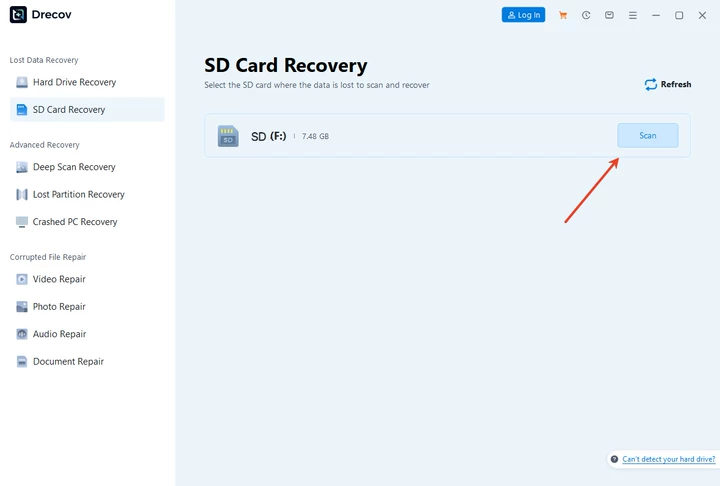
Step 1: Select Location and File Types
Launch the software to see a clear list of storage devices. If you deleted files from your PC, check the Recycle Bin; for SD card issues, insert your card reader and select the corresponding drive. To save time, you can also filter specific categories like Photos, Videos, or EXE files.
Step 2: Intelligent Scanning and Real-time Preview
Click “Start” to begin a comprehensive scanning process. As the software works, files will appear in the list. You can view files in real-time and double-click to preview photos or videos to ensure they are the ones you need.
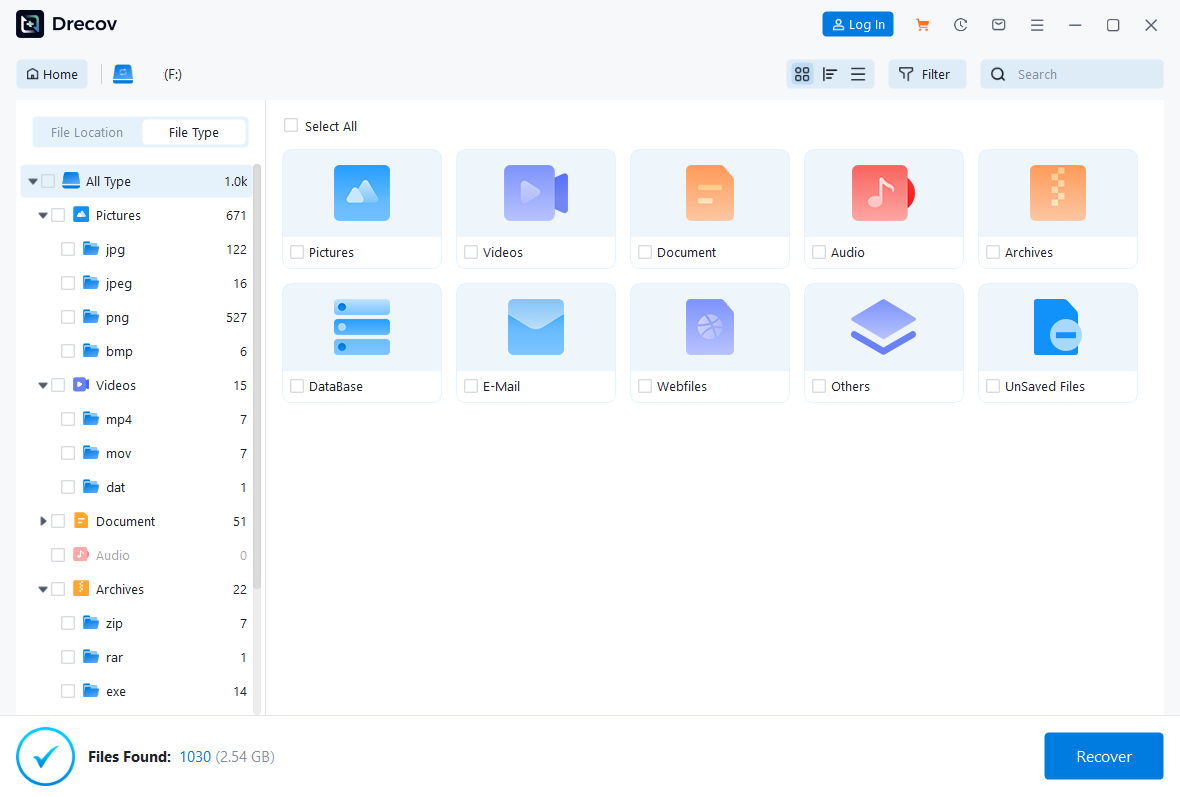
🔍 Note: If file names appear as random characters, don’t worry—you can still verify them through the “Preview Content” feature.
Step 3: Fast Recovery and Secure Saving
Once you find your data, select the target items and click Recover and Save.

🚨 Warning: Never save the recovered files back onto the original SD card! Instead, save them to your local hard drive first. Only after you confirm the files open correctly should you consider reformatting the SD card for reuse.
Alternative Data Recovery Tools for SD Cards
Depending on your technical comfort level, you might consider these other three utilities for your recovery needs:
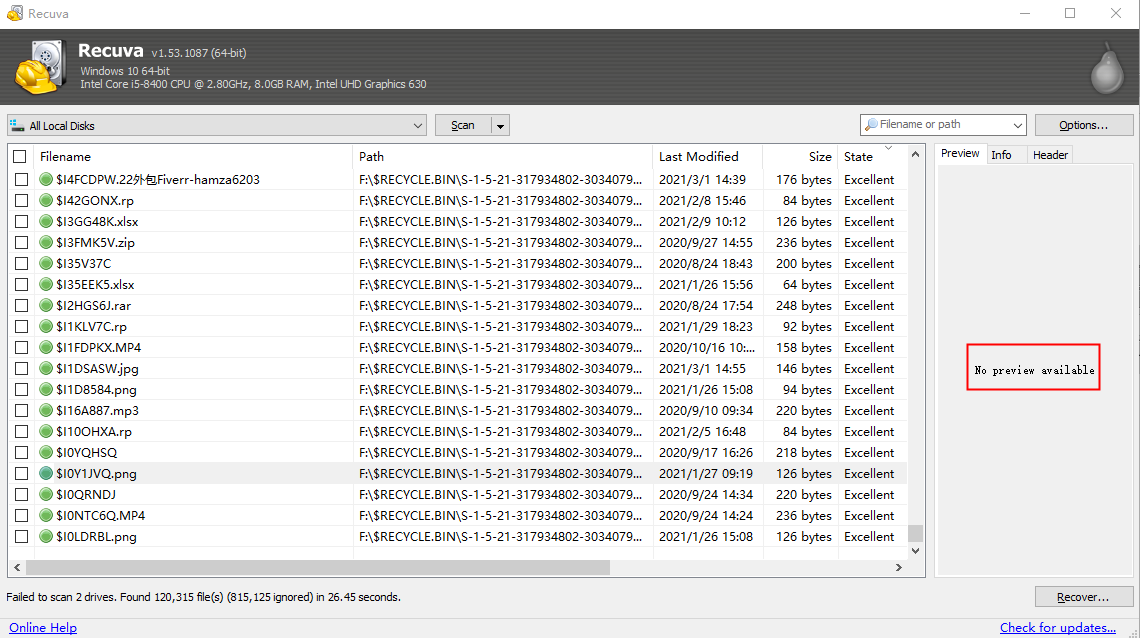
1. Recuva (Ideal for Light Recovery)
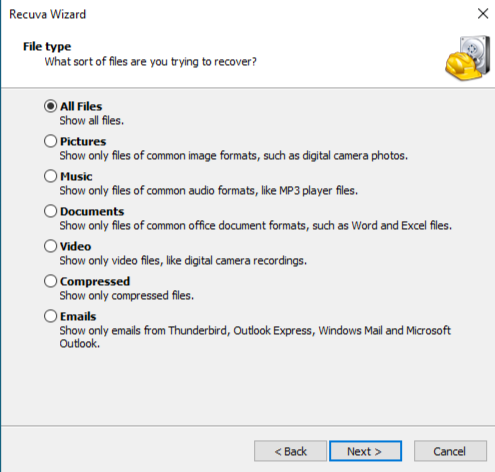
- Step 1: Run the Recuva Wizard and choose the file type you wish to retrieve.
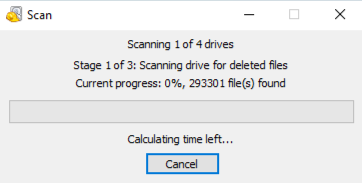
- Step 2: Select “On my media card” as the location and start the search.
- Step 3: Review the results. A green icon indicates a healthy file. Select your files and click “Recover” to save them to a new drive.
2. PhotoRec (The Open-Source Expert Choice)
- Step 1: Launch the program. Since this is a command-line interface, use your keyboard to select the SD card drive and press Enter.

- Step 2: Choose the partition type (usually FAT32 or exFAT) and select the
[Whole]option for a full-disk scan.
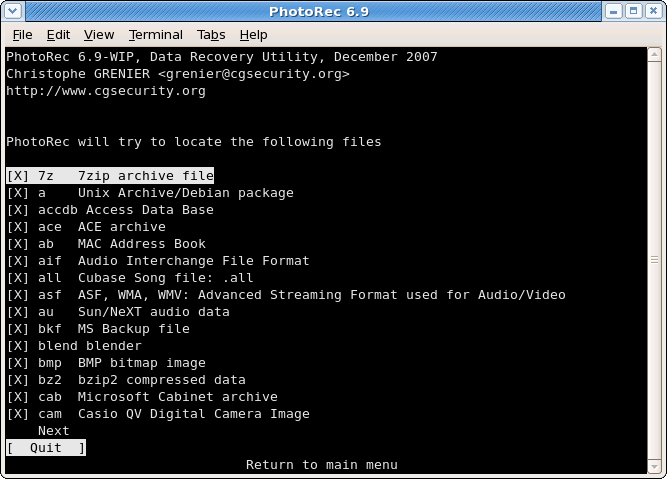
- Step 3: Press
Cto confirm the destination folder. Because it lacks a preview feature, it will recover all found data into a folder for you to sort manually later.
3. R-Studio (Advanced Partition Reconstruction)
- Step 1: Locate your SD card in the device tree on the left and right-click “Scan.”
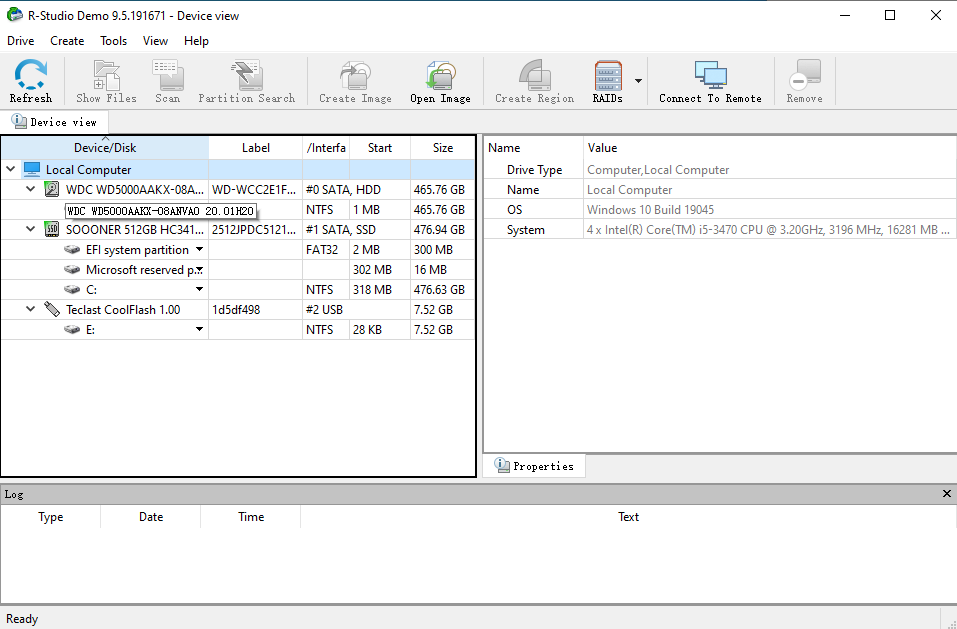
- Step 2: Set the scan parameters in the pop-up window. If the card has bad sectors, you can adjust the “Retry count” to attempt a forced read.
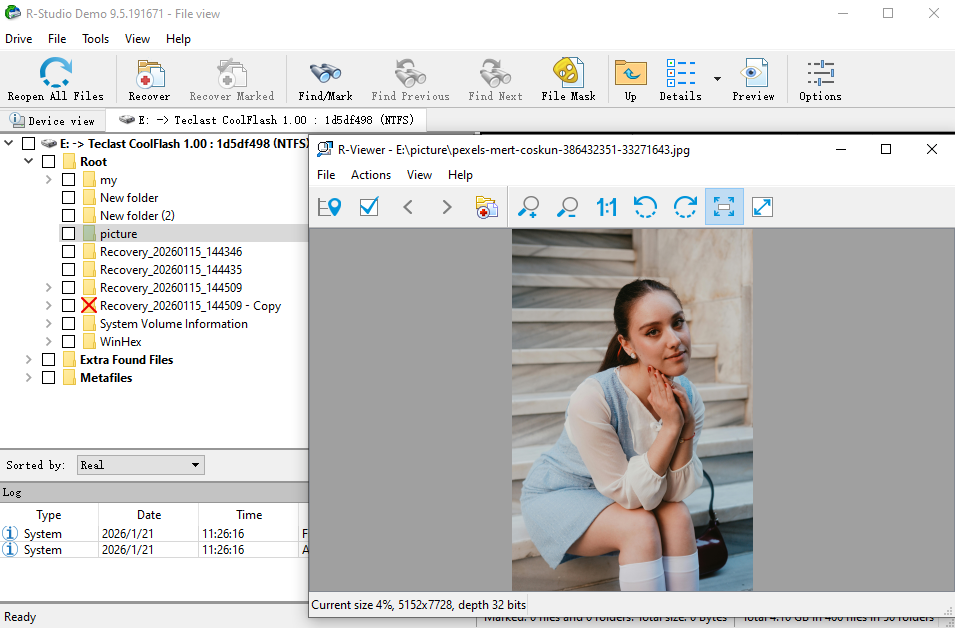
- Step 3: After the scan, click “Extra Found Files” to browse the data. Right-click your items and choose “Recover” to export them.
Detailed Comparison of Leading SD Card Recovery Solutions
| Software Name | Advantages | Disadvantages | Best For |
| PandaOffice Drecov | Extremely easy to use; supports repairing garbled/corrupted files; runs locally with zero leak risk; officially partnered with Microsoft Store. | Deep scanning for high-capacity disks requires patience. | Beginners and professionals seeking high success rates and simplicity. |
| Recuva | Simple interface; fast scanning speed; the free version offers decent basic functionality. | Recovery success rate is inconsistent; limited support for severely damaged or corrupted SD cards. | Users needing to find simple, recently deleted files. |
| PhotoRec | Completely free and open-source; supports a wide range of operating systems and file systems. | No graphical user interface (Command-line only); extremely difficult for beginners; no file preview. | Tech-savvy users and developers. |
| R-Studio | Exceptionally powerful; supports complex network recovery and RAID reconstruction. | Interface is highly complex; packed with technical jargon; steep learning curve for average users. | Data recovery lab experts and IT professionals. |
Proactive Strategies to Prevent SD Card Corruption
While data recovery tools for sd cards are powerful, prevention is always better than a cure. Follow these practical tips to minimize the risk of data loss:
- Strict Ejection Protocol: Always click “Safely Remove Hardware” on Windows or Mac. Abruptly pulling a card can damage the File Allocation Table (FAT), causing “Drive needs formatting” errors.
- Monitor Battery Levels: Avoid shooting videos or saving large files when your battery is below 5%. A sudden shutdown during a write operation can crash the entire logical partition.
- In-Camera Formatting: After backing up your data, format the card inside your camera rather than on a computer. This ensures perfect compatibility between the file system and the device hardware.
- Invest in High-Speed Brands: Cheap, low-quality cards have shorter lifespans. Stick to reputable brands with V30 or UHS-II ratings to reduce the risk of data loss caused by write delays.
- Avoid Full Capacity: Never fill your SD card to 100%. Leaving at least 10% of space free reduces pressure on the flash memory chips and prevents data overflow errors.
SD Card Data Recovery FAQs
1. My SD card says “needs formatting to use” when inserted into the computer, but there’s important data on it. What should I do?
Don’t format it directly! Close the prompt first, use data recovery software (e.g., PandaOffice DRecov) to scan the SD card, extract and back up the important data. Once backed up, use tools like SD Card Formatter to format and fix card errors—then it’ll work normally.
2.My phone keeps showing “SD card write speed too slow” and interrupts video recording. How to fix this?
Shooting HD/4K videos requires a U3-class SD card (write speed ≥30MB/s). If you have a U1-class card, replace it with a high-speed one. If it’s already a high-speed card:
① Format the SD card on your phone to clear redundant files;
② Check if the card is properly inserted and clean the metal contacts;
③ Close background apps that use storage to reduce write pressure.
3.My SD card shows a lot of used space, but the actual files take up very little—where did the free space go?
It’s likely due to hidden files (e.g., system cache, partially deleted large files) or file system errors. Solutions:
① Show hidden files on your computer (Press Win + E to open File Explorer, then go to the View menu and check the Hidden items option ) and delete useless ones;
② Use Windows’ built-in CHKDSK tool or Mac’s Disk Utility to scan and fix SD card errors, freeing up the occupied invalid space.
4.I stored my SD card for a long time, and now devices say “unrecognized.” Can I recover the old photos?
Recovery is possible! First, clean the SD card’s metal contacts gently with a soft eraser, then try different card readers or devices. If it’s still unrecognized, use data recovery software (e.g., PandaOffice DRecov) in “Deep Scan” mode—even unrecognized cards may have detectable data. For physical damage (e.g., chip oxidation), contact a professional data recovery service.
5.My 64GB SD card says “file too large” when transferring a single 8GB video. How to solve this?
The issue is the file system—FAT32 doesn’t support files over 4GB. Solution: Right-click the SD card on your computer, select “Format,” and change the file system to exFAT (compatible with Windows and Mac, no single-file size limit). Back up existing data first, then format—you’ll be able to transfer large files afterward.
Conclusion
In conclusion, safeguarding your digital memories requires both proactive habits and a reliable safety net. While the loss of critical files can be overwhelming, modern data recovery tools for sd cards have made the restoration process more accessible than ever. By understanding the underlying logic of file storage and acting quickly to prevent data overwriting, you can significantly increase your chances of a successful rescue. Among the various solutions available, PandaOffice Drecov stands out as a premier choice, combining a high-success repair engine with a secure, three-step local recovery process. Whether you are dealing with a formatted partition or corrupted files, this professional utility ensures that your “lost” data is never truly gone.


