


If you’ve been exploring AI-powered automation tools lately, chances are you’ve come across OpenClaw. It’s one of those powerful open-source AI agents that can automate tasks, interact with APIs, and even operate like a digital assistant directly from your system. Sounds impressive, right? It absolutely is—but like any powerful tool, it comes with responsibilities, especially when it’s time to remove it. In this guide, we will explore How to Uninstall OpenClaw effectively while ensuring your system remains optimized.
What Is OpenClaw and Why You Might Want to Remove It
Overview of OpenClaw
OpenClaw integrates deeply with your system, often accessing files, storing configurations, and keeping logs of its activities. Think of it as a highly capable assistant that keeps notes everywhere—helpful when you need it, but potentially problematic when you no longer do. This is why learning How to Uninstall OpenClaw isn’t just about deleting an app; it’s about ensuring every trace of it is gone.
Many users underestimate how much data OpenClaw leaves behind. Even after uninstalling, configuration files, cached data, and sensitive credentials can remain hidden in your system. That’s why a thorough understanding of how it works is crucial before attempting to Remove OpenClaw software.
Common Reasons for Uninstalling
So, why would someone want to Uninstall OpenClaw in the first place? The reasons vary, but they often revolve around control, security, and performance. Some users find that OpenClaw consumes more system resources than expected, especially when running background tasks. Others may be concerned about privacy, given that the tool can store API keys and interact with external services. There are also cases where users simply want to switch to a different AI agent or clean up their development environment.
Another big reason is troubleshooting. Sometimes, OpenClaw may conflict with other tools or create unexpected behavior in your system. When that happens, a clean uninstall becomes necessary to restore stability. At its core, knowing How to Uninstall OpenClaw is about regaining control. You’re not just removing software—you’re making sure your system is clean, secure, and running exactly the way you want it to.
Understanding How OpenClaw Installs on Your System
Installation Methods
Before you can Remove OpenClaw software properly, you need to understand how it got installed in the first place. This might sound obvious, but it’s a step many people skip—and it often leads to incomplete removal.
OpenClaw can be installed in several ways, depending on your setup. Some users install it via package managers like npm, while others may use direct scripts or manual downloads from repositories like GitHub. Each method places files in slightly different locations, which means the process to Uninstall OpenClaw can vary.
For example, installing via npm typically places the executable in a global directory, while manual installations might scatter files across custom paths. It’s like setting up furniture in different rooms—if you forget where you put something, it’s easy to leave it behind when moving out. Understanding your installation method helps you track down every file associated with OpenClaw, ensuring nothing gets left behind.
Default File Locations
OpenClaw doesn’t just sit in one place. It creates multiple directories to store its data, and many of these are hidden by default. Common locations include:
~/.openclaw~/.openclaw/workspace~/.clawdbot
These directories hold everything from configuration files to logs and cached data. They’re essentially the “brain” and memory of the software, storing all the information it needs to function. The tricky part? These folders often remain even after you Remove OpenClaw software. That means your system could still contain sensitive data long after you think the program is gone.
Why Proper Uninstallation Matters
Security Risks of Incomplete Removal
Let’s be real—leaving leftover files on your system might not seem like a big deal at first. However, when those files contain API keys, tokens, or logs of your activity, the stakes become much higher. Incomplete uninstallation can expose sensitive data to potential threats. If someone gains access to your system, those leftover files could provide valuable information about your accounts and integrations. It’s like leaving your house keys under the doormat—convenient, but risky.
Performance and Storage Issues
Beyond security, leftover files can also affect your system’s performance. While a few megabytes here and there might not seem like much, they can add up over time—especially if you frequently install and uninstall tools. These residual files can clutter your system, making it harder to manage and potentially slowing down operations. A clean method of How to safely uninstall OpenClaw without data loss ensures your system stays optimized and free of unnecessary clutter.
Step-by-Step Guide to Uninstall OpenClaw
When you decide to Uninstall OpenClaw, following a structured approach is the best way to avoid errors.
Step 1: Stop Running Processes
Before you begin, you need to make sure the software is not running. This might seem like a minor step, but it’s actually critical. If OpenClaw is still active in the background, it can lock files, prevent deletion, or even recreate directories after you remove them.
- Windows: Press
Ctrl + Shift + Escto open the Task Manager. Look for any process named “OpenClaw” or “ClawDBot,” right-click it, and select End Task. - Linux/macOS: Open your terminal and type
ps aux | grep openclaw. If a process ID (PID) appears, usekill -9 [PID]to terminate it.
Step 2: Run the Uninstall Command
Next, use the official uninstall command if you installed it via a CLI tool. This is the primary phase to Remove OpenClaw software.
Bash
openclaw uninstall --all --yes --non-interactive
This command removes the core application, including binaries and essential components. It’s the quickest way to get rid of the main program. However, it’s important to understand that this step doesn’t remove everything. While it handles the primary files, it often leaves behind directories and configurations that need to be deleted manually.
Step 3: Remove Residual Files
After running the uninstall command, it’s time to clean up what’s left behind. This involves locating and deleting directories that OpenClaw created during installation. Use commands like ls -a in your terminal to reveal hidden files, and look for directories such as .openclaw or .clawdbot. Once you find them, remove them using:
Bash
rm -rf ~/.openclaw
rm -rf ~/.clawdbot
Warning: Be extremely careful with the
rm -rfcommand. Ensure you have typed the path correctly, as this will permanently delete the folder without asking for confirmation.
How to Safely Uninstall OpenClaw Without Data Loss
A common concern when removing automation tools is the accidental loss of important data, such as custom scripts or output files generated by the AI. To master How to safely uninstall OpenClaw without data loss, you must prioritize the backup of your workspace.
Step 1: Backup Your Workspace
Before hitting delete, navigate to your workspace directory (usually ~/.openclaw/workspace). Copy any files you want to keep to a safe location, such as an external drive or a cloud storage service like Google Drive.
Step 2: Use PandaOffice Drecov for Emergency Recovery
If you accidentally deleted important files during the uninstallation process, don’t panic. PandaOffice Drecov is a professional-grade data recovery tool designed to handle accidental deletions and partition errors. It is highly effective for recovering workspace data lost during a manual cleanup.
⚠ Warning: Install it on a drive different from the one where your data was lost to prevent overwriting.
How to use PandaOffice Drecov:
- Step 1: Start the Scan. Click the “Scan” button. The software will perform a deep scan to locate fragments of deleted files, including
.jsonconfigs and.txtlogs.

- Step 2: Preview and Filter. Once the scan is complete, use the search bar to filter for “openclaw” or specific file extensions. PandaOffice Drecov allows you to preview files before recovery to ensure they are intact.
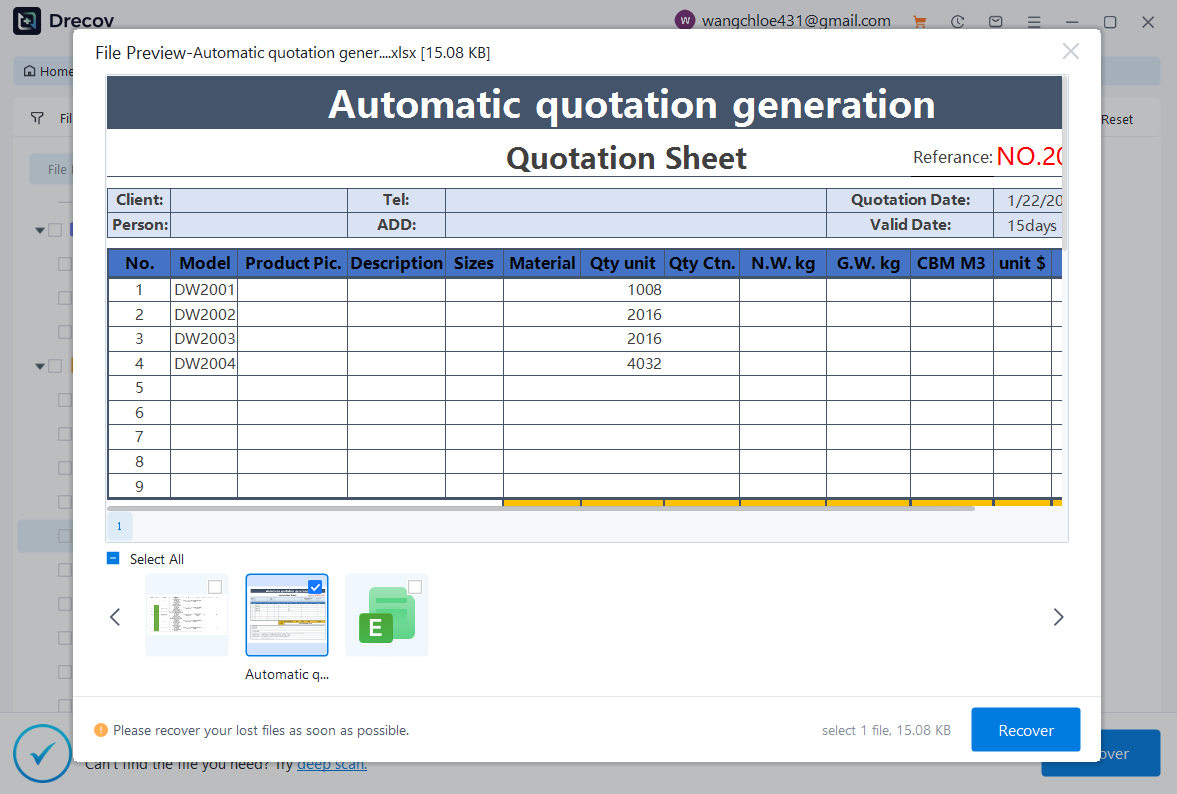
- Step 3: Recover Your Data. Select the files you need and click “Recover.” Always save the recovered files to a different drive than the one you are scanning to avoid overwriting data.
Warning Prompt: If you realize files are missing, stop using the computer immediately. Continued use of the hard drive can overwrite the “empty” space where your deleted files still reside, making recovery impossible.
After securing your data, you might also find these guides helpful:
- Recover deleted Chrome bookmarks complete guide
- Recover deleted files from USB flash drive
- How to recover deleted messages from Microsoft Teams
- Delete OneDrive the right way
Manual Removal of OpenClaw Directories
Identifying Hidden Dairectories
Hidden directories are where most of the data lives, and they’re easy to overlook. These folders don’t show up in standard file views, which means you need to actively search for them. In Windows, you must enable “Show hidden files, folders, and drives” in the Folder Options menu. In Linux/macOS, a simple ls -la command in the home directory will reveal them.
Deleting Remaining Files
Once identified, delete these directories carefully. If you’re on a Windows system, check the following path:
C:\Users\[YourUsername]\AppData\Roaming\OpenClaw
Deleting these ensures that the next time you install a similar tool, there are no configuration conflicts.
Removing OpenClaw from Different Operating Systems
Linux and macOS
On Linux and macOS, the process is relatively straightforward. Most installations rely on terminal commands, making it easy to locate and remove files.
- Step 1: Use
which openclawto find the binary location. - Step 2: Remove the binary using
sudo rm /usr/local/bin/openclaw(or the path identified). - Step 3: Clean the shell profile. Open
.bashrcor.zshrcusing a text editor likenanoand remove any lines exporting OpenClaw paths.
Windows Systems
On Windows, the process can be slightly different. You may need to use File Explorer to locate directories and Command Prompt or PowerShell to remove them.
- Step 1: Go to Control Panel > Programs > Uninstall a Program. If OpenClaw appears here, select it and click Uninstall.
- Step 2: Check the
AppDatafolder as mentioned previously. - Step 3: Check the Registry Editor (regedit). Search for “OpenClaw” under
HKEY_CURRENT_USER\Software. Only delete keys if you are comfortable with registry edits.
Cleaning Up Environment Variables and Dependencies
Removing Environment Variables
OpenClaw may add environment variables to your system, especially if you’ve configured custom paths. These variables can persist even after you Uninstall OpenClaw. In Windows, search for “Edit the system environment variables” in the Start menu. In the “Environment Variables” window, look for entries like OPENCLAW_HOME or additions to the Path variable and remove them.
Clearing Package Manager Residues
If you installed the software using npm, you must ensure the global package is removed:
Bash
npm uninstall -g openclaw
This ensures that no global packages remain, preventing any command-line conflicts in the future.
Security Best Practices After Uninstallation
Revoking API Keys
Even after you Remove OpenClaw software, your API keys may still be active on the provider’s side (e.g., OpenAI, Anthropic, or Google Cloud). It is a vital security step to go to your provider’s dashboard and rotate or revoke the keys used by the software. This prevents any potential “leaked” keys in your leftover local logs from being used by unauthorized parties.
Checking System Permissions
Review your system permissions and ensure no leftover processes or configurations remain. If you granted the software administrative privileges or specific firewall exceptions, visit your Windows Firewall or macOS Security & Privacy settings to remove those rules. This adds an extra layer of security to your post-uninstallation environment.
Comparison Table: Automatic vs. Manual Uninstall
| Feature | Automatic Uninstall | Manual Cleanup |
| Removes core files | ✅ Yes | ❌ No |
| Deletes hidden directories | ❌ No | ✅ Yes |
| Clears environment variables | ❌ No | ✅ Yes |
| Removes custom paths | ❌ No | ✅ Yes |
| Ensures full cleanup | ❌ No | ✅ Yes |
Remove OpenClaw software FAQs
1. Can I reinstall OpenClaw after uninstalling it?
Yes, you can reinstall it anytime. Just make sure you perform a clean uninstall first to avoid configuration errors.
2. What happens if I don’t delete hidden directories?
They can store sensitive data like logs and API tokens, which may pose a security risk if your system is ever compromised. They also take up disk space.
3. Is the uninstall command enough?
Usually, no. Most scripts only remove the executable. Manual intervention is required to How to safely uninstall OpenClaw without data loss while clearing all traces.
4. How do I find all OpenClaw-related files?
Use terminal commands like find ~ -name "*openclaw*" or use a dedicated file search tool like Everything (on Windows).
5. Do I need to restart my system after uninstalling?
It’s highly recommended. A restart ensures that the system clears out temporary files and that environment variable changes are fully applied to all active processes.
Conclusion
Knowing How to Uninstall OpenClaw isn’t just about removing software—it’s about taking back full control of your system. A quick uninstall might seem sufficient, but it often leaves behind hidden files and sensitive data that can pose risks down the line. By following a thorough, step-by-step process, you ensure that every trace of the software is removed, keeping your system clean and secure.
Taking the time to perform a complete removal may feel tedious, but it’s worth it. Think of it as a deep clean rather than a quick tidy-up. When you Remove OpenClaw software properly and use tools like PandaOffice Drecov for safety, you’ll have peace of mind knowing that your system is free from leftover files, unnecessary clutter, and potential vulnerabilities.


