


It happens in a flash. One moment, your vital presentation slides, family photos, or critical work documents are safely stored on your flash drive. The next, thanks to a moment of distraction or a rogue click, they’re deleted. That sinking feeling hits: Is everything gone forever? Can I actually recover deleted files from flash drive storage?
The good news is that those deleted files are almost certainly still there. The key to successful recovery lies in understanding why they haven’t vanished and acting fast. If you’ve ever wondered how to recover deleted files from flash drive storage without paying a fortune, you’re in the right place.
The Digital Ghost: Why Your Deleted Files Still Exist
When you delete files from a hard drive or, more commonly, a flash drive, they don’t get physically shredded into nothingness right away. Understanding this principle is the core of knowing how to recover deleted files from flash drive.
The Library Card Trick
Think of your flash drive as a massive library with a detailed index card catalog. This catalog tells your computer exactly where every file—your document, your image, your deleted files—is physically stored.
- Deletion is just paperwork. When you delete a file, your computer doesn’t waste time erasing the raw data (the actual zeroes and ones). That would be slow. Instead, it simply removes the file’s entry from the index card catalog.
- Space marked “Available.” The space previously occupied by the deleted files is marked as “available” for new data. Your files are still physically there; your computer has just lost the address.
- The Overwrite Danger. The moment you save a new file onto that flash drive, the computer might write that new data into the “available” space, permanently destroying the original deleted files. This is called overwriting, and once it happens, recovery is virtually impossible.
This digital limbo is what makes how to recover deleted files from flash drive a solvable problem—if you act quickly.
Precautions and Seven Essential Methods
Successful deleted files recovery starts with strict adherence to a couple of crucial rules.
🚨 Core Precautions: Stop and Hurry Up!
- STOP using the flash drive IMMEDIATELY. This is the single most important step. Do not save any new data to the drive, do not install software onto it, and do not use it to transfer other files. Eject it safely and put it away.
- The Sooner, The Better. The longer you wait, the higher the chance that temporary files or background processes might overwrite your deleted files. The faster you initiate the recovery process, the higher your data recovery success rate will be.
Method 1: The Quick Check – Windows Recycle Bin
This method only works if you deleted the file from the flash drive while it was connected to your computer, and if your operating system was configured to send external drive deletions to the Recycle Bin (not the default setting, but worth checking).
- Step 1: Double-click the Recycle Bin or Trash icon on your desktop.
- Step 2: Look through the files for your missing item. It might still be there, even if it came from the flash drive.
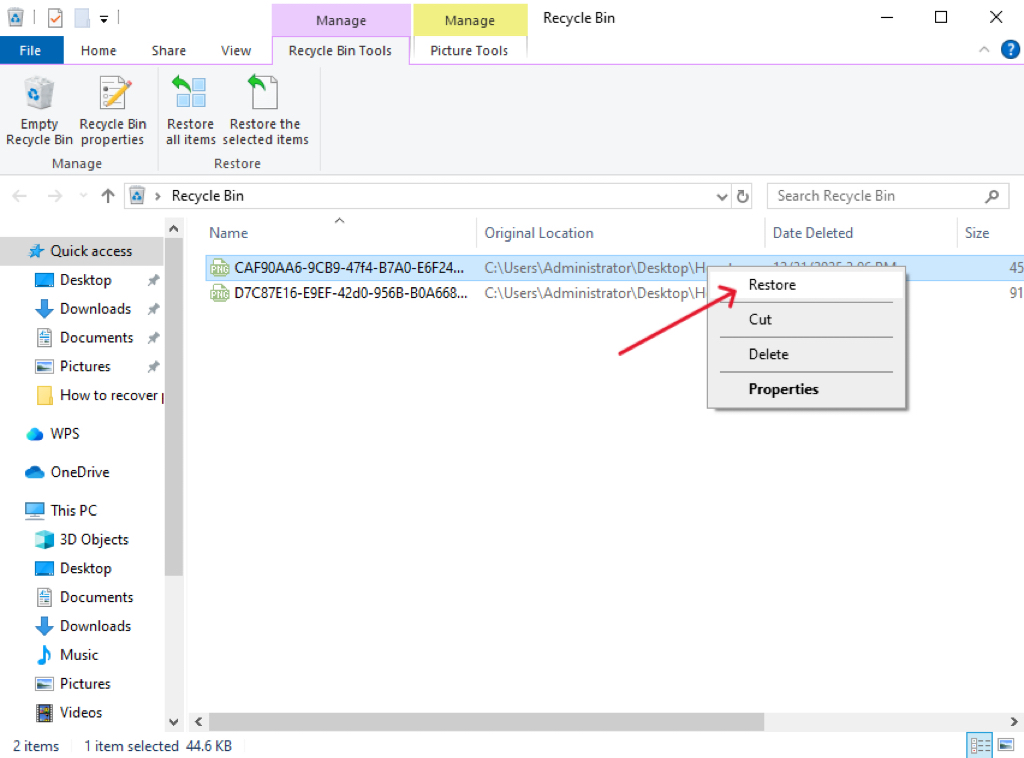
- Step 3: If you find the deleted files, right-click them and select Restore. They will return to their original location on the flash drive.
Method 2: Professional Recovery Software
If the files are not in the Recycle Bin, you need professional software that can scan the raw sectors of the flash drive to reconstruct the deleted files. PandaOffice Drecov is designed for ultra-high data recovery success rates and is easy enough for anyone to use, without needing any code or complex operation.
🌟 Core Advantages of PandaOffice Drecov:
- High Success Rate: It is known for its ability to quickly retrieve data lost through accidental deletion, Recycle Bin emptying, disk formatting, and mistaken SD card/USB drive formatting.
- Wide Format Support: It supports the recovery of over a hundred common file formats, including images, videos, audio, compressed files, EXE files, and documents.
- File Repair: It can even repair content from files that might otherwise appear corrupted or unreadable after recovery.
- Privacy Focus: It performs recovery locally, ensuring your recovered data remains private and secure.
- Wide Compatibility: It is fully compatible with Windows systems.
The Three-Step Recovery Process:
- Step 1: Select the Location. Launch the software. Select the specific drive letter corresponding to your flash drive from the list of available locations.
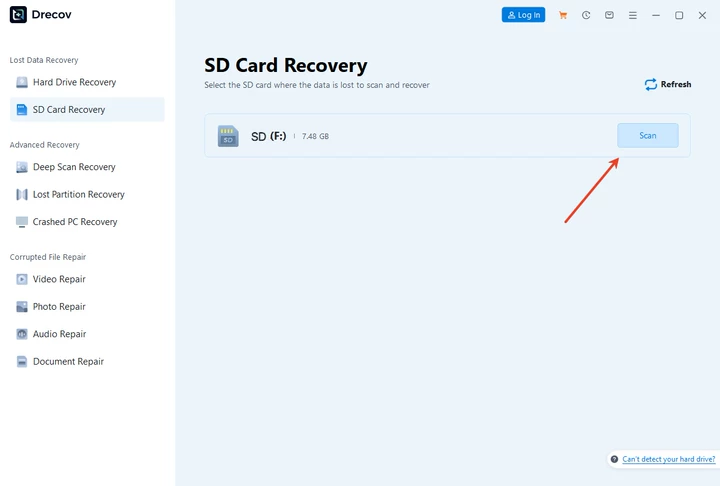
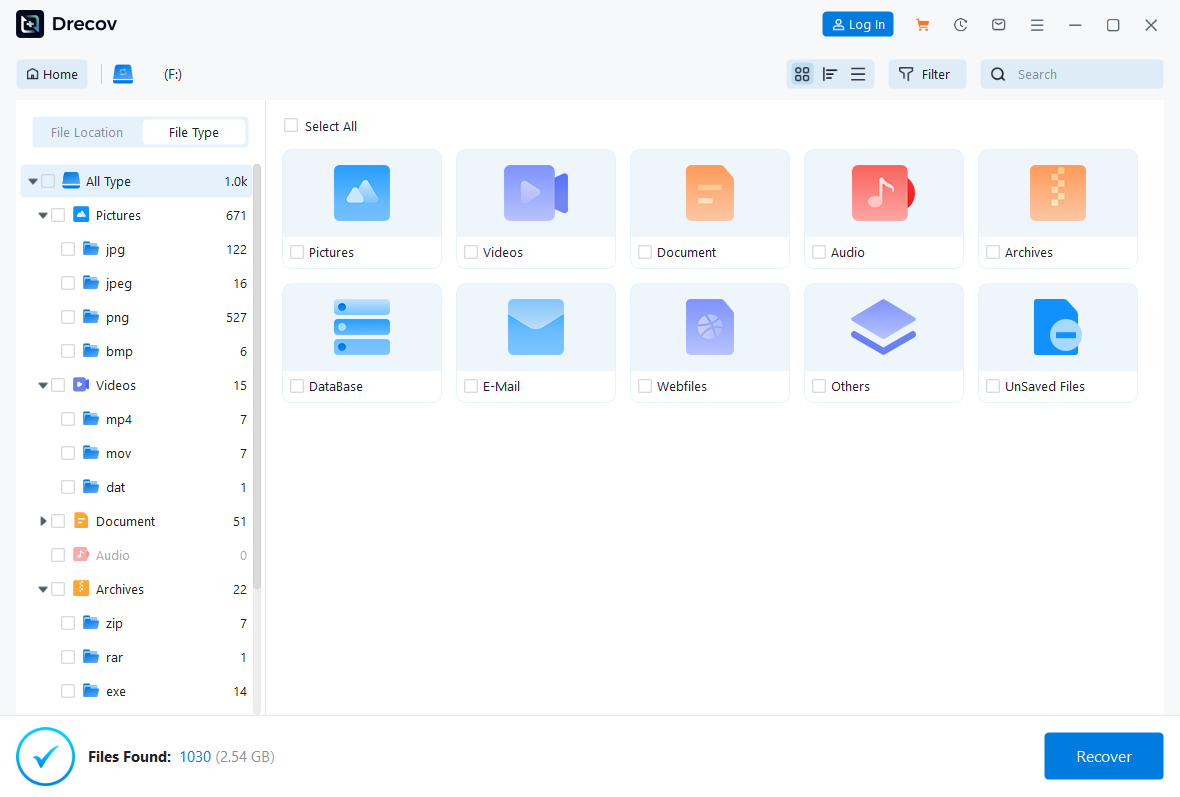
- Step 2: Scan and Find. Click the “Scan” button. The software will perform a deep scan to find your deleted files. Once the scan is complete, use the file type filters to quickly locate the missing deleted files (photos, documents, etc.).
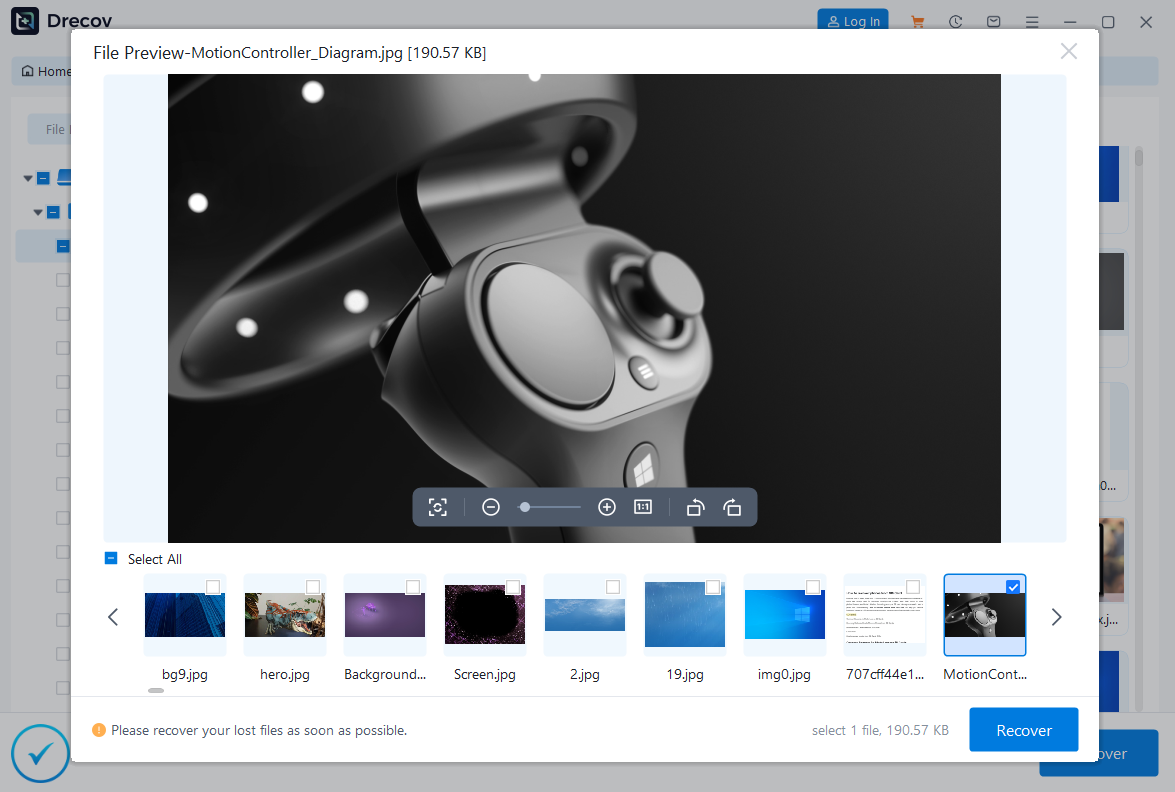
- Step 3: Recover and Save Safely. Preview them to confirm they are intact and elect the files you want to retrieve. Click “Recover”. The above recovery steps also apply to hard drive data recovery.
🚨 CRITICAL REMINDER:
Do NOT save the recovered files back onto the same flash drive. Choose a different location, such as your computer’s desktop or an external hard drive, to ensure successful retrieval and prevent overwriting.
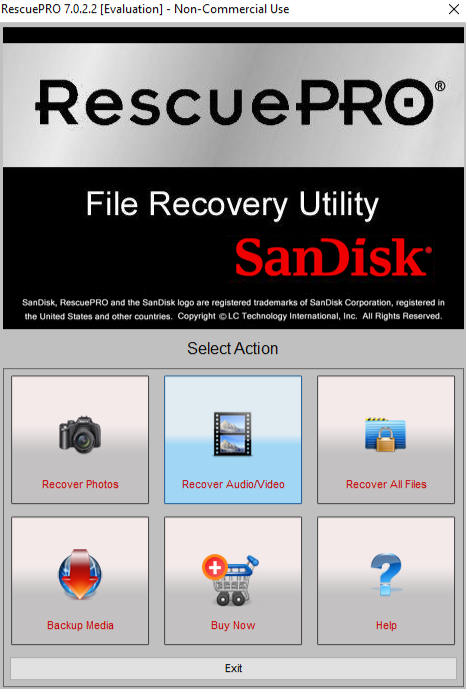
Method 3: Using Sandisk’s Official Tool RescuePRO
For users who primarily lost photos or videos from memory cards, Sandisk’s official utility, RescuePRO, is a well-regarded tool to help with how to recover deleted files from flash drive media.
- Step 1: Install and Launch. Download and install RescuePRO onto your computer.
- Step 2: Choose Recovery Type. Choose the type of data you wish to recover (e.g., Images, Videos, or All Files). Select the relevant option.
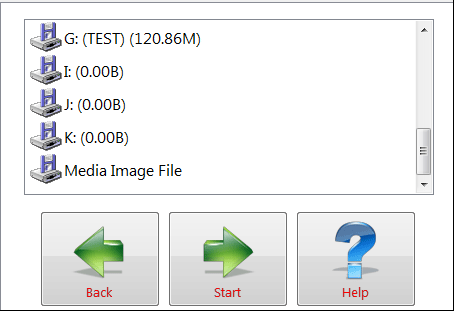
- Step 3: Select the Drive and Start. Identify your flash drive from the list of removable media and start the scan.

- Step 4: View and Save. After the scan, view the list of recoverable files and save the desired items to a safe location away from the source flash drive.
Method 4: Restoring Hidden Files via CMD Command
Sometimes, files on a USB drive appear to be missing not because they were actually deleted, but because a virus or malware has either hidden them or changed their attributes to system-protected files, making them invisible in File Explorer. In these instances, the Command Prompt (CMD) offers a direct solution to force the files back into view.
- Step 1: Identify the Drive: Insert your USB drive and make a note of its assigned drive letter (e.g., F:).
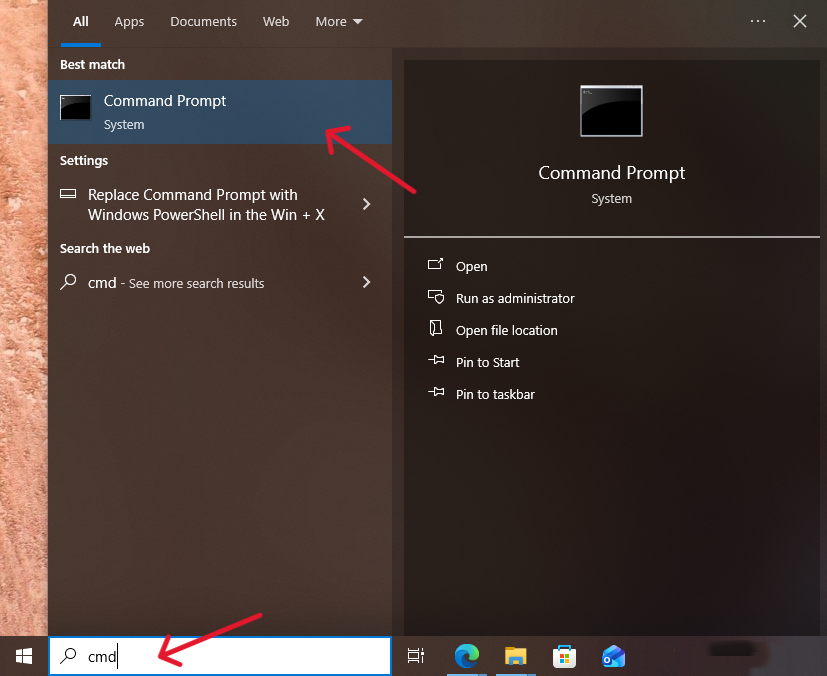
- Step 2: Access Command Prompt: Press the Win + R keys, type
cmd, and press Enter to launch the Command Prompt window.
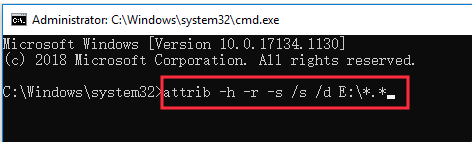
- Step 3: Execute the Command: Type the following command and execute it by pressing Enter: attrib -h -r -s /s /d E:*.*
🚨 Command-based repair carries risks and may not recover lost videos. Beginners are advised to use professional recovery tools first.
Method 5: Using Previous Versions/Shadow Copy
If the folder containing the deleted files was previously located on a drive where Windows Volume Shadow Copy Service was enabled (which is rare for a simple flash drive but possible if it was a frequently used external HDD), you might be able to restore an older version of the folder.
- Step 1: Navigate to the Parent Folder. Browse to the location where the files were originally saved. If you copied them from your desktop to the flash drive, this method applies to the desktop location . Right-click the parent folder.
- Step 2: Open Previous Versions. Select Properties and then click the Previous Versions tab.
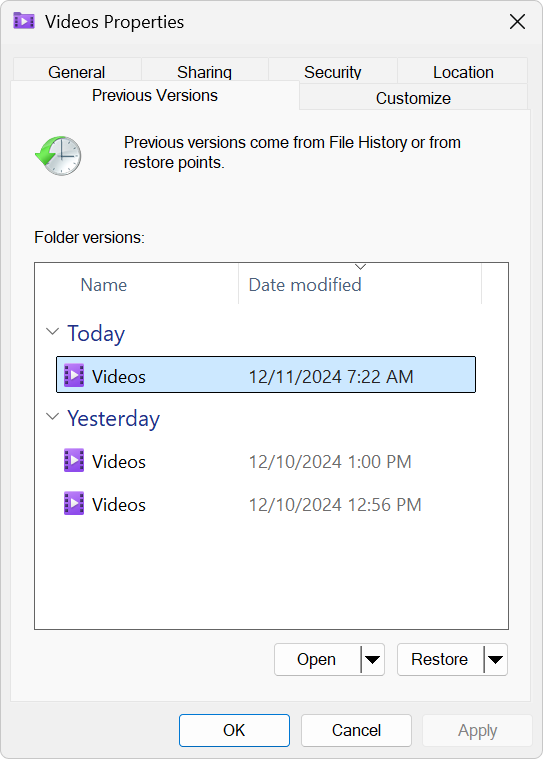
- Step 3: Restore a Version. Windows will list versions of the folder saved at different times. Select a version dated before the files were deleted and click Restore or Copy the folder contents to a safe location.
Method 6: Checking the System’s Temporary Files and Application Caches
Sometimes, the files you think are deleted from the flash drive were actually copied or accessed by an application that keeps its own cached copies. This often works for documents and small files that were recently worked on.
- Step 1: Disconnect the Flash Drive. Eject your flash drive immediately to prevent the system from clearing any potential cached data related to it.
- Step 2: Check Application Caches. Navigate to the cache folders of applications you used while the flash drive was connected (e.g., MS Office, Adobe software, temporary browser folders).
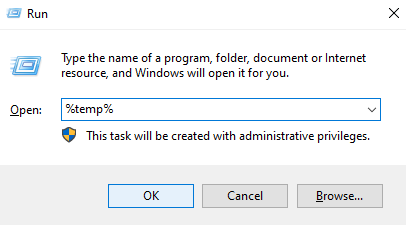
- For Windows Temporary Files, search for in the Run dialog
%temp%(Windows Key + R). - Look for subfolders with names related to the date or the application you used to open the deleted files (like “Word,” “Excel,” etc.).
- For Windows Temporary Files, search for in the Run dialog
- Step 3: Search for Temporary File Extensions. In these cache folders, search for file extensions that indicate temporary or auto-saved files:
- Word:
*.tmp,*.wbk ,*.asd - Excel:
*.xlk,*.xlsb
- Word:
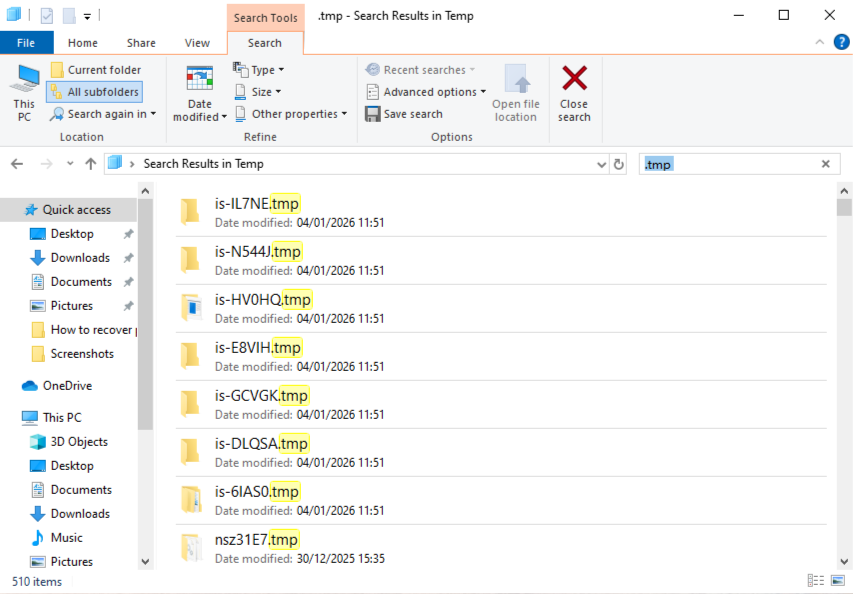
- Step 4: Copy and Rename. If you find a relevant temporary file, copy it to your desktop, change the file extension back to its original format (e.g., change to
.tmp.docx), and try opening it. This can often successfully retrieve the last saved version of your deleted files.
Method 7: Professional Data Recovery Lab Service
If your flash drive is physically broken—perhaps the connector is snapped, it won’t power on, or it is severely water-damaged—no software can access the data chips. In this scenario, how to recover deleted files from flash drive media requires specialized hardware manipulation.
- Step 1: DO NOT Attempt to Fix It Yourself. Do not try to repair the drive, glue the connector back on, or put it in rice. Any attempt to power on or repair a physically damaged drive can cause permanent data loss by short-circuiting the memory chips.
- Step 2: Contact a Reputable Data Recovery Lab. Search for a professional data recovery lab near you. These labs use controlled cleanrooms and specialized equipment for chip-off recovery.
- Step 3: Receive Diagnostic and Quote. Send the physically damaged flash drive to the lab. They will perform a diagnostic assessment to determine if the memory chips are intact and the data is recoverable.
- Step 4: Authorize Recovery. If the data is recoverable, you will receive a quote. While this method is the most expensive, it is the only viable option when the physical components required to read the deleted files are broken.
Conclusion
Knowing how to recover deleted files from flash drive storage is a vital skill, but the best way to protect your data is to never lose it in the first place. You now understand that time is your greatest enemy when dealing with deleted files—the moment you realize the loss, you must stop using the device.
🌟 Make the 3-2-1 Backup Rule a habit:
- Keep 3 copies of your data (the original + 2 backups).
- Use 2 different storage types (e.g., internal drive and cloud storage).
- Store 1 copy off-site (e.g., a secured cloud service).


