







BitLocker not showing up is usually fixable when the issue comes from Windows edition, hidden Control Panel paths, unsupported drive type, policy settings, TPM state, or device encryption differences. Check Windows edition and BitLocker status first. Do not remove encryption, reinstall Windows, or format the drive until you confirm whether the volume already uses BitLocker and whether you still have the password or recovery key.
This guide explains why BitLocker may disappear from Settings or Control Panel, how BitLocker with password works, what to do when a BitLocker password forgot case appears, and how to protect files before removing encryption.
Quick Decision Table For BitLocker Not Showing Up
| Situation | Best First Action | What To Avoid |
|---|---|---|
| BitLocker missing in Settings | Check Control Panel and Windows edition | Do not assume the drive lacks encryption |
| Drive asks for password | Use the password or recovery key | Do not attempt unauthorized bypass |
| Business device | Check administrator policy | Do not remove corporate encryption without approval |
| External drive missing option | Check drive format and edition support | Do not format before copying files |
| Need file recovery | Unlock or decrypt first, then scan | Do not scan a locked encrypted volume |
Why BitLocker Does Not Show Up
BitLocker may not appear because the computer runs a Windows edition that lacks full BitLocker management, because the user opened the wrong Settings page, or because an administrator policy hides options. Some systems show Device encryption instead of the full BitLocker interface.
A drive can also use BitLocker even when the management option does not appear in the expected location. That is why a status check matters. Use Control Panel, Settings, PowerShell, or manage-bde -status to confirm the actual protection state.
Password problems need a lawful unlock path. BitLocker password forgot cases require the recovery key, Microsoft account key, printed key, saved file, USB key, or administrator escrow. File recovery tools cannot break the password.
Method 1: Find BitLocker In Windows
Best For: users who cannot find the BitLocker option.
Tool Used: Control Panel, Settings, Windows Search, and manage-bde.
Steps
- Press Start and search for Manage BitLocker.
- Open Control Panel and go to System and Security.
- Check whether BitLocker Drive Encryption appears.
- Run winver to confirm the Windows edition.
- Open an elevated Command Prompt and run manage-bde -status.
- Record which volumes show protection status.
Risk Level: Low because these steps only inspect settings.
Method 2: Recover Access With Password Or Recovery Key
Best For: drives that ask for BitLocker password or recovery key.
Tool Used: BitLocker unlock prompt, Microsoft account recovery key page, business administrator escrow, and saved recovery key files.
Steps
- Try the known BitLocker password only when you trust it.
- Check the Microsoft account linked to the device for recovery keys.
- Search printed records, USB keys, and saved text files.
- Ask the organization administrator if the device belongs to work or school.
- Unlock the drive and copy important files.
- Change the password only after files are safe.
Risk Level: Low when you use authorized keys and avoid random attempts.
Method 3: Remove BitLocker Only After Backup
Best For: users who want BitLocker remove steps after unlocking the drive.
Tool Used: Control Panel, Settings, or manage-bde.
Steps
- Unlock the drive with the password or recovery key.
- Copy important files to another drive.
- Open Manage BitLocker.
- Choose Turn off BitLocker for the correct volume.
- Wait for decryption to complete.
- Confirm files open before changing partitions or formatting.
Risk Level: Medium because removing protection changes drive state.
Recover Lost Files After The Storage Is Accessible
When This Method Applies
Use this recovery method only after Windows can access the target storage, or after you unlock or decrypt the protected drive with the correct password, recovery key, or administrator-approved method. PandaOffice Drecov cannot bypass encryption. It can help scan an accessible drive, partition, SD card, or external storage device when files disappeared after deletion, formatting, file system errors, or a failed repair attempt.
Best For: documents, images, project files, and archives from an accessible unlocked or decrypted BitLocker drive.
Tool Used: PandaOffice Drecov.
Test Environment:
Operating System: Windows 11
Storage Type: Unlocked BitLocker volume or decrypted Windows storage
Problem Scenario: Files missing after BitLocker option disappeared, drive unlock, or decryption
Tool Used: PandaOffice Drecov
Steps
- Confirm that the drive or removable storage appears in Windows after legal unlock, decryption, or connection.
- Stop saving new files to the same storage device.
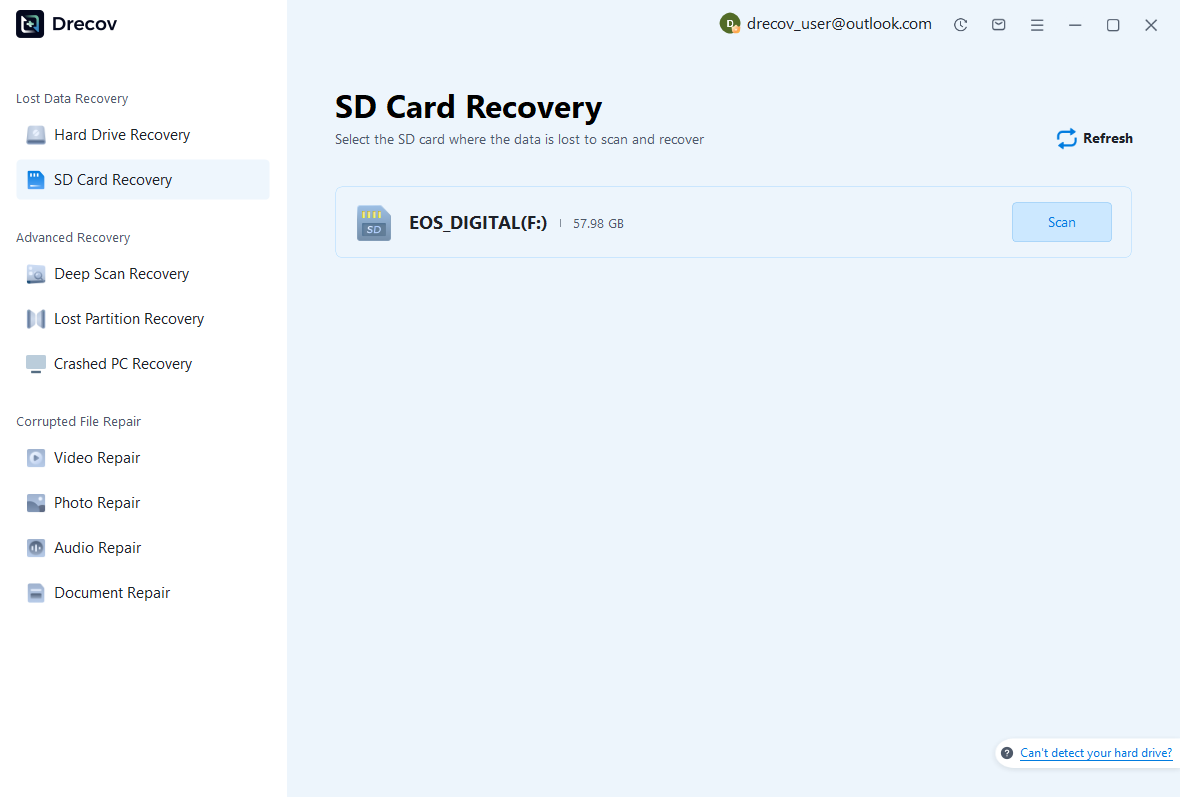
- Open PandaOffice Drecov and choose the drive, partition, SD card, or external device that lost files.
- Start the scan and wait for quick scan and deep scan results.
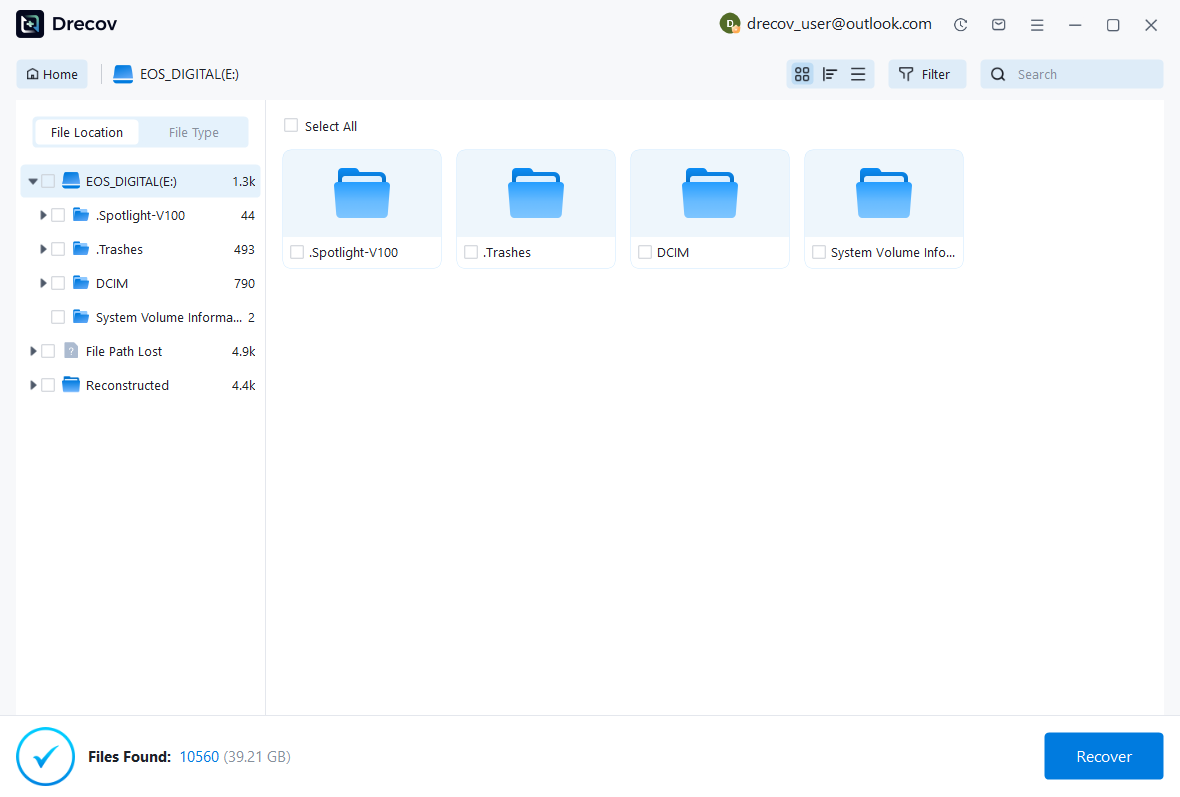
- Filter results by documents, photos, videos, archives, or the original folder path.
- Preview important files before recovery.
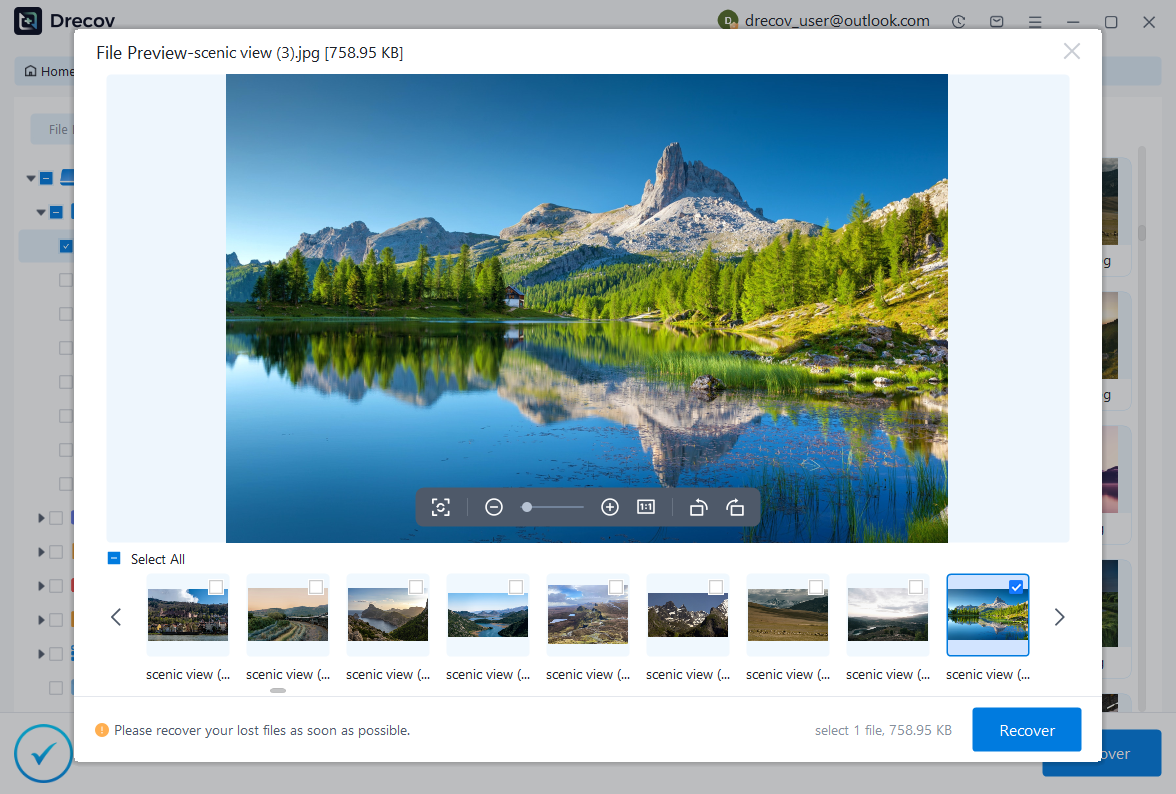
- Recover selected files to another healthy drive, not back to the problem storage.
- Open recovered files and confirm that they work before formatting or reusing the original device.
Risk Level: Low when you save recovered files away from the original storage and avoid writing new data to the source drive.
Password And Document Confusion
BitLocker Password Vs Windows Password
A BitLocker password protects a drive or removable volume. A Windows sign-in password opens the user account. These passwords can differ, so changing one does not automatically change the other.
When a drive asks for BitLocker password, use the matching drive password or recovery key. A Windows account password may not unlock the volume.
Break Password On Word Document Searches
Some keyword sets mix BitLocker questions with Word document password searches. Treat them separately. A Word document password protects a file, while BitLocker protects a drive.
If the missing file is a protected Word document, recover the document first. Then use the legitimate password or saved copy to open it.
BitLocker With Password Best Practice
Store the recovery key outside the encrypted drive. Use a password manager, printed key, Microsoft account, or business escrow process.
Test recovery information before a crisis. A key that lives only on the encrypted drive will not help when the drive locks.
Practical Recovery Workflow That Keeps The Case Safe
Stage 1: Confirm What Problem You Have
A strong recovery workflow starts with diagnosis, not software. For BitLocker missing option recovery, write down the exact symptom, the storage source, the last successful access, and the first action that happened after the problem appeared. This short record tells you whether the case involves deletion, encryption, password loss, system policy, file system damage, a missing drive, or a simple display issue.
Use one sentence to describe the problem before you touch the device. For example, say that Windows shows a BitLocker error during enablement, that Samsung pictures disappeared after Gallery cleanup, or that a locked drive asks for a recovery key. This wording keeps the recovery path focused and prevents tool hopping.
The practical question behind a bitlocker not showing up search is not only which software to use. The reader needs to know whether the user can solve the problem, which conditions make success possible, and which steps can make recovery worse. That answer belongs near the beginning of the article and should stay visible throughout the workflow.
Stage 2: Protect The Original Storage
Preserve the original source before deeper troubleshooting. Stop downloads, transfers, formatting attempts, encryption changes, drive repairs, and cleanup tools. When a removable card or external drive holds the missing files, disconnect it after the first safe check. When a Windows drive holds the files, avoid installing new tools on that same drive if another computer or another partition can run the recovery.
Protection also means avoiding rushed fixes. A format prompt, reset suggestion, disable-encryption command, or repair wizard may solve one visible symptom while reducing file recovery chances. Read the prompt carefully and choose a path that keeps data intact.
Keep recovered files away from the source device. Use a separate internal drive, external drive, or cloud folder. After recovery, open each important file before you reuse the original storage.
Stage 3: Check Built-In Recovery Sources
Built-in recovery sources often deliver the cleanest results. Windows may offer File History, OneDrive Recycle Bin, Previous Versions, system restore points, or application autosaves. Samsung and Android users may have Gallery Trash, Google Photos, OneDrive, Samsung Cloud, and app backups. BitLocker users may have Microsoft account recovery keys, Active Directory, Azure AD, printed keys, USB startup keys, or saved text files.
Check these sources before scanning raw storage. They usually preserve file names, folder paths, and complete content. Browser-based account checks can also show data that a local app no longer displays.
Download or export found files to a safe location. Do not rely on a restored view inside the same app until you create a second copy.
Stage 4: Use Commands Only When You Understand The Target
Command-line steps can help, but they can also change the wrong drive quickly. Identify the drive letter, volume label, and disk number before you run a command. For BitLocker, commands such as manage-bde -status, manage-bde -protectors -get, and manage-bde -unlock should target the correct volume only. For Samsung or Android removable media, Windows commands should not format or repair the card before recovery.
Run read-only checks first. Status commands, account checks, and folder copies create less risk than repair, remove, disable, format, or clean commands. When the case involves encryption, use the recovery key or password instead of trying to bypass protection.
Document each command and result. A simple note helps you avoid repeating a failed step and gives a technician useful context if you need support.
Stage 5: Scan Only Accessible Storage
Recovery software needs access to the storage it scans. Encryption changes this rule. Unlock a locked BitLocker volume first with the correct recovery key, password, or authorized administrator method. After Windows can read the volume, file recovery tools can scan deleted files, lost folders, or damaged file system records.
For removable media, connect the device through a stable reader and scan from a computer. Internal phone storage adds encryption and permission limits, so software recovery may not reach every file. External drives need a healthy cable and a stable port instead of an unstable hub.
Preview files before saving. A file name in scan results does not prove that the document, image, or video still works. Preview reduces wasted recovery time and helps the user choose the right copy.
Stage 6: Verify And Back Up The Result
Verification turns a scan result into a real recovery. Open documents in the correct app, zoom images to full resolution, play videos from start to end, and extract archive files when needed. Check file dates and content, not only names.
Create a second backup after verification. Use a drive that does not have the same problem. For encrypted workflows, store recovery keys in a password manager, Microsoft account, printed record, or approved business key escrow system. For phone workflows, turn on cloud sync and export important media regularly.
A finished recovery should leave the user with working files, a safer backup path, and a clear reason why the problem happened. That is how a problem-solving article earns trust instead of sounding like a software advertisement.
Advanced Troubleshooting Notes For BitLocker missing option recovery
Check The Error Before Changing The Drive
Advanced troubleshooting should begin with the exact error text, not a quick fix. Copy the message into a note, write down the drive letter, and record whether the problem affects a phone, an SD card, an external drive, a Windows system drive, or an encrypted volume. This record helps you choose the right recovery path and reduces repeated trial-and-error steps.
For bitlocker not showing up cases, the wording matters because similar symptoms can point to different causes. A missing option, a disabled checkbox, a password prompt, a deleted-file problem, and a drive-health issue all need different steps. Treat each symptom as evidence instead of forcing every case into one software workflow.
Keep the first check as read-only whenever possible. Status screens, account pages, folder lists, and command outputs give useful information without changing the source. Repair, format, decrypt, disable, remove, reset, and clean steps should come later, after backup and diagnosis.
Separate Access Problems From Deleted-File Problems
Access problems happen when the storage exists but the user cannot open it. Examples include a broken screen, a BitLocker recovery key prompt, a missing encryption option, or a drive that needs an unlock password. Deleted-file problems happen after the storage opens but the files no longer appear. Mixing these two categories leads to poor advice.
Solve access first. Unlock the drive, restore screen access, sign in to the right account, or connect the removable device safely. After access returns, look for missing files with Trash, backups, folder copies, and scans. This order keeps the recovery realistic because file recovery tools need readable storage.
When access cannot return, backups become the main path. Cloud copies, account sync, File History, OneDrive, Microsoft account recovery keys, Samsung backups, and external drive copies can solve cases that raw scanning cannot.
Use A Safe Destination For Every Test Recovery
Every recovery test needs a safe destination. Use another internal drive, an external drive, or a cloud folder. Avoid saving results to the source device because that can overwrite data that a deeper scan might still recover. This rule applies to Android SD cards, Samsung phones, BitLocker volumes after unlock, and Windows folders after encryption troubleshooting.
Give recovered files a clean folder structure. Create folders such as Photos Recovered, Documents Recovered, Video Test Copies, and Browser Exports. Clear organization helps you verify results and prevents confusion between original files, recovered files, and repaired copies.
Do not rename everything immediately. Keep original scan names and paths until verification finishes. After you confirm that a file works, create a readable copy with a useful name. This keeps evidence from the recovery process intact.
Verify Results By File Type
Different file types need different verification. Photos should open at full resolution and zoom without blocks or grey areas. Videos should play from beginning to end with working audio. Documents should open in the correct program and show the latest edits. Archives should extract without errors. Browser history exports should show the dates and pages the user actually needs.
For encrypted-drive cases, also verify that recovered files came from the unlocked or decrypted volume, not from a temporary cache or shortcut. A shortcut can look like a file but fail when the original target is missing. Open the actual file and check its properties when the result matters.
For Samsung and Android media, compare file size and resolution with nearby originals. A tiny file may be only a thumbnail or compressed preview. Keep it if no better copy exists, but do not treat it as a full-quality recovery without checking.
Plan The Next Backup Before Reusing The Device
A recovery article should not end at one successful file open. The next step is backup design. Windows users can enable File History, OneDrive folder backup, or another scheduled backup. BitLocker users should store recovery keys outside the encrypted drive. Samsung users can review Gallery sync, Google Photos, OneDrive, and external SD card backup habits.
Backups need testing. Open the backup location from another device and confirm that important files appear there. A backup status screen may say complete while excluding large videos, Downloads, app folders, or files outside selected folders.
After testing, document the new habit in simple terms. Decide where photos go, where documents go, where recovery keys live, and how often external drives get copied. This prevention step gives the reader a clear finish and reduces repeat data loss.
When To Stop Troubleshooting
Stop when the next step would change the only source copy and the files have high value. Examples include formatting an SD card, disabling encryption on the wrong volume, clearing TPM without key backups, resetting a phone, or running repair commands on a drive that still holds missing data. A pause can protect the case.
Stopping does not mean the problem has no solution. It means the user should preserve the storage, gather keys or account access, prepare a safe destination, or get professional support. This judgment matters for business records, legal files, family media, and password-protected storage.
The safest bitlocker not showing up workflow gives a clear answer, uses read-only checks first, separates access from recovery, scans only accessible storage, verifies every file, and creates a backup before normal use resumes.
Related Recovery Guides
When the missing content is a TikTok draft or deleted social video, this TikTok video recovery guide covers app-specific checks that a drive-level article may not address.
For Adobe Illustrator documents, use this Illustrator file recovery guide to handle project files, autosaves, and desktop recovery paths.
If you plan to store recovered files on a Mac external drive and the drive does not appear, this LaCie hard drive not showing up on Mac guide can help you prepare a working destination.
When Windows restore points or system rollback affect the recovery plan, read how to restore a computer to an earlier date on Windows before changing the computer that may still contain backups.
FAQ
Why Is BitLocker Not Showing Up?
Windows edition, policy, device encryption mode, drive type, or the wrong settings page can hide the option.
Can I Remove BitLocker Without Password?
You need the password, recovery key, or administrator-approved recovery path. Do not use unauthorized bypass methods.
Can Recovery Software Read A Locked BitLocker Drive?
No. Unlock or decrypt the volume first, then scan accessible storage if files are missing.
Conclusion
Fix BitLocker not showing up by checking Windows edition, Control Panel, policy, and manage-bde status. Use the correct password or recovery key before removal, and recover files only after the storage becomes accessible.






