







For a “DiskPart list drives” task, use list disk to see storage devices and list volume to see volumes across the computer. Use list partition only after selecting the correct disk. These commands display information; you do not need clean, format, or partition creation simply to identify a drive.
For beginners, the main trap is confusing disk numbers with drive letters. Disk 1, Volume 1, Partition 1, and drive E: do not necessarily describe the same object. Before following any storage tutorial, learn which identifier its next command actually expects.
Open DiskPart and run the two system-wide lists
Save ongoing work and finish file transfers. From Start, search for Command Prompt and choose Run as administrator. Approve the request only if you are authorized to manage the computer. Type diskpart and press Enter. At the DISKPART> prompt, commands go to DiskPart rather than the ordinary shell.
List the devices
Enter list disk. Read the disk numbers, sizes, and status fields. Compare them with what is physically connected and what Windows displays elsewhere. A device’s marketed capacity may not match the rounded number shown here exactly, so capacity alone is not sufficient identification.
Do not select the first row automatically. Windows may assign different numbers after hardware or startup changes. The smallest listed device is not necessarily your intended USB target, and Disk 0 is not a universally safe assumption for the Windows system device.
List the volumes
Enter list volume. This view helps you compare drive letters, labels, file systems, and sizes. It lists volumes across the system, not merely the last disk you looked at. A volume without a letter can still exist and serve a legitimate purpose.
Compare the output with This PC or Disk Management without changing anything. An unfamiliar small volume may be part of startup or recovery, not unwanted clutter. Record useful details instead of assigning letters or deleting structures to make the list look simpler.
Match the identifiers before selecting a disk
A disk is the storage object that can contain partitions. Windows uses a volume as a logical storage area that it can make available to you. Many everyday basic configurations look straightforward, but the identifiers remain separate even when one disk contains one visible data volume.
Use several details together
Suppose a removable device has a recognizable label and approximately the expected capacity. The volume list can help identify that visible volume, while the disk list supplies candidate devices. Check Disk Management’s graphical layout to relate the volume to its containing disk rather than equating matching row numbers.
This is an illustrative method, not a promise about which number your computer uses. If two devices look similar, stop and collect another identifying detail. Safely disconnecting an unrelated removable device may reduce confusion, provided it has no active use. Recheck the lists afterward because the environment changed.
Understand the Free column
Free space in the disk listing concerns unallocated space, not necessarily the free room inside your documents volume. A disk can show little unallocated space while Explorer reports plenty of available capacity within an existing file system. These views answer different questions.
Do not delete a partition because its disk row appears to have no free space. That would turn an interpretation mistake into a destructive operation. For ordinary file storage capacity, inspect the relevant volume’s available space in Windows.
Inspect partitions only after verifying the selected device
Set the focus deliberately
Type select disk, a space, and the actual disk number verified from your current list, then press Enter. Selecting the disk changes DiskPart’s focus without erasing its contents. Do not copy another person’s number from a screenshot or a generic example.
Selection matters because later commands act on the focused object. An asterisk in appropriate DiskPart output identifies the object with focus. Treat it as a pointer, not a health indicator or a recommendation about which device you should use.
Read details, then list partitions
Enter detail disk to inspect the selected disk’s properties and associated volumes. Confirm that the information fits the intended device. If it does not, return to the lists and correct your identification before continuing.
Once confirmed, enter list partition. This describes the partition entries on that selected disk, unlike the system-wide volume list. Microsoft’s DiskPart list reference distinguishes these scopes. Dynamic or more complex configurations do not always map partitions to volumes in the simple way a beginner might expect.
Exit when identification is complete
Type exit to leave DiskPart. Return to your original task with the recorded identity and current layout. Finishing a successful inspection does not create a reason to initialize or format anything. Leave a separate modifying workflow for when you actually need one and have protected its data.
Interpret an unexpected result without making it worse
The disk appears but no familiar letter does
Check both the disk and volume lists, then inspect the graphical layout in Disk Management. A missing letter is not the same as a missing partition. Encryption, an unsupported format, an offline state, or damage can each prevent normal access. The list alone cannot establish whether formatting would destroy needed files.
Record any prompt asking to initialize or format and cancel while you investigate important existing data. Creating a fresh structure may make storage usable for new files while reducing access to what was there before. Usability and recovery are different goals.
The reported device disappears or changes unexpectedly
A device repeatedly dropping out calls for a connection and stability assessment. Stop rerunning scans or trying to create partitions. With serious read errors or physical symptoms, seek advice about imaging or professional recovery before further work.
A disk listed once is not proof that every sector or file can be read. Likewise, a GPT marker identifies a partition style, not overall health. Keep these limits in mind when passing information to support: the list is evidence of detection, not a full diagnostic report.
A previous operation already removed files
Stop storage modifications and inspect independent backups. For a removable source, USB recovery covers the loss scenario. Do not run another creation or formatting sequence just because the current list looks empty.
Recover missing originals before creating a new layout
Drecov is Windows data recovery software, not a replacement for DiskPart’s management functions. Its read-only recovery mode, Quick Scan, Deep Scan, filters, and supported previews help locate lost local files. Lost Partition Recovery can search for data from a missing partition; it does not imply partition-table repair or physical-device repair.
If your data is readable and merely needs copying, copy it normally to another healthy destination. Use a recovery workflow when actual originals or their partition disappeared. The file recovery page explains that separate task. A drive listing cannot confirm that lost files are unrecoverable.
Prepare before Step 1
Stop writing to the affected location, prepare another healthy device, and do not install Drecov on the source partition. Arrange an accessible working Windows environment if the original computer cannot run the software. Legitimate encryption access is still required. Overwriting and SSD TRIM may limit what remains; unstable media needs imaging advice or specialist help.
⚠ Warning: Install it on a drive different from the one where your data was lost to prevent overwriting.
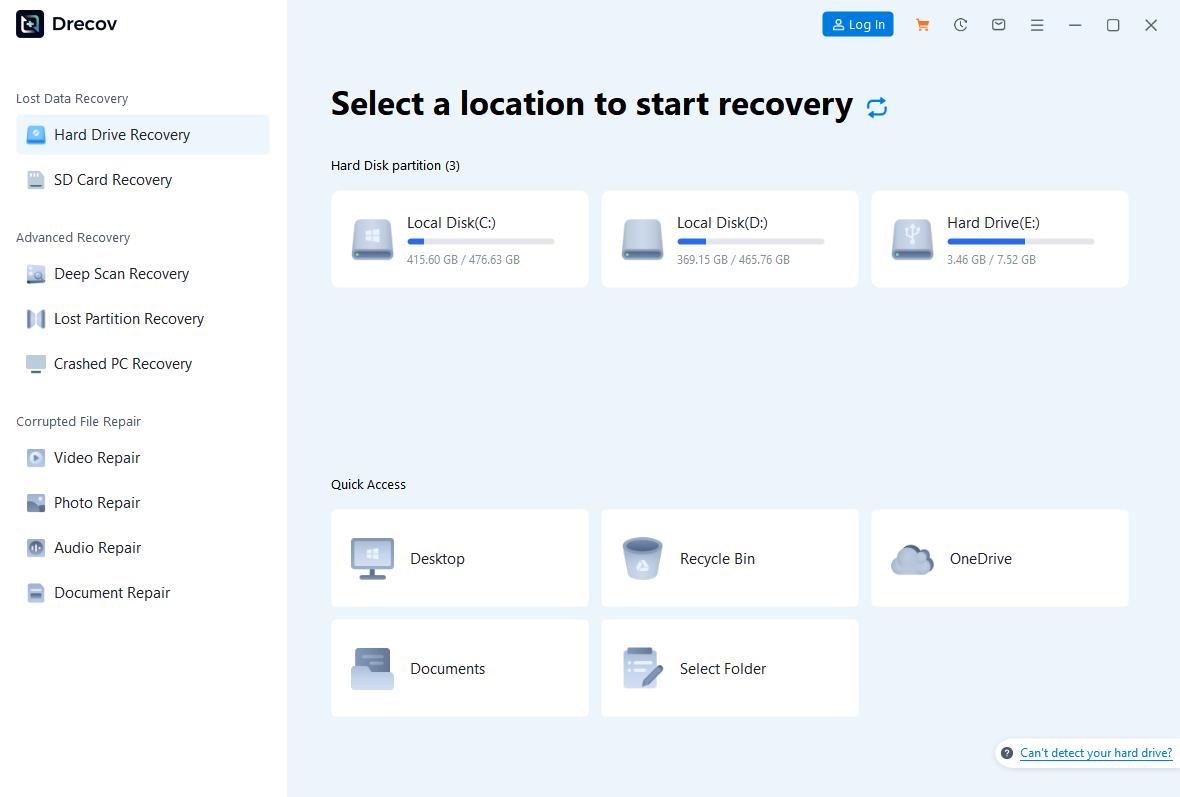
Step 1: Open Drecov and identify the original source
Select the stable device or original loss location using its current identity, not an old DiskPart number alone. Use the applicable Lost Partition Recovery mode if the partition disappeared. Do not create a new partition first just to make an old drive letter return.
Step 2: Start Quick Scan and inspect familiar results
Look for original user folders and expected file types. Compare names, available paths, and dates with your own records. A newly created volume label does not prove that every found file belongs to the new layout; prioritize the files you actually need.
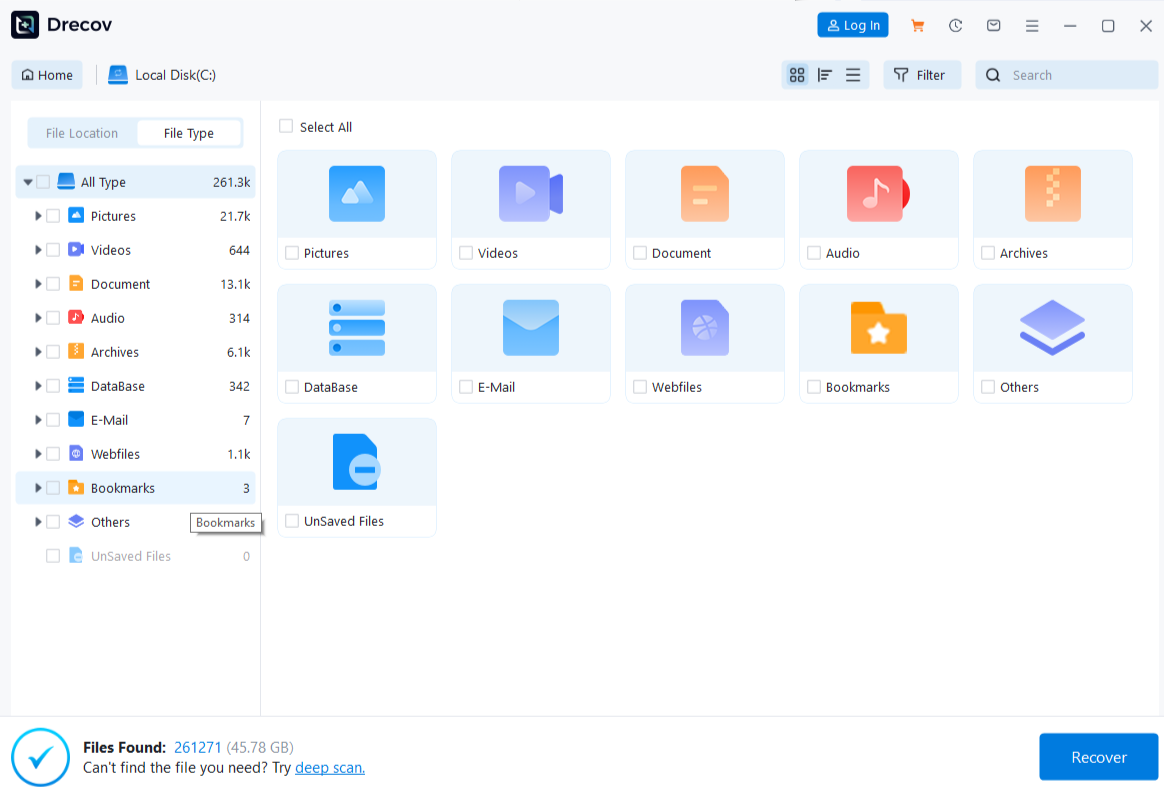
Step 3: Use Deep Scan when necessary on a stable source
If Quick Scan misses the desired data and access remains reliable, continue with Deep Scan. Stop if errors worsen or the source disconnects. More scanning cannot guarantee a complete result and cannot recreate fully overwritten content.
Step 4: Locate candidates and preview supported files
Apply available name, type, path, and date information to narrow the search. Preview representative supported documents or images rather than trusting filenames alone. For photo recovery, distinguish actual originals from small preview images and inspect recognizable detail.
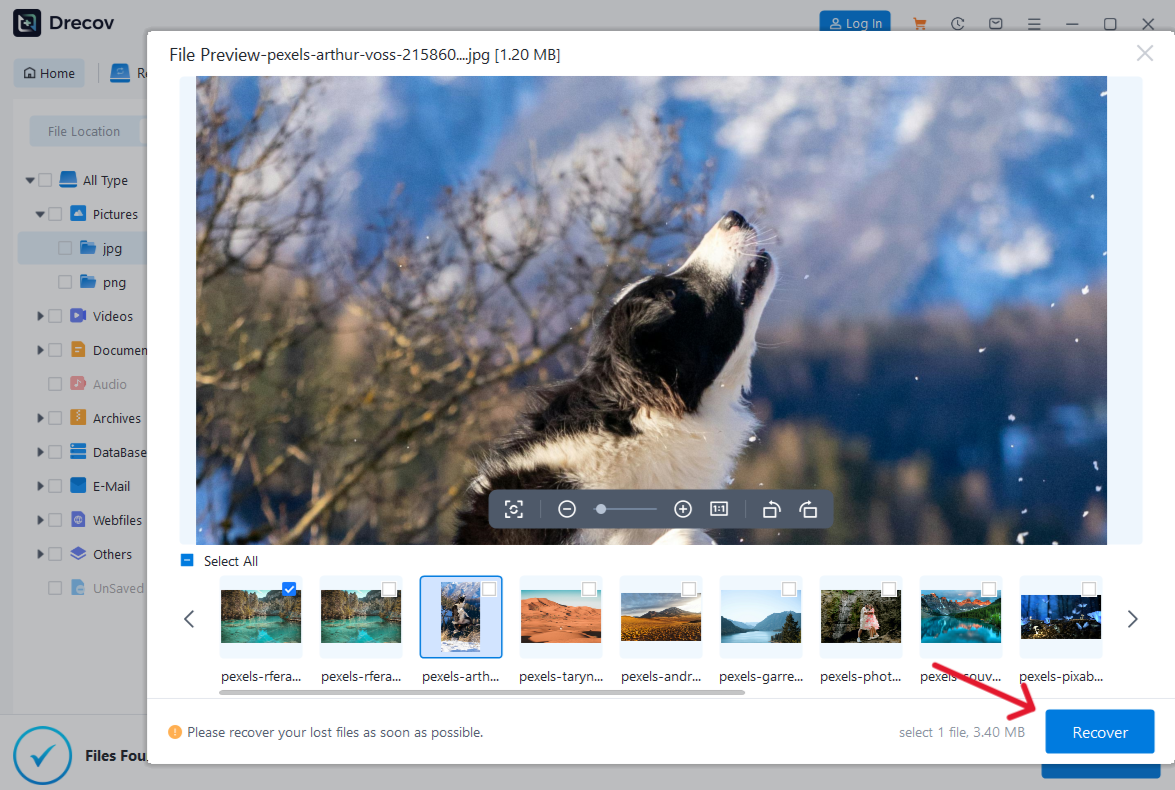
Step 5: Save elsewhere and verify before modifying storage
Recover selected files to the separate healthy device, never the source. Check Drecov Folder or Recovery Folder if results are not where expected. Open important files and compare their contents. Verify the recovered files before considering formatting, initialization, or changes to the partition layout.
⚠ Warning: Install it on a drive different from the one where your data was lost to prevent overwriting.
FAQs about listing drives in DiskPart
Does list disk erase anything?
No. It displays disk information. Keep that read-only purpose separate from modifying commands found in unrelated storage tutorials.
Is Volume 2 always on Disk 2?
No. The identifiers use different numbering systems. Inspect the selected disk’s details or Disk Management to establish the relationship.
Why is the Free value different from Explorer?
The disk listing concerns unallocated space. Explorer usually reports available space within a particular volume’s file system.
Does selecting a disk format it?
Selection changes command focus. It is not formatting, but later commands may act on that selection, so accurate identification remains essential.
Should I create a partition if the old one is absent?
Not while needed data remains unprotected. Preserve the source and assess recovery first; a new layout is a separate task for later.
Conclusion
Use DiskPart’s lists to answer three separate questions: which devices exist, which volumes Windows sees, and which partitions belong to the selected disk. Verify identities before any later command. If original data is missing, Drecov can help search a stable source, but recover elsewhere and verify files before creating or formatting anything.
⚠ Warning: Install it on a drive different from the one where your data was lost to prevent overwriting.





