
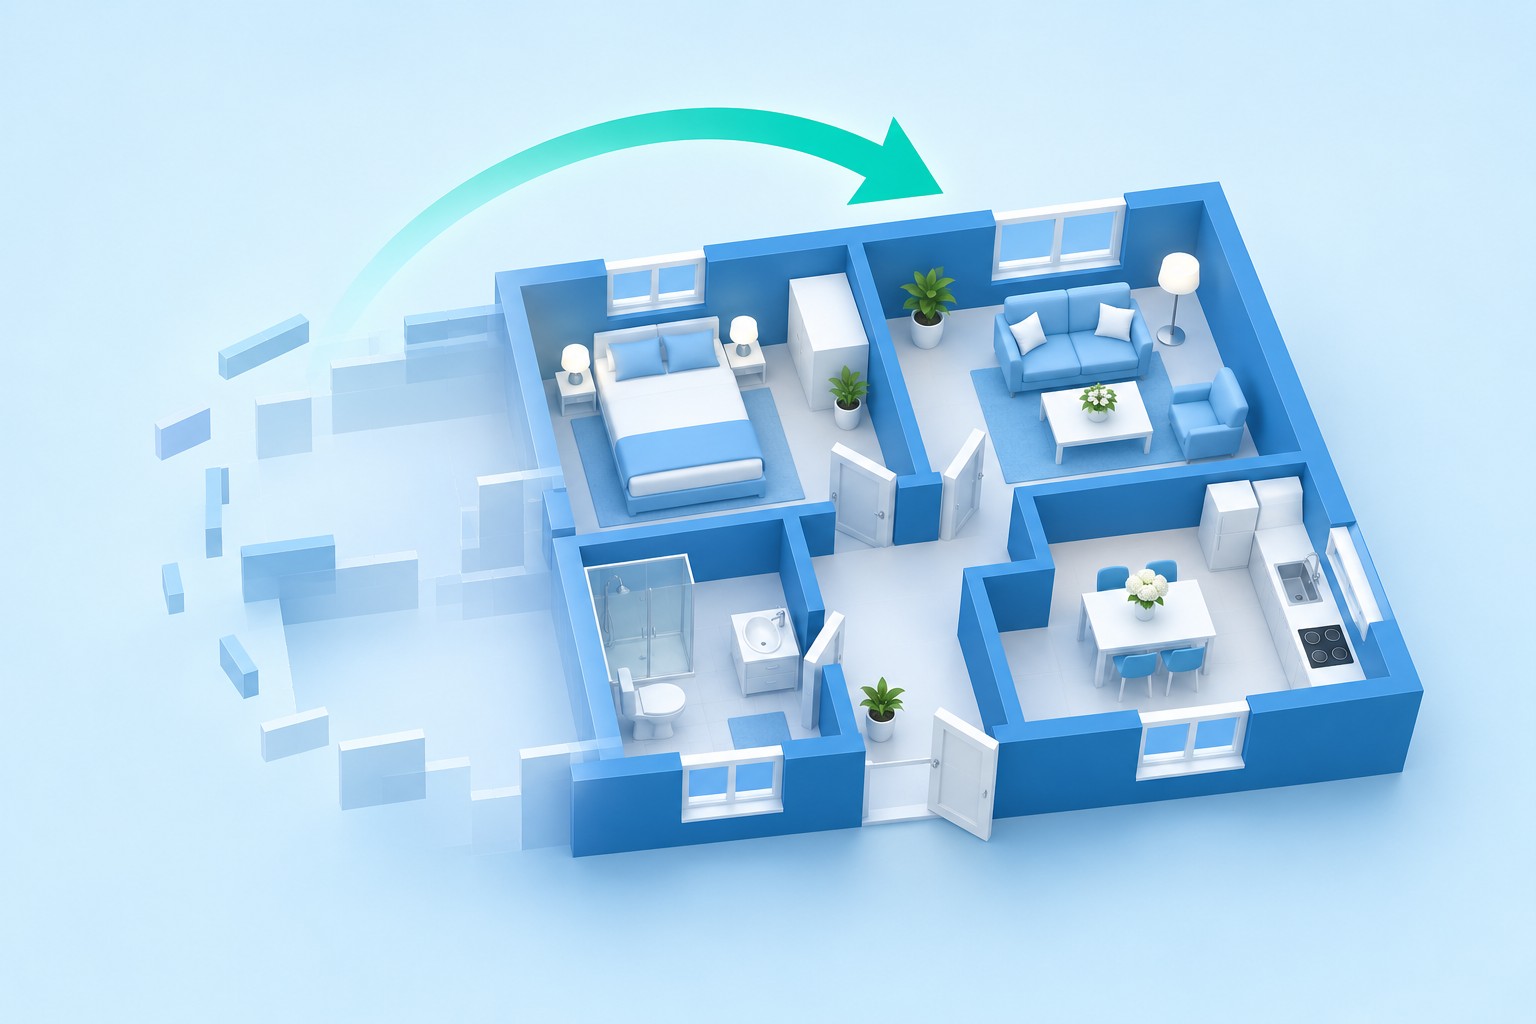
Recover a Sweet Home 3D plan as an editable home
To recover Sweet Home 3D plans, distinguish the native home document from a rendered picture, printed plan, or exported model. A .sh3d file can preserve editable rooms, walls, levels, furniture, and other home information. A picture can show appearance while omitting the editable design. Therefore, identify whether your task needs the original model or a documented reconstruction from surviving references.
Record the document name, application edition and version, expected levels, and one distinctive measurement. Also note whether the home had ever been saved. A crash during an unsaved session and accidental replacement of an existing document have different candidate sources. Preserve the actual files before changing preferences or creating a new home with the same name.
Save a surviving open design separately
If the application still displays useful work, use Save As to create a new native home file on healthy storage. Keep a readable plan or image reference too when practical. Then reopen a copied native file and compare the distinctive measurement. This checks that the editable design persists outside the current application session.
Avoid changing the only surviving home while investigating missing objects. Copy it first and record the incident. A new save can preserve your current state, but it can also replace an older useful milestone if you reuse its filename. Clear recovery names help distinguish the source candidate, your working copy, and the accepted result.
Native route 1: save an available recovered home
- Preserve surviving home documents and recovery candidates before repeated launches.
- Restart the appropriate application and inspect any recovered home it offers.
- Compare levels, walls, and a known recent edit.
- Save the accepted candidate under a new .sh3d name.
Sweet Home 3D can periodically preserve home data for recovery when that feature was enabled and the data survives. The application can offer the recovered design after a crash. This does not guarantee that the final unsaved adjustment reached the recovery copy. Compare the actual content rather than accepting the offered window as automatically complete.
Check the recovery preference as context
The Save home data for recovery preference controls periodic protection in supported desktop versions. Inspect the setting used by the original installation, but do not assume enabling it now restores the past. Recovery information also depends on the application’s private storage and write access. A configuration checkbox alone is not a recoverable home document.
When a recovered home opens, inspect the latest important change, such as a moved wall or added upper level. Then save separately and reopen that file. Keep the original candidate untouched where practical. A successful second open shows that the accepted design now exists as a normal native document rather than only in an offered recovery session.
Native route 2: open an existing full SH3D backup
- Locate a previously copied or archived native home document.
- Preserve the original backup and create a separate working copy.
- Open the working copy through Sweet Home 3D.
- Compare measurements, furniture, levels, and the intended design milestone.
A complete native backup can provide a direct route to an earlier editable home. Its usefulness depends on the state it preserved. A file named final may still predate several changes. Compare a distinctive room dimension and a recent object placement before deciding which candidate best represents the design you need.
Compare native content rather than file size
A larger file can contain different models or textures without containing the latest wall layout. A smaller file can preserve the important structural changes. Use actual design checks instead of ranking candidates only by size or modification time. Retain alternatives until you understand which useful details each one contains.
If an older backup holds the correct structure while the current file contains valid later furnishing work, preserve both. Any combination should happen in a working copy with measurements checked afterward. Record copied or rebuilt elements explicitly. A useful combined result is not necessarily an exact historical restoration of one original file.
Native route 3: locate the correct prior home document
- Search the intended project folders for native home files and known names.
- Compare their full paths with the application’s current document.
- Open copied candidates and inspect the expected levels and dimensions.
- Save the accepted recovery under a clear name without replacing alternatives.
A recent-file entry can point to an older copy or a location that moved. Another document with the same name may still contain the intended work. Check full paths and actual contents. An empty new home does not prove that the earlier saved design disappeared, just as a familiar filename does not prove you opened the correct revision.
Distinguish desktop and online storage
The desktop application and an online service can use different storage arrangements. Identify the environment where the home was actually created and saved. A local document search cannot retrieve a file that existed only in an account’s online storage. Conversely, an empty online account view says nothing about native files saved on your computer.
If you use a provider’s history or an existing account export, preserve the candidate and inspect its contents through the appropriate supported workflow. Keep within the account and storage you are authorized to access. Record the candidate’s milestone and compare the design, rather than assuming every provider retains a recoverable version indefinitely.
- Preserve original plans, measurements, model exports, and rendered references.
- Create a new home specifically for reconstruction.
- Rebuild measurable structure first, then add supported furniture and materials.
- Compare the result and document assumptions and unavailable editing information.
A printed or exported plan can help reconstruct wall layout and room dimensions. A rendered image can help identify furniture and appearance. Neither automatically restores the native home’s editable structure. Keep measured facts separate from visual estimates. If a dimension is unreadable, seek another source rather than presenting a guessed wall length as recovered data.
Treat an exported model as a different artifact
An exported 3D model may preserve visible geometry without restoring editable Sweet Home 3D walls, rooms, or level relationships. Importing a model as furniture does not turn it into the original native home. It can still serve as a reference or partial visual salvage, but its editing limits should remain clear.
For practical reconstruction, start with a known overall dimension and compare several independent measurements. One matching length does not establish the whole plan’s scale. Then inspect door openings, wall thickness, and level elevations. Record inferred details so another person can review them before relying on the reconstructed plan for further design work.
Diagnose missing furniture before replacing the home
Check the furniture list, visibility, level assignment, and object position in a working copy. An object can exist outside the current view or on another level. A hidden item does not require file recovery. Select a known object from the list and inspect its properties before assuming that the native document lost its model.
Compare list state and 3D view
If the list contains the object but the 3D view does not show it, inspect its level, elevation, visibility, and size. A misplaced or tiny object can appear absent. Correct only an understood property in the test copy and compare the result. Do not delete and re-import furniture broadly when a simple view or placement issue explains the symptom.
If a model genuinely fails to load, preserve the home and locate the legitimate original model or library. Check that the replacement corresponds to the intended furniture, dimensions, and orientation. A similar-looking object can alter clearances and design meaning. Record substitutions separately from recovered native content.
Verify wall and room geometry after recovery
Compare the plan’s outline, wall connections, thickness, openings, and room boundaries. Then inspect the corresponding 3D view. A design can look plausible from one camera angle while containing a gap or misplaced wall in plan. Use a distinctive dimension and a junction that changed near the incident as concrete verification points.
Check units before judging measurements
Confirm the unit settings and compare actual numeric dimensions. A unit display change can make familiar values look wrong without changing the geometry itself. Conversely, an imported reference image can have incorrect scale even when the display units are familiar. Preserve the original candidate and establish a reliable measurement before resizing the design globally.
If you manually reconstruct walls from a plan image, keep the image and calibration evidence with the recovery record. A visually aligned outline is not proof of accurate dimensions. Compare multiple independent distances and inspect corners and openings, which often reveal scale or tracing errors that a broad overview misses.
Inspect levels and elevations independently
A multi-level home requires more than a correct ground-floor outline. Compare level names, elevations, wall heights, floor thickness assumptions, and object assignments where relevant. A recovered file may show the right furniture but place it on the wrong level. Test the plan and 3D views together to understand the relationships.
Use a section-like comparison where needed
Inspect stairs, upper-floor openings, and objects that span levels. Compare their vertical relationships with a trusted reference or original measurement. A top-down plan can conceal these errors. If a recovery source lacks the necessary vertical information, record that gap rather than inferring a complete multi-level model from a single floor image.
Also inspect stored viewpoints if they matter for presentation. A missing camera position is different from missing geometry. You can often recreate a useful view from surviving content, but that is a new presentation decision. Preserve the accepted model first and keep reconstructed viewpoints clearly separate from the evidence of structural recovery.
Check textures and custom models without changing geometry
A home can open with altered appearance because a material or model dependency differs. Compare a distinctive surface and an imported object with an earlier render. Locate legitimate original source files or libraries where necessary. Do not replace a missing texture with a convenient alternative and then describe the appearance as fully restored.
Compare dimensions after replacing a model
Even a correct-looking furniture replacement can import at a different size or orientation. Check width, depth, height, elevation, and rotation. Then inspect its relationship to adjacent walls and doors. A visual substitute may support an emergency presentation while remaining unsuitable for decisions that depend on accurate clearances.
Retain any original models and texture sources separately where permitted. A native home and an installed furniture library play different roles. A library can help place new furniture, but it does not automatically recreate the arrangement that was lost. Record which objects you recovered from the home and which you placed again manually.
Work through a crash after a layout change
Suppose the application closes after you move a kitchen wall and add several cabinets. Preserve the saved home, inspect the offered recovery, and compare the wall’s actual dimension and position. Then inspect cabinet placement and level. Save the best candidate under a new native filename rather than overwriting the earlier design immediately.
Preserve valid alternatives
The saved home may contain the approved room structure while the recovery copy contains new furnishing work. Compare both before deciding which design should become the accepted baseline. If you rebuild part of the layout, record the source and measurements. This keeps creative revisions from being mistaken for exact recovery of the pre-crash state.
Reopen the accepted file and inspect the same wall, a nearby opening, and a cabinet’s dimensions. Then export a plan reference and compare it with the application view. This checks persistence and presentation, while making sure the immediate repair did not leave a hidden structural mismatch elsewhere in the design.
Recover useful information from partial references
If no native home survives, collect the best existing plan, dimensions, furniture list, and rendered views. Rank them by what they actually prove. A dimensioned drawing supports measurements; a render supports visible arrangement; a model export supports geometry. Keep those roles distinct as you rebuild a separate working home.
Mark uncertain design decisions
A hidden wall thickness or unseen room cannot be recovered by confidence alone. Record unknowns and request an authoritative measurement when the design depends on them. For a conceptual visualization, an approximation may be acceptable if labeled. For precise planning, preserve the uncertainty until evidence resolves it rather than embedding a guess silently into the model.
Save reconstruction milestones as you complete structure, furnishing, and appearance. This provides clear comparison points and helps a reviewer identify which stage introduced a discrepancy. Keep the source references unchanged so the reconstructed home remains traceable to the evidence available after the loss.
Test the accepted home as a separate restore
Open a copied native file from its intended location and inspect the affected geometry, levels, models, and materials. Export the deliverable you actually need and review it independently. A file that opens is a useful start, but your acceptance check should establish that the recovered design supports its intended planning or presentation task.
Preserve an incident-specific checklist
Use concrete items such as the kitchen wall length, staircase elevation, door opening, and custom cabinet dimensions. These checks make future restores repeatable. Keep a readable reference export and a short recovery note alongside the native file. This helps distinguish an accepted milestone from several similarly named candidates later.
Build a measured acceptance sheet for the recovered home
Choose several dimensions that define the design: an overall wall length, an opening width, a room dimension, and a level elevation. Record their expected values from an authoritative source. Use the same checks for every native candidate and reconstruction. This prevents a visually attractive file from becoming the accepted recovery while its geometry differs from the intended plan.
Compare two independent directions
A plan can match one horizontal dimension while its vertical scale is wrong. Check distances in more than one direction and inspect a corner or junction. If you calibrated a background plan image, preserve the calibration evidence. A traced outline that looks close at normal zoom may still contain errors large enough to affect furniture placement or room proportions.
For a conceptual model, some approximation may be acceptable. Record that choice rather than leaving a future reviewer to infer accuracy from the polished 3D view. If precise planning is required, keep uncertain measurements unresolved until you obtain reliable evidence. Recovery should not silently turn a missing value into a confident-looking design fact.
Compare levels through actual relationships
Select one object or opening that connects levels, such as a staircase or upper-floor void. Inspect its position in plan and in the 3D view. Then compare the relevant elevations. A recovered home can show every object while placing them at inconsistent heights, so the presence of furniture alone is not a sufficient test of a multi-level design.
Distinguish an inactive level from missing content
If a floor looks empty, inspect which level is selected and which levels are visible. The content may still exist under another level or outside the current viewing context. Record the view change that reveals it. This can solve an apparent loss without replacing the native home or rebuilding geometry that was never deleted.
If you must reassign an object to a level, preserve the original candidate and compare its resulting height. A change that fixes one view can affect another relationship. Check adjacent walls, doors, and stairs before accepting the adjustment, and record it as a deliberate repair rather than assuming the backup supplied the corrected assignment automatically.
Recover furnishing meaning as well as appearance
A furniture list can preserve names and dimensions useful for reconstruction. Compare an imported model’s width, depth, height, elevation, and rotation with that information. Two visually similar cabinets can have different measurements. For a design that depends on clearances, the correct dimensions matter more than a close visual match from one camera angle.
Inspect custom models separately
If a custom object fails to appear, locate its legitimate original model or a valid preserved home containing it. Test the candidate in an appropriate separate context before substituting it into the accepted design. A damaged model file can have the expected name while lacking usable geometry, and repeated placement attempts will not repair its missing data.
When you use a replacement model, record the substitution and its dimensions. The result may be entirely suitable for continued conceptual work, but it is a new design choice. Keep the original reference so another reviewer can assess whether the replacement changes the meaning or practical use of the recovered plan.
Use rendered views as evidence with boundaries
A rendering can show furniture arrangement, materials, and visible wall relationships. It cannot reveal every hidden dimension or object property. Use several views where available and compare them with a dimensioned plan. If only one image survives, mark the unseen areas instead of building a complete home from assumptions that the image cannot support.
Separate camera reconstruction from model reconstruction
A different camera can make an unchanged model appear unfamiliar. Inspect the geometry and measurements before altering the design to match one view. If you recreate a viewpoint, record that presentation change separately. This prevents a perspective difference from prompting unnecessary wall or furniture edits that move the model away from its recovered source.
For material matching, compare lighting and viewing conditions too. A surface can look different because of the render setup rather than a missing texture. Preserve the native candidate and test an understood setting in a copy. Do not broadly recolor the design until you know whether the underlying material information actually changed.
Compare candidates using a specific renovation example
Suppose an older home file contains the correct room outline, while a recovered session contains later furniture placements but an unwanted wall move. Preserve both and compare the measured acceptance sheet. Decide which structure is authoritative before copying furnishings or recreating the layout. This keeps the recovery anchored in evidence rather than whichever file has the latest timestamp.
Check neighboring geometry after a repair
Restoring one wall can affect openings, room boundaries, and furniture relationships. Inspect the neighboring objects and the corresponding 3D view. A repaired length by itself does not prove the junctions are correct. Compare the nearby door and a known clearance so the accepted model supports the design task rather than merely matching one number.
Save a native milestone after the structural comparison, then make later furnishing or presentation improvements in another version. This preserves an assessable recovery state. If a new discrepancy appears, you can compare against the measured milestone and identify whether it came from the incident or from subsequent design work.
Prepare a native home restore test
Create a copied accepted file in the planned storage location and open it independently. Check the dimensions, level relationship, custom object, and material sample from your acceptance sheet. Export a fresh plan reference and inspect it. This verifies useful persistence and presentation instead of relying on a home that happened to remain open during the recovery session.
Keep the evidence alongside the accepted design
Retain original plans, measurements, render references, and any legitimate custom resources needed by the project. Add a short record identifying the native source milestone, reconstructed geometry, and unresolved details. A clear record lets another person continue the design without mistaking a plausible reconstruction for an exact restoration of every original property.
After the test passes, preserve a complete accepted backup outside the active working copy through your chosen backup arrangement. The important outcome is a demonstrably usable native design with known limits. A folder full of similarly named files is less helpful if nobody can identify which one preserves the verified measurements and intended layout.
When storage recovery can help home documents
PandaOffice Drecov may help retrieve deleted local .sh3d files, surviving recovery copies, project backups, or original design references from readable storage. It cannot recreate an unsaved wall arrangement that never reached disk or turn a render into the original editable home. Prefer native candidates first and minimize new writes where deleted design files may remain.
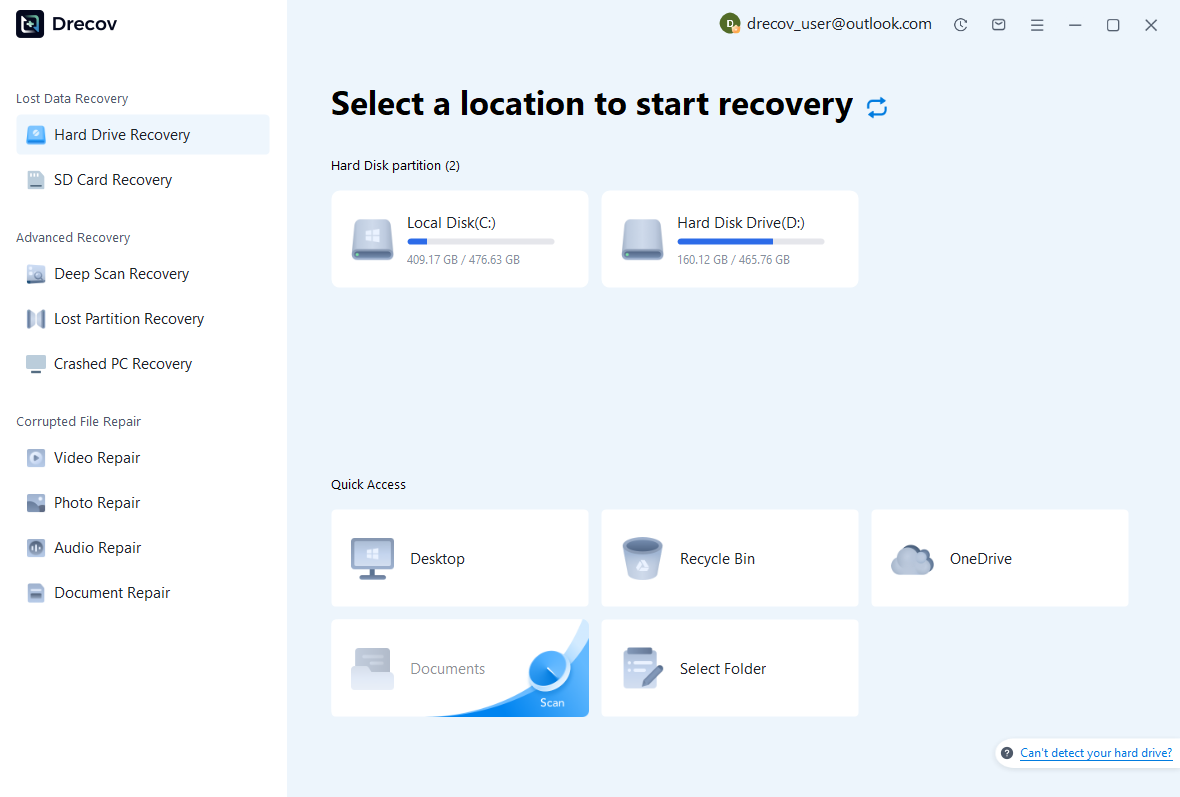
Step 1: identify the home and recovery storage
Choose the drive or partition that held the native home, application recovery data, or existing backups. Record which component you are trying to retrieve. Keep recovered output on other healthy storage. If the source repeatedly disconnects or reports hardware read failures, assess the device condition before proceeding with routine software scanning.
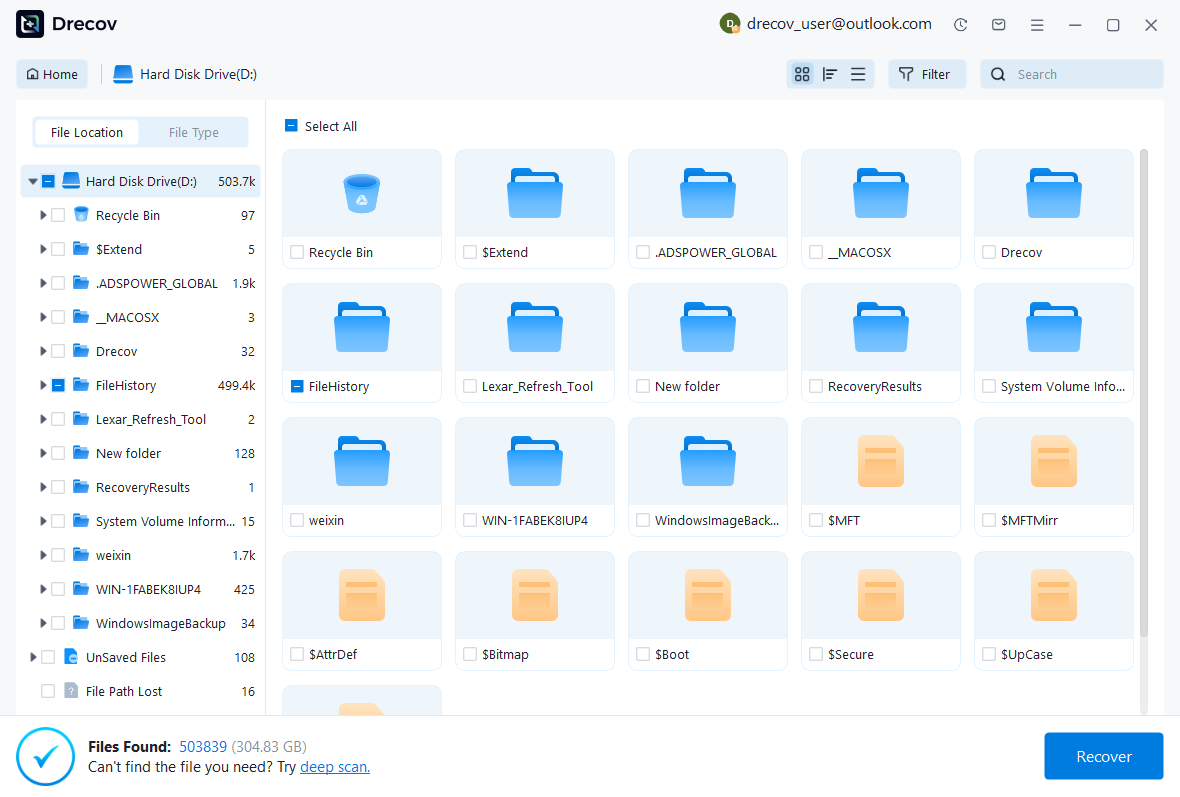
Step 2: compare native and reference candidates
Inspect available paths, names, dates, sizes, and supported previews. Preserve plausible native documents and references separately without rewriting their contents. A rendered image does not establish that editable wall and level data survived. Keep alternative native candidates until the application can compare their actual geometry and design milestone.
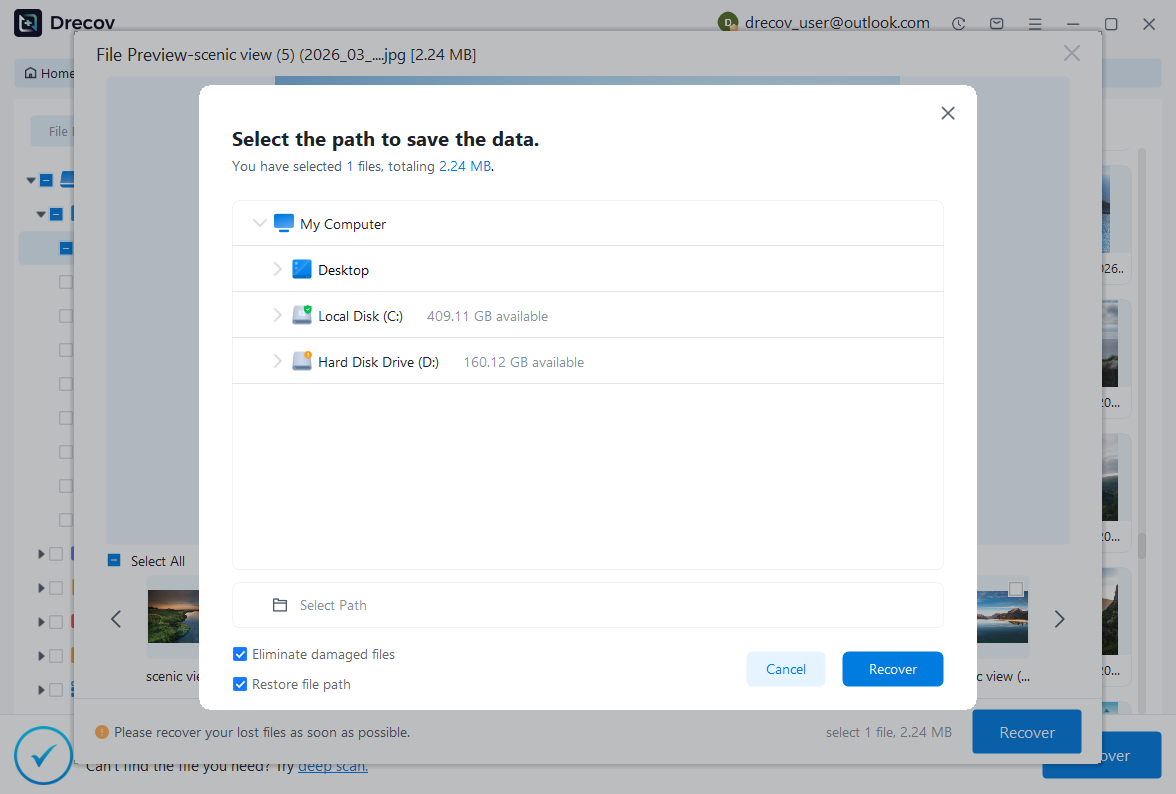
Step 3: restore elsewhere and verify the home
Recover selected files to a separate destination and preserve an untouched set. Open a working native copy in the appropriate Sweet Home 3D environment, then inspect measurements, levels, openings, furniture, and materials. Save and reopen the accepted result. Record manually reconstructed geometry and missing resources before treating the home as ready for continued design.
Keep the editable home and measured evidence together
Retain the accepted native file, a readable plan reference, important original resources, and a short recovery record. Test a copied restore against the incident measurements. This preserves a useful design milestone whose geometry you can assess, rather than relying only on a picture that happens to resemble the earlier home.
Related recovery resources
Explore the relevant recovery options: Hard drive recovery, External hard drive recovery.
For another recovery case and its practical checks, read the related recovery guide.
Check the vendor guidance for the installed version: official recovery documentation 1, official recovery documentation 2, official recovery documentation 3, official recovery documentation 4.