







To partition a USB drive in Windows, first decide what each section should hold and copy every needed file to another healthy device. Then identify the correct USB disk in Disk Management, create volumes from available unallocated space, format each new volume for its intended use, and verify the result. Do not delete an existing partition merely to follow a tutorial if the stick still holds files you need.
Decide whether two volumes solve a real problem
A partition divides a storage device into separately managed volumes. Each may receive its own drive letter and file system. That can be useful when a specialist workflow needs one area for a particular device and another for ordinary files. It can also add confusion: two letters may appear for one physical stick, and some older devices or embedded systems may not use the layout you expect. Separate folders are simpler when all you need is organization on one Windows PC.
Write down the purpose of each proposed volume before choosing sizes. For example, a 64 GB USB stick might reserve a smaller area for a device-specific workflow and leave the remainder for documents. Check the target device’s current requirements rather than assuming a universal split or file system. Capacities displayed by Windows and packaging can differ because of measurement conventions and formatting overhead, so leave a margin instead of allocating every last displayed unit.
Ask whether the USB must work with a TV, printer, camera, game console, or firmware update tool. Such devices can have precise format or partition expectations, and a two-volume layout might be unsupported. If no documented requirement calls for partitions, one volume plus clear folders is often easier to maintain. This planning question is distinct from the published general USB partition tutorial, which focuses on avoiding file loss while changing the device.
Make the backup testable before changing partitions
Open the current USB volume in File Explorer and copy its contents to another healthy drive or trusted storage location. Do not call a backup complete just because a progress bar disappeared. Open representative documents, photos, and any large archive from the destination. Compare folders and important file sizes. If the USB is the only place holding a needed project, retain it unchanged until you have a verified second copy.
Partition deletion and formatting can remove access to the old file system. A “quick” format still writes new file-system information; it is not a harmless label change. Do not run DiskPart clean, initialize the disk, or create a new simple volume in space that may contain missing files. If the stick was previously partitioned and a volume vanished unexpectedly, treat that as a recovery case first. The USB recovery topic covers the separate decision to retrieve files from a stable but inaccessible device.
Stop here if the USB disconnects repeatedly, reports severe read errors, becomes abnormally hot, or displays an implausible capacity. Such symptoms may indicate a device problem that a new partition cannot fix. Repeated writes can complicate recovery and may put the only copy at risk. If the files matter, a controlled image or professional assessment is safer than experimenting with partition tools.
Inspect the disk layout without making a change
Right-click Start and choose Disk Management. Microsoft’s Disk Management guide lists this entry point and the volume operations available in Windows. Find the USB by approximate capacity and by the letter you saw in File Explorer. Never rely on Disk 1, Disk 2, or another number alone; numbering changes as devices are attached.
Look at the blocks shown to the right of that disk. They may show one existing volume, several volumes, or unallocated space. Record the current state before touching a menu. A healthy existing volume that contains your files is not “free” simply because you want a second partition. If Windows shows RAW, Unallocated, or Not Initialized unexpectedly, stop and investigate why. Those labels are not instructions to overwrite the device.
Disk Management may offer different actions depending on the USB device, its partition style, and the current layout. A grayed-out option is a constraint, not permission to substitute a destructive command found online. For a USB stick used with another platform, check that platform’s current documentation as well. The safest plan is one whose backup and intended device compatibility are known before any volume changes begin.
Create the layout only after the old files are safe
If the USB is empty or its contents have been independently verified elsewhere, you can proceed. Right-click only the intended USB volume and review the available options. If you must remove an existing volume to obtain unallocated space, confirm the disk’s capacity and label one more time, then understand that Delete Volume removes that volume’s accessible structure. Do not perform this step on the PC’s internal system drive. If you cannot positively identify the target, cancel.
Right-click the USB’s unallocated area and choose New Simple Volume where Windows offers it. In the wizard, enter the planned size for the first volume, assign an unused letter, and select the file system required by the device that will use it. Give the volume a plain label indicating its purpose. Review the summary before selecting Finish. The exact choices and supported file systems can vary, so do not pick a format solely because another article used it for a different device.
If unallocated space remains, repeat the New Simple Volume wizard for the second section. Choose a distinct label so the two letters do not become interchangeable in later transfers. On systems where the second volume is not offered or another device cannot see it, do not wipe everything and repeat without checking support. Return to your recorded requirements and decide whether a single-volume layout is the better fit.
Confirm both partitions work for their intended use
Open This PC and check that the expected volume letters appear. Compare each displayed size with your plan, allowing for ordinary capacity differences. Copy a small, non-sensitive test file to each new volume, eject the USB safely, reconnect it, and open the test files. This checks more than the Disk Management picture: it confirms that Windows can write and later read both sections.
Next test the USB in its actual target device if you have one. A Windows-readable volume may still be unsuitable for a camera, television, firmware updater, or recovery environment. Verify that the target sees the intended partition and can handle the expected file size. Do not copy your only important files to either partition until this compatibility test succeeds. Once the layout proves useful, restore your backed-up data to the appropriate volume and sample several restored files.
Keep the verified backup even after the USB appears to work. Partitioning does not make a flash drive more reliable, and two volumes on one physical device do not count as two independent backups. If you need to move files to a new PC, retain another copy outside the removable stick. A clear label and a written note of the layout will help you recognize the right destination later.
If an old partition vanished before you could back it up
Stop creating or formatting volumes. The remaining space may still contain recoverable file data, and new writes can replace it. Check any independent backup first. Drecov is Windows data-recovery software for stable local storage. Its Lost Partition Recovery mode can help locate files from a missing partition, while Quick Scan, Deep Scan, filters, and preview help evaluate candidates. It is not a partition-table repair tool and cannot revive a physically failing USB controller.
Prepare a different healthy destination with enough room. Install Drecov away from the affected USB source and keep that source connected only if it remains stable. If it repeatedly disappears or shows a wildly incorrect capacity, stop direct scans and consider a specialist or controlled image. The file recovery overview explains why extracting copies and rebuilding a partition are different jobs.
⚠ Warning: Install it on a drive different from the one where your data was lost to prevent overwriting.
Step 1: Select the original USB and lost area
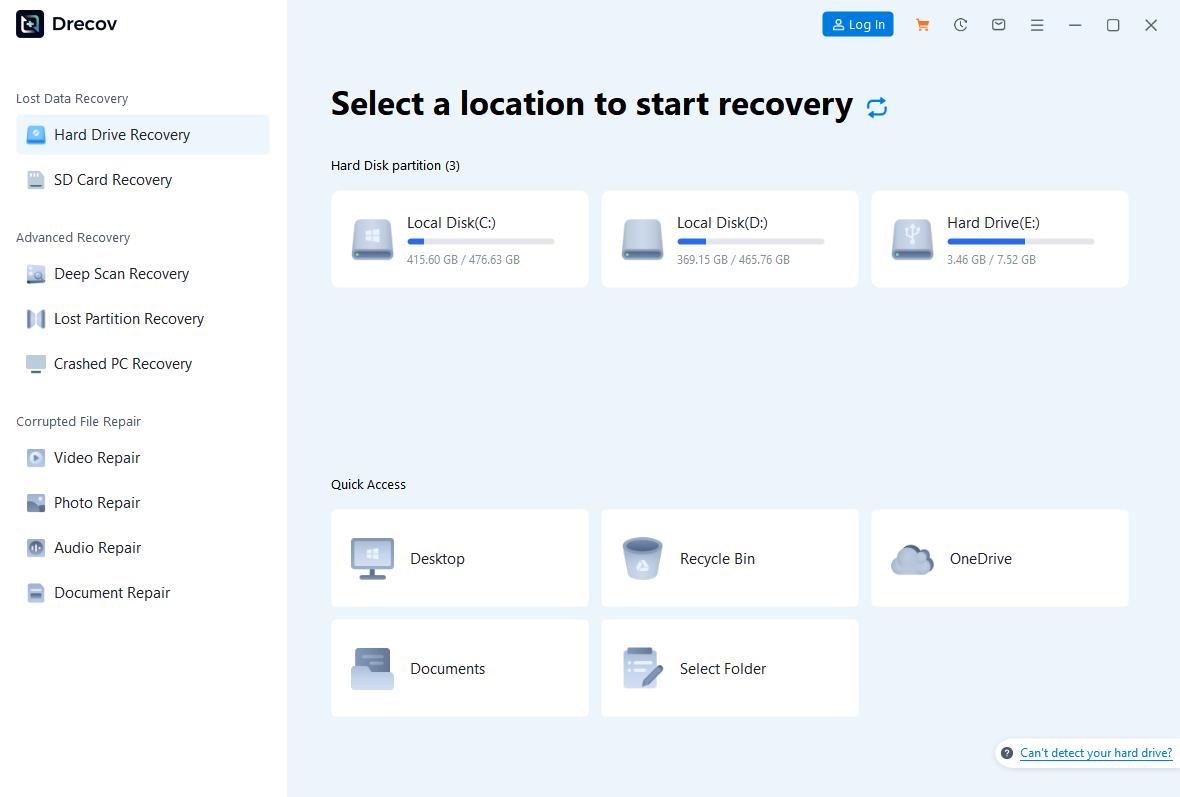
Open Drecov and identify the flash drive by capacity and history, not by a letter that may have changed. Select its original location or Lost Partition Recovery when the volume itself disappeared.
Step 2: Inspect Quick Scan
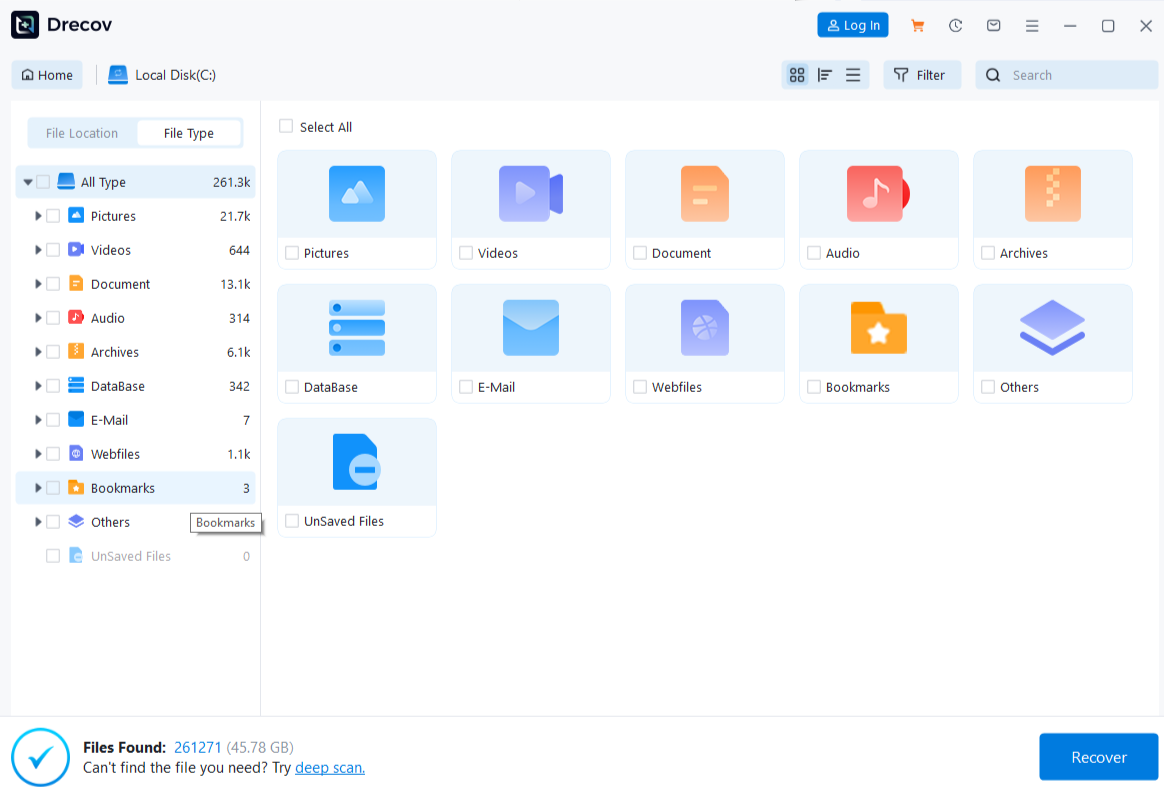
Run Quick Scan first and look for recognizable former folders, filenames, and file types. Do not assume a new empty partition is where the old data belonged.
Step 3: Deep Scan only while stable
If the first scan misses needed files and the USB remains reliably recognized, use Deep Scan. Stop if it disconnects or produces serious read errors rather than repeating the same full-device operation.
Step 4: Filter and preview candidates
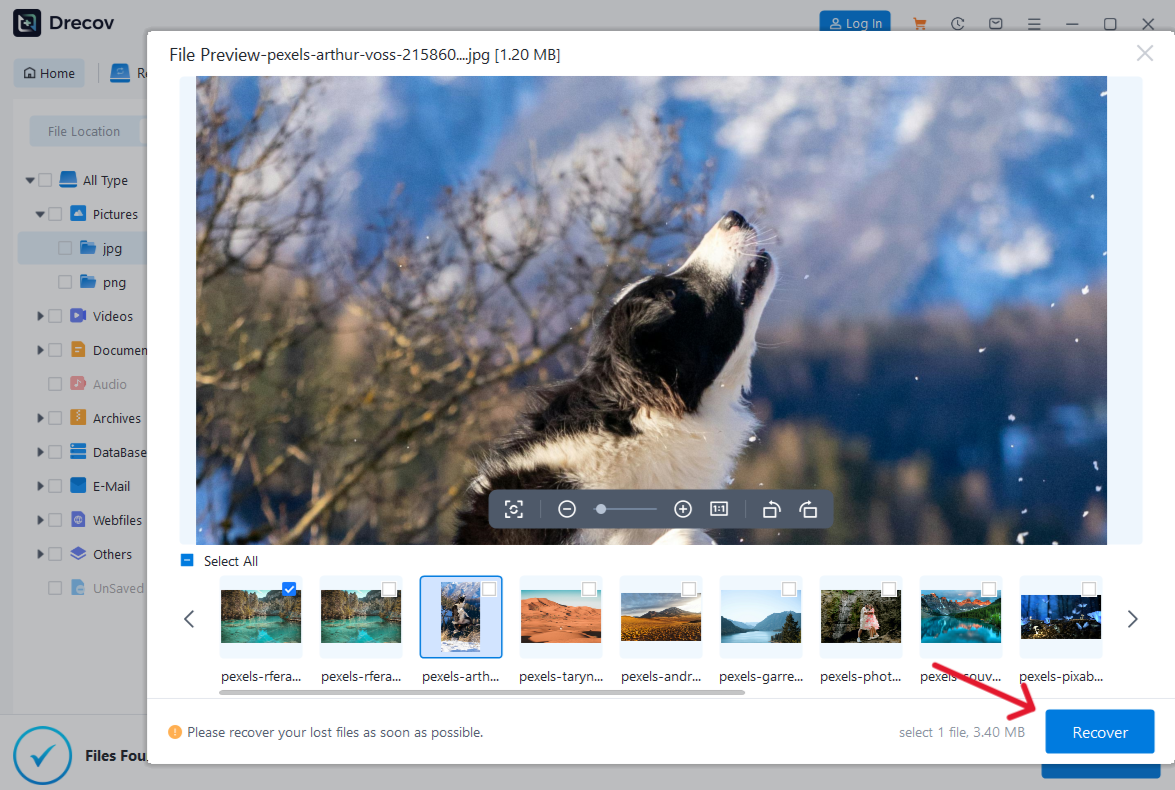
Narrow results by likely path, file name, or type. Preview representative supported files. A readable preview helps identify a candidate but cannot guarantee every byte of a large archive or video.
Step 5: Recover elsewhere
Save selected files to the prepared healthy drive, never back to the USB being examined. If the output is not where expected, check the Drecov Folder or Recovery Folder at your chosen destination.
Step 6: Verify before rebuilding
Open the recovered files and check the content you need. Only after the important copies are verified should you decide whether to recreate USB partitions. The Drecov homepage describes its recovery modes; it does not promise that partition metadata itself will be restored.
⚠ Warning: Install it on a drive different from the one where your data was lost to prevent overwriting.
Frequently asked questions
Can I create two USB partitions without deleting anything?
That depends on the current layout and available supported operations. Do not assume an in-place method is risk-free. First make and test an independent backup. If Windows offers no appropriate non-destructive route for your device, consider leaving one volume with separate folders.
Will both partitions show up on every device?
No universal guarantee exists. Windows may show both while another device sees only one or expects a particular file system. Test the exact camera, TV, console, or tool that will use the USB before relying on the layout.
Does partitioning increase storage capacity?
No. It divides the same physical capacity into volumes. Formatting and file-system structures use some space, so the sum of displayed usable capacity can be lower than the number printed on the package.
Should I use DiskPart instead of Disk Management?
DiskPart is powerful but easier to apply to the wrong disk, especially when copying commands from another machine. For a beginner with an ordinary USB stick, the graphical Disk Management view provides better visual confirmation. Do not run clean on a device that may contain files you need.
Conclusion
A useful USB partition layout starts with the job each volume must perform, not with a command. Verify a backup, confirm the correct disk, create only the planned volumes, and test them in the target device. If an old partition or its files disappeared, stop modifying the stick. On stable media, Drecov can search the original USB location and recover files to another drive before you rebuild or format anything.
⚠ Warning: Install it on a drive different from the one where your data was lost to prevent overwriting.





