







While cloud storage offers immense convenience, many users eventually want a change. They choose to learn how to move all onedrive files to pc for permanent offline access or comprehensive backups. Storing files locally also ensures faster performance and allows you to stop using cloud syncing entirely.
If you are wondering how to move all onedrive files to pc, this educational guide will help. We will walk you through every method available for Windows computers. Your ultimate goal might be to download all files or disable cloud-only placeholder storage. Alternatively, you may want to disconnect the OneDrive application from your operating system completely. Either way, this article explains everything in simple, actionable steps.
What Happens When Files Are Stored in OneDrive?
When the OneDrive sync client is active on your Windows machine, your files may exist in three distinctly different data states. To manage your storage effectively, you must understand what these visual icons mean.
| File Status Icon | Meaning | Local Storage Impact |
| Blue Cloud Icon | Cloud-only file; appears on your PC but is stored exclusively online | Uses 0 bytes of local disk space |
| Green Checkmark | Locally available file; downloads temporarily when opened | Uses local space but can revert to cloud-only if disk space runs low |
| Solid Green Circle | Always available offline; permanently stored on your hard drive | Consumes permanent local disk space and is always accessible offline |
Many users mistakenly believe that because they can see their file names in File Explorer, all OneDrive files are already safely saved locally on their hard drives. However, cloud-only files do not fully exist on the computer until they are systematically downloaded. That is exactly why it is vitally important to properly move or download all OneDrive files to your PC before altering your sync settings or disabling the application.
Why Move OneDrive Files to Your PC?
There are several critical reasons why experienced users and data management experts prefer storing files directly on a local storage drive rather than relying solely on cloud environments:
- Reliable Offline Access: You can seamlessly access your entire database anytime without requiring an active internet connection.
- Superior File Performance: Local Solid State Drives (SSDs) read and write data significantly quicker than cloud-based networks, eliminating loading lag.
- Elimination of Sync Conflicts: Active cloud syncing routines sometimes trigger unexpected synchronization errors, which can cause missing data or frustrating duplicate file versions.
- Cost Efficiency: Moving your extensive file library locally can reduce or completely eliminate expensive monthly cloud storage subscription fees.
- Total Data Ownership: Keeping physical files on your PC provides absolute security, strict privacy, and total structural control over your sensitive information.
Mastering the Local Migration: How to Move All OneDrive Files to PC Safely
To ensure that no data is permanently lost during the migration process, we have organized the following methods by their technical layout and execution style. Follow these detailed steps to successfully complete your data transition.
Method 1: Changing Sync Settings to Make All OneDrive Files Available Offline
This particular approach represents the safest, most efficient, and highly recommended method for users who wish to keep using their PC normally while ensuring every single piece of data is downloaded locally.
- Step 1: Open your native Windows File Explorer by pressing the Windows Key + E hotkey combination on your keyboard.
- Step 2: Navigate to the left sidebar menu and locate your specific OneDrive directory. Depending on your configuration, it will usually be explicitly named OneDrive, OneDrive – Personal, or OneDrive – [Your Company Name]. Click it to reveal the root folders.
- Step 3: Click anywhere inside the main content window and press the Ctrl + A hotkey simultaneously. This action instantly highlights every single file and subfolder nested within the cloud directory.
- Step 4: Right-click anywhere on the highlighted selection to populate the context menu. Scroll down and click on the option labeled Always keep on this device.
Important Note: Once selected, the operating system will immediately begin downloading all cloud-only elements. You will observe the status icons changing. Do not close your computer, disconnect from your network, or put your PC into sleep mode until every single file displays a solid green circle icon, confirming the local download is complete.
Method 2: Manual File Transfer via Local Copy and Paste Procedures
If your ultimate goal is to achieve complete, unhindered independence from the Microsoft OneDrive infrastructure, you should actively copy everything into a completely independent local folder directory on your PC.
- Step 1: Launch File Explorer (Windows Key + E) and open your primary cloud directory from the navigation panel.
- Step 2: Select the entire contents of the directory by pressing the Ctrl + A keyboard shortcut.
- Step 3: Execute a system copy command by pressing Ctrl + C on your keyboard (or right-clicking and selecting the Copy icon).
- Step 4: Navigate completely away from the cloud environment. Open a safe local destination folder such as your local Documents folder, your main Desktop, or an attached External Hard Drive.
- Step 5: Create a newly designated storage folder, open it, and press Ctrl + V to paste the copied content.
Method 3: Downloading Compressed Archives from the Official OneDrive Web Portal
Sometimes, local sync clients encounter internal software bugs or network blockages. In such scenarios, accessing the cloud repository through a standard web browser offers a highly stable alternative route to download your critical assets.
- Step 1: Launch your preferred web browser and navigate directly to the official Microsoft OneDrive Login Page.
- Step 2: Input your official credentials to safely sign in to your Microsoft account.
- Step 3: Once the web interface loads, hover your cursor near the top menu, select all the files and folders you wish to move, or click the master selection toggle next to the “Name” column header.
- Step 4: Click the prominent Download button located in the top command ribbon.
The web portal will automatically compress your selected folders into structured ZIP archives before initiating the web download. Once the transfer finishes, navigate to your local C:\Users\[Username]\Downloads path, right-click the file, and choose Extract All to view your data natively.
Safely Disconnecting and Deactivating OneDrive Sync Routines
Once you have meticulously verified that your files have been fully migrated locally, you can safely proceed to deactivate the automated synchronization engine to prevent future file alterations.
Step-by-Step: Unlinking the PC Account Infrastructure
Unlinking your machine ensures that future changes made on the local hard drive do not delete items stored within the cloud storage account, and vice versa.
- Step 1: Locate the small cloud icon residing in your Windows system tray (near the clock at the bottom right corner of your desktop screen). Click it to open the status panel.
- Step 2: Click on the Gear Icon (Settings) situated at the top right of the small pop-up window, and select Settings from the secondary dropdown options.
- Step 3: In the main settings display, look at the left-hand navigation pane and click directly on the Account tab.
- Step 4: Locate the specific section containing your account details and click the blue link labeled Unlink this PC.
- Step 5: A safety confirmation prompt will manifest on your display. Click the Unlink account button to finalize the disconnection.
Following this process, the OneDrive wizard will return to its initial setup state, and your downloaded files will safely remain in their local folders without any lingering cloud connections.
Unexpected Cloud Loss: Recovering Missing Files Natively and Externally
During massive data migrations, file structural modifications, or unlinking procedures, users occasionally experience accidental data loss. This can happen due to a mistaken keystroke, premature cache clearing, or accidental deletions. If you notice that some folders disappeared entirely during your attempt to resolve how to move all onedrive files to pc, do not panic. Data recovery is highly achievable if you act promptly.
Native Recovery Option A: Checking the Local Windows Recycle Bin
When files are deleted locally via File Explorer, they are initially routed to the temporary system trash repository.
- Step 1: Locate the Recycle Bin icon on your main Windows Desktop interface and double-click it.
- Step 2: Use the built-in search bar in the upper right corner to scan for the missing folder names or document titles.
- Step 3: Once located, right-click the file or folder and click Restore. This immediately returns the items to their exact original folder path.
If a file was deleted while the OneDrive sync engine was still fully operational, it may have been bypassed locally and moved straight to the cloud-based trash repository.
- Step 1: Open your internet browser and log directly into the web-based OneDrive platform.
- Step 2: Look closely at the left-hand navigation column and click on the Recycle bin tab option.
- Step 3: Scan the list of items, tick the selection circles next to the missing files, and click the Restore button located at the top of the interface. Cloud items generally remain recoverable here for 30 days for personal accounts.
Advanced Deep Storage Restoration via PandaOffice Drecov Data Recovery Software
When files are missing from both the local Recycle Bin and the cloud web interface, it usually means a permanent local deletion has occurred on your hard drive storage sectors. In these critical situations, professional data recovery software becomes necessary. Utilizing PandaOffice Drecov data recovery software allows you to perform an exhaustive, low-level sector scan of your drive to locate and piecemeal reconstruct files that the operating system has marked as empty space.
Precise Step-by-Step Recovery Using PandaOffice Drecov
- Step 1: Choose Your Target Storage Partition. Launch the tool from your desktop shortcut. The main user interface will display a clear breakdown of all active internal hard drives, solid-state drives, external media, and common paths. Hover your cursor over the specific drive partition that originally contained your local OneDrive storage root folder (typically the C: Drive) and click the Scan button.

- Step 2: Allow the Deep Scanning Algorithm to Run. The recovery utility will immediately commence an initial Quick Scan followed by an automated Deep Scan. The tool systematically reads every sector of the storage medium to find structural file signatures. You can track the progress bar at the top of the application screen. Let the system run completely uninterrupted for the best outcome.

- Step 3: Filter and Locate Your Lost Materials. Once the scanning sequence concludes, the software organizes thousands of discovered items into a highly organized folder directory tree. You can utilize the built-in search filter to input specific file formats (such as
.docx,.pdf, or.jpg) or type file names directly to find your missing data.
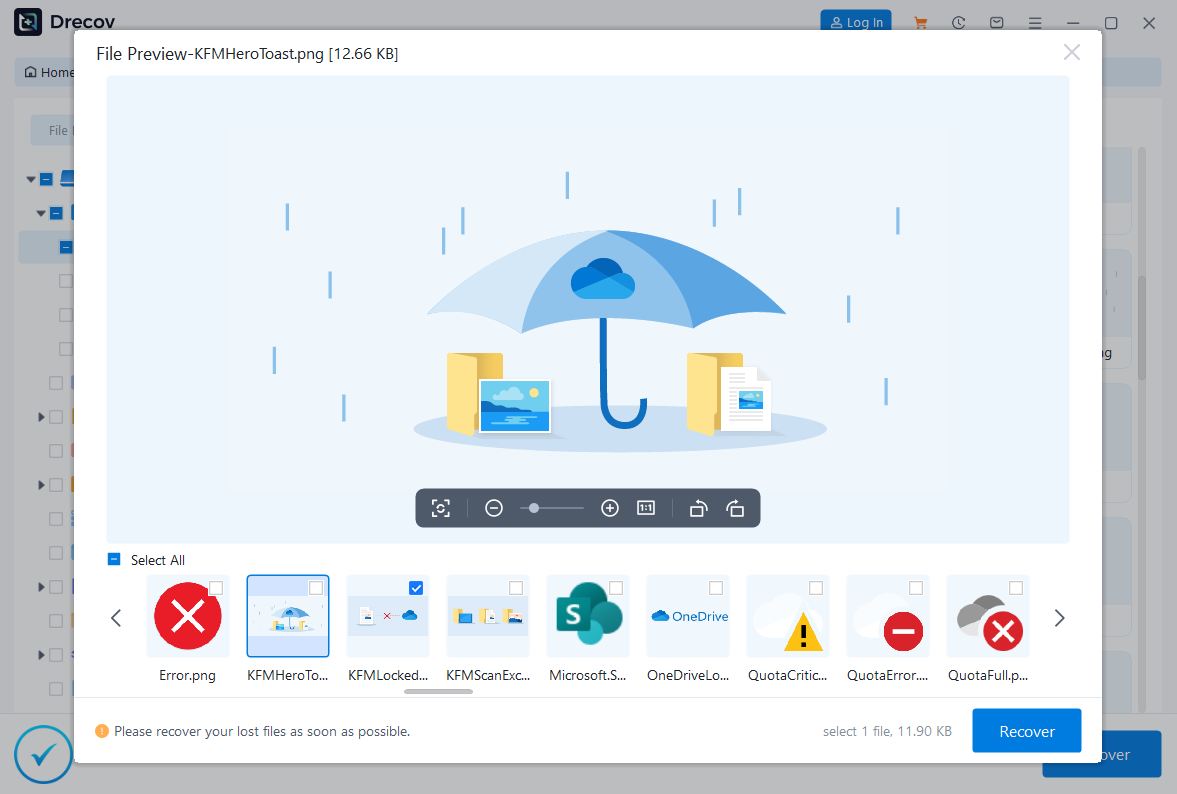
- Step 4: Preview File Integrity and Execute Recovery. Double-click on any discovered document, photo, or spreadsheet file within the user interface to activate the built-in file preview panel. This allows you to verify that the file is fully healthy and readable before performing the recovery. Select the check-boxes next to your desired files, click the Recover button, and choose a completely separate, secure external drive or partition to save the restored files.
Related Data Recovery Resources
If you encounter other data loss scenarios during your migration or daily computer tasks, you may find these comprehensive step-by-step guides helpful:
- For items accidentally cleared from your computer’s primary trash bin, read the guide on how to recover files deleted from the Recycle Bin.
- If your office application crashed unexpectedly before you could save your progress, consult the complete guide on how to recover an unsaved Excel file.
- To restore your web browser data after a major system shift, view the tutorial on how to recover deleted bookmarks in Chrome.
Verifying the Integrity of Your Localized Files
Before you completely wipe your cloud accounts or uninstall the OneDrive system service from Windows, you must perform a strict verification routine to prove beyond a doubt that every file resides fully on your machine.
Method A: The Structural Size Verification
- Step 1: Open your File Explorer environment and navigate to your newly created local folder path.
- Step 2: Right-click the folder and select Properties from the bottom of the options menu.
- Step 3: Examine the two distinct statistics listed: Size and Size on disk.
If your files are still operating as virtual cloud placeholders, the “Size on disk” value will be extraordinarily low or close to zero bytes. Conversely, if the data has successfully moved over to your physical PC storage, the two metrics will match almost perfectly, indicating real physical space consumption on your storage drive.
Method B: The Offline Simulation Test
The most practical method to verify local accessibility is to completely sever your internet connection temporarily.
- Step 1: Disconnect your PC from your Wi-Fi network or unplug your physical ethernet networking cable.
- Step 2: Navigate deep into your local folder structures and attempt to open random documents, high-resolution images, and video clips.
If every asset opens immediately and renders fully without displaying a network connection error message, your local file migration was successful. You can safely reconnect to the internet afterward.
Troubleshooting Common Problems When Downloading OneDrive Files
During large data migrations, minor errors can occur. Below is a breakdown of common issues users face and how to resolve them.
Issue 1: “Always Keep on This Device” Option Is Grayed Out or Missing
This usually happens if the OneDrive core application process has crashed or has been manually closed in the background.
- The Fix: Open your Windows Start menu, type OneDrive into the search bar, and select the application to relaunch it. Once the icon reappears in your system tray, right-click your files again, and the option should be fully restored.
Issue 2: Insufficient Storage Space Notification Error
If you are moving a very large cloud account down to a compact laptop SSD, you may run out of storage space.
- The Fix: Do not attempt to download everything at once. Migrate your data in small batches. Select two or three folders, apply Method 1, move those downloaded folders completely to an external hard drive, and then repeat the process for the remaining folders in your cloud drive.
Issue 3: Persistent Sync Freeze or Stalled Downloads
Occasionally, the download progress bar may get stuck on a single large or corrupted file, halting the entire migration.
- The Fix: Reset the OneDrive application cache completely. Press the Windows Key + R hotkey to open the Run dialogue box. Carefully input or paste the following exact system execution path:
%localappdata%\Microsoft\OneDrive\onedrive.exe /resetClick OK. The system tray icon will disappear for a moment and then restart fresh, clearing any stuck queues and rebuilding a healthy connection to resume your download.
Conclusion
Learning how to move all onedrive files to pc provides you with complete digital autonomy, vastly improved local file management performance, and reliable offline data access. Whether you want to step away from cloud storage subscriptions completely or simply prefer keeping a physical backup on hand, the manual processes outlined above allow you to migrate your files smoothly and securely.
Additionally, keep tools like PandaOffice Drecov data recovery software available on your computer. This ensures that if a file is ever deleted by accident, you can scan your drive and recover your important documents immediately.






