








Decide Whether Eclipse Lost the File or the Project View
A source file that disappears from Eclipse has not necessarily disappeared from storage. The project may be closed, filtered, imported into another workspace, or disconnected from its original location. Alternatively, the file may really have been deleted or overwritten. Start with that distinction, because rebuilding the workspace display and restoring source contents are different operations with different consequences.
For example, an empty Package Explorer after a workspace switch can look alarming even though the project folder remains complete. By contrast, a class that opens with yesterday’s implementation may need an earlier local-history state. Record the project path, active workspace, missing filenames, and last known good edit. This gives you a specific target before you change project settings or search for deleted data.
Preserve the Workspace before Broad Repairs
If the current editor still contains useful source, save a separate recovery copy first. Then preserve the affected project and the workspace metadata while Eclipse is closed when practical. The metadata can contain local-history information and other context. Do not delete it as a routine reset before investigating missing work, because a clean workspace can remove access to evidence you still need.
Keep the preserved copy distinct from the working trial. Record the Eclipse version, relevant plugins, and project type. A Java project, a linked resource, and a general text project can have different dependencies. Avoid running builds that generate or replace files in the affected source directory until you know what is missing. Your first objective is preserving editable content, not immediately obtaining a green build indicator.
Check the Actual Resource Location
Inspect the project’s properties or resource information to find its physical location. Projects can live outside the workspace directory, and linked resources can point elsewhere again. Open that location in the file manager without moving anything. Compare the expected source tree with the view shown in Eclipse. A missing resource in the view and a missing resource on disk require different next steps.
If the file exists on disk, preserve it before refreshing the project. A refresh can reveal changes made outside Eclipse, but it cannot recreate deleted bytes. Check whether filters, working sets, or closed projects explain the missing display. Also verify the workspace shown at launch. Switching to the correct existing workspace may restore familiar project organization without any file recovery operation.
Distinguish Generated Output from Source
A surviving class file or build output can help identify a project, but it is not the same as the original editable source. Comments, formatting, and some design intent may be absent from generated artifacts. Keep such outputs as supporting evidence rather than treating them as a complete source backup. Search for actual source versions before considering reconstruction from compiled material.
Likewise, a project descriptor alone does not contain all project code. Files such as build configuration and IDE metadata can help recreate the environment, but they cannot replace absent application classes. Inventory what survives by category: source, configuration, resources, tests, and generated output. This avoids overstating recovery when only the project structure or a previously built application remains available.
Free Method 1: Restore Deleted Resources from Local History
Eclipse can retain earlier saved resource states in its workspace local history. If a file was deleted, select its former parent folder or project and inspect the Restore from Local History action. The available dialog can show retained states for resources that previously belonged there. Review the actual contents and date before restoring, and keep your preserved project copy outside the active workspace.
Select only the resources you need. Restoring an entire group indiscriminately can introduce obsolete files alongside current replacements. After restoration, inspect the file path, package declaration, and neighboring dependencies. A recovered class with the correct text can still sit in the wrong source folder. Local history helps recover content, while project structure and build configuration determine how that content participates in the application.
- Select the existing parent folder or project that previously contained the deleted resource.
- Open Restore from Local History and inspect the available retained states.
- Choose the needed files and compare their contents before restoring them.
- Save a separate copy of the restored result and validate its project location.
Understand the Retention Limits
Local history depends on what Eclipse actually retained. Its preferences can limit age, entries per file, and file size. A file that was never saved, never belonged to the relevant workspace, or exceeded retention limits may have no useful entry. Changing retention now can protect future changes, but it does not create revisions that the workspace already discarded.
If the dialog shows no candidate, record that fact before trying another workspace. Use evidence such as the original launch configuration or recent project path to choose the next location. Repeatedly creating empty projects with the same name is not a general recovery method. The useful material is an existing retained state, an actual source copy, or a versioned revision that you can inspect.
Free Method 2: Compare an Earlier Saved File State
For a file that still exists but contains an unwanted change, inspect its Compare With or Replace With local-history options. Compare the current state with a candidate around the incident time. Save the current file separately first, because it may include valid changes made after the missing section. A selective restoration can be safer than replacing the entire file with an older version.
Use the comparison to locate the exact lost method, constant, or configuration block. Restore the smallest coherent unit that solves the problem. If the change spans several files, note those dependencies before applying it. A single restored method may reference a class that was renamed later, so the final result needs more than a visual check that the desired lines have returned.
Recover Related Resources Together When Necessary
Some changes belong to one logical operation. A renamed interface, its implementation, and its tests may need compatible states. Compare their histories around the same event rather than combining arbitrary newest candidates. Timestamps provide useful clues, but the code relationship matters more. A slightly older coherent set can be more useful than a collection of individually newer files that never worked together.
Keep the current project available as a comparison source while testing that coherent set. You may need to preserve later bug fixes while restoring an earlier design element. Write down which files came from local history and which changes you merged manually. That record makes review easier and helps you explain a successful recovery without claiming that the entire project returned automatically to a previous state.
Free Method 3: Reconnect a Surviving Project
If the source tree remains intact in another folder, use Eclipse’s normal project-import workflow to inspect a copied project. Choose the import type appropriate to its build system or project metadata. Do not move the only surviving folder into a new workspace while experimenting. A copied import lets you identify missing configuration without changing the original directory structure or losing external links.
An old workspace may still know where the project lived, while a new workspace appears empty. Compare both locations carefully. If the source is present but IDE-specific metadata is damaged, you may be able to recreate the project configuration around those surviving files. This restores access to existing work; it does not recover missing source. Keep that distinction clear in your notes and final validation.
Check Linked Resources Separately
A project can refer to files outside its own directory. Copying only the visible project folder can therefore omit important source, data, or configuration. Inspect resource locations and link targets before declaring the project complete. If a linked target moved, reconnect it to the correct existing copy rather than creating an empty replacement with the same display name.
After reconnecting a resource, verify its contents and origin. Two folders with similar names may contain different branches or experiments. Compare a recognizable implementation detail, build identifier, or project-specific resource before trusting the link. Then run a limited validation that confirms Eclipse resolves the expected file. An error-free link icon alone does not prove that the project now uses the intended source version.
Last Resort: Inspect a Preserved Local-History Store
The Eclipse workspace history store can contain separately retained resource contents under metadata. If normal interface recovery is unavailable, a preserved copy may still offer useful fragments. Treat direct inspection as a last resort. Work only on the copied metadata and use the documented history location for the relevant workspace. Do not rename or edit files inside the live store while Eclipse is using it.
History entries can have internal or random names rather than their original source filenames. Search copied contents for a distinctive class name or phrase when appropriate. A matching fragment can help recover code, but its original path and chronological context may be uncertain. Extract useful text into ordinary separate files and label that uncertainty. Do not transplant arbitrary internal history files into a new live metadata directory.
Judge Fragments by Content and Context
A fragment containing the desired method can still come from an experimental branch. Compare imports, package names, related types, and nearby comments before merging it. If several candidates differ, preserve them all until a project-level check identifies the coherent result. This is especially important when the same class name appears in tests, examples, generated code, and production source.
Do not treat manual history inspection as guaranteed restoration of every workspace resource. Metadata can be incomplete, cleaned, or damaged. A useful recovered fragment is still worthwhile, but it needs explicit validation. If the history yields no reliable source, move to existing repositories, archived project copies, or deleted-file recovery according to the evidence you have, rather than continuing to alter internal Eclipse structures.
Use Existing Version Control without Destroying Newer Work
If the project already uses version control, inspect the relevant file history and surviving branches. Export or check out the desired version into a separate working location. Avoid a broad reset of your active project, because uncommitted work may be the very material you are trying to protect. Local history and repository history answer different questions: one may contain recent local saves, while the other contains committed project states.
Compare a recovered local file with the repository revision before merging. A committed version may offer a coherent baseline even when it lacks the latest edits. Conversely, a local-history entry may preserve those edits but depend on other uncommitted changes. Keep both sources available. Recovering a project often means combining a verified baseline with a small set of independently reviewed local changes.
Include Non-Code Resources in the Review
A Java build can succeed while application resources remain missing. Inspect templates, configuration files, images, service descriptors, and test fixtures that the project requires. Check whether their paths changed during a refactor or import. A source-only recovery can look complete in the editor and fail when the application loads a resource at runtime.
Also review launch configurations and environment assumptions separately from source restoration. The recovered code may expect a different runtime, dependency version, or working directory. Record what you change to make the trial run. Do not silently edit the recovered source merely to match a new environment, because that can obscure whether the historical implementation survived correctly or whether you introduced a separate compatibility change.
Validate in Stages before Running the Application
Start with a source review and a build that does not alter important external data. Check package structure, dependency resolution, and compiler messages. Then run targeted tests that exercise the restored behavior. A successful compile confirms some structural relationships, but it does not prove that the recovered algorithm is the intended one. Use an expected input and result that you can explain.
Next, inspect the changed files as a group. Look for duplicated classes, obsolete resources, and unintended reversions introduced by the recovery. If the project normally writes files or contacts services, use an appropriate test configuration before launching it. Recovery should return trustworthy work without causing a separate incident through an old endpoint, obsolete credential reference, or accidental execution against a live environment.
Recognize When the Disk Is the Problem
If unrelated files also fail to read, the issue may extend beyond Eclipse. Preserve readable data and avoid repeated builds or workspace repairs on the affected volume. A source tree that disappears intermittently can reflect storage trouble rather than an IDE indexing issue. Software recovery experiments should not take priority over obtaining a stable copy of the underlying data.
For a healthy disk with a single deleted source file, a targeted recovery attempt may be reasonable. For a failing device or irreplaceable project, choose a preservation approach appropriate to the storage condition. Keep notes about read errors and affected locations. Those observations help distinguish a logical deletion from a broader failure and prevent you from mistaking temporary readability for a complete recovery.
Recover a Workspace with Multiple Similar Projects
A workspace can contain several projects with the same package names but different purposes. Before merging a history fragment, identify whether it belongs to production code, a tutorial, a test harness, or an experimental branch. Compare the project location and a distinctive implementation detail. This prevents a familiar class name from drawing you toward the wrong source. Keep candidate provenance in your inventory even when the text appears to solve the immediate compiler error.
For a multi-module build, inspect the module that actually owns the resource. Restoring a class into a neighboring module can create duplicate types or change dependency direction. Use the build configuration and existing directory structure to choose the destination. If you import a recovered project into another workspace, confirm that the physical files remain in the expected copied location rather than accidentally linking back to the preserved original.
Review Refactor Boundaries Around Deleted Resources
An accidental deletion can occur during a legitimate rename or extraction. Compare the surrounding change: the old class may have been replaced by a new abstraction, while one required method was omitted. In that situation, restoring the entire old class can reintroduce obsolete architecture. Recover the missing behavior in a separate trial and review its relationship with the current design. Keep the original history state available as evidence rather than using it as an automatic instruction.
Tests can help identify the intended boundary. A failing test may describe behavior more clearly than a remembered filename. Compare the test history with the source history, and confirm that the selected combination represents a coherent expectation. If a test was deliberately changed later, do not silently restore its older assertion merely to make the recovered implementation pass. Record which behavior the accepted recovery is meant to preserve.
Separate Build Repair from Source Restoration
Importing a project can expose missing libraries or changed runtime paths that are unrelated to source loss. Record those environment issues separately. Restore source first, then make the smallest documented configuration change needed for a controlled build. This avoids altering recovered code to compensate for an incorrect runtime. It also makes the final review easier, because source restoration and environment adaptation have distinct reasons and validation evidence.
If generated sources are part of the build, identify their original inputs and generation step. A generated file recovered from an old output folder may be useful as a clue, but regenerating from complete accepted inputs is usually clearer when possible. Preserve any unique manual edits before doing so. The important distinction is whether you are restoring authoritative source or merely recreating a derivative artifact from the sources that survived.
Verify Resource Paths in a Clean Trial
A project can pass on your machine because it still reads a file from an old absolute path. Test the accepted copied project in a way that exposes that dependency. Inspect linked resources and working-directory assumptions before calling the result portable. If a required file remains outside the project, document and protect it deliberately rather than relying on an accidental local path that another developer cannot reproduce.
Once the trial behaves correctly, save a concise list of restored resources and the checks that exercised them. Include any linked dependency that you reconnected. This record helps prevent future cleanup from removing the same external material again. It also establishes a useful stopping point: the recovery is complete when the accepted project has the required source, dependencies, and verified behavior, rather than when every old workspace preference has been recreated.
When File Recovery Software May Help
PandaOffice Drecov offers another route when an actual source file, project copy, or workspace-history file was deleted from readable storage. It cannot recreate an unsaved editor state that never reached disk, and it cannot automatically reconstruct Eclipse’s project relationships from a familiar filename. Use it after checking existing resource locations and native retained states, because those methods can preserve more useful context.
Before scanning, stop unnecessary writes to the volume that held the missing data. Keep the scan destination on another healthy device and preserve accessible workspace folders separately. If you need source and metadata from different locations, record both search targets. A recovered project directory is only a candidate until you inspect its content, dependencies, and build behavior in a controlled copy.
Step 1: Choose the Source Volume Deliberately
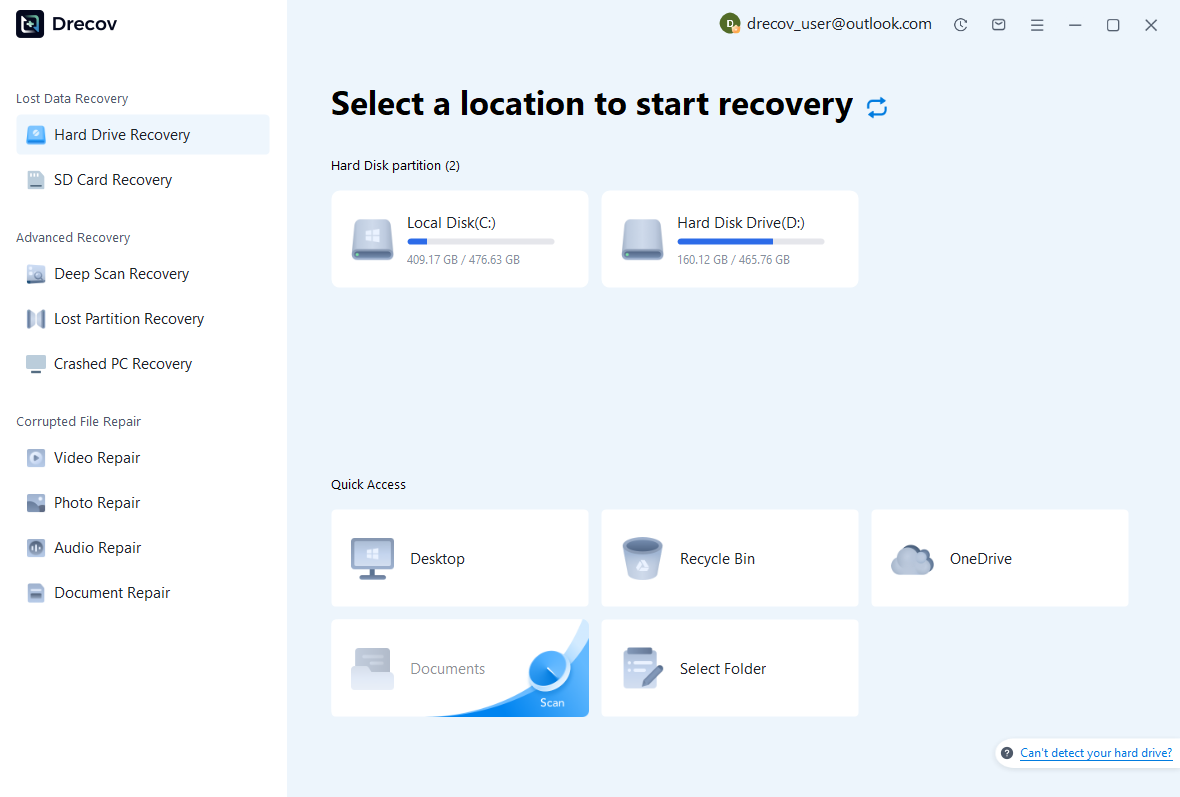
Select the storage volume that held the actual resource, not merely the workspace you happened to launch. For linked files, that may be another location. Confirm the volume by its capacity and project role, and avoid installing recovery software there. The selection screen illustrates the interface; your own drive names and available storage locations will differ from the example.
Step 2: Review Source and History Candidates
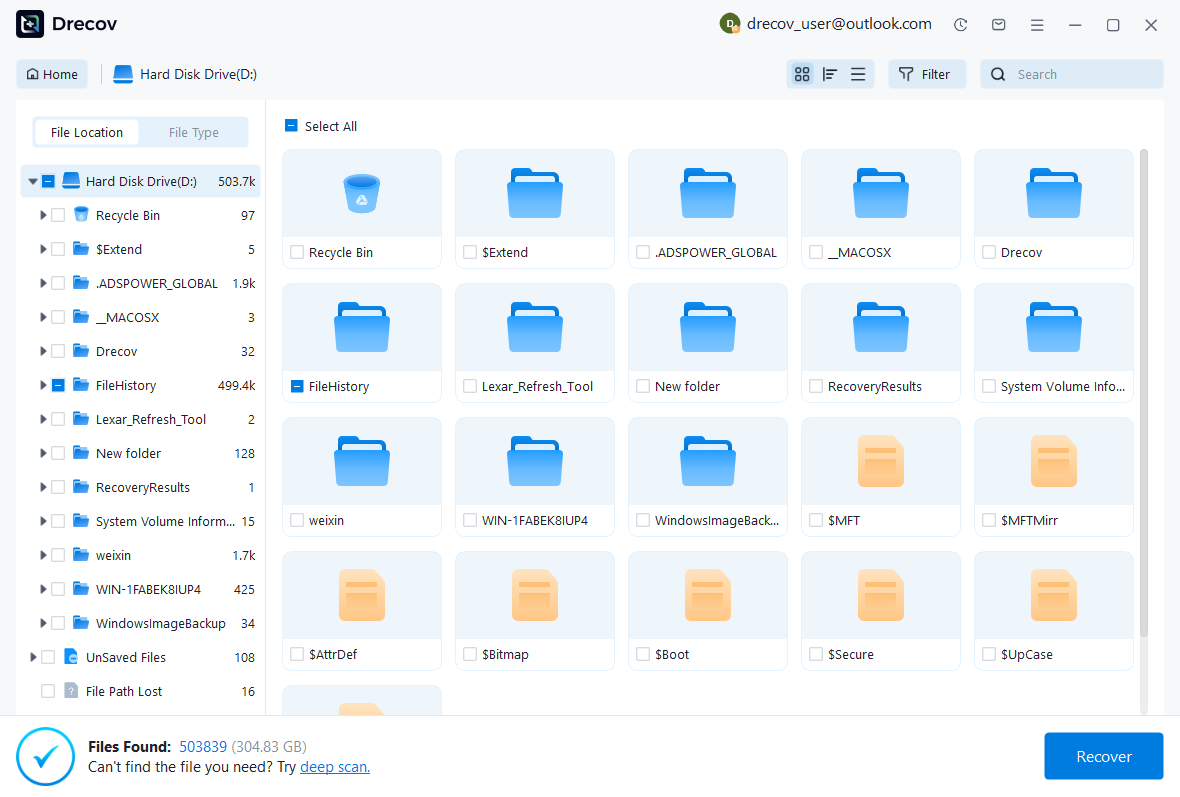
Inspect available names, paths, dates, sizes, and supported previews. Retain plausible source versions and relevant project descriptors rather than choosing only the newest class file. When candidates contain text, compare distinctive implementation details. If a recovered metadata fragment lacks a clear path, keep that uncertainty in your inventory. A matching class name alone does not identify the correct revision.
Step 3: Recover Elsewhere and Test a Copied Project
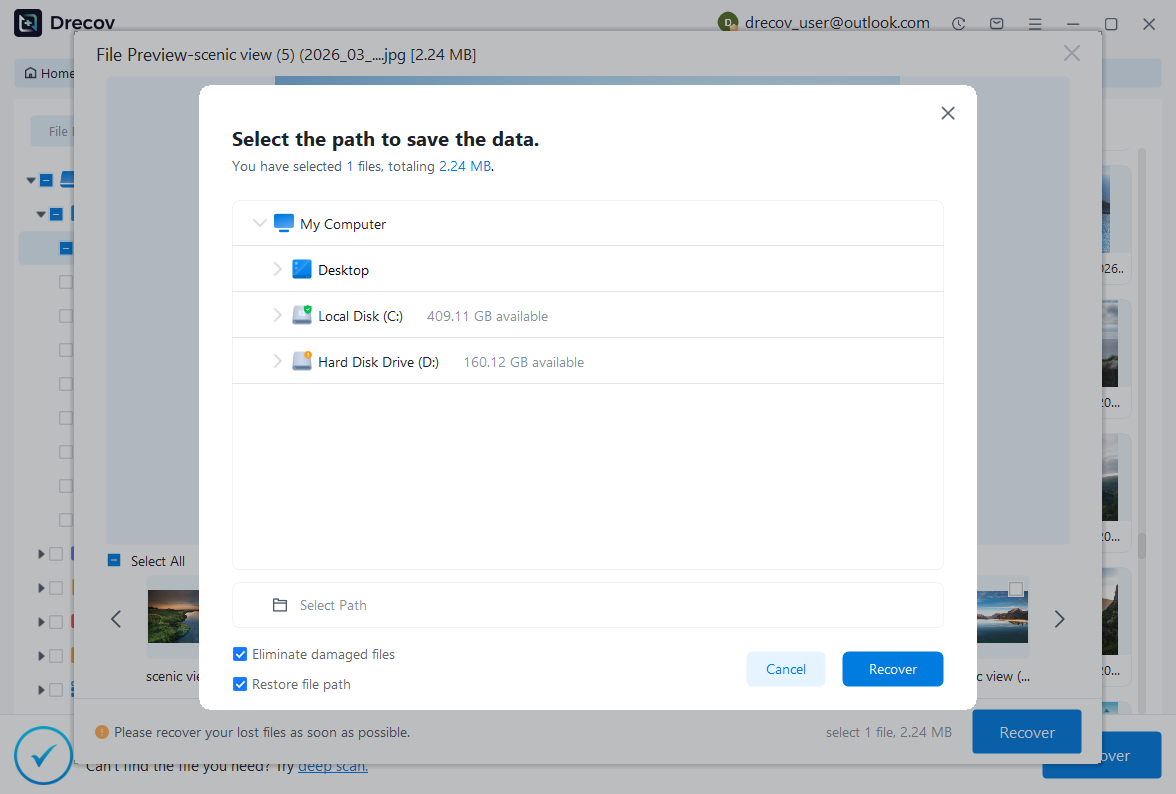
Save candidates to the separate destination, then create a trial project around the accepted files. Inspect source before building, restore required resources, and use the correct project type. Run targeted checks for the recovered behavior. Keep the original recovered candidates unchanged so that you can revisit a comparison if the first imported project reveals a missing dependency or incompatible file state.
Close the Recovery with a Verified Baseline
Your final baseline should contain the accepted source, required resources, build configuration, and a short explanation of what came from each recovery source. Save it outside the active workspace as well as in the current project. If version control is already part of the workflow, commit the reviewed result with a clear description. Do not mix unrelated cleanup into that recovery checkpoint.
- Confirm that every restored file belongs in the expected source or resource location.
- Review the recovered change together with its dependent files and tests.
- Build and run focused validation in a controlled environment.
- Preserve a complete verified baseline before resuming ordinary development.
Improve Local Protection without Relying on One Feature
Review Eclipse’s local-history limits after the incident and choose settings appropriate to your project. Keep normal source control and independent backups for longer-term protection. Local history can rescue a saved edit, but a workspace cleanup or retention limit can remove it. A repository can preserve committed history, but it does not automatically capture every unsaved or uncommitted change.
Finally, test restoration of one disposable resource through the interface. Verify both its content and project path after recovery. This shows what your actual installation retains and makes the workflow familiar before another incident. A tested recovery procedure, a coherent repository, and a separate project backup provide different layers of protection, each with a clear role and a practical limit.
Related Recovery Resources
Explore the relevant recovery options: Hard drive recovery, External hard drive recovery.
For another recovery case and its practical checks, read the related recovery guide.
Check the vendor guidance for the installed version: official recovery documentation 1, official recovery documentation 2, official recovery documentation 3.





