







When an app says “this drive isn’t formatted as NTFS,” do not click Format as your first fix. Verify which drive the app selected, and check that drive’s actual file system in Windows. The message often appears while choosing a PC game installation location, but the same first checks apply to other programs that require NTFS. A drive may truly use exFAT or FAT32; alternatively, Windows may show NTFS while the app is rejecting a particular target or installation setup. Those situations need different answers, and only one calls for a file-system change.
Confirm which drive the warning refers to
Look at the selected destination inside the app before touching Disk Management. A game installer may show a drive letter that differs from the folder you expected. On a PC with several internal disks and a plugged-in USB drive, a letter alone is easy to misread. Write down the app name, proposed folder, drive letter, and complete error wording. If a separate note mentions sector size or allocation size, preserve that wording too; an NTFS label is not the whole diagnosis.
In File Explorer, open This PC, right-click the exact target drive, select Properties, and read File system. Microsoft documents this as the basic way to identify the file system. Confirm capacity and volume label while you are there. If the app selected E: but you inspected D:, you have not tested the reported condition. For a removable drive, disconnect other similar drives after closing open files, then reconnect only the intended one and verify its letter again.
Also check whether the intended folder is on a different volume from its shortcut. A library or mapped location can appear to be on one drive while storing data elsewhere. If the program offers a browse button, follow the target folder path rather than trusting a friendly name. The goal is to identify the actual volume that would receive new files.
If Windows says exFAT or FAT32, keep the files before changing the format
Now the warning has a plausible basis: the destination is not NTFS. That does not mean the volume is broken. exFAT is common on removable media because it works across different devices; FAT32 is another compatibility choice. An application can still require NTFS for its installation layout or permissions. In that case, choose a different NTFS drive if one is available. This is often the simplest path and leaves the removable drive unchanged.
If you need this specific drive, inventory its files first. Copy documents, photos, save files, installers, and any irreplaceable project folders to another healthy device. Open samples from the copy. A backup is not verified merely because the copy dialog closed. If the source disconnects, clicks, shows read errors, or reports changing capacity, stop repeated reads and seek an imaging or professional recovery path. File-system changes on unstable hardware can compound the loss.
Why formatting is not a quick compatibility toggle
Formatting creates a new file system on the selected volume. Microsoft’s format documentation warns that it can delete the drive’s data. A quick format is not a harmless label change. Do not use DiskPart clean, initialize the disk, or delete a partition to solve an app’s NTFS warning. Those operations can remove the structure needed to find existing files.
After you have a checked backup, formatting may be appropriate for a dedicated Windows install drive. In File Explorer, verify the right drive letter and label once more, right-click the drive, choose Format, select NTFS, and review the confirmation before starting. Do not format C: or another system volume from an incidental game-install prompt. Then copy your data back and test several files. If the app still refuses the drive, the format alone was not the cause; move to the app and device checks below.
What about converting FAT32 without a format?
Windows includes an NTFS conversion path for certain FAT or FAT32 volumes. It is not a universal exFAT-to-NTFS switch, and it is not a substitute for a verified backup. Conversion changes file-system structures; a failed conversion or unexpected power loss can still cost you access. If the volume is FAT32 and changing it is truly necessary, consult the current Windows command guidance for the exact target and prerequisites. Do not paste a command copied for someone else’s drive letter. A clean backup, followed by a deliberate format, is often easier to verify on a non-system game drive.
If Windows already says NTFS, test the installation target
When Properties shows NTFS, do not reformat merely to make the same label appear again. First confirm that the app and File Explorer refer to the same physical volume and letter. Open Disk Management from the Start menu and match the drive’s capacity and volume label. If its letter changed after reconnecting an external disk, the application’s stored destination may be stale. Re-select the folder in the app, preferably on a known healthy internal NTFS volume for a comparison test.
In a PC game launcher, inspect its Settings or Install options page and choose a fresh destination rather than reusing a broken library path. Create an ordinary folder on the intended volume if the app allows a custom folder, then let the app manage its contents. Do not manually delete protected game or Windows app folders to force a reinstall. Their permissions and registration belong to the platform and can break other installations.
If a known NTFS system drive is accepted but this NTFS drive is refused, the problem is narrower than a missing file-system feature. Check whether the device remains connected, has sufficient free space for the game and updates, and can create and delete a harmless test file in a new folder. Save the test outside existing game directories. If even that simple write fails, investigate access or device health before changing game settings. If it works, record the app’s exact secondary error and use its official support flow.
When the drive holds important files that are now inaccessible
An NTFS warning alone is not proof of data loss. The recovery branch begins when files are missing, a folder has become inaccessible, or a previous format has removed the directory you expected. Check another account, backups, and the drive’s original folder first. Do not install a game or download large updates to that volume while looking for missing files. Those writes can overwrite recoverable data.
Drecov is Windows data-recovery software for files lost from a stable, recognizable drive. Its read-only recovery mode, Quick Scan, Deep Scan, filtering and preview help you locate candidate files before saving them to another healthy location. The software supports common file categories such as documents, photos, videos, audio, email, and archives, as well as Lost Partition Recovery when a partition itself has disappeared. Here its job is to retrieve missing personal files or save-folder copies, not to make a game launcher accept a drive. Physical hardware repair, changing the file-system requirement, and recovering overwritten data are outside that role.
For an actual missing-file case, the file recovery overview can help you distinguish a deleted file from a visible but unusable volume. A previously formatted NTFS volume has its own NTFS recovery considerations. If the entire USB volume was reformatted earlier, the USB recovery path is the more relevant neighboring case.
⚠ Warning: Install it on a drive different from the one where your data was lost to prevent overwriting.
Recover first if the app error followed a format or deletion
Only scan a device that remains stable and is identified correctly. If it repeatedly disconnects or returns severe read errors, stop software retries and arrange an image or specialist assessment. Prepare a separate healthy drive with enough free space for recovered files. Install Drecov away from the affected volume, and never restore candidates back onto it.
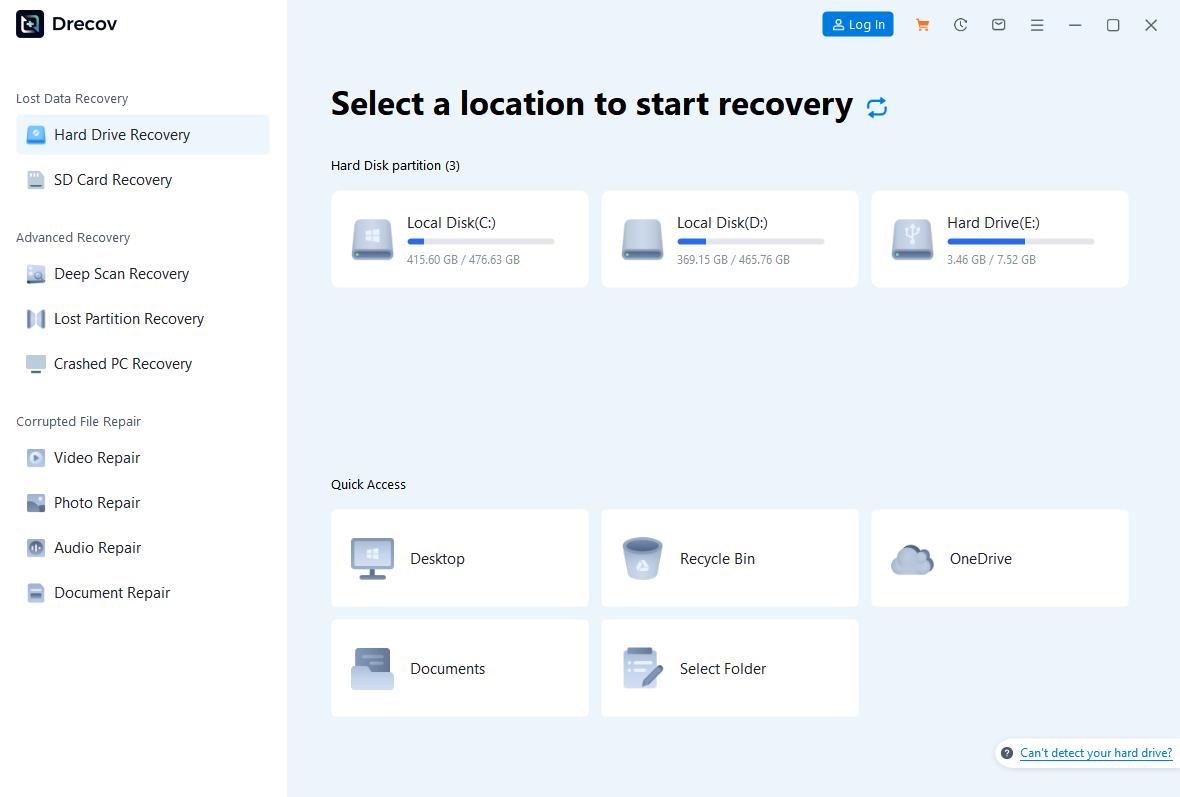
Step 1: Select the original loss location
Open Drecov and choose the volume that held the missing files before the NTFS change or failed installation. Use the original physical device and partition as the guide, not a drive letter that may have changed. If the partition no longer appears but the disk remains stable, use Lost Partition Recovery rather than creating a replacement partition.
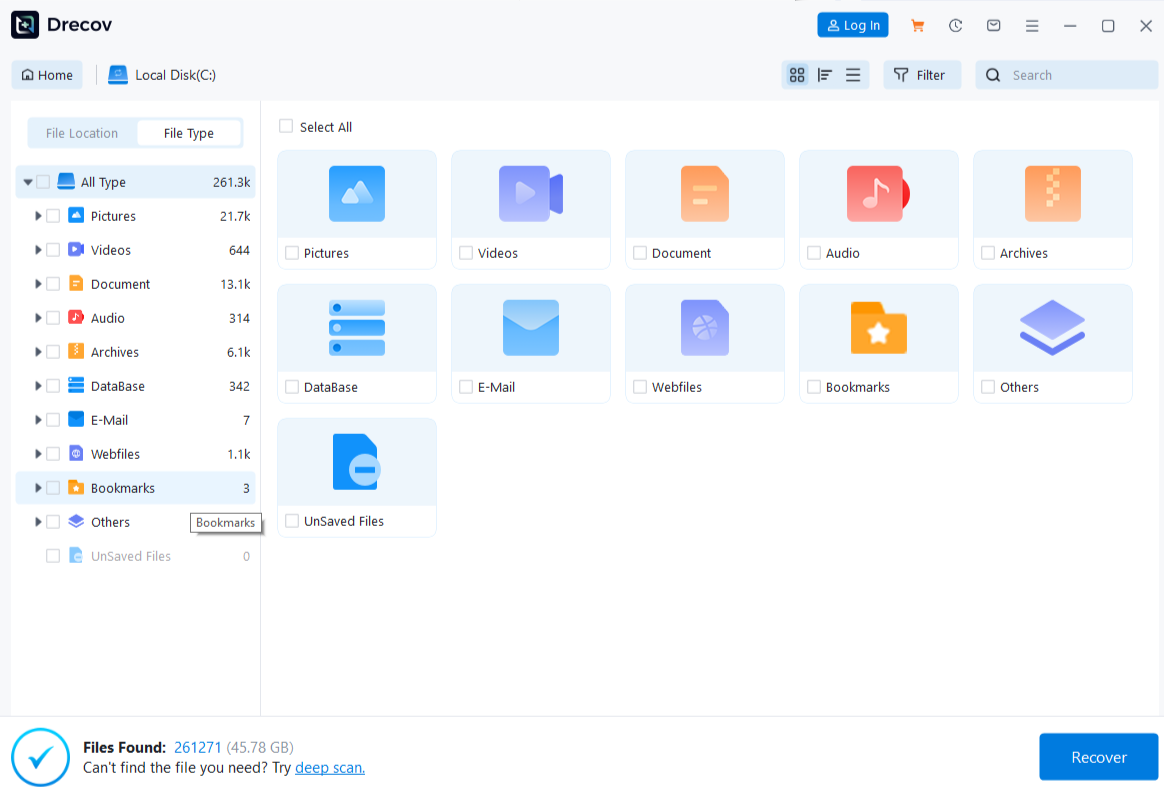
Step 2: Run Quick Scan, then decide whether to deepen the search
Start Quick Scan and inspect the former folder, filenames, and file types. If needed files are absent and the media stays stable, run Deep Scan. Avoid repeated scans if connection or read behavior deteriorates. A recovery scan cannot fix a drive that fails electrically.
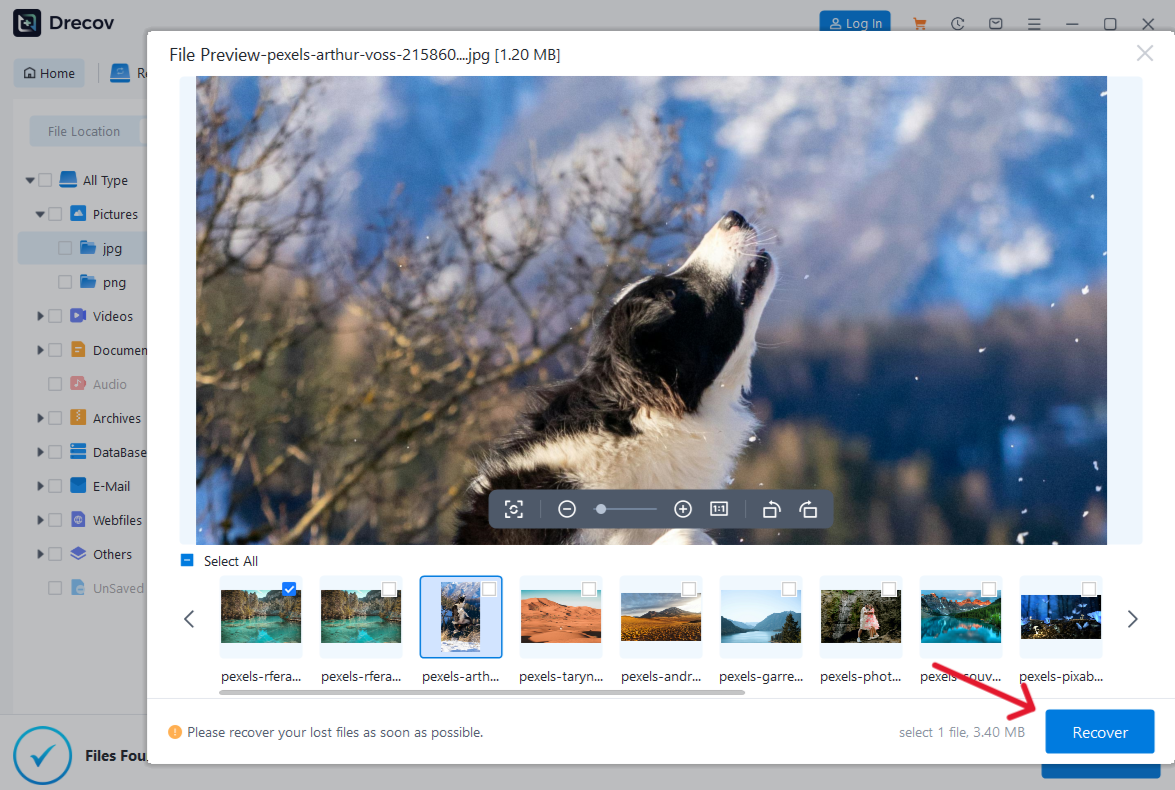
Step 3: Narrow results and preview useful candidates
Filter by document, photo, archive, or other needed types, and use paths or names where available. Preview representative supported files to avoid recovering a large set of unusable copies. A preview may not support every game-specific save format, so test those files later with the owning app rather than assuming a thumbnail proves full integrity.
Step 4: Save elsewhere and verify before repairing
Recover selected files to your separate healthy device. If output is not in the expected folder, check the destination and any Drecov Folder or Recovery Folder used for that recovery job. Open several ordinary files, compare sizes and dates, and verify any game-save copy through the application’s supported restore path. Only after you have a usable copy should you return to formatting, file-system conversion, app reset, or other changes.
⚠ Warning: Install it on a drive different from the one where your data was lost to prevent overwriting.
FAQs about the NTFS warning
Does the message prove my drive is damaged?
No. It may report a genuine exFAT or FAT32 volume that the app does not accept. If Windows already reports NTFS, the selected target or the app’s stored install location may be the issue. Device instability is a separate warning sign.
Will quick format keep my files?
No. Quick format changes file-system records and should not be used as a way to preserve the files. Copy and verify them on another device first.
Can I convert exFAT to NTFS without copying files?
Windows’ familiar FAT/FAT32 conversion route does not serve as a general exFAT-to-NTFS conversion. Plan a verified backup and a deliberate reformat if the application truly needs NTFS.
Why does an app object when File Explorer says NTFS?
The app may be checking a different destination, retaining a stale library path, or reporting another constraint in a simplified warning. Match the exact volume and test a new folder before assuming the file system is wrong.
Can Drecov make the game install to my drive?
No. Drecov helps retrieve missing files from suitable Windows storage. Use the app’s installation settings and official support guidance for drive acceptance after your data is safe.
Conclusion
“This drive isn’t formatted as NTFS” is a reason to inspect the chosen destination, not a command to erase it. Match the app’s drive with Windows Properties, check your backups, and use another NTFS location if that solves the install. Reformat only when the drive genuinely needs NTFS and its files are safely copied. If an earlier format or deletion already removed important data from a stable volume, Drecov can search the original location and save candidates elsewhere before further changes.
⚠ Warning: Install it on a drive different from the one where your data was lost to prevent overwriting.





