







If a USB eraser cannot finish or verify a wipe, do not tell yourself the drive is clean. The tool may have stopped before reaching all accessible space, or it may have written data that it could not read back. First decide whether you still need anything from the USB. If you do, stop writing immediately and check your backups. If your goal was to give the drive away, keep it in your possession until you can establish a trustworthy result. A failed progress bar is evidence of uncertainty, not evidence of privacy.
Decide whether the priority is data recovery or privacy
These goals pull in opposite directions. If you need old files, every new write can reduce the material available to recover. Stop erasing and inspect the backups you already have. If the files exist elsewhere, open several from the backup before committing to disposal. A sync icon or an untested archive is not enough. If the USB is unstable, an imaging or professional recovery assessment may be safer than another direct scan.
If you want to prevent someone else from reading the USB, recovery is not your next step. Keep the drive private while you determine whether your organization’s policy requires replacement, certified handling, or physical destruction. Do not donate, sell, or recycle an unverified drive that held sensitive information. A quick format changes file-system structures and should not be represented as verified sanitization. For a broader explanation of the difference between file removal and recovery, see the file recovery overview.
A write-protected USB deserves special caution. A physical lock switch, a managed-computer policy, or a failing flash controller may block the operation. Forcing a succession of utilities on a read-only device is unlikely to create a trustworthy wipe. On a company computer, ask the administrator before changing removable-storage controls. On a personal computer, compare the drive’s behavior on a known-good port and review its manufacturer guidance before deciding it is reusable.
A failed erase and a failed verification mean different things
An erase operation writes or discards information according to the tool and device. Verification checks whether the tool can confirm its intended result. A failure during writing means some portion may not have been processed. A write that finishes but fails verification means the result cannot be trusted from that run. Neither outcome tells you exactly which older files remain, and neither is fixed by changing a file’s visible name.
Record the tool name, exact message, progress point, drive capacity, and whether the USB disappeared or became read-only. Do not publish a screenshot containing personal file names or serial numbers. If this is an employer’s device, follow its disposal policy rather than running another personal utility. Some organizations require a documented sanitization method and a chain of custody; an ad hoc Windows format may not meet that standard.
Microsoft distinguishes clean from clean all: the latter writes zeros to every sector of the selected disk, while the former removes partition or formatting information. Its DiskPart documentation makes the distinction explicit. That does not make clean all a universal secure-erasure certificate for every flash controller. It also makes a wrong-disk selection especially dangerous. Do not run it from a copied command without verifying the exact target and understanding the irreversible effect.
Read the failure pattern without adding more writes
The tool cannot start or select the USB
Check whether Windows lists the device with the expected capacity in File Explorer or Disk Management. A drive missing everywhere has a detection problem, not an eraser-specific one. If another storage device appears instead, stop immediately; selecting the wrong disk can destroy unrelated data. Do not use a size alone as proof when several drives have similar capacities. The USB detection guide covers an invisible drive.
Progress stops, or the USB disconnects
Repeated disconnects, severe I/O errors, unexpected heat, or capacity changes suggest that the device cannot sustain the operation. Powering and rewriting it again may make both privacy verification and possible recovery harder. Keep it disconnected while you decide whether the remaining data matters. If it does, ask about imaging or professional handling. If it does not, do not trust the device for new backups or transfer it while its old contents remain uncertain.
The write completes, but the check reports an error
Do not call the wipe successful. Check whether the verifier tested the same physical USB and the entire intended area. Some tools only verify a file system or a sample, while others report read-back errors. Read the tool’s own documentation for the meaning of its status rather than inferring a guarantee from a green progress bar. If verification fails on a stable drive, consider another method only when you know the target, have no needed files on it, and can verify the result independently. Sensitive drives may still warrant controlled disposal.
When the failed wipe also removed files you still need
Drecov is Windows data-recovery software for accessible, stable storage, including USB flash drives. It offers Quick Scan, Deep Scan, file locating and preview, and recovery to a different healthy destination. Lost Partition Recovery can help search a drive whose original partition disappeared. It cannot undo data that an erase overwrote, repair failing flash electronics, or certify that a privacy wipe succeeded. Its role is limited to the accidental-loss branch: you started a wipe, realized needed files were on the source, and stopped before further writes.
Keep the USB unplugged until you have a safe recovery setup. Check verified backups first. If the drive repeatedly disconnects, reports severe errors, becomes hot, or cannot be imaged reliably, stop direct software scanning and seek specialist advice. For a stable drive, prepare another healthy device large enough for the output. Do not install Drecov on the USB that held the missing files, and do not use that USB as the destination.
⚠ Warning: Install it on a drive different from the one where your data was lost to prevent overwriting.
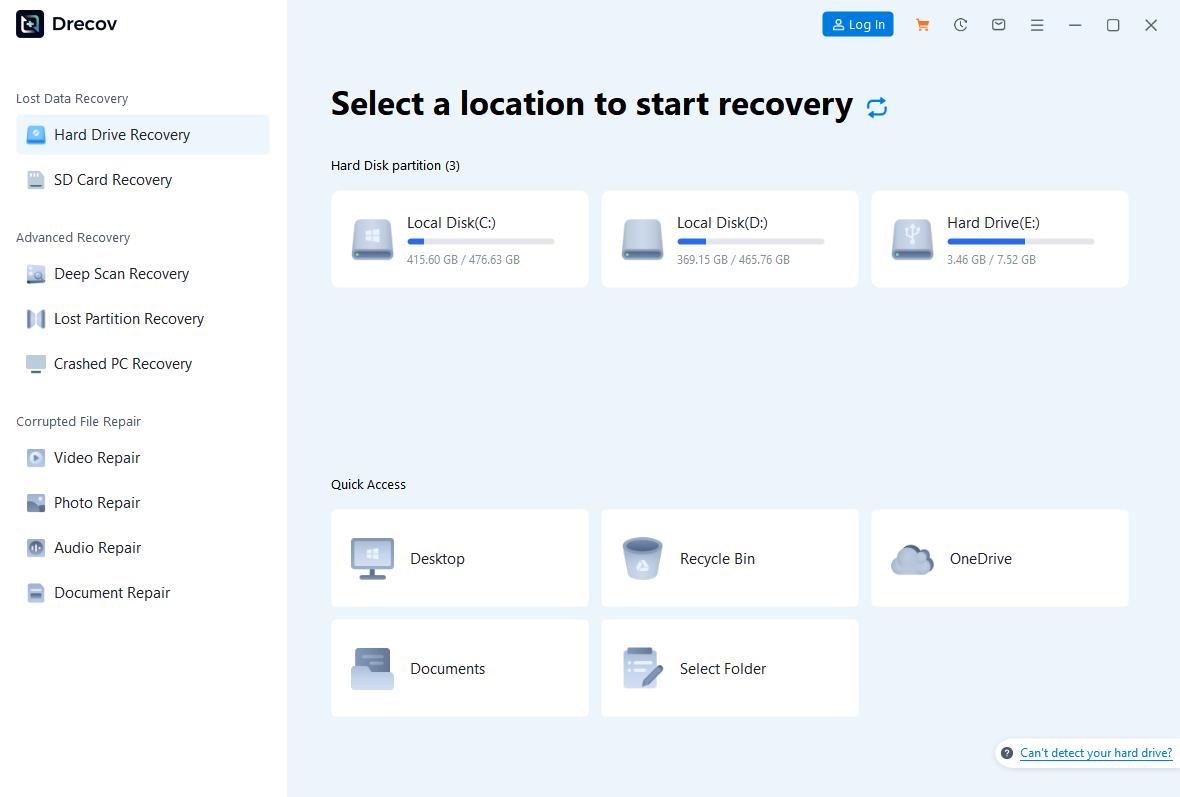
Step 1: Open Drecov and identify the original USB
On a working Windows PC, open Drecov and select the affected USB by capacity and current drive letter. If its former partition is missing, consider the Lost Partition Recovery mode. Double-check the source before you scan; the current File Explorer label may differ from the one it had before the failed wipe.
Step 2: Start Quick Scan and assess candidates
Run Quick Scan and look for the old documents, images, or archives. Compare names and paths where that information survives. Preview representative files to see whether they open. An old filename alone does not establish that the contents escaped the overwrite.
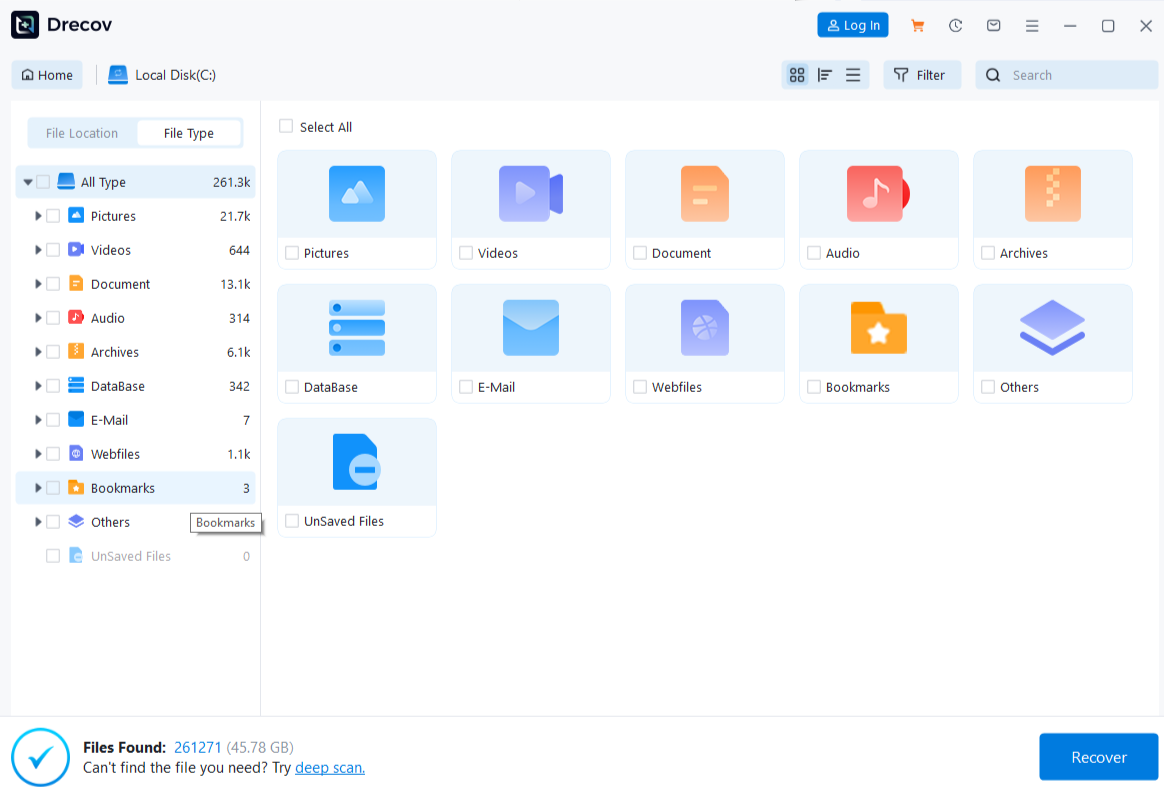
Step 3: Use Deep Scan only if the device remains stable
If Quick Scan does not find the needed material and the USB reads normally, try Deep Scan. The more of the drive the eraser overwrote, the fewer old bytes may remain. Stop if the device disconnects or produces serious read errors; repeated scanning is not a substitute for imaging an unstable source.
Step 4: Filter, save to another drive, and verify
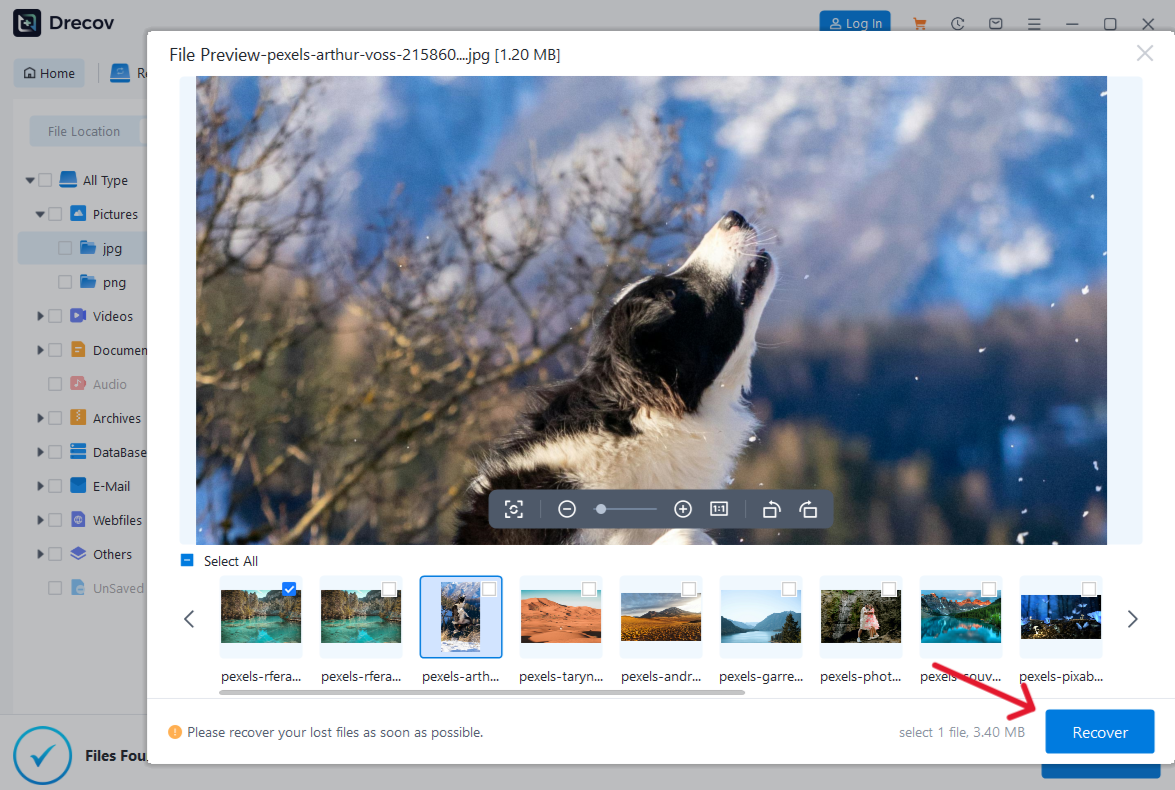
Use available type, path, or filename filters, preview a few important results, and recover selected files to the separate healthy destination. If the output is not where expected, check the Drecov folder or Recovery folder there. Open recovered samples and compare them with any backups. Only after protecting what survived should you resume a deliberate disposal decision. Use Drecov only if old files are needed and the USB remains stable; a recovery scan cannot certify a successful wipe.
⚠ Warning: Install it on a drive different from the one where your data was lost to prevent overwriting.
A safe next action for an ordinary personal USB
For a drive with no needed files and no workplace disposal requirement, start by checking its physical state and recognition. If the drive is stable, choose a method supported by its manufacturer or operating system, identify the exact disk, and document whether the method completed and what its verification actually covered. Never use a generic script that silently selects a disk number; that number can change after a restart or when another drive is attached.
If the erase fails again with a new error or cannot be verified, stop treating the USB as a reliable storage device. A drive that cannot accept or return data consistently should not hold backups, and its old data should not be assumed gone. For a drive with sensitive content, consult the applicable disposal policy or a professional service. If there was no sensitive content, the practical choice may be replacement rather than more attempts. The decision is based on reliability and privacy, not on how much time the first tool spent running.
Do not conflate a failed wipe with a drive that was deliberately erased and checked under an approved method. For the latter procedure, see the secure USB wipe guide. After an error, the result remains uncertain. A screenshot or tool name cannot certify that your particular USB is safe to pass to someone else.
Questions before you reuse or transfer the USB
Does “format completed” prove the old files are unrecoverable?
No. A normal format creates a file system; it is not the same as a verified sanitization process. The details of the method and device matter.
Can I just run the eraser repeatedly?
Only after you are certain no needed files remain and have understood why the last attempt failed. Repeated errors or disconnects are reasons to stop, not to increase the number of passes.
Is a read-only USB automatically safe to donate?
No. If the device refused writes, the old contents may still be present. Keep a sensitive drive in your control and follow an approved disposal method.
Why did verification fail after the write reached 100%?
The tool may have been unable to read back the expected result, or its check may have encountered errors. Read the tool’s status details; the progress number alone cannot settle the question.
Can Drecov prove the wipe succeeded?
No. Drecov is a recovery tool, not a sanitization verifier. Finding no files in one scan is not proof that no recoverable data exists.
Conclusion
When a USB eraser cannot finish or verify a wipe, treat the drive as both unreliable and potentially still readable by someone else. Stop further writes if you need old files; retain control of the device if privacy is the priority. Investigate the failure without guessing at disk numbers or accepting a progress bar as certification. Drecov may recover surviving files from a stable USB after an interrupted mistake, but it cannot repair failing hardware or certify that an erase succeeded.
⚠ Warning: Install it on a drive different from the one where your data was lost to prevent overwriting.





