







Is an ISO copied to USB but not bootable on your PC? Copying the .iso file as one ordinary file usually leaves you with a storage drive, not prepared installation media. First check whether Windows shows only that single ISO or a set of installer folders and files. Then confirm that the target PC’s boot menu actually offers the USB. Do not format or rebuild the drive until you have copied off anything you need. A missing boot entry and an installer that starts but fails later are different problems; the checks below keep them separate.
Before rebuilding, protect what is already on the drive
Many media-creation methods erase or repartition the selected USB. If the drive contains family photos, work files, backup archives, or a recovery image, copy them to a different healthy device first. Open a sample from the copy to confirm that it is usable. A desktop shortcut, sync icon, or assumed cloud copy is not sufficient proof. Identify the USB by both capacity and label before selecting it in any tool; drive letters can change when devices are reconnected.
If you originally created the USB as an emergency recovery drive, keep it until another usable copy exists. A Windows installer is not a substitute for every vendor recovery tool or personal backup. Also check whether the USB was prepared for another computer or operating system; replacing it may remove boot files that matter elsewhere. The USB data recovery overview helps when files have already been lost, but it is not a reason to skip a backup you can still make normally.
A drive that disconnects, becomes unusually hot, or shows the wrong capacity needs a different response. Stop trying to write installer images to it. Repeated formatting or write attempts can further damage access and overwrite recoverable data. If important files are inaccessible, arrange imaging or professional recovery when the device is unstable. A healthy spare USB is often the safest way to test a new installer while keeping the original intact.
A visible ISO file is not the same as a bootable USB
An ISO is a disk image: a package containing a file system and, for an operating-system installer, the files needed to start an installation environment. Placing that package on a USB through File Explorer does not necessarily lay out the boot files or prepare the drive for a computer’s firmware. The PC does not generally open an arbitrary file on a USB and decide to boot from the software inside it.
Open the USB in File Explorer on a working Windows machine. If you see just windows.iso, linux.iso, or another single image file, ask how you created the drive. The difference matters more than the file’s name. If you instead see installer folders such as boot, efi, and sources, the media may already be prepared, but folder names alone still cannot prove that it will boot your particular computer. Do not delete the ISO yet; it might be the only copy you downloaded.
Microsoft provides a Windows installation-media workflow that distinguishes creating a USB installer from saving an ISO file. For a Windows 11 installer, use the current official media-creation route when it fits your computer, or follow the official image-to-USB instructions for the ISO you have. Avoid third-party downloads that claim to be a patched installer without a verifiable source.
Identify which of the three failure points you have
Power off the target PC, connect the prepared USB directly rather than through a hub, and open the one-time boot menu using the key named by that computer’s manufacturer. The key varies by model; do not assume a universal shortcut. Check for entries that name the USB and for a separate UEFI version of the same drive. If neither appears, try a known-good USB port and confirm the drive is actually prepared as boot media. Do not change firmware options randomly. If Windows cannot detect the drive either, the USB detection steps address that different fault.
The USB appears, but the PC returns to its normal system
Select the USB entry explicitly in the one-time menu and watch what happens. If the machine immediately returns to Windows, a setup screen never started. That points toward the USB’s preparation, the firmware boot mode, or a failed read rather than an installation error. Record the exact screen or message. A secure-boot or UEFI/legacy mismatch may matter for some images, but any setting change must match the official instructions for that image and computer. Revert a test change if it provides no benefit.
The installer starts and then reports an error
Once the installer logo or setup interface appears, the USB did boot. An error about partitions, drivers, or available space belongs to the installation stage, not the “copied ISO cannot boot” stage. Do not erase the internal drive to fix a USB startup question. Protect the PC’s existing data and follow the exact installer error instead. The file recovery topic addresses accidental file loss, not a generic substitute for diagnosing that message.
Build fresh Windows media without guessing at firmware settings
For a supported Windows installation, start from Microsoft’s current download page and choose the official media-creation option. Prepare a spare USB whose contents may be erased. Read the tool’s target-drive confirmation slowly; the destination is the removable USB, not your computer’s internal disk. Let the tool finish, then use File Explorer to confirm that the drive contains the expected installer structure. An interrupted write or an error from the tool means you do not yet have a trustworthy installer.
If you are working from an ISO rather than the media-creation tool, follow the publisher’s method for that exact image. Some workflows mount an ISO and copy its contents after preparing a suitable USB layout; others use an imaging utility. These are not interchangeable instructions for every Windows, Linux, or vendor-recovery image. Microsoft notes that FAT32 is useful for UEFI boot but has a 4 GB single-file limit, so simply choosing a file system without checking the image can create a new failure. Do not use a generic diskpart clean command to “fix” a USB whose data you have not protected.
Safely eject the finished USB and test it in the target computer’s one-time boot menu. Your first success condition is that the installer or recovery environment opens. You do not need to begin a reinstall to prove the media boots. Once that screen appears, stop if your goal was only to verify the USB. Continuing into a clean install or partition screen can put internal files at risk.
When data recovery is appropriate after a mistaken media write
Drecov is Windows data-recovery software for accessible, stable sources including PCs, USB drives, memory cards, and external storage. It offers Quick Scan, Deep Scan, filters or file locating, preview, and recovery to a different healthy destination. Lost Partition Recovery can be relevant if an image writer removed the original visible partition. It does not turn a copied ISO into bootable media, repair a failed USB controller, or guarantee files overwritten by a new installer image. Its role here begins only if the rebuild unexpectedly deleted files you still need.
Stop writing to the affected USB and check your backups. If the drive now disconnects or reports severe read errors, do not force repeated scans; seek imaging or specialist help. For a stable drive, use another healthy storage location for the recovered output and run the software from a different drive. The scope of a scan depends on where the missing files were before the media-creation step, not on where you downloaded the ISO.
⚠ Warning: Install it on a drive different from the one where your data was lost to prevent overwriting.
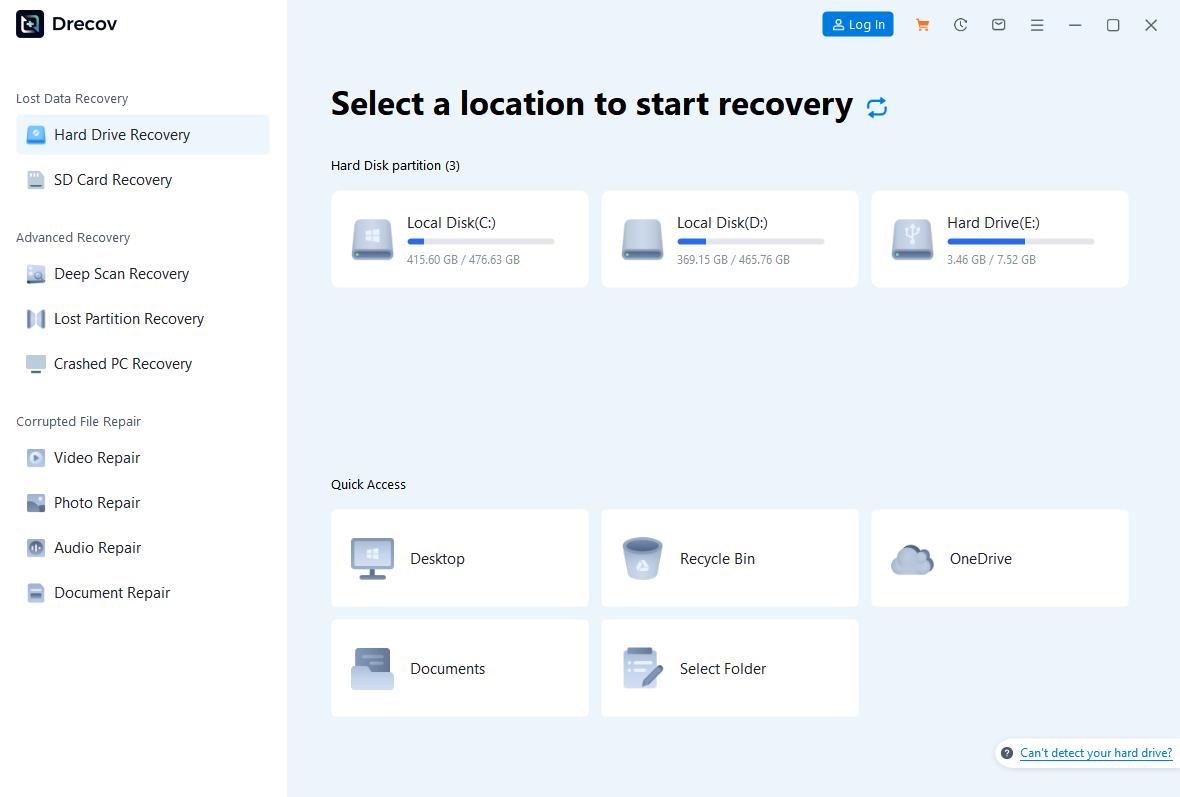
Step 1: Open Drecov and select the original USB
On a working Windows PC, open Drecov. Choose the USB by its current capacity and drive letter, then confirm that it is the device that held the lost files. If the original volume disappeared entirely, consider the Lost Partition Recovery mode. Do not select your internal system disk merely because it now holds a copy of the ISO. Never install recovery software on the affected USB.
Step 2: Run Quick Scan before a deeper search
Start Quick Scan and inspect any files that match the old folders or names. For ordinary documents or photos, check whether the results include usable versions. If you find what you need, avoid unnecessary additional reads. A scan that cannot keep the USB connected is a stop sign, not a prompt to run it again.
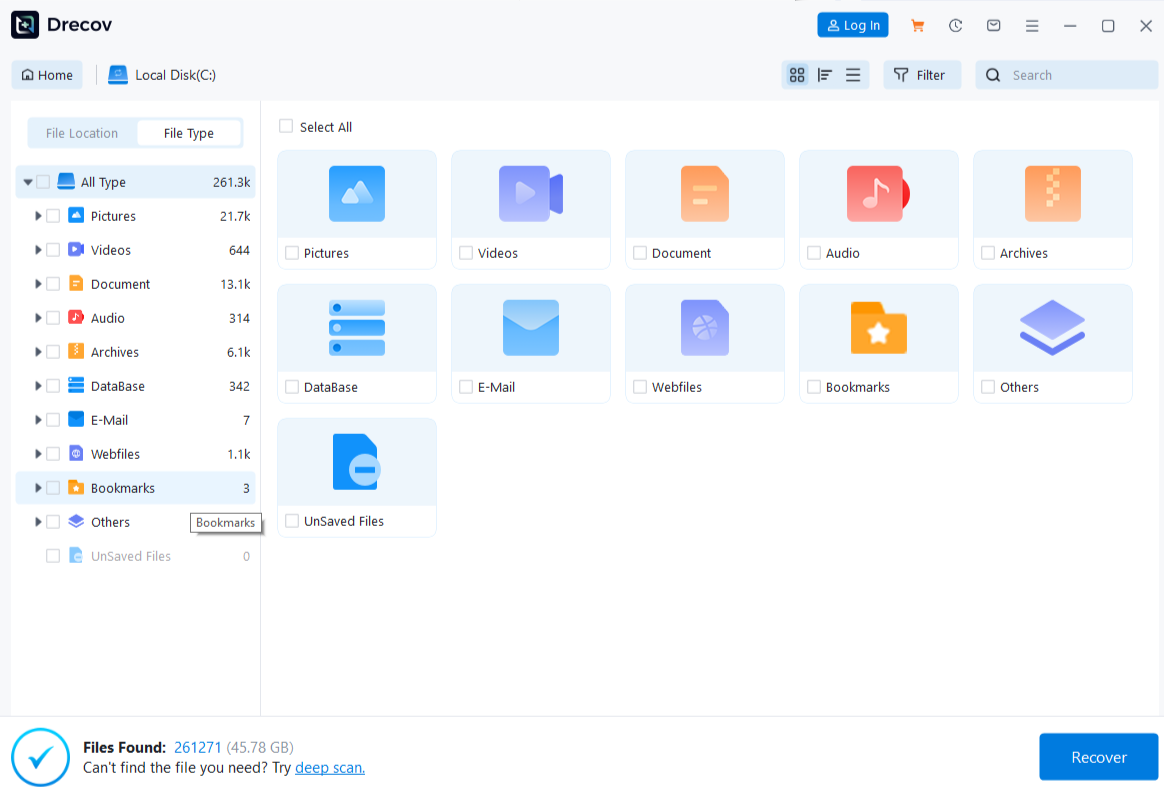
Step 3: Use Deep Scan only if the USB stays stable
When Quick Scan misses the needed material and the device reads consistently, run Deep Scan. An installer image may have overwritten some of the old space, so results can be incomplete. Do not interpret a found filename as proof that its content survived. If the drive grows hot or repeatedly vanishes, stop and consult a professional about imaging.
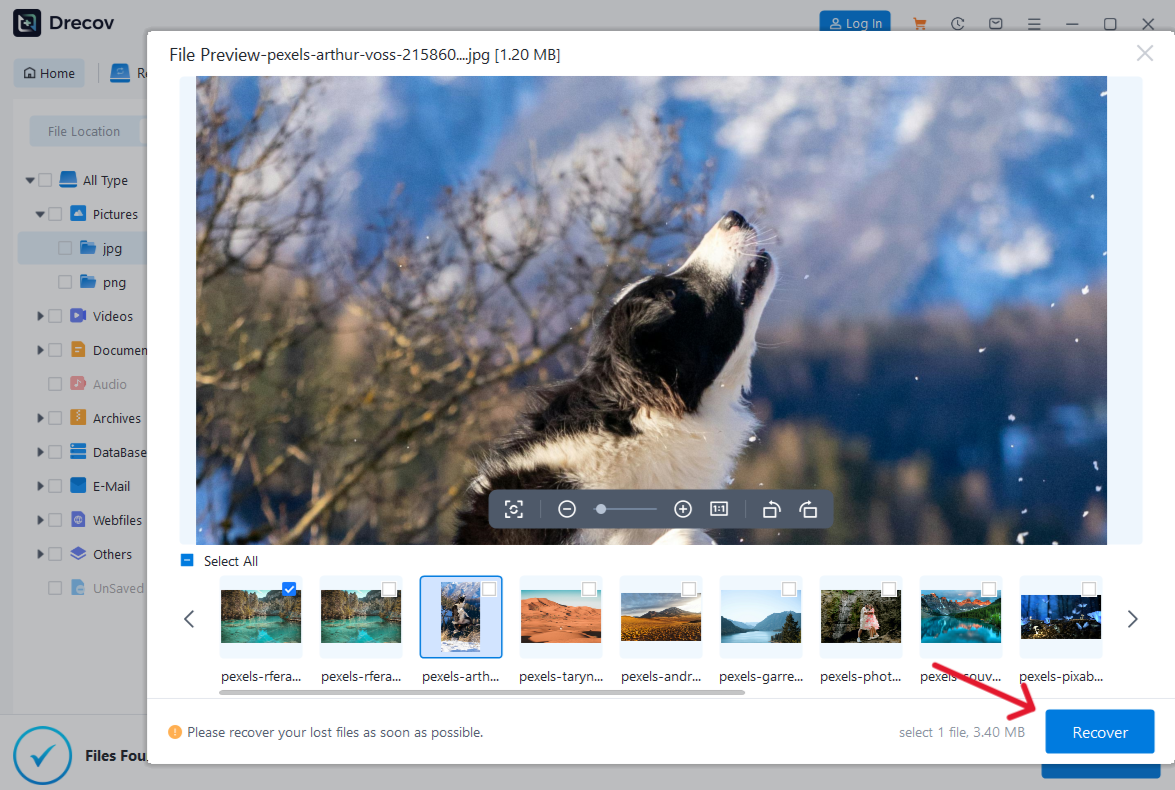
Step 4: Locate, preview, recover, and verify
Filter or browse by the old path, file type, and name where those clues survive. Preview several representative files. Recover selected files to the separate healthy drive, never back to the USB being scanned. If the output is not where expected, check the Drecov folder or Recovery folder on the target. Open samples and compare important files with any available backups before doing more USB formatting. Open Drecov on a healthy Windows PC only when files from the original USB actually went missing.
⚠ Warning: Install it on a drive different from the one where your data was lost to prevent overwriting.
Questions that can save a second failed attempt
Can I just rename the ISO to make it boot?
No. Renaming does not prepare a boot layout or change the image’s contents. Use the publisher’s actual boot-media creation method.
Should I copy the ISO’s contents instead of the ISO file?
That can be part of a documented Windows workflow, but only after the USB is prepared correctly for the intended firmware and image. Follow the publisher’s instructions rather than treating any file copy as universal.
Will changing the boot order erase my PC?
Choosing a USB in a one-time boot menu does not itself erase files. Starting an installer and accepting a partition or clean-install action can. Stop at the first installer screen if you are only testing whether the USB boots.
Why does the USB boot on one computer but not another?
The computers may differ in firmware mode, supported architecture, USB ports, or security settings. Check the exact target model and the image publisher’s boot requirements before changing settings.
Can Drecov repair the installer USB?
No. Drecov may recover old files from a stable USB after an accidental overwrite or deletion. It does not create bootable media or repair the installer’s startup files.
Conclusion
If an ISO was copied to USB but the PC will not boot from it, first find out whether the drive contains a single image file or prepared installer files, then check the one-time boot menu. Preserve the USB’s existing data before recreating media, and stop as soon as the installer launches if you only need a boot test. If media creation erased personal files, Drecov can search a stable source and recover surviving files to another drive; it cannot make an ISO bootable or restore overwritten data with certainty.
⚠ Warning: Install it on a drive different from the one where your data was lost to prevent overwriting.





