Identify What Survives in the Animation Project
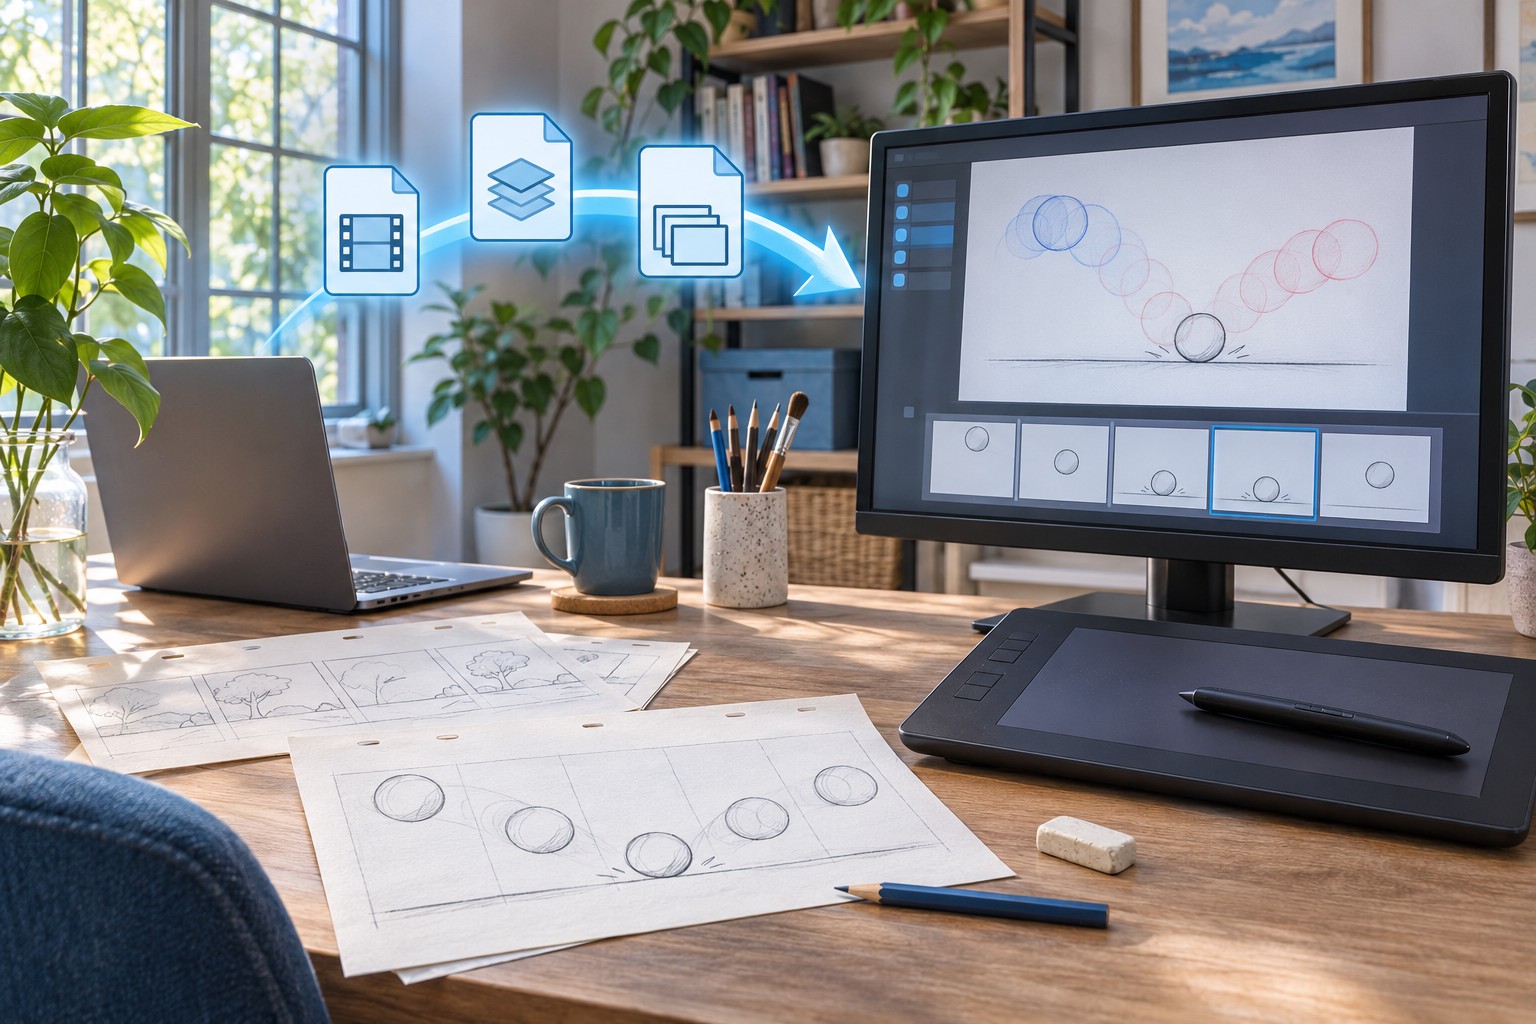
A Pencil2D animation includes more than its visible drawings. The project also organizes layers, keyframes, timing, camera information, and other session details. If a PCLX file fails to open, some drawings may still survive inside it or in an existing temporary project folder. If the timeline opens with blank frames, the problem may involve missing drawing data rather than a completely absent project.
Start by recording the Pencil2D version, the project format, and the event that caused the loss. A crash, an interrupted save, and a deliberate file move can leave different evidence. Keep the affected file unchanged and make a working copy before trying recovery. Your first goal is preserving the existing drawings and project structure, even if a complete animation cannot be restored immediately.
Keep a Useful Open Session Alive Long Enough to Preserve It
If the animation still appears in an open session but the saved file looks wrong, do not close the application as your first test. Preserve the current temporary project data and save a separate copy when possible. Closing can remove working data that might help. Avoid creating a new project or performing cleanup until you have captured the surviving session’s relevant files.
If Pencil2D has already closed, preserve the affected PCLX and any remaining temporary folders before reopening repeatedly. Record file sizes and modification times without changing the originals. A small or damaged package may still contain a subset of valuable drawings. Keeping it unchanged lets you revisit extraction or comparison later if the first recovery route restores only part of the timeline.
Understand PCLX and Legacy Project Relationships
A PCLX project is a packaged project format whose contents can be inspected on a copy using archive tools. A legacy PCL workflow uses a project description together with associated drawing data. Do not treat a project descriptor as a complete animation if its companion data is missing. Preserve the full related folder structure rather than collecting only the file that carries the familiar project name.
A package that opens in an archive tool is not automatically a healthy animation. It may contain a readable project description while some drawings are absent or incomplete. Conversely, intact drawings can survive even when the project description is damaged. Inventory those parts separately. This helps you decide whether to recover a native project or perform partial drawing salvage into a new animation.
Distinguish Playback Output from Editable Drawings
An exported video can show timing and appearance, but it does not preserve the original layer structure or native editable drawings. Keep it as a reference for validation and possible reconstruction. Search for source frames and project data first. Rebuilding from a rendered video is a different task and may involve reduced resolution, compression, and loss of separation between foreground and background elements.
Likewise, a thumbnail or one visible frame does not prove the rest of the animation survived. Check the beginning, middle, and end of the timeline and inspect each important layer. A project can look convincing at its first frame while later drawings are missing. The recovery goal should include the sequence’s usable timing and organization, not merely one image that resembles the animation.
Free Method 1: Preserve an Existing Temporary Project
Pencil2D’s documented recovery guidance describes temporary project data that may survive a crash or remain while the project is open. Use the appropriate temporary-directory access for your installed version and inspect candidate folders without deleting anything. Look for a project description such as main.xml and its associated drawing data. Copy the complete relevant folder before attempting to package or open it.
The presence of a temporary folder is an opportunity, not a guarantee. Check whether it contains actual drawing files and whether those files match the affected animation. Compare dates and recognizable imagery. A similarly named folder may belong to another session. Preserve several plausible candidates separately if necessary, because combining unrelated descriptors and drawing folders can produce a misleading or unusable project.
- Preserve the current project file and any useful open-session state before cleanup.
- Locate the relevant existing temporary project folder through the version-appropriate workflow.
- Copy its project description and associated drawing data together to a separate location.
- Inspect the copy and test reconstruction of the native package only when its parts correspond.
Repackage Only the Correct Internal Structure
If the copied temporary data contains a coherent project description and drawing folder, follow the official recovery procedure for arranging those items in a package. Work on a new archive, never the only surviving folder. Avoid adding an unnecessary extra parent directory that changes the expected internal structure. A package extension alone cannot make an incorrectly arranged archive into a valid Pencil2D project.
Open the trial result in Pencil2D and save a useful recovery under a distinct name. Then inspect layers and timeline contents before continuing edits. If it fails, preserve the exact error and keep the copied components for partial salvage. Do not repeatedly overwrite the same candidate archive, because you may lose track of which arrangement or source folder produced each result.
Free Method 2: Inspect a Copied PCLX Package
Create a copy of the affected PCLX and inspect that copy as an archive. A compatible archive tool may open it directly or after changing the copied extension to ZIP. Keep the original extension and bytes unchanged in your evidence folder. List the contents before extracting, and note whether the project description and drawing files appear present and readable.
Extract into a new folder and inspect several actual drawings. A file list can contain entries whose data is damaged, so try opening representative images. Compare the recovered imagery with known scenes or storyboards. If the project description remains coherent, the native project may be recoverable. If only drawings survive, preserve them in their original filenames and plan partial reconstruction rather than claiming full project recovery.
Preserve Frame and Layer Clues in Filenames
Drawing filenames can carry useful ordering information. Keep them unchanged during extraction and make a separate copy for any renaming. Record the folder structure and the association with the original package. These clues can help map surviving drawings back to layers or keyframes when the full project cannot open. Renaming everything immediately to generic image numbers can remove valuable context.
Do not assume that alphabetic filename order equals final playback order. The timeline can include held drawings, gaps, and layers with different timing. Use the project description when readable, and compare with a known render or storyboard. If you reconstruct timing manually, document that decision. The drawings may be recovered originals while the rebuilt animation timing remains newly created work.
Free Method 3: Compare Existing Autosaves or Earlier Projects
Inspect any existing autosave result or deliberately saved earlier project that your actual configuration produced. Verify the installed version’s behavior rather than assuming every release keeps a permanent series of backups. Preserve candidates separately and open copies. An older healthy project can provide a coherent timeline into which you may later bring drawings salvaged from a newer damaged package.
Compare candidates with concrete checkpoints: a particular pose, a recently added layer, a camera change, and the last completed shot. The most recent timestamp is not always the best starting point if it came from an interrupted save. An older coherent project plus a small set of newer surviving drawings may be more usable than a newer package with uncertain structure.
Combine Recovery Sources with Clear Boundaries
If you use an older project as a baseline, keep it unchanged and create a new reconstruction copy. Import or add salvaged drawings only through appropriate supported workflows. Record which parts came from the older native timeline and which came from extracted data. This makes it possible to review timing and layer placement without confusing the reconstructed result with a single intact historical project.
For vector drawings, do not assume that a generic image viewer can interpret native data or that renaming its extension converts it. Preserve native files and consult the capabilities of the installed Pencil2D version. If a supported import route is unavailable, keep those files for further investigation rather than discarding them as empty. Partial recovery decisions should follow actual content and format support.
Check Layers and Frame Exposure Deliberately
After a project opens, inspect every important layer rather than only the composite view. A background can hide missing foreground work, and a hidden layer can make intact drawings appear lost. Toggle visibility carefully in the trial copy and compare the layer order with a known reference. Keep notes about any recovered layer that appears incomplete or contains a different revision of the artwork.
Then inspect how long each drawing remains visible. An animation can contain all the source images yet play incorrectly because exposure or keyframe positions changed. Scrub slowly through transitions and compare recognizable beats with the storyboard or existing render. A recovered first and last pose does not prove the timing between them survived. Save timing adjustments as new edits after preserving the recovered baseline.
Verify Camera and Project Settings
Check the camera framing, output dimensions, and frame rate that matter to the animation. A different frame rate can make a familiar sequence feel wrong without changing the drawing count. A camera shift can move intact artwork outside the visible area. Confirm those settings before assuming that the drawing data is missing or before repositioning many layers to compensate for an environment difference.
If the project includes sound or other external material, inspect those relationships too. A visual-only preview can hide a missing audio dependency. Keep the original media and its location information with the recovered project. Reconnecting an existing sound file is different from recovering lost recorded audio, so identify which operation you performed and whether the accepted timeline remains synchronized.
Diagnose Empty Frames without Overwriting Them
When a frame looks empty, compare its layer visibility, camera view, and underlying drawing data. Do not immediately draw over it or delete the keyframe. Preserve the trial first and inspect neighboring frames. The missing appearance may reflect a visibility or timing issue, while an absent or unreadable drawing file points to a different problem. Each diagnosis leads to a different recovery action.
If a drawing file exists but cannot open, preserve it separately for inspection. Do not replace every failed image with a blank placeholder and call the project repaired. A placeholder may make playback continue while hiding missing original work. Mark the affected range explicitly, and use surviving references to decide whether partial reconstruction is worthwhile. That gives you a truthful inventory of what remains to be redrawn.
Avoid Broad Permission Changes During Recovery
Older documentation discusses specific historical save failures, but those reports should not become a blanket instruction to weaken Windows security. First preserve your files and test saving a disposable project in a normal writable user folder. If access is blocked, investigate the exact application, path, and security message. Do not disable protection globally or run every recovery experiment with elevated privileges by default.
Keep application updates separate from evidence preservation. A newer version may fix a relevant bug, but installing it does not repair absent drawings automatically. Save an unchanged copy before opening the damaged project in another version. Record the version used for each test, because format behavior and recovery prompts can differ. This makes a successful result reproducible and keeps failed trials from overwriting useful earlier candidates.
Test Saving before Resuming Production
Once a candidate opens with useful content, save it under a new name to a healthy normal project location. Then reopen that saved copy and inspect the same critical frames. This tests whether the recovered data can survive a fresh save-and-load cycle. An animation that looks correct only in the original recovery session is not yet a dependable working project.
Next, export a short representative section or the relevant scene and inspect playback. Check timing, layering, camera framing, and any synchronized sound. Keep the export separate from the native project. A successful video export is useful validation, but it does not replace the editable source. Preserve both the accepted project and a reference render so you can compare future recoveries more efficiently.
Plan Partial Salvage Around the Most Valuable Work
If full recovery is impossible, prioritize original drawings, complex poses, and completed sections that would be hardest to recreate. Keep recovered files organized by their source package and any known layer or frame association. A partial result can still save substantial effort when its limitations are clear. Do not discard a useful drawing simply because its complete timeline context did not survive.
Create a separate reconstruction plan for missing timing, camera settings, or damaged frames. Use the storyboard and known render as references, and mark new drawing work distinctly in your notes. This prevents you from repeatedly searching for data that you have already established is absent. It also helps estimate remaining effort based on concrete missing ranges rather than an all-or-nothing view of the project.
Recover a Shot with Held Drawings and Gaps
An animation timeline does not necessarily contain a new drawing at every frame. Held poses and intentional gaps can be part of the design. When inspecting extracted data, do not assume that a missing filename for one frame means a drawing was lost. Compare the project description, neighboring keyframes, and known playback. This helps distinguish absent source artwork from timing information that tells the application to keep displaying an existing drawing.
For a damaged shot, build a simple timeline inventory before importing images into a new project. Record known drawing positions, expected holds, and uncertain ranges. Keep original filenames and source folders in that inventory. If the timing must be reconstructed, use the storyboard or reference render deliberately. The recovered drawings remain original evidence, while the new exposure decisions should be documented as reconstruction.
Compare Bitmap and Vector Recovery Separately
Bitmap drawings and native vector data can require different inspection tools and recovery routes. A standard image viewer may confirm a PNG drawing immediately, while an unsupported native vector file may show nothing useful there. Do not equate the absence of a generic preview with an empty file. Preserve the native data and test it through supported application capabilities on copies.
If one format survives more completely than another, prioritize the most valuable recoverable work without discarding uncertain candidates prematurely. Record which layers retain native editability and which are available only as rendered images. This distinction helps estimate future changes: repainting a bitmap export or rebuilding vector structure can require different effort even when both initially look similar in the composite animation.
Verify Layer Order Against a Known Composite
A collection of intact drawings can produce the wrong scene if layer order changes during reconstruction. Compare overlap at several recognizable points, such as a character passing behind a prop or an effect crossing the foreground. Use the known render as a reference, but inspect the native layers too. A composite can hide a misplaced drawing that becomes visible later in the sequence.
When importing salvaged drawings, keep each source group separate until you understand its role. Avoid merging all recovered imagery into one layer merely to obtain quick playback. That can reduce editability and make timing repairs harder. Save an intermediate reconstruction checkpoint before broader cleanup, so you can return to the original recovered organization if a later comparison reveals a different layer relationship.
Test the Destination Folder with Disposable Work
If the original incident involved saving, check the new destination with a harmless short test project before trusting it with the recovered animation. Save, close, reopen, and inspect its actual file contents. This separates a destination or access problem from corruption in the recovered artwork. Use a normal writable project folder and investigate specific errors rather than applying broad system changes without evidence.
Then perform the same save-and-reopen check on a copy of the accepted recovered project. Compare critical frames after reopening and retain the raw evidence until that succeeds. A working destination and a coherent native save are both necessary for dependable recovery. Keeping those checks distinct helps you avoid blaming the artwork for a storage problem or trusting a live recovery session that still cannot produce a durable project file.
When Deleted-File Recovery May Add Useful Candidates
PandaOffice Drecov may help search for a deleted native project, drawing file, or previously existing temporary folder on readable storage. It cannot guarantee repair of a damaged archive or recreate drawings that never reached disk. Check existing package contents and native recovery data first. Those sources can preserve frame relationships that isolated recovered images may lack.
Before scanning, stop exporting or saving new work to the affected volume. Keep recovered outputs elsewhere and preserve accessible temporary data. Check support for the relevant file formats in your installed edition, especially native vector or project files that may not have a visual preview. A scan result becomes useful only after you inspect actual drawing content and its relationship to the animation.
Step 1: Choose the Storage Holding the Missing Project Data
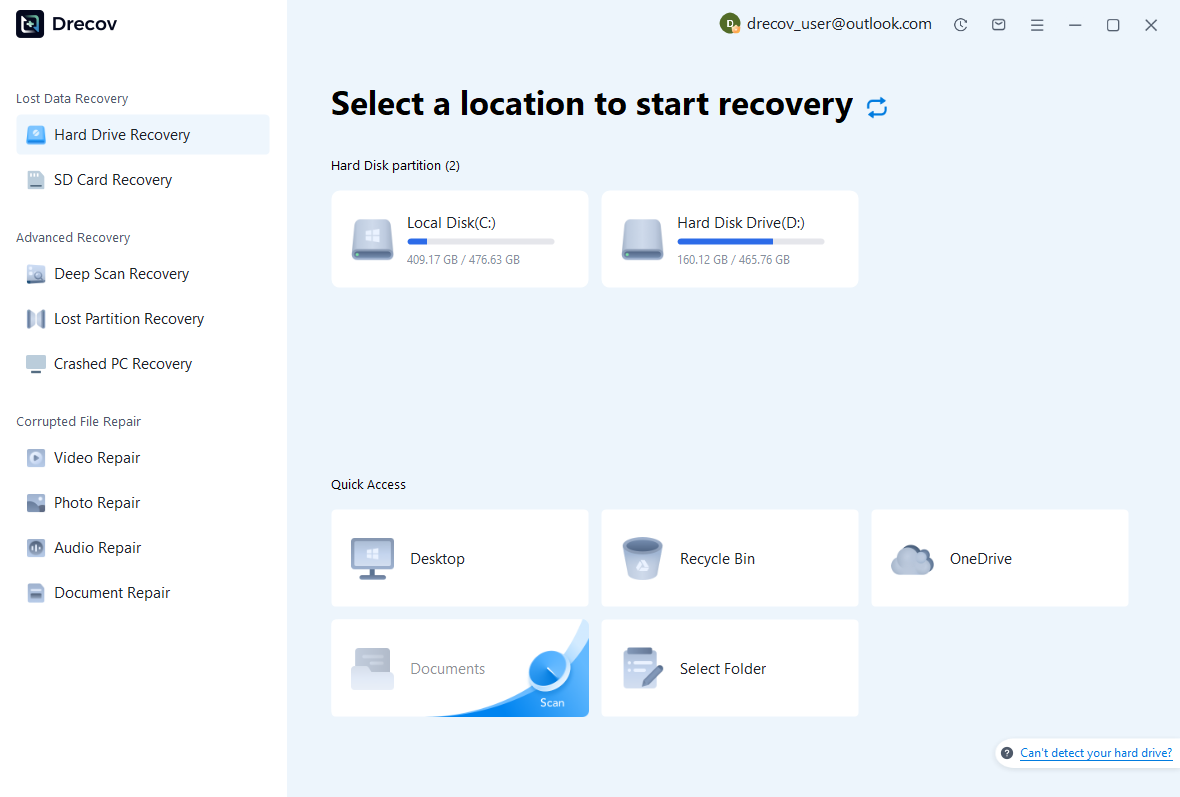
Select the volume that held the project or temporary working data. These locations can differ, so record the original project path and the relevant temporary location separately. Avoid installing recovery software or creating new animation trials on the affected volume. Reserve another healthy destination for candidates, and confirm the correct storage using its actual role and capacity rather than a guessed drive label.
Step 2: Compare Native Packages and Drawing Candidates
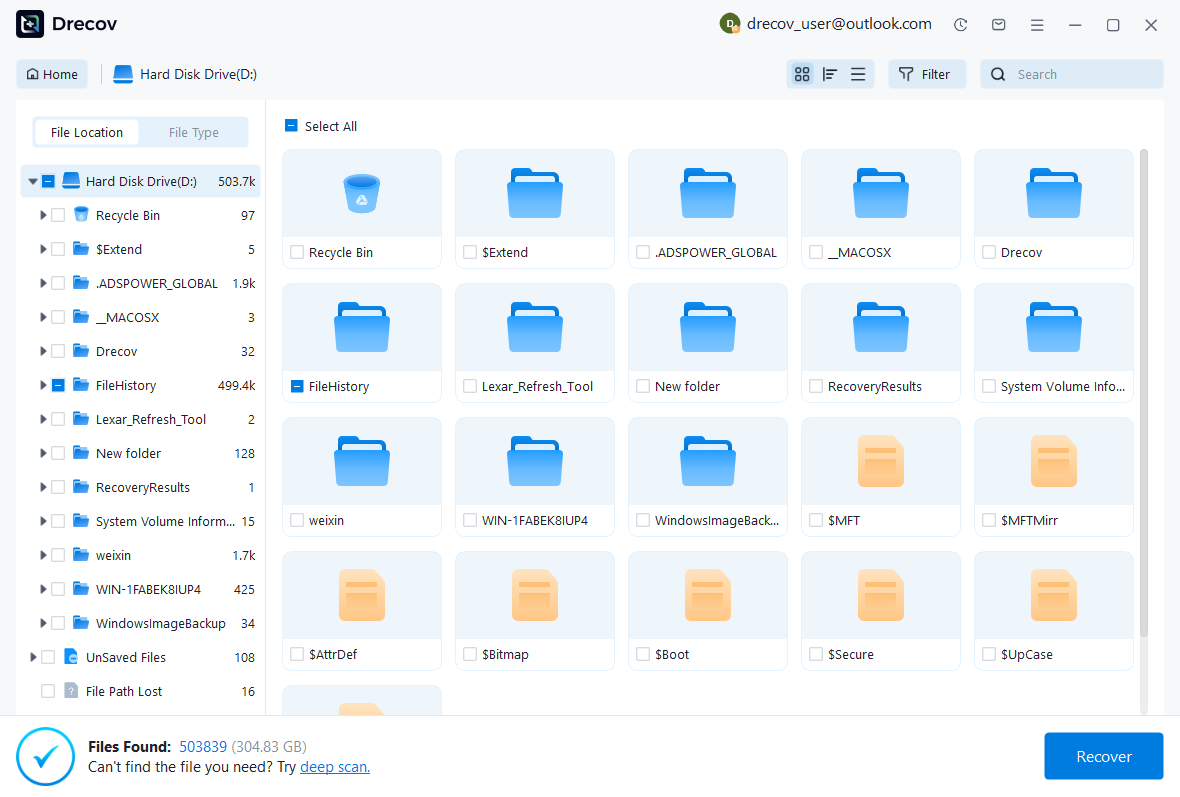
Review available paths, names, sizes, dates, and supported previews. Keep competing PCLX versions and related drawing data separately. Inspect actual frames when preview support exists, and preserve plausible non-previewable native files for later testing. A recognizable drawing confirms that some artwork survived, but it does not prove that the complete timeline, camera information, or all layers are intact.
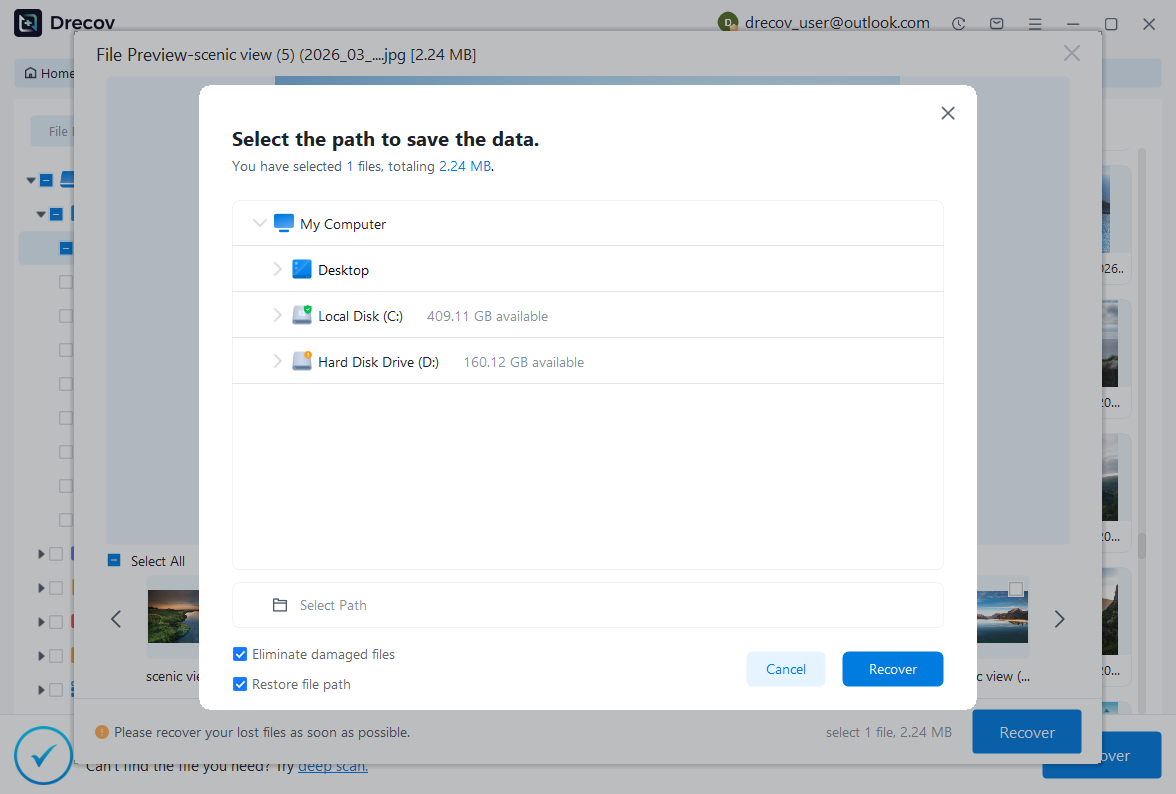
Step 3: Recover Elsewhere and Validate a Trial Animation
Save candidates to the separate destination and work from copies. Inspect package contents or open the native project through the supported workflow, then check layers, timing, and camera framing. Save a new recovered project and reopen it before accepting the result. Keep raw candidates unchanged until a representative export confirms that the recovered animation behaves as expected.
Record What Was Recovered and What Was Rebuilt
Your final recovery note should identify the accepted native project, extracted drawings, and any reconstructed timeline sections. Include version information and the save-and-reopen test result. If some frames remain missing, list their ranges or scene locations. This makes the partial result useful and reviewable, and it prevents a future editor from assuming that every original drawing and timing decision survived.
- Confirm the accepted project’s format, version, and complete related data folders.
- Inspect important layers and frame exposures throughout the affected animation.
- Reopen a fresh saved copy and check a representative rendered section.
- Preserve the verified native project, source drawings, and recovery notes independently.
Protect Future Animation Milestones
Save deliberate milestone versions before major scene changes, and back up the complete native project relationship. Test the actual autosave behavior of your installed version with disposable work instead of assuming unlimited historical retention. Keep a reference render for important milestones, but retain editable sources as the primary recovery material. A rendered video is useful evidence and a poor replacement for original layered drawings.
Finally, rehearse opening one complete project copy from your backup location. Scrub several frames, inspect layers, and save a separate test version. This reveals missing companion data or unwritable paths before a real incident. A verified animation backup should preserve both the artwork and the structure that makes it editable, not merely a file whose name ends with the expected project extension.
Related Recovery Resources
Explore the relevant recovery options: Hard drive recovery, External hard drive recovery.
For another recovery case and its practical checks, read the related recovery guide.
Check the vendor guidance for the installed version: official recovery documentation 1, official recovery documentation 2, official recovery documentation 3.