







When Windows cannot create a recovery drive, note the exact point where it stops before retrying. A USB that never appears in the drive picker presents a different problem from a drive selected successfully but rejected during copying. Do not format several USB sticks to guess the cause. First move any personal files off the intended target and open the copies. Microsoft’s Recovery Drive tool erases that USB during creation, and the finished drive does not contain your personal files. If your real goal is to back up documents or photos, use a separate backup method instead.
What this tool is making—and what it is not
Windows Recovery Drive creates USB media for recovering or reinstalling a PC. It may include system files and manufacturer customizations. It does not make a copy of your personal folders. That distinction matters because a user may risk a USB full of photos while expecting the new recovery drive to preserve them. The tool is for a specific recovery purpose; a file backup should be made and verified separately.
Microsoft’s Recovery Drive instructions direct users to start with an empty USB because creation erases its existing data. They also describe selecting “Back up system files to the recovery drive” before choosing a USB. The exact screen may vary by Windows version and device setup, but the safe rule does not: copy valuable USB data away first, then check the result of the copy. Keep the target’s capacity and label in view so you do not choose another drive by mistake.
If the computer currently boots and your purpose is future preparedness, there is no need to rush into a destructive attempt. Use another healthy USB if the first is questionable. If the computer does not boot, you generally cannot run the Recovery Drive tool on that same broken Windows installation; use an already created recovery drive or consult Microsoft’s installation-media path from a working machine. Do not confuse creating media with executing “Recover from a drive,” which can remove files from the PC being restored.
Locate the point where creation failed
The USB never appears in the selection screen
Check whether File Explorer and Disk Management can see the USB with an expected capacity. Try a known-good direct port, not an unpowered hub. If Windows cannot see the device at all, the problem precedes Recovery Drive. A drive that disconnects or reports the wrong size should not be used as dependable emergency media. The USB detection guide owns that earlier diagnosis.
If Windows sees a stable drive but the Recovery Drive picker does not, note its capacity, partition state, and whether the device presents as removable or fixed storage. Do not wipe or repartition it merely to make it appear. Test an empty, known-good flash drive that the tool accepts if one is available. This gives you a cleaner comparison than changing the original in place.
The tool accepts the USB but fails before copying
Record the message and whether the “Back up system files” option was selected. Try the tool once more after a normal restart, using an empty healthy USB. Repeated identical failures suggest a problem in the preparation stage or the Windows recovery environment, not simply a slow stick. If the option to include system files is unavailable or the error points to missing recovery files, investigate Windows RE and vendor recovery instructions. Avoid copying random recovery partitions or using unverified downloads.
Copying begins and then stops
A partially written USB is not a verified recovery drive. Do not label it as your only emergency medium. Use a different empty USB, preferably one that stays stable during ordinary file transfers. Check the PC’s free space and the exact tool message. If the computer experiences unrelated read errors or crashes, protect the internal data before running more repair tasks. Repeating the process on the same failing USB may both waste time and overwrite anything that was still recoverable on it.
Recover files from a target USB that was erased by mistake
Drecov is Windows data-recovery software for stable, accessible USB drives as well as other storage. It provides Quick Scan, Deep Scan, file locating, preview, and recovery to another healthy destination. Lost Partition Recovery may help search a drive whose original volume disappeared during a media-writing attempt. It does not fix the Recovery Drive utility, supply missing Windows system files, or guarantee data that the new recovery image overwrote. Use it only when personal files were on the target USB and are now missing.
Stop writing to that USB. Do not use it for another Recovery Drive or installer attempt while those files matter. Check other copies first. A stick that becomes hot, disconnects, or reports implausible capacity is not a safe candidate for repeated direct scans; seek imaging or specialist help. For a stable one, prepare a separate healthy destination with enough space and run Drecov from a different drive, not from the erased USB.
⚠ Warning: Install it on a drive different from the one where your data was lost to prevent overwriting.
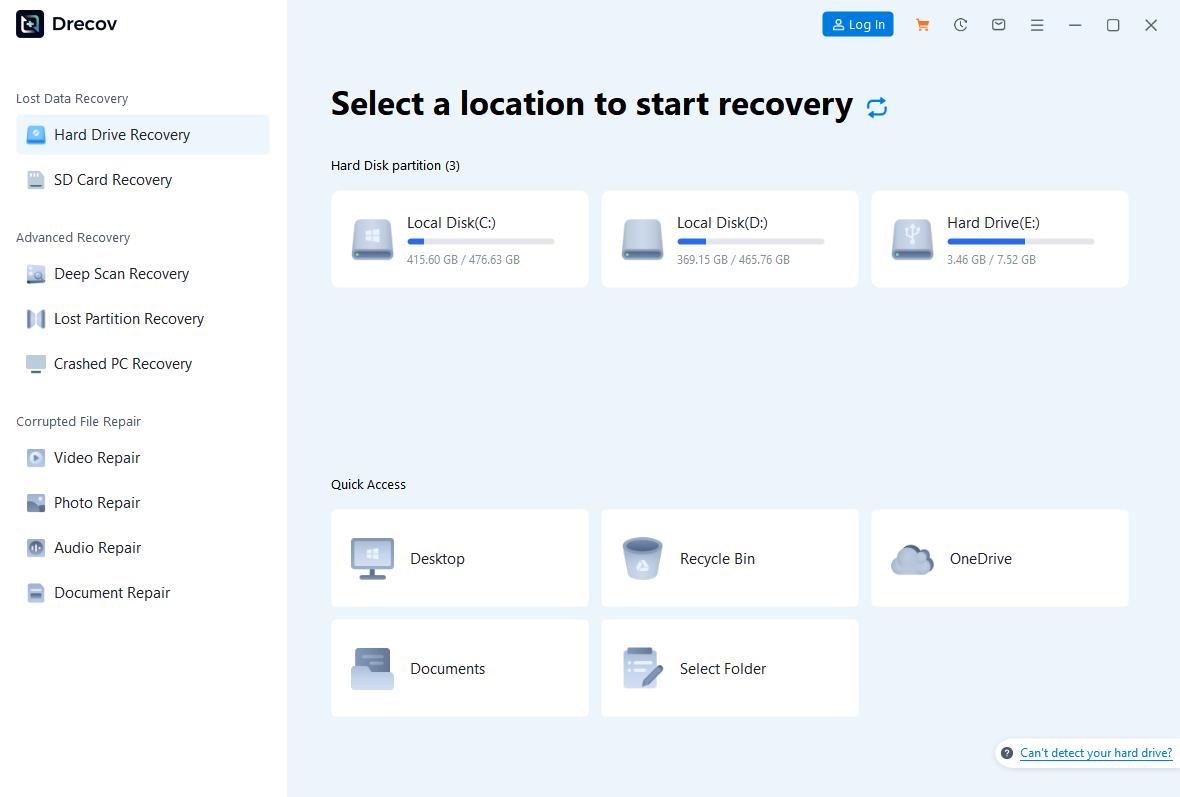
Step 1: Open Drecov and select the erased USB
On a working Windows machine, open Drecov and identify the original USB by capacity and current drive letter. If the original partition is no longer visible, consider the Lost Partition Recovery mode. Check that you have not selected the PC’s internal disk or the healthy output drive. The source is the stick that held the missing files, not the computer on which you are currently running the program.
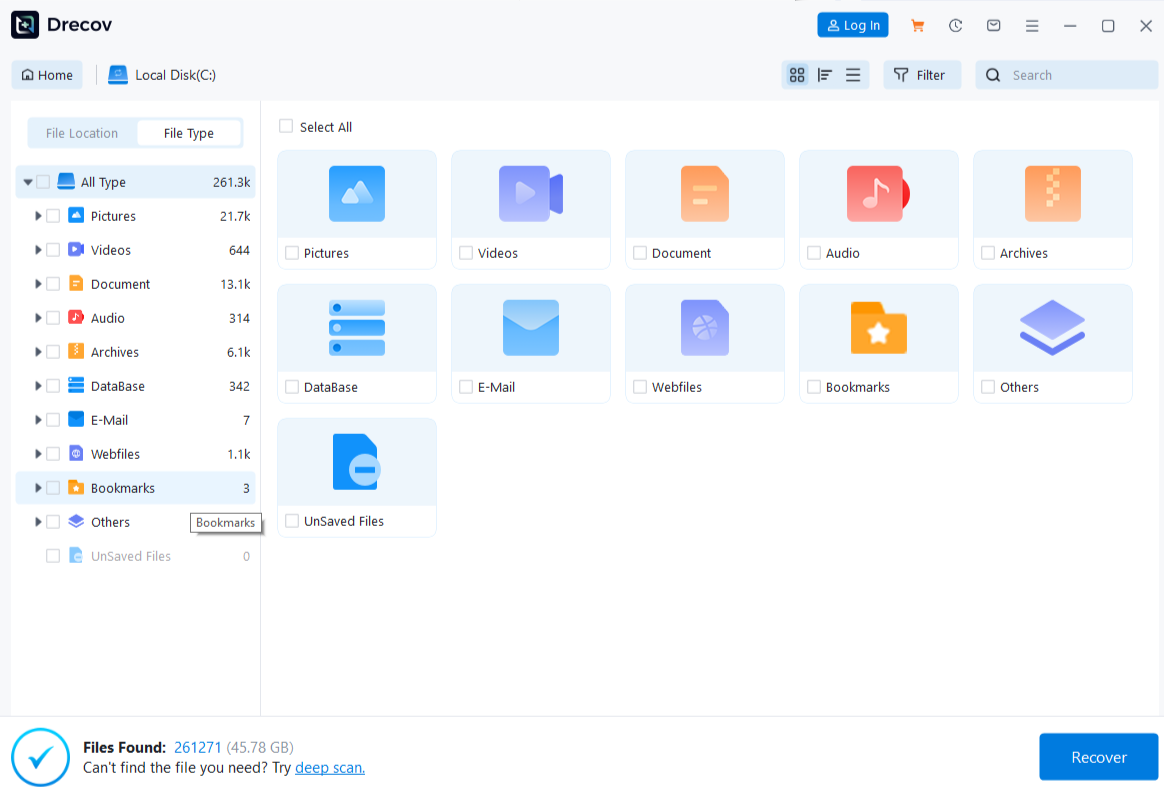
Step 2: Run Quick Scan and inspect what remains
Start Quick Scan. Search for the old documents, photos, or archives and compare any surviving names and paths. Preview a few important files where supported. A displayed filename is not proof that its contents survived the media write. If you find usable copies, do not keep rescanning merely to get a longer result list.
Step 3: Use Deep Scan only while the stick remains stable
If Quick Scan misses the files and the USB continues to read normally, run Deep Scan. Creation of a recovery drive may have overwritten some old sectors, so some files may be incomplete or absent. Stop if the device disconnects, heats up, or starts reporting serious errors. Software cannot repair the electronics behind those symptoms.
Step 4: Filter, recover elsewhere, and check the files
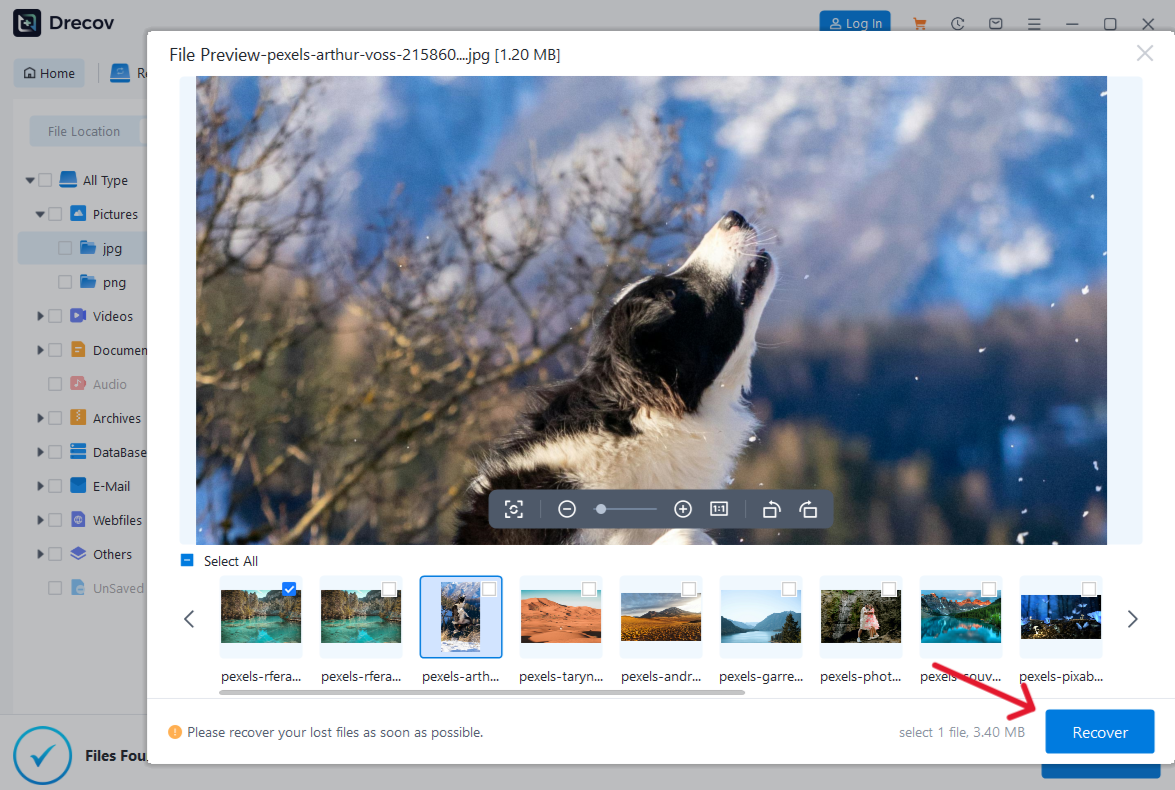
Filter by old folder or file type where possible, preview representative results, and recover selected files to the separate healthy destination. Never save them back to the USB you are scanning. If you cannot find the output, check the Drecov folder or Recovery folder at the destination. Open samples of each important file type before you decide whether the source USB can be reused. If the stick is stable and its files are genuinely missing, open Drecov on the healthy Windows computer.
⚠ Warning: Install it on a drive different from the one where your data was lost to prevent overwriting.
Retry the built-in method without losing another USB
After confirming the target can be erased, search Start for “Recovery Drive” and open the built-in utility. Choose the system-file backup option if you need a drive capable of that fuller recovery use. Let Windows inspect available media. Select the correct USB by capacity and label, read the erase warning, and choose Create only when the target is empty or its contents have been verified elsewhere. Keep the PC connected to reliable power and do not unplug the USB while files are being copied.
Success is not merely the disappearance of a progress window. The tool should report completion. Safely eject the drive and label it with the computer it was created for. If you later test the boot path, stop when the recovery environment opens; do not begin a restore just to prove that the USB works. A restore can remove personal data. Store the recovery drive separately from your ordinary backup because the two serve different purposes.
If the same error recurs, write down whether it occurred at drive selection, before copying, or during copying. The next action should follow that observation. A USB absent everywhere needs a device or connection diagnosis. If the tool rejects every healthy USB, investigate the PC’s recovery setup. Failure only after heavy writing may indicate an unreliable drive. Avoid treating all three with the same DiskPart command.
Choose an alternative that matches your actual need
If you need to repair startup soon and Recovery Drive creation will not complete, Microsoft’s installation-media option is a different route. It can provide a bootable environment from another working computer, but it does not recreate your machine-specific recovery media in every case. Keep personal files protected before choosing any reinstall or reset action. If the computer belongs to a workplace, follow its IT instructions; company recovery media and policies can differ from a home PC.
If your need is to protect personal data, stop spending time on recovery media and make a file backup instead. Copy the folders you care about to another healthy drive or a suitable cloud destination, then open sample files from that destination. A recovery drive that boots perfectly can still be useless for restoring a deleted family photo. The file recovery options address a different event: files that have already been lost.
When the target USB held needed files before an accidental creation attempt, do not use it for another retry yet. A new write may overwrite more of the old content. Check the copies and backups you already have. If none exist and the USB remains stable, consider recovery before formatting or rebuilding it. The USB recovery topic explains that data-protection branch.
Questions to settle before trying again
Does a Windows Recovery Drive back up my documents?
No. It is recovery media for system restoration. Make a separate personal-file backup and verify that it contains the folders you need.
Can I keep other files on the same USB?
Do not count on it. Microsoft’s tool warns that creation erases the selected USB. Move needed data off before you start.
Is a partially written USB safe to rely on?
No. Treat a failed creation as unverified. Make a new drive with an empty, stable USB and confirm the utility reports completion.
Will reinstall media do the same job?
Not necessarily. Installation media can provide repair or reinstall options, but it is not always equivalent to recovery media created for your device. Choose based on the task and the manufacturer’s guidance.
Should I run a file-recovery scan if the tool simply refused to start?
Only if files actually went missing from a storage device. Drecov does not repair a Windows utility error. If the USB was never erased and its files remain accessible, copy them normally instead.
Conclusion
When Windows cannot create a recovery drive, the failing stage tells you where to look: USB detection, recovery-file preparation, or copying. Protect the USB’s existing files before any retry and remember that recovery media is not a personal backup. Use a healthy empty stick for the next attempt or choose an appropriate alternative. If an earlier attempt erased files from a stable USB, Drecov can search for surviving data and recover it elsewhere; it cannot make the Windows Recovery Drive tool succeed.
⚠ Warning: Install it on a drive different from the one where your data was lost to prevent overwriting.