







A USB overcurrent warning with nothing plugged in is not an invitation to reset Windows or keep trying flash drives. Shut the computer down, disconnect power, and confirm that no external USB device, hub, dock, or charging cable remains attached. If the warning still appears at startup, the fault may involve a USB port, an internal connection, or the board itself. Protect any needed files without repeatedly testing a suspect port. A machine that shuts itself off or reports a persistent electrical fault needs hardware diagnosis, not a recovery scan.
Why unplugging the visible devices changes the diagnosis
An overcurrent message means the computer has detected an electrical condition on a USB connection that it cannot treat as normal. It does not tell you which part is responsible. A damaged peripheral, a shorted connector, a cable, a case-front port, or the computer’s internal USB circuitry can all be candidates. The message may appear before Windows loads, so installing a driver is often beside the point.
The first isolation test is useful because it removes an entire class of suspects without modifying storage. ASUS’s motherboard troubleshooting guidance says to remove all USB devices and power on again. If the alert disappears, reconnect devices one at a time to find the failing accessory. If it remains, ASUS directs users to service. That guidance does not prove a particular board component has failed; it marks the point where home software fixes have little basis.
“Nothing plugged in” should mean more than no flash drive. Check for a wireless mouse receiver, webcam, card reader, printer, dock, phone cable, external SSD, or monitor USB upstream cable. A tiny receiver can easily be overlooked at the back of a tower. On a laptop, inspect every external port. Do not insert a test device into a visibly bent, loose, burned, or unusually hot connector.
Make one careful external check, then stop cycling power
Turn the machine fully off
Use the normal shutdown command if the computer reaches the desktop. Otherwise, follow the manufacturer’s shutdown instructions. Disconnect the power cord from a desktop, or unplug the laptop charger. Remove every external USB item, including hubs and USB-powered accessories. Do not open a computer merely to complete this first check. Note the exact warning text and whether it appears before a logo, during firmware startup, or inside Windows.
Inspect without probing the connector
Look at the external ports under good light. A bent metal tongue, foreign object, corrosion, liquid residue, or heat damage is a reason to leave the port unused and arrange service. Avoid scraping inside with a metal tool, spraying liquid into the socket, or forcing a connector to “straighten” it. Those actions can make an electrical problem worse. If a device or cable seems damaged, keep it disconnected from other computers as well.
Perform a single no-device restart
Reconnect power and start the computer once with no external USB connections. If the warning clears, shut down again and add only one known-good device at a time. Use a port that looks sound. Stop if the alert returns with a specific device or cable; that item is now the lead suspect, not a reason to try every port repeatedly. If the warning persists with nothing external attached, record that result and move to the service decision below.
What still counts as a USB connection inside the computer?
A desktop case may connect its front USB sockets to headers on the motherboard. Internal card readers, RGB controllers, cooling accessories, or built-in USB hubs may also use internal headers. A laptop may have integrated devices connected through its USB controller. Removing external accessories does not remove these internal paths. That is why the remaining warning does not automatically mean the entire motherboard must be replaced.
For a desktop you own and know how to service, the case-front USB cable is a reasonable detail to tell a qualified technician. You do not need to detach it yourself. Opening the case can expose sharp edges and sensitive components, and a wrong connector can be damaged. If the machine is under warranty, owned by an employer, or unfamiliar to you, stop at the exterior check and contact the manufacturer or authorized service. Give them the exact error text, the model, and the fact that the alert remained with all external USB devices removed.
When the display also reports a boot-drive problem, treat that as a separate observation. An overcurrent warning can interrupt startup before Windows checks the drive. Do not conclude that the SSD has failed solely because the machine does not boot past the USB warning. Conversely, do not bypass the warning merely to reach Windows. If you need to compare a genuinely missing drive later, use the USB detection guide for that distinct symptom.
Choose the next step from what the computer actually does
The warning disappears with all devices removed
The next question is which accessory reintroduces it. Test a known-good mouse or keyboard first, then add only one suspect accessory at a time. If one USB drive or cable triggers the warning, stop using that item. Do not attach it to another computer just to see whether it can be read. A flash drive with valuable files may require specialist assessment if it appears electrically unsafe. Data-recovery software cannot repair an electrical short.
The warning remains before Windows starts
Leave external devices disconnected and arrange a hardware check. Tell the technician whether any port is damaged, whether the warning follows a spill or impact, and whether it occurs immediately at power-on. Do not repeatedly restart the computer or disable an error halt to keep working. A BIOS or firmware setting that hides a prompt does not remove the electrical condition. On a shared or warranty-covered machine, avoid disassembly until the owner or vendor approves it.
The computer boots, but only one storage device is inaccessible
That is not the same as a persistent preboot overcurrent alert. If the device is stable, normally recognized, and does not heat up or disconnect, preserve its data before any repair or format. If it clicks, cycles on and off, or has an implausible capacity, stop direct scanning and ask about imaging or professional recovery. The USB data recovery overview explains the data-loss side of this separate branch.
Protect files without treating Drecov as an electrical repair
Drecov is Windows data-recovery software for accessible, stable storage such as a PC drive, external drive, USB device, or memory card. It offers Quick Scan, Deep Scan, file locating and preview, and recovery to another healthy location. Lost Partition Recovery addresses a missing-partition data situation, not a damaged USB controller. These abilities matter only if files are actually missing or inaccessible on a storage device that a safe computer can still recognize. Drecov cannot clear an overcurrent alert, repair a shorted port, override an unstable power path, or guarantee files from damaged electronics.
Before considering a scan, check a current backup on a different healthy computer if that can be done without connecting the suspect USB item. If the affected PC cannot pass its hardware warning, do not run recovery on that PC. A technician may first need to make the computer safe or remove an otherwise healthy internal drive for access through a suitable setup. Never improvise a drive removal on a sealed or unfamiliar device. If the only missing data lives on the USB item that triggers the alert, keep it unplugged; software scanning is not the safe first response. For the separate case of files missing from a stable drive, see the file recovery options.
⚠ Warning: Install it on a drive different from the one where your data was lost to prevent overwriting.
Step 1: Select the original stable storage location
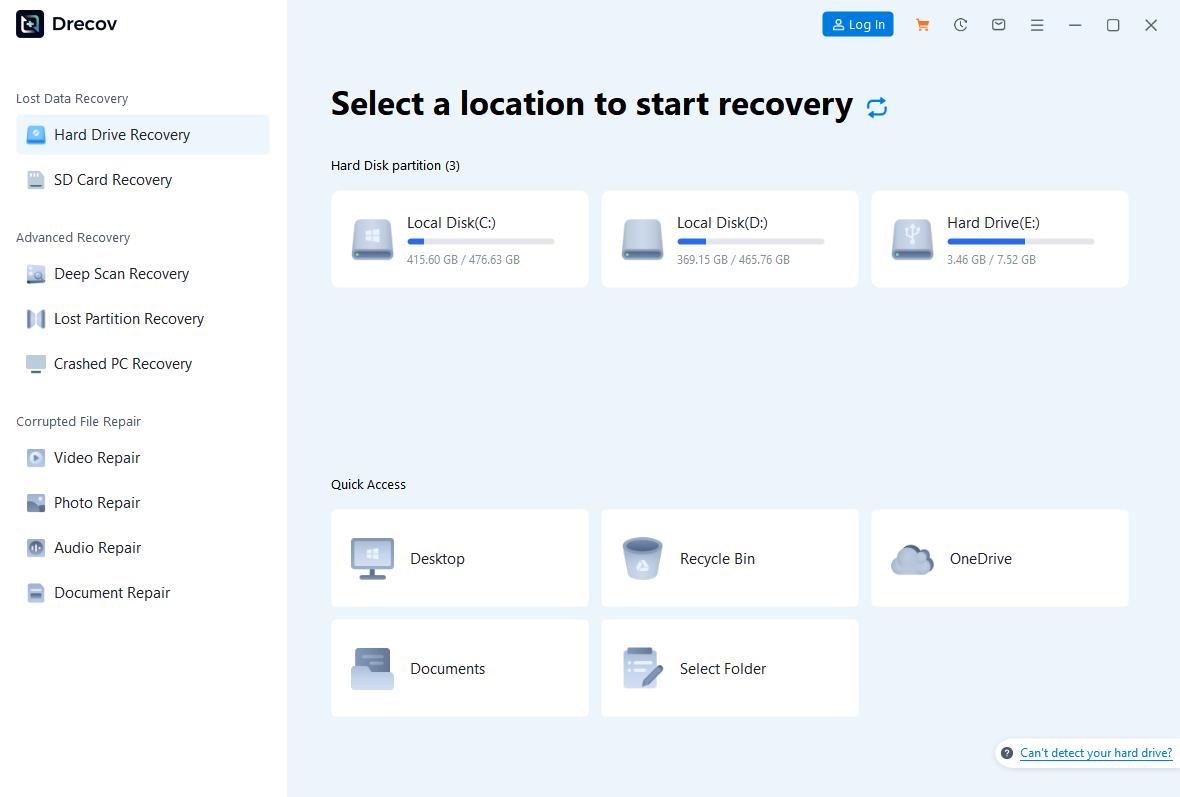
On a working Windows computer, open Drecov and choose the drive or partition where the missing files were stored. Confirm its capacity and label before starting. If a partition vanished, choose the relevant Lost Partition Recovery route instead of claiming that a normal file scan will rebuild the partition table. Do not install the program on the source partition. Prepare a second healthy drive with enough space for the recovered files.
Step 2: Start with Quick Scan
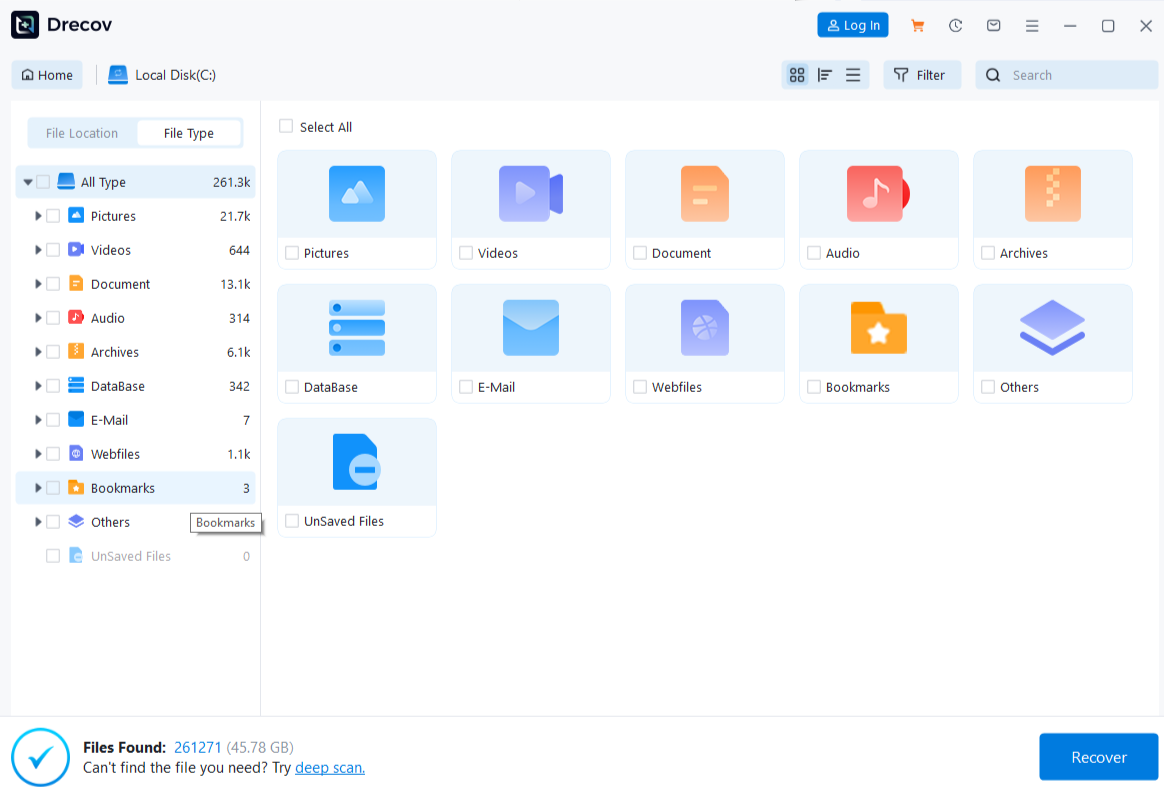
Run Quick Scan on the selected original location. Look for the needed documents, photos, or other files and compare their names and paths with what you remember. If the results include the correct versions, do not keep scanning just to produce a longer list. Any repeated disconnect, severe read error, unusual heat, or capacity change means stop and reassess the device’s stability.
Step 3: Use Deep Scan only if the device remains stable
If Quick Scan misses the needed files and the source reads normally, try Deep Scan. A deeper search does not fix electrical damage, and a failing source can deteriorate during repeated reads. If the device is unstable, pause the software path and discuss imaging or professional recovery. Keep the original source free of new writes while you decide.
Step 4: Locate, preview, and recover elsewhere
Filter or browse results by file type, old folder, and filename where those details are available. Preview several representative files; a preview shows that a sample can be decoded, not that every page, frame, or byte is intact. Select the files you need and recover them to the separate healthy destination, never back to the source. If you cannot find the output where expected, check the Drecov folder or Recovery folder on that destination.

Step 5: Verify before attempting a repair
Open a sample of each important recovered file type and confirm its contents. Compare key documents or media with backups if available. Only after the recovered copies are usable should you consider repairs to a logically faulty storage device. None of these steps authorizes plugging an electrically suspect USB item back into the damaged computer. If the storage itself is stable and accessible on another safe PC, Drecov can be used there to look for genuinely missing files.
⚠ Warning: Install it on a drive different from the one where your data was lost to prevent overwriting.
Questions that often change the decision
Can a Windows driver update clear a startup overcurrent warning?
Not reliably when the warning appears before Windows starts. A driver update cannot remove a short or damaged port. Start with external isolation, then request hardware service if the no-device test still triggers the alert.
Should I reconnect a USB drive that caused the warning?
No, not as a routine test. Set it aside, especially if it became hot, smelled unusual, or caused the same alert more than once. For important files, describe the behavior to a qualified data-recovery service before another power-up.
Does the message prove the motherboard is ruined?
No. The fault could involve an internal connection or port rather than the whole board. Still, a persistent alert with all external devices removed warrants service-level diagnosis instead of repeated software fixes.
Could I disable the warning in firmware?
Hiding or skipping a prompt is not the same as correcting an electrical fault. Do not suppress a protection message to continue using questionable hardware. Record the message for the technician.
Are my files necessarily lost because the PC will not boot?
No. Startup may stop before the storage drive is evaluated. Keep the machine off until the electrical issue is assessed. Once the drive is safely accessible, check backups and then consider recovery if files are actually missing.
Conclusion
A USB overcurrent warning with nothing plugged in deserves one careful isolation check, not a string of restarts, driver changes, or test drives. If it persists, stop and arrange hardware diagnosis, noting any damaged port or internal USB connection for the technician. Protect data on a separate stable drive before making storage changes. Drecov can help recover missing files from storage that a safe Windows setup recognizes; it cannot resolve the electrical warning itself.
⚠ Warning: Install it on a drive different from the one where your data was lost to prevent overwriting.