







Yes, how to recover deleted history from safari is possible when the missing data still has a readable source, a backup, a cloud version, or a recoverable local trace. Stop using the affected device first. Then check built-in restore paths before running any scan. When local storage is still readable, PandaOffice Drecov can help recover files to a separate healthy drive.
This guide focuses on cleared browsing history, removed website records, missing downloads, or a damaged browser profile. It gives the practical order: protect the source, check iCloud sync checks, Time Machine, Safari profile backups, download history, and device history, scan only the correct local storage, preview results, and save recovered files away from the original location.
Recover Deleted Safari History: Quick Answer
The safest first move is simple: stop writing to the Safari profile, iCloud-synced device, Time Machine backup, browser cache, or readable Mac storage. New downloads, app updates, sync changes, repair commands, and even normal browsing can overwrite the records that still point to Safari history. A quiet source gives recovery software more useful evidence.
Built-in recovery should come first because it keeps names, dates, folder structure, and app context. For this case, start with iCloud sync checks, Time Machine, Safari profile backups, download history, and device history. A clean backup or account copy is usually better than a raw scan result.
Local file recovery becomes useful when those built-in routes fail and the data once lived on readable storage. The scan should target the specific folder, drive, card, mail archive, or profile path. Broad scans waste time and create many duplicates.
| Situation | Best First Move | Avoid |
|---|---|---|
| Recent deletion | Check trash, version history, and backups | Do not install recovery tools on the affected source |
| Synced folder or account data | Pause sync and inspect account retention | Do not let sync repeat the deletion |
| Readable local storage | Scan the exact source and preview results | Do not recover back to the same location |
| Unclear ownership or access | Use official account or admin recovery | Do not try bypass or cracking methods |
Diagnose The Source Before You Scan
Map The Last Known Location
Write down where the Safari history last existed. Include the device, user account, app, folder, file extension, approximate date, and the last action before the loss. This short note prevents a broad scan from turning into a long list of unrelated fragments.
For how to recover deleted history from safari, the source may be a local folder, a cloud sync folder, an application database, a phone backup, a browser profile, a mail archive, or an exported file. Each source has a different safe path. Treat them separately instead of assuming one tool solves every location.
Separate Account Recovery From File Recovery
Account recovery restores access or server-side retention. File recovery scans storage that actually held the content. This difference matters for email, YouTube, browser history, WhatsApp, voicemail, Dropbox, and OneDrive. A drive scan cannot restore data that never existed on that drive.
When the provider still stores the item, use the official recovery route first. When a local export, cache, archive, media folder, or synced copy existed, protect that local source and scan it only after account options are checked.
Record Risk Signals
A healthy source mounts normally, shows the expected capacity, and allows read access. A risky source disconnects, freezes, clicks, shows input-output errors, or changes capacity. Stop software scans on risky hardware. Copy visible files first and consider a specialist for failing drives.
For app or account data, risk looks different. Rebuilding a profile, clearing cache, reinstalling an app, or reconnecting sync can remove useful remnants. Avoid cleanup until you know which copy is good.
Use Built-In Recovery Paths First
Check Trash, Versions, And Backups
Start with iCloud sync checks, Time Machine, Safari profile backups, download history, and device history. These routes preserve context. Restore one test copy into a new folder, open it, and compare content before replacing any current file. A version that opens cleanly is more valuable than a newer damaged copy.
Related Drecov guides can help when your case overlaps. For Windows restore points, see How To Fix Google Chrome Not Downloading Files Complete Guide. For app-specific or file-specific recovery, compare the relevant workflow in How To Get Your Google Chrome Bookmarks Back. Use these guides as supporting checks, not as shortcuts around the source diagnosis.
Search Local Copies Carefully
Use targeted Windows search, file extension filters, recent-file lists, app recovery folders, and backup locations. Search for names, partial names, extensions, and date ranges. A temporary file may not use the expected name, so sort by modified time and size as well.
Keep the search read-only. Do not save new files into the same folder while searching. Move recovered copies to a separate drive or a new safe folder so the original source remains available for a deeper pass.
Understand What Cannot Be Restored
No recovery method can recreate data that was never stored, never synced, never exported, or already overwritten beyond usable remnants. The honest goal is to find existing copies, recover readable traces, and reduce additional loss.
This is especially important for account and cloud topics. Official account recovery, provider retention, and local backups define the practical limit. Recovery software helps only when the missing content once touched readable local storage.
Recover Local Files With PandaOffice Drecov
Use PandaOffice Drecov when the Safari profile, iCloud-synced device, Time Machine backup, browser cache, or readable Mac storage is readable and built-in recovery does not return the needed Safari history. The tool can scan local drives, external disks, SD cards, media folders, exported archives, and application folders. It should not be used as a password bypass, account unlocker, or cloud-only recovery shortcut.
Risk level: low for a normal deleted-file case on healthy storage, medium after formatting or heavy use, and high when hardware is unstable. Install the software on a healthy drive when possible. Save recovered files to a different destination.
Steps
- Connect or mount the Safari profile, iCloud-synced device, Time Machine backup, browser cache, or readable Mac storage and stop new writes before the scan.
- Open PandaOffice Drecov and choose the specific device, folder, card, or drive that actually stored the lost files.
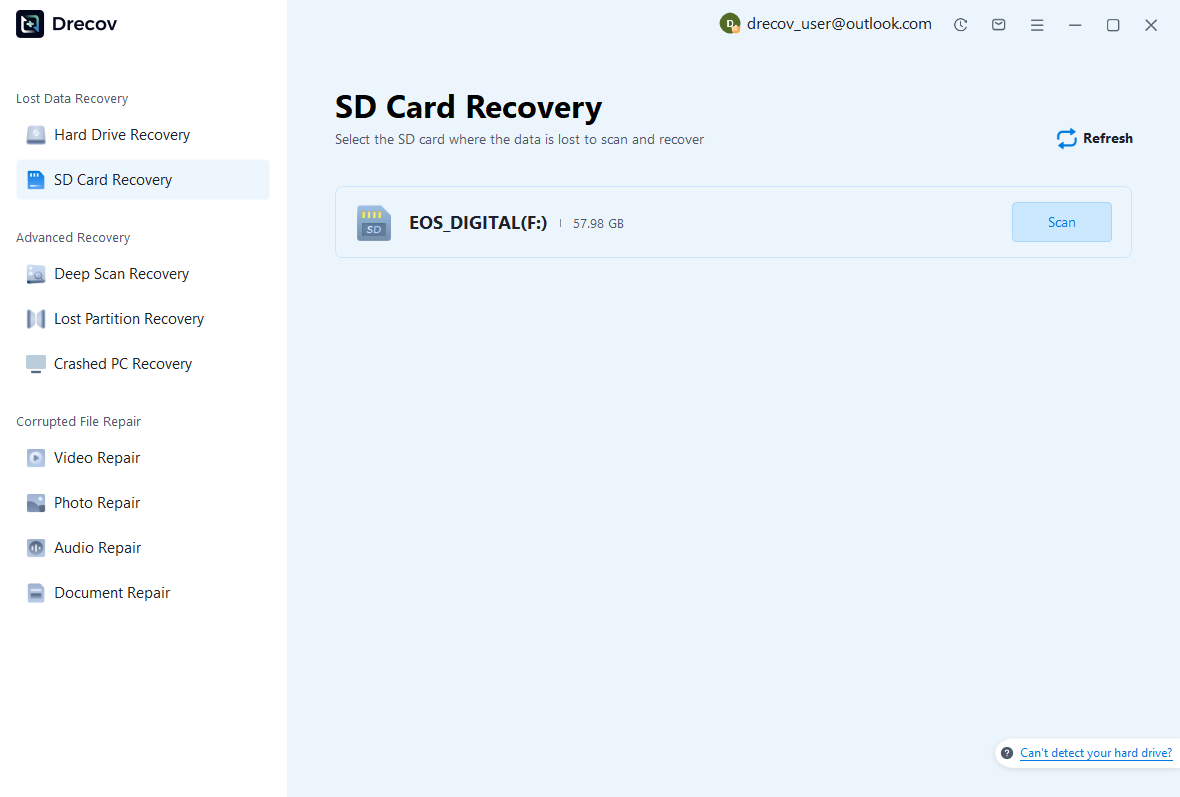
- Start the scan and wait for quick scan and deep scan results.
- Filter by file type, path, size, date, or name to reduce noise.
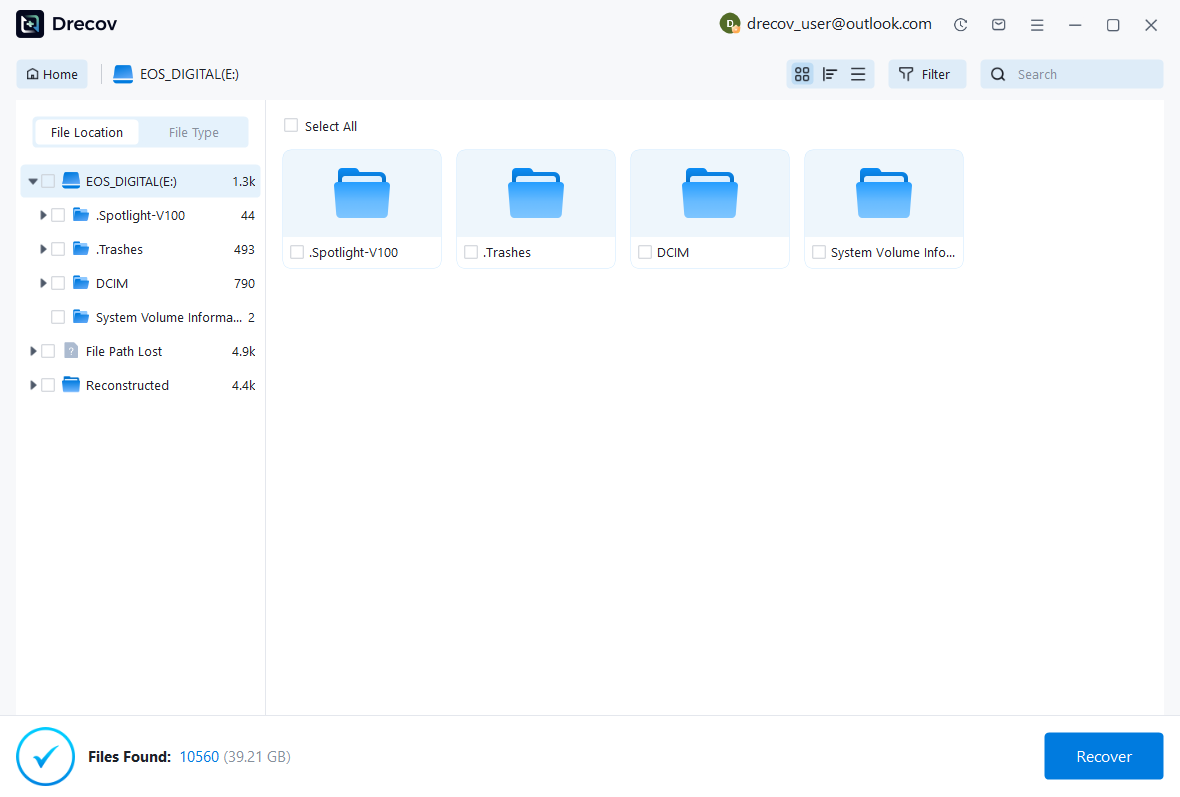
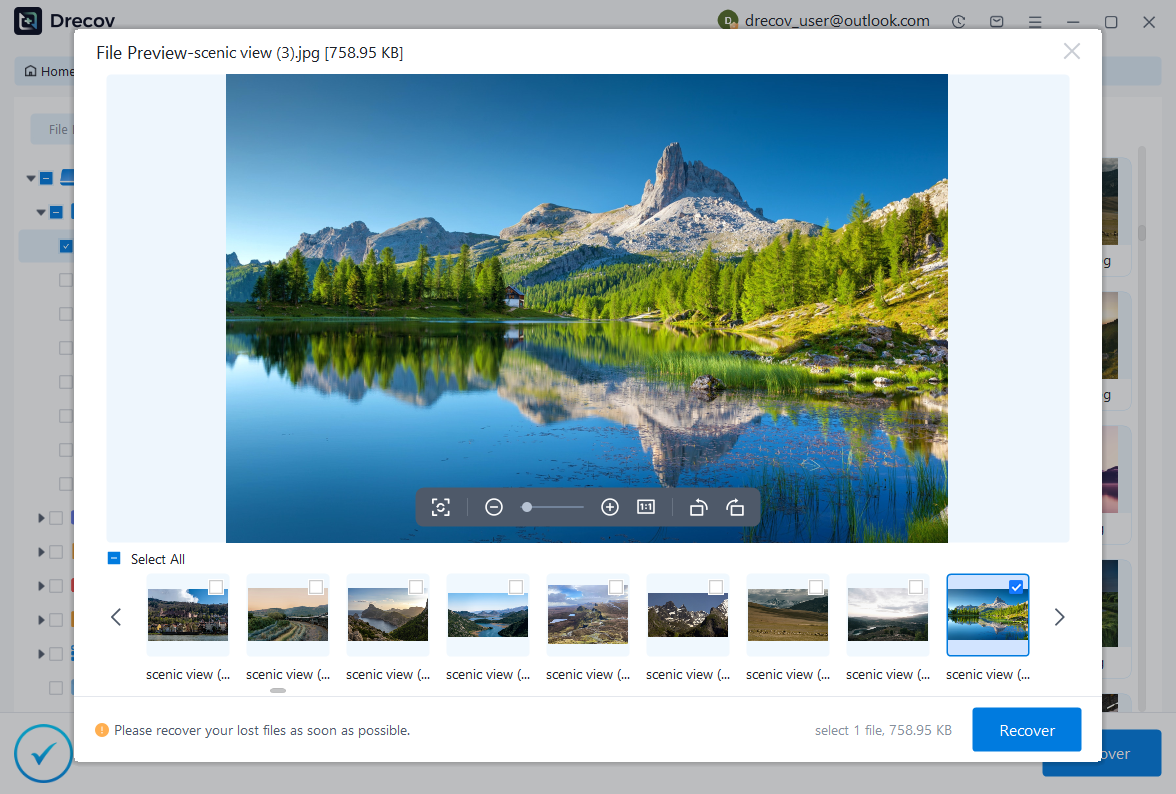
- Preview important files before saving them.
- Recover selected files to a different healthy drive and verify samples.
Review Results Without Creating More Loss
Preview Before Saving
A convincing file name is not enough. Preview documents, open photos at full size, test videos at several points, check spreadsheets for sheets and formulas, and inspect mail or browser records for readable content. Recover the most important samples first.
For how to recover deleted history from safari, duplicates are normal. Results may include thumbnails, cache files, old versions, partial records, temporary files, and backup copies. Sort by path, size, date, and type. Keep a verified set separate from fragments.
Keep The Source Unchanged
Do not clean the source, rebuild a profile, empty more folders, reinstall the affected app, or restart sync until the recovered set is verified. A stable source gives you the option to repeat the scan with better filters.
If the first scan is noisy, narrow the location. Scan the folder, profile, archive, card, or drive that actually held Safari history. A smaller, better-targeted scan usually beats a huge scan that mixes unrelated deleted files.
Validate The Final Set
Recovery ends only when important files open and the recovered folder has its own backup. Keep the original source until the owner confirms the data. Compare multiple versions by content, not only by modified date.
Some cases need a second guide. How To Fix Google Chrome Black Screen Issues On Windows is useful for a related failure path, while How To Download Video From Google Drive Complete Guide can help when the problem involves a nearby device, app, or storage condition.
Scenario Notes For This Case
With how to recover deleted history from safari, the strongest result usually comes from matching the method to the source. A PC folder needs Windows history and a local scan. A cloud folder needs account trash and sync control. A document needs app recovery folders. A phone item needs backup and media-folder checks.
When you are unsure, build a small evidence table. List source, last seen date, account involved, backup status, local copy status, scan target, and recovery destination. This table reduces repeated work and prevents risky guesswork.
For deleted documents, compare AutoRecover, temporary files, and versions. For media, check gallery trash, thumbnails, synced albums, and SD card folders. For mail, check server retention, local archives, and export files. For browser history, check account activity, bookmarks, downloads, and profile databases.
Avoid software that promises impossible results. A safe recovery article should explain limits, not hide them. If a tool claims it can recover any cloud-only account item, crack encryption, or restore overwritten data perfectly, treat that claim as a warning.
The same principle applies to free tools. Free recovery software can be useful for previewing or simple cases, but the workflow matters more than the price. Protect the source, preview results, and avoid writing back to the original location.
When recovered files matter for work, legal, family, or business reasons, record what you did. Keep scan dates, paths, screenshots, and sample checks. Good notes make the result easier to trust and easier to repeat if a second pass is needed.
Build A Recovery Log
Before you continue with how to recover deleted history from safari, create a simple recovery log. Record the original device, account, folder, file type, last known date, and the action that caused the loss. Add a line for every check you complete. This keeps the workflow calm when several backups, apps, or devices are involved.
A good log also protects you from repeating risky actions. If you already checked a cloud trash folder, write down the account and date. If you scanned a drive, record the scan target, filters, and destination. Clear notes help you compare versions later without guessing.
Choose A Safe Destination
The recovery destination should be separate from the source. Use an external drive, another internal disk, or a clean network location with enough free space. Do not recover to the same desktop, SD card, phone folder, browser profile, mail archive, or game save folder that lost the data.
Give the destination a plain folder structure. Use folders such as confirmed, needs review, duplicates, fragments, and exported backups. This structure makes the final review faster and reduces the chance that a partial file gets mixed with a verified copy.
Use Filters Instead Of Guessing
Filters matter for Safari history. Start with the file type, then narrow by date, path, and size. For documents, check DOCX, XLSX, PPTX, PDF, TXT, and temporary formats. For media, include original files and thumbnails, but do not assume thumbnails are full recovery.
Path filters often reveal whether a result came from the correct account or application. A file found in a browser cache is not the same as a file found in a documents folder. A mail attachment cache is not the same as a server-side message. Keep those origins visible.
Preview More Than One Sample
Open several recovered samples before saving hundreds of files. A folder may contain one good copy and many damaged copies. Test the newest file, an older version, and one file from the original path. This gives you a realistic view of recovery quality.
For spreadsheets, inspect sheet tabs, formulas, linked cells, and charts. For Word documents, check the first page, middle section, and final page. For photos, zoom in and check full-size detail. For audio or video, play more than the first few seconds.
Handle Cloud And Sync Carefully
Cloud sync can help or hurt. It may keep deleted items, versions, and older device copies. It may also push a deletion across every connected device. Pause sync when you inspect a local synced folder, then decide which copy should become the master.
If account trash contains the file, restore it through the provider first. If the account copy is gone but a local sync folder remains, protect the local machine and avoid opening the app in a way that triggers cleanup. A local scan is useful only when the file truly existed there.
Avoid Common Recovery Mistakes
Do not format a drive just because Windows asks you to. Do not run repair commands before copying visible files. Do not rebuild a browser profile, mail profile, or app database before checking backups. These actions may solve the visible error while removing recovery evidence.
Do not trust a tool only because it says free recovery. Look for preview, file type filters, safe destination selection, and clear limits. A careful workflow is more valuable than a dramatic promise.
When To Stop Scanning
Stop if the source becomes unstable. Repeated disconnects, slow reads, freezing, or unusual noises mean the storage may be failing. Long scans can make that situation worse. Copy visible files first and consider imaging or professional help for critical data.
Stop also when the case is not a local file case. Passwords, account ownership, deleted channels, and server-only mail require official recovery paths. A local scan helps only with local exports, caches, archives, downloaded media, or synced folders.
Create A Prevention Plan
After recovery, set up a prevention plan tied to the source. Use File History for Windows folders, version history for cloud documents, exports for important account data, and separate backups for phone media or game saves. Test one restore before trusting the plan.
Keep at least one backup disconnected or outside the main sync path. Sync is useful for convenience, but it can mirror deletion. A separate backup gives you a clean point to return to after mistakes, malware, app errors, or account trouble.
Compare Versions By Content
Version comparison is often the difference between a weak recovery and a usable one. For Safari history, compare the file content, not only the file date. Older backups may contain complete information while newer copies may be empty, damaged, synced after deletion, or missing attachments.
Use a small sample set first. Pick one recent candidate, one older candidate, and one candidate from the expected path. Open each one and write a short note. This gives you a quality baseline before you spend time recovering a full folder.
Protect Evidence While Sorting
Sorting should happen on the destination, not on the source. Rename folders in the recovered set if needed, but do not rename or reorganize the original storage. Any write to the source can change metadata and reduce the chance of a second recovery pass.
When several people need to review the result, keep a read-only master copy and make a working copy for sorting. That simple split prevents accidental deletion during review and gives you a fallback if a folder gets reorganized incorrectly.
Handle Partial Files Honestly
Partial files are not failures by themselves. A partial document may still contain useful text. A partial photo may keep a usable preview. A partial archive may reveal names even when it cannot open fully. Separate these files instead of mixing them with confirmed clean copies.
Label partial results clearly. Use notes such as preview only, opens with error, missing pages, audio starts late, or thumbnail only. Clear labels keep the final handoff honest and help the owner decide what is still worth keeping.
Plan A Second Pass Only When Needed
A second scan is useful when the first pass was too broad, used the wrong file type, missed the original folder, or stopped before deep scan finished. It is not useful when the source is unstable or when the data was cloud-only with no local trace.
Before a second pass, change one variable at a time. Narrow the path, add a file extension, adjust the date range, or scan an image of the drive. Changing everything at once makes the result hard to interpret.
Create A Clean Handoff
At the end, prepare a clean folder for the recovered set, a notes file, and a backup copy. Include what was recovered, what was not found, which source was scanned, and which built-in recovery paths were checked. This turns a stressful recovery into a traceable result.
For how to recover deleted history from safari, the best handoff is practical: confirmed files in one folder, uncertain files in another, and a clear reminder that the original source should stay unchanged until the recovered set is backed up.
FAQ And Final Checklist
Can I recover files after emptying trash?
Sometimes. Stop using the source and check backups first. If the storage is still readable and the data has not been overwritten, a local scan may find recoverable traces or older copies.
Should I restore to the original folder?
No. Restore to another healthy drive or a separate folder. Writing to the original source can overwrite other recoverable data before you finish checking the results.
Can software recover account-only data?
Only when a local copy, export, cache, archive, or synced folder existed. Pure account-side recovery depends on the provider’s retention rules and official recovery tools.
How do I know the recovery worked?
Open the important files. Check size, date, content, attachments, formulas, pages, or playback. Then create a fresh backup before cleaning the old source.
Final answer: how to recover deleted history from safari works best when you protect the source, use built-in restore paths, and scan readable local storage only when needed. PandaOffice Drecov is useful for local recovery, but the safer habit is to diagnose first, recover to a separate destination, and verify every important file before deleting anything.
- Stop using the affected source.
- Check trash, backup, versions, and account retention first.
- Scan only the storage that actually held the data.
- Preview files before recovery.
- Save recovered files to a different healthy drive.





