


Navigating the digital landscape often feels like a balancing act between security and convenience. Google Chrome, the world’s most popular browser, employs a robust security architecture designed to shield users from intrusive advertisements and malicious redirects. However, there are many legitimate situations where pop-ups are necessary. Banking portals, document downloads, and specialized cloud tools frequently rely on secondary windows to function. If you find yourself unable to access a critical download or a login screen, you likely need to learn how to disable popup blocker in chrome to restore full functionality.
Beyond simple browsing, managing browser permissions is a gateway to better digital literacy, especially when handling sensitive tasks like file sharing or emergency data recovery. This guide provides a comprehensive walkthrough on managing your Chrome environment while introducing essential skills for data protection and recovery.
Understanding Why Chrome Blocks Pop-ups by Default
Google Chrome utilizes a built-in filter to categorize web behavior. If a site attempts to launch a window without a direct user action (like a click), Chrome flags it as potentially disruptive. While this protects you from “malware traps,” it can inadvertently break the workflow of professional web applications.
When you encounter a blocked window, Chrome usually displays a small icon in the address bar that looks like a window with a red ‘X’. Clicking this icon is the fastest way to disable popup blocker in chrome for a specific instance, but sometimes a more permanent configuration change is required in the browser’s core settings.
How to Disable Popup Blocker in Chrome on Desktop (Windows & Mac)
For professionals and students, the desktop version of Chrome is the primary workstation. Disabling the blocker here ensures that complex web apps run without interruption.
- Step 1: Launch Google Chrome and locate the three vertical dots in the upper-right corner of the interface.
- Step 2: Select Settings from the dropdown menu to open the configuration dashboard.
- Step 3: On the left-hand sidebar, navigate to the Privacy and security section.
- Step 4: Click on Site Settings. This area controls what information websites can use and what content they can show you.
- Step 5: Scroll down to the “Content” category and click on Pop-ups and redirects.
- Step 6: Under the “Default behavior” header, select the radio button for “Sites can send pop-ups and use redirects.”
Pro Tip: If you want to maintain high security, instead of a global disable, use the “Allowed to send pop-ups” list. Click Add and paste the specific URL of the site you trust. This ensures you disable popup blocker in chrome only where it is strictly necessary.
Once you have configured your browser to allow necessary windows, you might find yourself needing to collaborate on large datasets. Many users who adjust their popup settings do so to facilitate smoother interactions with cloud storage services. A common task in this realm is learning how to share OneDrive folder efficiently.
Managing cloud permissions is just as vital as managing browser permissions. Follow these steps to collaborate safely:
- Step 1: Navigate to the OneDrive official website and log in. If your browser blocks the login popup, ensure you have followed the steps above to disable popup blocker in chrome.
- Step 2: Locate the folder you wish to distribute. Right-click the folder or hover over it and select the Share icon (the arrow pointing out of a box).
- Step 3: A dialog box will appear. Here, you can specify if “Anyone with the link” can edit, or if you want to restrict access to “Specific people.”
- Step 4: For enhanced security, click the Settings gear icon within the share window to set an expiration date or a password for the link.
- Step 5: Click Copy Link or send an email invitation directly from the interface.
Understanding how to share OneDrive folder correctly prevents unauthorized access to your data while ensuring your team has the files they need to stay productive.
The Expert Solution: PandaOffice Drecov Data Recovery Software
Even with the best browser settings and cloud sharing habits, data loss can occur due to accidental deletion, drive formatting, or system crashes. When files disappear from your local drive or an external USB, professional intervention is required. This is where PandaOffice Drecov data recovery software becomes an indispensable tool for every user.
PandaOffice Drecov is engineered to handle complex file retrieval tasks that standard system tools cannot manage. It supports over 1,000 file formats, including photos, videos, and professional documents.
⚠ Warning: Install it on a drive different from the one where your data was lost to prevent overwriting.
How to Recover Data Using PandaOffice Drecov Data Recovery Software
If you have lost files and need a reliable way to get them back, follow this structured recovery process:
- Step 1: Select the Target Location. Upon launching PandaOffice Drecov data recovery software, you will see a list of available drives and partitions. Select the specific drive (e.g., C: Drive, External Disk, or Recycle Bin) where your files were last seen.

- Step 2: Perform a Deep Scan. Click the Scan button. The software will perform a “Quick Scan” followed by a “Deep Scan.” The Deep Scan is a sector-by-sector analysis that finds fragmented files buried deep within the drive’s architecture.

- Step 3: Filter and Preview. Once the scan is complete, use the file type filter (Images, Documents, etc.) to narrow down the results. One of the best features of PandaOffice Drecov is the preview function, which allows you to see the contents of a file before committing to the recovery.
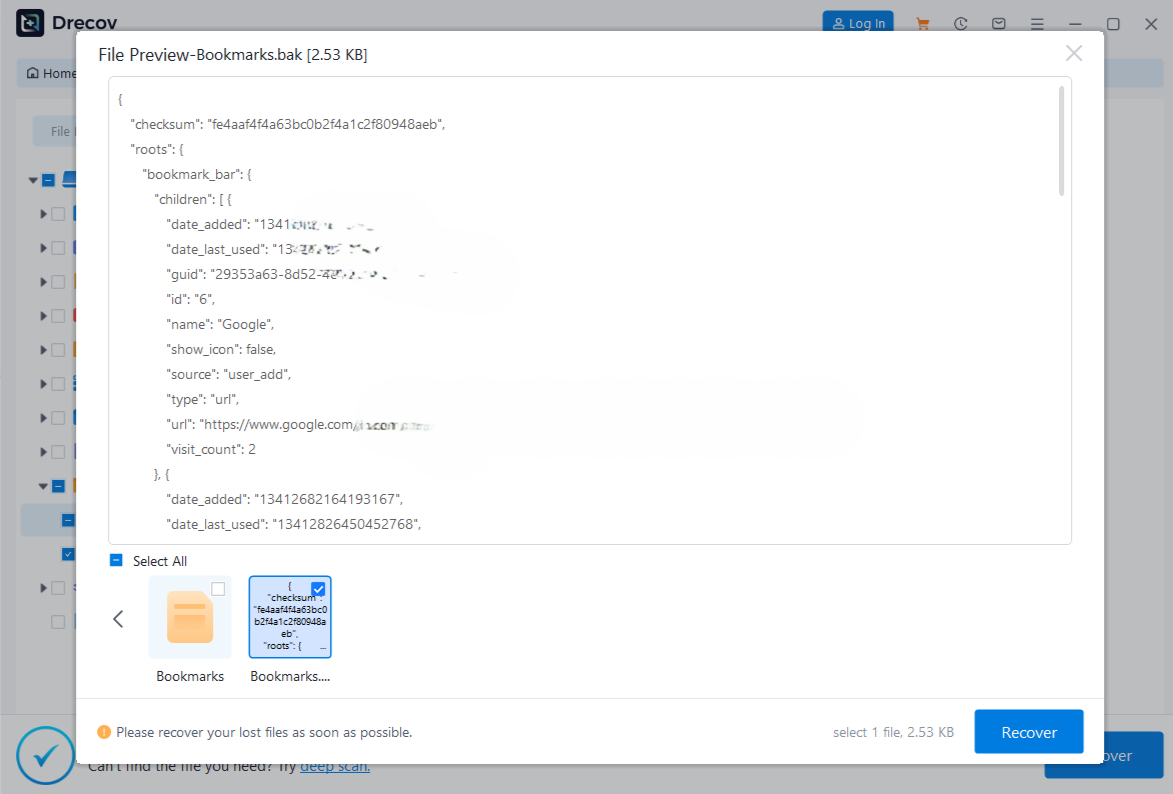
- Step 4: Secure Recovery. Select the files you wish to restore and click Recover.
Warning: Always save your recovered data to a different physical drive or a cloud storage service like OneDrive to ensure the integrity of the data.
After successfully retrieving your files, you may want to learn more about specific recovery scenarios. Check out these helpful resources:
- Recuva Free vs. Pro: Is it still worth it in 2026?
- Step-by-step guide to recovering deleted Outlook drafts
- Restoring lost messages from Microsoft Teams
How to Disable Popup Blocker in Chrome on Mobile (Android & iOS)
In 2026, a significant portion of data management happens on the go. If you are trying to download a recovery log or share a folder from your phone, you may still need to disable popup blocker in chrome.
For Android Users:
- Step 1: Open the Chrome app and tap the three dots in the top right.
- Step 2: Tap Settings, then scroll down to Site settings.
- Step 3: Tap Pop-ups and redirects and toggle the switch to the On position (Allow).
For iPhone (iOS) Users:
- Step 1: Open the Chrome app and tap the three dots in the bottom right corner.
- Step 2: Select Settings and then navigate to Content Settings.
- Step 3: Tap Block Pop-ups and turn the toggle Off.
By mastering these settings, you ensure that your mobile device is just as capable as your desktop when it comes to accessing restricted web content.
Advanced Troubleshooting: When the Blocker Won’t Turn Off
Sometimes, even after you disable popup blocker in chrome, windows still won’t appear. This is often caused by secondary layers of security.
- Third-Party Extensions: Many users install ad-blockers like AdBlock or uBlock Origin. These extensions have their own filtering rules that override Chrome’s native settings. You must manually whitelist the site within the extension’s menu.
- Antivirus Software: Programs like Norton or McAfee often include “Web Protection” modules. These can block scripts that look like popups. Check your antivirus settings if the problem persists.
- JavaScript Issues: Most popups are triggered by JavaScript. If JavaScript is disabled in your Site Settings, the popup command will never execute. Ensure JavaScript is set to “Allowed” in the same menu where you found popup settings.
Summary of Best Practices for Browser Security and Data Safety
To maintain a healthy digital environment, follow this comparison of configurations:
| Feature | Recommended Setting | Reason |
| Global Pop-up Setting | Blocked (Default) | Prevents the majority of malicious ads. |
| Specific Site Exceptions | Allowed | Ensures trusted tools like PandaOffice Drecov work correctly. |
| OneDrive Sharing | Restricted/Password Protected | Prevents accidental data leaks when you share folders. |
| Data Recovery | External Drive Destination | Prevents overwriting lost data during the recovery process. |
Conclusion
Knowing how to disable popup blocker in chrome is a fundamental skill that facilitates smoother web navigation and better tool integration. Whether you are learning how to share OneDrive folder for a project or using PandaOffice Drecov data recovery software to save years of digital memories, having control over your browser environment is the first step toward technical proficiency. Always remember to browse with caution, keep your recovery tools updated, and verify your sharing settings to keep your data both accessible and secure.


