


In the fast-paced digital world of 2026, we handle thousands of files daily. It is remarkably easy to accidentally delete a crucial document, a sentimental photo, or a vital spreadsheet. The moment you realize a file is gone, your heart might skip a beat. However, understanding how to recover items from recycle bin storage is one of the most valuable digital skills you can possess. Whether you simply hit the delete key or went as far as emptying the trash, your data is often still retrievable.
This comprehensive guide serves as an educational roadmap. We will explore the mechanics of how Windows stores “deleted” data and provide a tiered approach to getting it back. We will move from the simplest system features to professional-grade tools like PandaOffice Drecov, ensuring you have every possible chance to rescue your work.
Understanding the Digital “Holding Pen”
Before we discuss the steps for how to recover items from recycle bin, we must understand what happens when you delete a file. In most modern operating systems, clicking “Delete” does not immediately erase the data from your hard drive. Instead, the system moves the file to a hidden directory (usually $Recycle.Bin) and updates the file system index to show the file is in the “Trash.”
Think of it like throwing a piece of paper into a physical wastebasket next to your desk. The paper is “gone” from your desktop, but it still exists physically until the janitor empties the bin into the incinerator. Even after the bin is “emptied” in the digital world, the data remains on the disk sectors until new files overwrite that specific space. This window of opportunity is what makes a professional recovery possible.
Level 1: The Standard “Restore” Method
For the vast majority of users, the answer to how to recover items from recycle bin is sitting right on their desktop. If you haven’t clicked “Empty Recycle Bin” yet, the process is instantaneous.
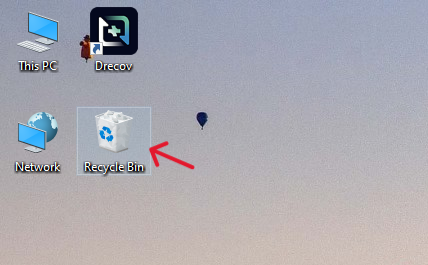
- Step 1: Locate the Recycle Bin icon on your desktop. If you don’t see it, you can type “Recycle Bin” into the Windows search bar.
- Step 2: Double-click the icon to open the folder. You will see a list of all recently deleted files.
- Step 3: Use the search bar at the top right to type the name of your file, or sort by “Date Deleted” to find your most recent mistakes.
- Step 4: Right-click the desired file and select Restore.
Key Operation Point: The file will automatically return to its original location. If you forgot where that was, right-click the file and select “Properties” to see the “Origin” path before restoring it.
Level 2: Moving Beyond the Basics — How Do You Recover Deleted Items from the Recycle Bin?
If you have already emptied the trash or used the “Shift + Delete” shortcut, the standard restore button will not work. You might find yourself asking, how do you recover deleted items from the the recycle bin once they are no longer visible? At this stage, we begin looking at system-level backups and shadow copies.
Utilizing Windows File History
Windows has a built-in backup feature called File History. If you had this enabled on an external drive or network location, you can perform a “point-in-time” recovery.
- Step 1: Open the folder where the file used to be located.
- Step 2: On the top ribbon of the File Explorer, click the Home tab and then click the History button.
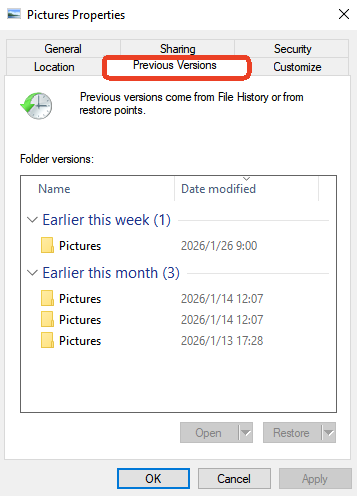
- Step 3: A window will appear showing previous versions of that folder. Use the arrows at the bottom to navigate back to a time when the file still existed.
- Step 4: Select the file and click the green Restore button (circular arrow).
This method is highly effective because it bypasses the Recycle Bin entirely, pulling data from a separate backup archive. It is a perfect solution for those wondering how do you recover deleted items from the recycle bin when the bin itself is empty.
Level 3: Pro-Grade Restoration with PandaOffice Drecov
When the bin is empty and no backups exist, you need to look at the physical sectors of your drive. This is where PandaOffice Drecov becomes your most powerful ally. This software is a dedicated data recovery product designed to find “invisible” data that the operating system has marked as empty space.
PandaOffice Drecov supports over 1,000 file types, including photos, videos, and complex office documents. It is particularly adept at handling how to get back items deleted from recycle bin scenarios because it ignores the broken file system pointers and scans for the raw headers of your data.
Warning Prompt: Do not install the software on the same drive partition where the data was lost. If you lost files on drive C:, install Drecov on a USB stick or drive D:. This prevents “data overwriting,” which is the single biggest cause of failed recoveries.
Step-by-Step Recovery with PandaOffice Drecov
Step 1: Select the Scan Source
Launch the program. On the main interface, you will see a list of locations. Specifically, select the Recycle Bin icon under the “Common Locations” menu. This tells the software to prioritize the sectors where the $Recycle.Bin metadata was last stored.

Step 2: Deep Scanning for Lost Data
Click Scan. The software will run a Quick Scan followed by a Deep Scan. During this time, it reconstructs file fragments.

Key Operation Point: Even if the scan is only at 50%, you can start browsing the results. If you see your file appear, you can pause the scan to save time.
Step 3: Search and Preview
Use the “Filter” or “Search” bar to find your file by name or extension (e.g., .docx). Double-click the file to Preview it. If the preview shows your data correctly, the recovery will be 100% successful.

Step 4: Execution and Saving
Check the boxes for the items you want back and click Recover.
Warning Prompt: A window will ask where to save the files. Always select a different drive than the source. For example, if you are recovering from your internal HDD, save the files to an external thumb drive.
Using a dedicated tool is often the only answer for how to get back items deleted from recycle bin when months have passed or the drive has been heavily used.
Level 4: Using Command Line for Attribute Issues
Sometimes, files aren’t actually deleted; they are just hidden or their attributes have been corrupted. This can happen after a system crash. If you are comfortable with a bit of typing, this is a technical way to address how to recover items from recycle bin errors.
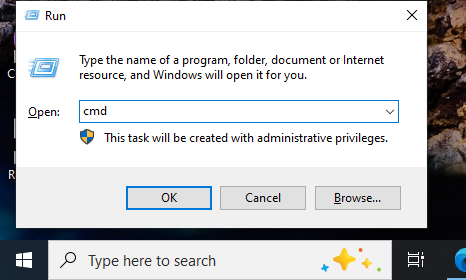
- Step 1: Press Win + S and type
cmd. Right-click and select Run as Administrator.
- Step 2: Type the drive letter where the files were (e.g.,
C:) and press Enter. - Step 3: Type
attrib -h -r -s /s /d *.*and press Enter.
This command forces the system to reveal any files hidden by the system or malware. Often, “deleted” items that were stuck in a corrupted bin will reappear in a newly created folder on the root of your drive.
Level 5: Advanced Search and Registry Checks
In rare cases, the Recycle Bin icon itself might be broken, or the pathing in the Windows Registry might be skewed, making it look like you have no items to recover. This is a deeper level of how to recover items from recycle bin troubleshooting.
Verifying the Recycle Bin Path in Registry
- Step 1: Press Win + R, type
regedit, and press Enter. - Step 2: Navigate to:
HKEY_LOCAL_MACHINE\SOFTWARE\Microsoft\Windows\CurrentVersion\Explorer\Desktop\NameSpace. - Step 3: Look for a key named
{645FF040-5081-101B-9F08-00AA002F954E}. If it is missing, the Recycle Bin will not function correctly on your desktop. - Step 4: If you are comfortable, you can right-click and add the key to restore bin functionality.
How to Get Back Items Deleted from Recycle Bin: The Cloud Factor
In 2026, many of our files are synced with services like OneDrive or Google Drive. These services have their own secondary recycle bins that act as a safety net even if you empty your local PC trash. This is a vital step when researching how to get back items deleted from recycle bin.
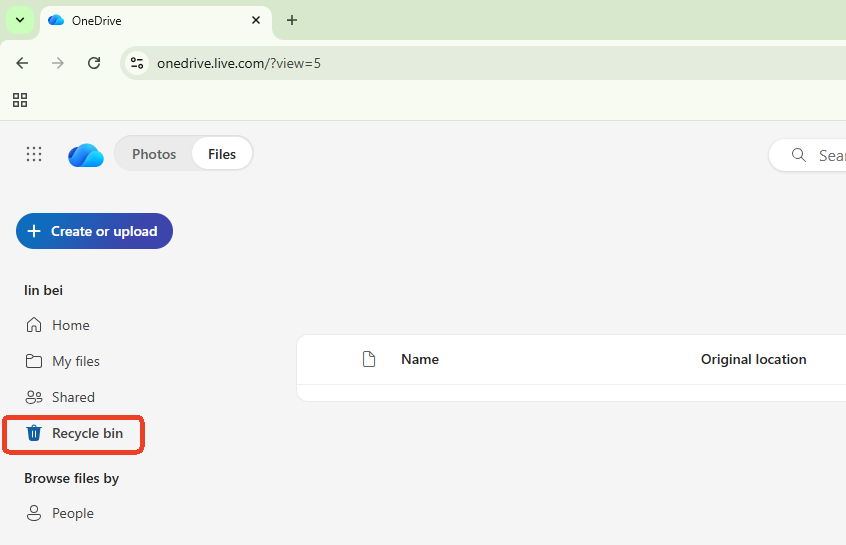
- Step 1: Log in to your cloud provider’s web interface (e.g., OneDrive.com).
- Step 2: Click on the Recycle Bin on the left-hand menu.
- Step 3: Cloud bins usually keep files for 30 to 93 days, regardless of your local settings.
- Step 4: Select the items and click Restore. They will sync back to your computer automatically.
For more information on cloud safety, you can visit the or the .
Recover Items Deleted from Recycle Bin: A Summary of Success Factors
Your success rate in learning how to recover items from recycle bin folders depends on three main factors:
- Time: The sooner you act, the better.
- Disk Activity: The less you use the computer after deletion, the lower the chance of overwriting.
- Drive Type: Recovery is generally easier on traditional HDDs than on modern SSDs with TRIM enabled. If you use an SSD, you must use a tool like PandaOffice Drecov immediately.
Best Practices for Future Data Safety
While knowing how to recover items from recycle bin is a great “break-glass-in-case-of-emergency” skill, prevention is even better. Consider these three pillars of data health:
- The 3-2-1 Rule: Keep 3 copies of your data, on 2 different media types, with 1 copy off-site.
- Increase Bin Size: Right-click the Recycle Bin > Properties. Increase the “Maximum size” so files stay in the bin longer before being purged.
- Disable “Permanent Delete”: Ensure the “Don’t move files to the Recycle Bin” option is unchecked.
To further secure your system, you might consider learning how to create a windows 10 recovery disk complete step by step guide. Additionally, managing your cloud sync is crucial; find out how to turn off onedrive sync without losing your files to prevent accidental cloud deletions. Finally, don’t forget your web data; if you lose your browser links, here is how to recover deleted bookmarks in chrome.
Frequently Asked Questions About Recycle Bin Recovery
Q1: Can I recover items from the Recycle Bin if I used the “Shift + Delete” shortcut?
When you use Shift + Delete, Windows bypasses the Recycle Bin entirely. To the operating system, the file is “permanently” deleted. However, the data bits still physically reside on your hard drive sectors. In this case, your only option is to use a professional tool like PandaOffice Drecov, which can perform a deep scan to find those “unindexed” files before they are overwritten by new data.
Q2: Why can’t I find the Recycle Bin icon on my desktop to begin recovery?
Sometimes the icon is hidden by system settings. To bring it back, right-click an empty space on your desktop, select Personalize > Themes > Desktop icon settings. Ensure the “Recycle Bin” checkbox is marked. Once the icon reappears, you can proceed with the standard steps on how to recover items from recycle bin.
Q3: Does emptying the Recycle Bin on my PC also delete the files from my backup drive?
No. The Recycle Bin only manages files on your local drive partitions. If you have a separate backup (like a Windows Recovery Disk or an external HDD), those files remain safe. This is why having a secondary copy is the most reliable way to recover items deleted from recycle bin storage.
Q4: How long do items stay in the Recycle Bin before they are gone forever?
By default, Windows keeps files in the Recycle Bin until the bin reaches its maximum storage capacity. Once full, Windows automatically deletes the oldest files to make room for new ones. However, if you use OneDrive, files in the online cloud bin are typically purged automatically after 30 days. Knowing how to get back items deleted from recycle bin quickly is essential to beat these automated timers.
Q5: Is it possible to recover files from a USB flash drive’s Recycle Bin?
Most USB flash drives and SD cards do not have a Recycle Bin. When you delete a file from a removable drive, it is usually deleted instantly. To recover items deleted from recycle bin scenarios involving USBs, you must use data recovery software like PandaOffice Drecov to scan the external device directly.
Conclusion
Accidental deletion is a part of digital life, but it doesn’t have to be the end of the story. By mastering how to recover items from recycle bin, you transform a potential disaster into a minor inconvenience. Whether you are using the standard restore function, checking your cloud backups, or utilizing the deep-scanning technology of PandaOffice Drecov, you have the tools to succeed.
Stay calm, stop writing new data to your drive, and follow the steps in this guide. Your files are likely still out there, waiting to be found. Happy recovering!


