


In the modern digital landscape, cloud storage has become a double-edged sword. While Microsoft OneDrive offers seamless integration with Windows, many users eventually find themselves asking how to stop OneDrive from syncing. Whether you are dealing with limited bandwidth, running out of storage space, or concerned about privacy and data fragmentation, knowing how to manage your synchronization settings is a critical skill for any PC user.
However, stopping a sync process isn’t always as simple as clicking a “stop” button. If handled incorrectly, you might find your local files missing or your cloud backups out of date. As a data recovery expert, I’ve seen countless cases where users accidentally deleted vital documents while trying to disconnect their accounts. This guide will walk you through every method to regain control of your files, from basic settings to advanced registry tweaks, while ensuring your data remains safe and recoverable.
Why You Might Need to Stop OneDrive Synchronization
Before we dive into the “how,” let’s look at the “why.” Understanding your motivation helps you choose the right method.
- System Performance: OneDrive can consume significant CPU and RAM, especially during large file uploads.
- Internet Bandwidth: If you are on a metered connection or a slow Wi-Fi network, background syncing can cause lag in other applications.
- Storage Management: OneDrive often defaults to “Files On-Demand,” which can be confusing for users who want their files stored strictly locally.
- Privacy Concerns: You may have sensitive data that you do not want hosted on Microsoft’s servers.
How to Turn Off OneDrive Sync Temporarily
Sometimes, you don’t need a permanent divorce from the cloud; you just need a few hours of peace. If you’re gaming or in a video conference, a temporary pause is the best approach.
Step 1: Locate the OneDrive Icon
Look at your Windows taskbar (bottom right corner). Find the blue or white cloud icon. If you don’t see it, click the upward-pointing arrow to show hidden icons.
Step 2: Access Settings
Right-click the cloud icon. Click on the gear icon (Settings) in the top right corner of the small window that appears.
Step 3: Pause Syncing
Select “Pause syncing” from the menu. You can choose to pause for 2, 8, or 24 hours. Once the time expires, OneDrive will automatically resume.

Expert Tip: If you frequently need to pause sync, consider setting “Battery Saver” mode on your laptop. OneDrive is programmed to stop syncing automatically when your device enters power-saving mode to conserve energy.
How to Stop OneDrive Synchronization Permanently by Unlinking Your PC
If you want to move away from OneDrive entirely on a specific device, unlinking is the most effective standard method. This tells Windows to stop treating the OneDrive folder as a live, synced directory.
Step 1: Open OneDrive Settings
Right-click the OneDrive icon in your system tray and select Settings.
In the sidebar of the settings window, click on Account. This section displays which Microsoft account is currently tied to your operating system.
Step 3: Unlink This PC
Click the blue link that says “Unlink this PC.” A confirmation dialog will appear. Click “Unlink account” to finalize the process.
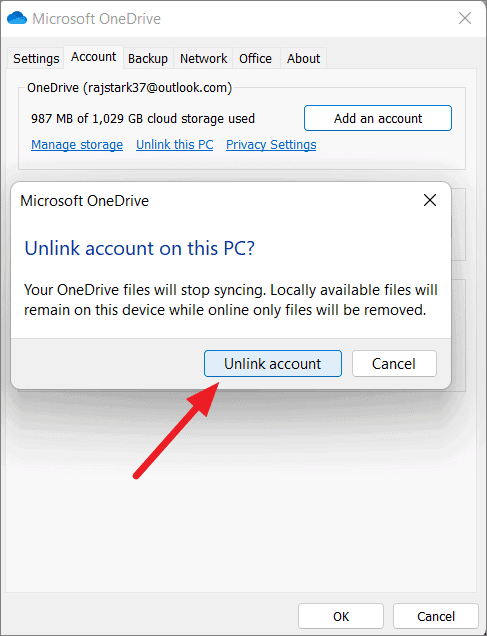
Step 4: Verify Your Files
After unlinking, your files will remain on your hard drive if they were already downloaded, but they will no longer upload changes to the cloud. You can find more official documentation on Microsoft’s Support Page.
How to Stop Sync OneDrive for Specific Folders
Perhaps you want to keep your “Documents” synced but want to stop your “Pictures” folder from hogging cloud space. This granular control is vital for efficient data management.
Step 1: Go to Settings > Account
Follow the same path as the previous method to reach the Account tab in OneDrive Settings.
Step 2: Choose Folders
Click the “Choose folders” button. This will open a list of all folders currently residing in your OneDrive cloud.
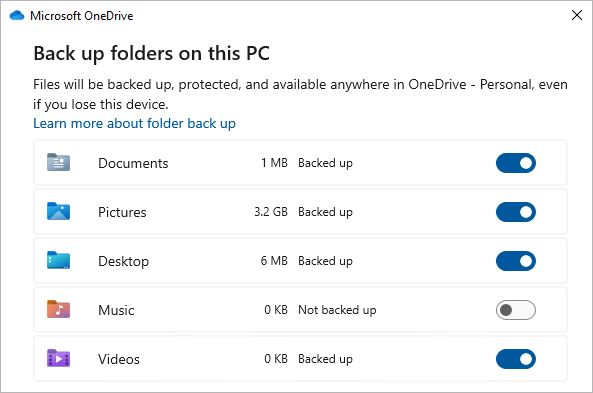
Step 3: Deselect Unwanted Folders
Uncheck the boxes for folders you no longer want to sync to this specific computer.
Warning: If you uncheck a folder that is currently on your PC, Windows will remove the local copy to save space. The files will still exist in the cloud at OneDrive.com, but they won’t be visible in your local File Explorer.
Advanced Method: How to Stop OneDrive from Syncing via Group Policy
For Pro, Enterprise, or Education versions of Windows, you can use the Local Group Policy Editor to disable OneDrive at a system level. This is the “nuclear option” for users who never want to see the cloud icon again.
Step 1: Open Run Command
Press Windows Key + R on your keyboard. Type gpedit.msc and hit Enter.
Go to: Computer Configuration > Administrative Templates > Windows Components > OneDrive.
Step 3: Prevent Usage of OneDrive
Double-click on the policy labeled “Prevent the usage of OneDrive for file storage.” Set it to Enabled, click Apply, and then OK.
The Hidden Danger: Data Loss During Disconnection
When users attempt to how to stop OneDrive from syncing, they often encounter a terrifying situation: their files disappear. This happens because of a feature called “Files On-Demand.” When this is active, your files are actually stored in the cloud, and the icons you see on your computer are just “placeholders.” If you disable OneDrive without downloading these files first, the placeholders vanish.
If you find yourself in a situation where files are missing after a sync change, do not panic. This is where professional data recovery tools become essential.
Using PandaOffice Drecov for Emergency Data Recovery
PandaOffice Drecov is a premier data recovery solution designed to handle complex file system errors, including those caused by interrupted cloud synchronizations. Whether a file was deleted locally or lost during a botched OneDrive unlinking, Drecov can scan your sectors to find what remains.
⚠ Warning: Install it on a drive different from the one where your data was lost to prevent overwriting.
Step 1: Select the Location
Launch the software. You will see a list of drives and common locations. Select the OneDrive folder path (usually C:\Users\[YourName]\OneDrive) or the specific partition where your files were stored.

Step 2: Initiate the Deep Scan
Click “Scan.” PandaOffice Drecov will first perform a Quick Scan to find recently deleted items, followed by a Deep Scan that reconstructs fragmented files at the byte level.
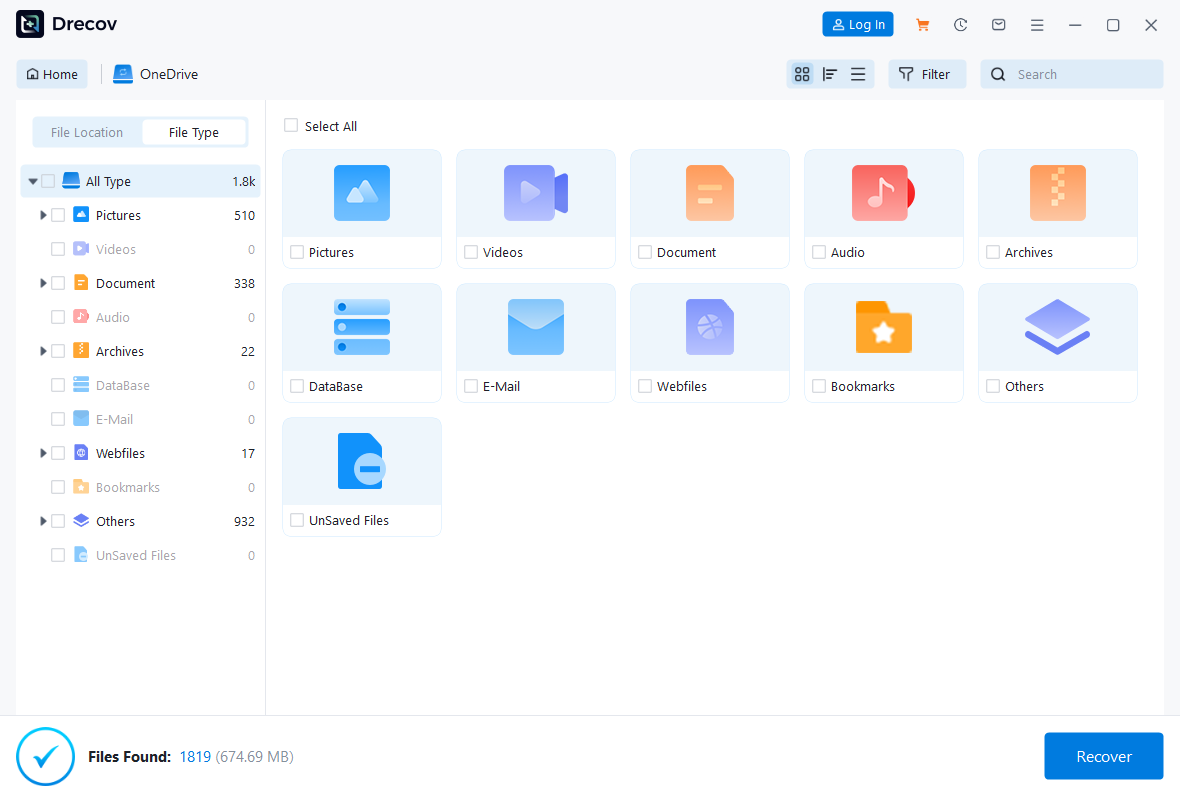
Step 3: Preview and Filter
One of the best features of Drecov is the preview function. Once the scan is complete, browse through the results. You can filter by file type (e.g., .docx, .jpg, .pdf) to find your missing documents quickly.
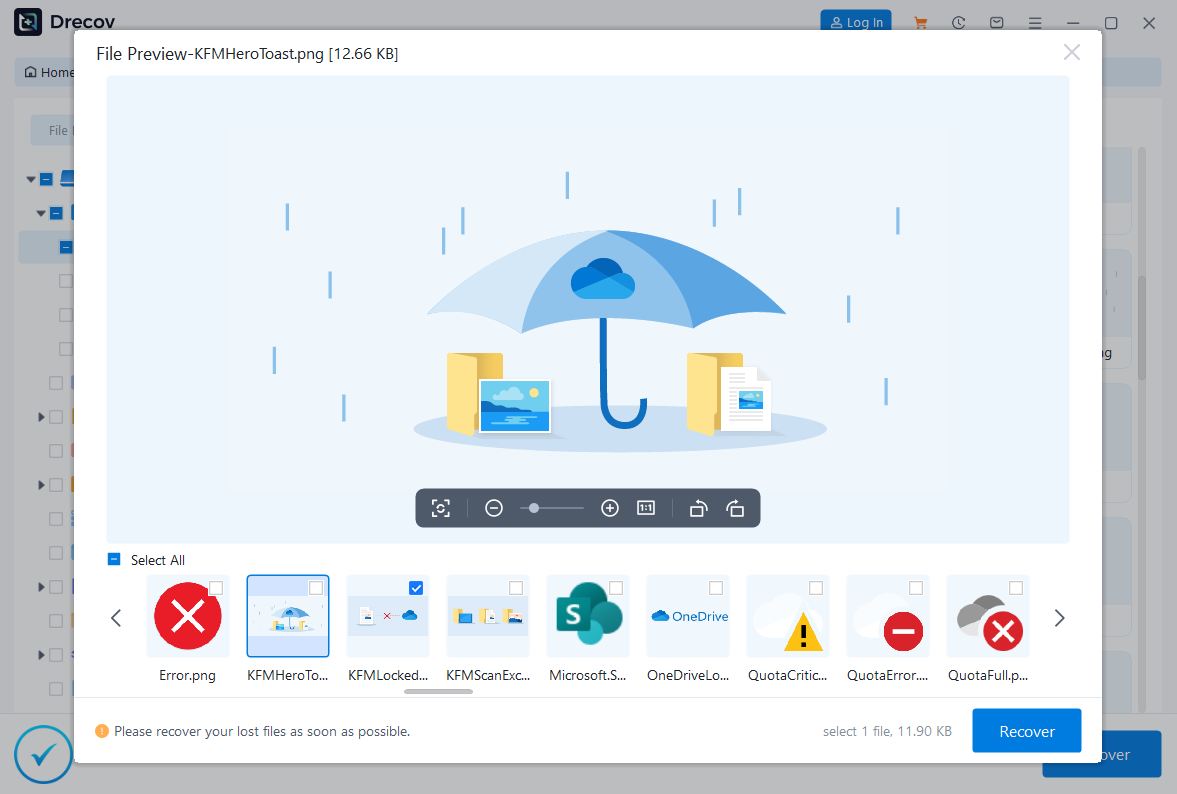
Step 4: Recover to a Safe Location
Select the files you want to save and click “Recover.”
Critical Prompt: Never recover files back to the same drive they were lost from. Always use an external hard drive or a different partition to prevent overwriting the very data you are trying to save.
Alternative Data Recovery and Management Guides
Managing your data doesn’t end with stopping a sync. If you’ve encountered issues during this process, or if you want to become a power user of Microsoft’s ecosystem, explore our specialized guides:
- If you accidentally hit delete while cleaning up your cloud, follow our 2026 Guide on How to Recover Deleted Files on OneDrive.
- Sometimes the sync engine gets stuck in a loop. In these cases, you might need to learn How to Reset OneDrive Like a Pro to fix underlying errors.
- Before you disable sync, ensure you haven’t lost previous edits by checking How to Use OneDrive Version History to Save Your Work.
How to Stop OneDrive from Syncing via Registry Editor (Windows Home Users)
If you are on Windows Home and don’t have access to the Group Policy Editor, you can achieve the same result using the Registry.
Step 1: Open Registry Editor
Press Windows Key + R, type regedit, and press Enter. Click “Yes” on the UAC prompt.
Paste this path into the address bar:
HKEY_LOCAL_MACHINE\Software\Policies\Microsoft\Windows\OneDrive
(If the OneDrive folder/key doesn’t exist, right-click the Windows folder and create a New Key named OneDrive).
Step 3: Create Disable Item
Right-click the OneDrive folder, select New > DWORD (32-bit) Value. Name it DisableFileSyncConfig.
Step 4: Set the Value
Double-click your new value and set the Value Data to 1. Restart your computer to apply the changes. This will effectively stop sync OneDrive at the system registry level.
Practical Tips for Long-Term Data Safety
Now that you know how to stop OneDrive from syncing, it is important to implement a robust backup strategy. “Syncing” is not the same as “Backup.” If a virus encrypts your local files, OneDrive will happily sync those encrypted files to the cloud.
- The 3-2-1 Rule: Keep 3 copies of your data, on 2 different media types, with 1 copy off-site (cloud or physical bank vault).
- Regular Snapshots: Use tools like PandaOffice Drecov to periodically check the integrity of your local drives.
- Manual Transfers: Instead of constant syncing, try manually moving finished projects to an external SSD once a month.
Conclusion
Learning how to stop OneDrive from syncing is about more than just clicking a button; it’s about taking ownership of your digital life. Whether you chose to pause it for a few hours, unlink your account, or use the Registry to disable it entirely, you now have the technical knowledge to manage your files on your own terms.
Remember, the transition between cloud and local storage is the most common time for data loss to occur. Always keep PandaOffice Drecov in your digital toolkit to ensure that no matter what happens during a synchronization change, your most precious memories and important documents are never truly gone.


