


Have you ever hit the “Delete” key and immediately felt a wave of regret? We’ve all been there. Whether it’s a crucial work document or a cherished family photo, losing data is stressful. Fortunately, Windows provides a robust safety net. To truly master your data, you need to know how to access recycle bin folder locations across your entire system.
This comprehensive guide will walk you through everything from basic desktop shortcuts to uncovering hidden system directories. By the end of this article, you will be an expert in recycle bin access and know exactly how to handle data emergencies using professional tools like PandaOffice Drecov.
Understanding the Recycle Bin System
Before we dive into the “how-to,” we must understand the “what.” The Recycle Bin isn’t just a pretty icon on your desktop; it is a sophisticated subsystem of the Windows NT file system (NTFS).
What Happens When You Delete a File
When you delete a file in Windows, the operating system doesn’t actually erase the bits and bytes from your hard drive. Instead, it performs a logical relocation. The file pointer is moved from its original directory to a special system-managed area.
The file remains physically present on the disk, but the space it occupies is marked as “available.” This is why recovery is possible. As long as new data hasn’t overwritten that specific physical sector, your “deleted” file is still there, waiting to be rescued. This temporary holding pattern is the core of the how to access recycle bin workflow.
Role of the Hidden $Recycle.Bin Folder
While you see a single “Recycle Bin” on your desktop, the reality is more complex. Every drive partition on your computer (C:, D:, etc.) contains a hidden, protected folder named $Recycle.Bin.
This folder is the actual engine room. It stores the deleted files from that specific drive. Windows aggregates the contents of all these hidden folders and presents them to you in the unified desktop view. Understanding the existence of $Recycle.Bin is the first step toward advanced data forensics and troubleshooting.
Methods to Access the Recycle Bin Folder
There are several ways to reach your deleted items, ranging from the incredibly simple to the more technical.
Using Desktop Shortcut
The most common method for recycle bin access is the desktop icon.
- Step 1: Go to your Windows Desktop.
- Step 2: Locate the trash can icon labeled “Recycle Bin.”
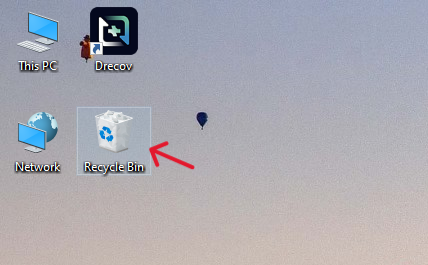
- Step 3: Double-click to open it.
If the icon is missing, you can restore it by going to Settings > Personalization > Themes > Desktop icon settings and checking the “Recycle Bin” box.
You can also find the bin through the standard File Explorer interface.
- Step 1: Open any folder or press
Win + E. - Step 2: In the left-hand navigation pane, look for “Recycle Bin.” It is usually located near the bottom of the list.
- Step 3: Click it to view all recently deleted files from all drives.
Accessing the Hidden $Recycle.Bin Folder
Sometimes, the standard shortcut isn’t enough—especially if you are dealing with a corrupted bin or need to see files on a specific partition. To see the “real” folder, you must change your system settings.
Enabling Hidden Files
Windows hides system folders to prevent users from accidentally deleting critical files. To reveal them:
- Step 1: Open File Explorer.
- Step 2: Click on the View tab (Windows 10) or View > Show (Windows 11).
- Step 3: Check the box for Hidden items.
Viewing System-Protected Files
Even with “Hidden items” enabled, the $Recycle.Bin folder remains invisible because it is a “protected operating system file.”
- Step 1: In File Explorer, go to Options (or “Change folder and search options”).
- Step 2: Switch to the View tab.
- Step 3: Scroll down and uncheck the box that says “Hide protected operating system files (Recommended).”
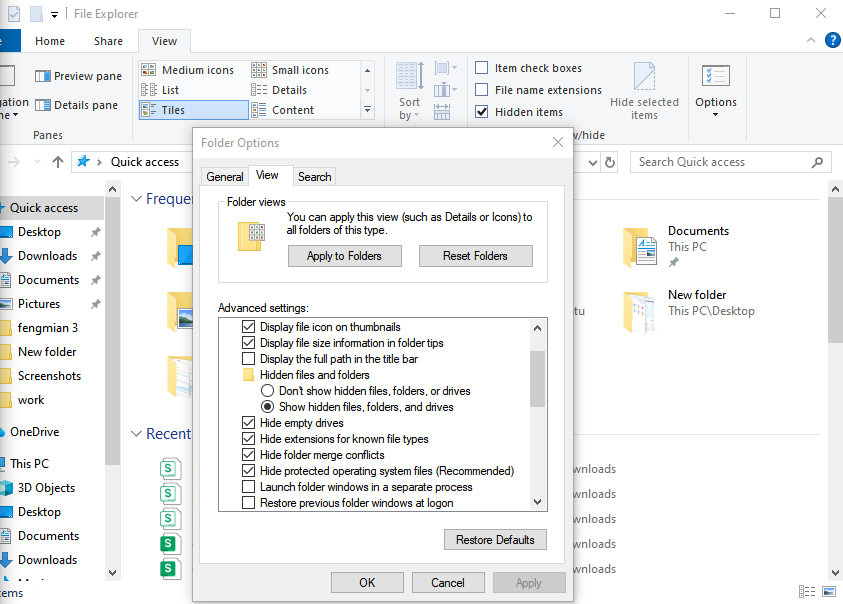
- Step 4: Click Yes on the warning prompt and hit Apply.
Step-by-Step Access via File Explorer
Now that the folder is visible, let’s navigate to it manually.
- Step 1: Open This PC.
- Step 2: Double-click your primary drive (usually Local Disk C:).
- Step 3: You will now see a faded folder named $Recycle.Bin. This is the directory you were looking for.
Opening the Folder Safely
- Step 1: Double-click $Recycle.Bin.
- Step 2: You may see a folder with a long string of numbers (a SID, or Security Identifier). This represents your user account.
- Step 3: Open that folder to see the raw deleted files. Note that filenames might look like “R” followed by random characters; this is how Windows tracks them internally.
Accessing Recycle Bin via Run Command
For those who want to know how to access recycle bin folder locations instantly without clicking through menus, the “Run” dialog is the fastest route.
Using Shell Commands
- Step 1: Press
Win + Ron your keyboard. - Step 2: Type
shell:RecycleBinFolderinto the box.e - Step 3: Press Enter. The standard Recycle Bin window will pop up immediately.
Quick Access Shortcuts
You can also type explorer.exe shell:RecycleBinFolder into a Command Prompt or create a new desktop shortcut using this path for one-click access.
Using Command Prompt to Access
If your GUI (Graphical User Interface) is glitching, the Command Prompt (CMD) is a powerful alternative.
Basic Commands
- Step 1: Press the Start button and type
cmd. - Step 2: Type
cd \$Recycle.Binand press Enter to enter the root directory. - Step 3: Type
dir /ato list all the hidden subdirectories and deleted files.
Administrative Permissions
To modify or empty the bin via CMD, you should right-click Command Prompt and select Run as Administrator. This ensures you have the necessary privileges to interact with system-level files.
Accessing Recycle Bin on External Drives
Did you know that USB sticks and external HDDs have their own bins? When you delete a file from an external drive, Windows creates a $Recycle.Bin folder on that specific drive.
USB and External HDD Behavior
On many removable flash drives (formatted as FAT32), files are often deleted permanently immediately. However, for external hard drives formatted as NTFS, the bin system works just like your internal C: drive.
Differences from Internal Drives
The main difference is portability. If you move an external drive to another computer, that computer may not show the files in its desktop Recycle Bin, but the files still sit inside the hidden $Recycle.Bin folder on the external disk itself.
Professional Recovery: Using PandaOffice Drecov
If you have accessed the folder and found it empty—or if you accidentally emptied the bin—don’t panic. This is where PandaOffice Drecov comes in. This professional data recovery tool is designed to find files that are no longer visible to the Windows operating system.
⚠ Warning: Install it on a drive different from the one where your data was lost to prevent overwriting.
How to Recover Data with PandaOffice Drecov
- Step 1: Select the Location. Launch the software. On the main interface, select the drive where your Recycle Bin is located (usually the C: drive) or select the “Recycle Bin” shortcut specifically.

- Step 2: Scan for Files. Click the Scan button. PandaOffice Drecov will perform a Deep Scan, looking for file signatures in the “unallocated space” of your hard drive.

- Step 3: Preview and Filter. Once the scan is complete, use the filter sidebar to search by file type (e.g., .jpg, .docx). You can double-click files to preview them before recovery.

- Step 4: Recover. Select the files you need and click Recover. Choose a safe destination (like an external drive) to save your restored files.
Warning: Never save recovered files back to the same partition they were lost from. This can lead to permanent data corruption.
For more specific guides on finding the bin or recovering lost items, check out these helpful resources:
- Where do I find Recycle Bin in Windows 10?
- Where is Recycle Bin in Windows 10: 3 quick ways to find it
- How to recover files deleted from the Recycle Bin
- How do I recover items deleted from Recycle Bin?
Why You Might Not See the Folder
If you’ve followed the steps above and still can’t figure out how to access recycle bin folder locations, there are two likely culprits.
Hidden File Settings
The most common reason is that the “Hide protected operating system files” setting was not toggled correctly. This is a separate setting from “Show hidden files.” Ensure both are configured to show data.
Permission Restrictions
On a work computer or a shared family PC, your user account might not have “System” or “Administrator” level permissions. If you are an “Standard User,” Windows may block your path to the root of the C: drive for security reasons.
Common Problems and Fixes
Access Denied Errors
If you try to open $Recycle.Bin and get an “Access Denied” error, right-click the folder, go to Properties > Security, and ensure your username has “Read” and “Execute” permissions.
Corrupted Recycle Bin Folder
Sometimes the bin “breaks.” You might delete a file, but it doesn’t show up, or the icon says it’s full when it’s empty. To fix this:
- Step 1: Open CMD as Administrator.
- Step 2: Type
rd /s /q C:\$Recycle.Bin. - Step 3: Restart your computer. Windows will automatically recreate a fresh, healthy version of the folder.
Best Practices for Safe Access
Avoiding Data Loss
When manually browsing the $Recycle.Bin, never move files around manually inside the folder. This can break the database Windows uses to track where files should be restored. Always use the “Restore” button within the official Recycle Bin interface if possible.
When Not to Access Directly
If you are a casual user simply looking for a deleted photo, stick to the desktop icon. Direct access to the hidden system folders should be reserved for technical troubleshooting or when using data recovery software like PandaOffice Drecov.
To learn more about the technical side of file systems, you can refer to the Microsoft Documentation on NTFS, which explains how data is structured on your drive.
Conclusion
Learning how to access recycle bin folder structures is a vital skill for anyone looking to maintain their digital life. From the basic desktop icon to the deep, hidden system directories of $Recycle.Bin, Windows provides multiple layers of protection for your data. By understanding these layers, you can troubleshoot errors, manage disk space more effectively, and recover lost files with confidence.
Remember, if the files aren’t in the bin, tools like PandaOffice Drecov are your best bet for a successful recovery. Stay calm, follow the steps, and your data will be back in no time.


