








Recover the REAPER project and its recordings separately
To recover REAPER projects, preserve the RPP file, existing RPP-bak candidates, and original recording folders before making new saves. A project can remember tracks and edits while its audio remains outside the file. Therefore, determine whether you lost arrangement data, a recorded take, plugin state, or simply access to media that moved.
REAPER is commercial software. Its native backup and recovery routes can help an existing eligible user without buying an additional recovery utility. They do not make REAPER or paid plugins free. Also inspect the backup settings that existed before the loss, since an option enabled afterward cannot create historical project versions retrospectively.
Identify the musical state you need
Record the project path, application version, tempo, and a distinctive edit such as a comped vocal or revised region. Then preserve the project and related files. If useful work remains open, save a separate recovery version before closing or resetting the environment. This keeps a surviving session from disappearing while you search for older candidates.
Inventory important recordings and note whether they live inside the project directory or another recording path. Also retain existing renders and presets as supporting references. A waveform cache or a familiar filename does not establish that the full recording survives, so compare the actual source audio when assessing the recovery.
Native route 1: open an existing RPP-bak
- Preserve the current RPP and all plausible RPP-bak files before additional saves.
- Copy useful backup candidates into a separate recovery directory.
- Open the candidate through REAPER and choose a historical version if the backup format offers that choice.
- Compare the intended edit and save the useful result under a new RPP name.
The available backup behavior depends on prior preferences and release. A backup can preserve one previous state or a set of historical versions according to configuration. Inspect actual candidates rather than assuming every RPP-bak contains unlimited history. Also keep the current project, since it may preserve valid later work missing from the older backup.
Compare arrangement and take decisions
Inspect the affected items, take selection, comp boundaries, fades, and automation. Then play the passage in context. A candidate can contain the same source recordings while using an older take decision or edit. The actual creative choice provides stronger revision evidence than the track list or overall project length.
For a mixed recovery, preserve both sources and transfer verified content into a new working project. Then inspect routing and effects after the transfer. An item that plays correctly in one track context can behave differently in another. Record the combination so that later comparison does not mistake it for a single untouched historical state.
Native route 2: compare configured autosave candidates
- Inspect the backup and autosave preferences relevant to the interrupted project.
- Locate existing timestamped candidates in the actual configured directories.
- Preserve them before opening several versions or creating new project saves.
- Compare the missing change and save the best verified candidate separately.
Autosave must have produced a candidate before the interruption to help now. Its location can differ from the main project folder. Also compare actual musical content rather than expecting the latest timestamp to be ideal. A recent candidate can follow an accidental deletion or plugin change, while an older one may preserve the stable edit you need.
Identify candidates with several landmarks
Check a distinctive region, a known recorded phrase, and the automation around a transition. Then compare the selected takes and source paths. This makes the search more reliable when several backups have similar names. Keep useful candidates separately until you establish which combination best preserves the intended session.
Do not repeatedly overwrite the main project to generate another backup during diagnosis. That can change the history you want to inspect. Work from copies and retain the source names and timestamps in a short note. This gives you a clear record of which candidate supplied the accepted arrangement and which later work still needs reconstruction.
Native route 3: inspect preserved undo history when available
- Preserve the matching project and any existing saved undo-history data together.
- Open a working copy in an appropriate REAPER environment.
- Inspect whether the available history contains the specific unwanted action or missing edit.
- Save a separate useful project state before continuing production.
Saved undo history is conditional on prior settings and compatible surviving data. It is not a substitute for every project backup, and it cannot supply a recording that never reached storage. Also keep the matching RPP context. An unrelated history file with a similar name does not establish a usable recovery source for the project you are investigating.
Avoid uncontrolled undo sequences
Inspect the relevant history entry before moving through many actions. An indiscriminate sequence can remove valid later work while searching for one missing edit. Preserve a baseline and compare the resulting arrangement. If history cannot supply the desired state, retain the useful current project and move to another candidate rather than repeatedly reopening it in the hope of creating new history.
If you recover an earlier item or take decision, inspect its surrounding fades and routing. A successful undo can restore an object while leaving other intended later changes outside that state. Reconcile those decisions deliberately in a new recovery version and keep the historical source intact for comparison.
Native route 4: reconnect original recorded takes
- Inspect the missing media’s expected filename, path, and project use.
- Locate the exact recording in the original recording folders or an existing project copy.
- Repair the reference in a working RPP using REAPER’s normal media-location workflow.
- Play the affected take and compare duration, content, offsets, and timing.
This route restores access to audio that still exists. It does not recover a deleted performance from a peak file or empty item. Also compare the actual take before accepting a same-name match. A different recording can remove the missing-media warning while changing the performance and the edit boundaries that depend on it.
Check source and item timing independently
A correct WAV can still play incorrectly if the recovered item uses different offsets, rate, pitch, or take selection. Inspect those controls and play the full phrase. Then compare the transition into neighboring items. This catches a mismatch that a simple audition of the source file cannot reveal.
Keep raw recordings alongside useful rendered edits. A render can preserve an approved sound while the original take provides material for future revisions. Their roles differ. If the project must be reconstructed from stems, label that result clearly and retain native candidates that may later restore more detailed editing controls.
Diagnose silence without assuming the project is empty
Inspect source availability, track mute and solo state, routing, device configuration, and item content. A silent project can contain intact editing data. Conversely, an item with a visible label may point to absent audio. Record the specific symptom and test a known source before rebuilding the session or replacing plugins indiscriminately.
Separate plugin availability from arrangement recovery
A missing or incompatible plugin can change playback while the tracks and edits survive. Preserve the original device state and any existing render before substituting another processor. Then test changes one at a time in a recovery copy. A replacement that makes the project play is a new sound decision unless you verify that it reproduces the intended behavior.
Also inspect automation destinations and parameter ranges after a device change. A recovered curve can target a control that behaves differently in another version. Compare the relevant passage with a known reference. Keep approximate replacements in the recovery note so the next producer understands what remains unresolved.
Use project text as evidence rather than a repair guarantee
RPP files use a readable structure, which can help an experienced user inspect source references in a copy. However, readable text does not establish that every project relationship survived. Use the application’s normal opening and media-repair workflow first. Preserve the source before any manual change and compare the resulting session carefully.
Keep truncated candidates separate
An incomplete RPP may contain useful track information while lacking later sections. Do not casually remove unfamiliar lines to force a load. A file that opens after editing can still omit important routing or item data. If you salvage a subset, label it as partial and retain the untouched candidate for a more complete investigation.
Likewise, changing a filename extension cannot supply missing audio or reconstruct an empty project. Inspect the actual content and the intended creative milestone. A successful file-open result is the start of musical validation, not proof that the interrupted session returned in full.
A worked recovery for a lost vocal comp
Suppose a crash follows several take selections and crossfade adjustments. Preserve the RPP, backups, and recordings. Compare the relevant phrase in each native candidate, checking the selected takes rather than only the number of items. An older project may contain all recordings but a different comp, while a later autosave preserves the intended performance choices.
Rebuild only the unresolved edit decisions
If no candidate contains the complete comp, use the best stable project and verified raw takes as a reconstruction baseline. Compare a reference render where available and rebuild the missing boundaries in a new version. Record that work explicitly. The surviving audio is recovered material, while newly inferred take placement remains reconstruction.
Then inspect fades and play the full passage through the mix. Export a short test and compare it independently. Finally, reopen the saved RPP and check source paths again. This establishes a usable native milestone and a reference output that belongs to the same accepted session.
Identify the intended REAPER state through take decisions
Choose a short passage that contains the performance and edit choices you need to preserve. Record the expected take, item boundaries, fades, and a distinctive automation change. Then compare that passage in each RPP candidate. A project can contain the same raw recordings while using a different comp or arrangement, so the actual musical decision provides stronger evidence than the presence of familiar track names.
Compare takes inside the item rather than just the source list
Inspect which take is active and how the item uses its source. Then play the phrase with neighboring items audible. A recovered recording can be complete while the project selects another performance or starts at a different offset. Keep those checks separate. If you manually recreate the take choice from a reference render, record it as reconstruction rather than treating the raw recording’s survival as proof that the original comp returned.
Also inspect crossfades and the transition into silence or breath. Small timing differences can change a spoken phrase or musical articulation even when the main notes remain intact. Save a checkpoint before repairing those boundaries. Then compare a short render with the intended reference. This connects the native item check with the audible result that another producer or listener will actually use.
Compare backup modes according to the files they produced
The configured backup workflow can preserve a prior save, timestamped candidates, or historical versions in another arrangement. Inspect the actual preferences and existing files before deciding what the RPP-bak contains. Do not infer unlimited history from the extension alone. Preserve all plausible candidates and compare their musical content in working copies, keeping the original backup source unchanged during selection.
Use a meaningful revision note for each candidate
Record the selected take, a distinctive region, and the relevant mix change. This makes comparison easier than writing only oldest or newest. A candidate with the correct comp may lack a later arrangement section, while another preserves the section but uses an older take. Keep both until you decide whether to adopt one baseline or combine verified material into a new recovery project.
If the application offers several versions from one backup candidate, inspect them deliberately and save useful results separately. Do not repeatedly overwrite the main project while browsing. A stable source set lets you revisit a version when another dependency becomes important. It also helps avoid the common mistake of choosing the first project that opens instead of the one that contains the creative state you actually need.
Recover a recording as audio before rebuilding its edit
Open a copied source file and compare the actual performance, duration, and channel content. Then identify its intended place in the project. A peak display, filename, or item label is only an identification clue. The original samples must survive in a readable audio file or another verified source. This distinction keeps a visible waveform from becoming an unsupported claim that the full take is recoverable.
Compare multichannel and alternate recordings carefully
A stereo file and a multichannel original can contain related material while supporting different editing tasks. Inspect the channels the project uses and compare the relevant performance. Likewise, a consolidated or rendered take can preserve the audible phrase while omitting material outside the edit. Keep useful alternatives, but document whether they provide the original recording or a limited replacement.
If a recording exists outside the project folder, preserve its original name and source details before collecting it into the recovery. Then inspect the project’s offsets, rate, pitch, and stretch behavior. A correct source can still play differently when those controls differ. Reconnecting the filename is therefore only the first part of restoring the musical relationship between the source and the timeline.
Preserve routing and automation during partial transfer
When one RPP candidate supplies a useful track or item, test the transfer into a new recovery project. Inspect input and output routing, sends, effects, and automation afterward. A track can sound correct alone while behaving differently in the full mix. Keep the source candidate so you can compare the intended context instead of rebuilding it from memory after the transfer.
Test the passage in both solo and full mix
Use solo playback to identify the recording and obvious edit defects. Then play the full mix to compare sidechain behavior, returns, and automation relationships. These checks answer different questions. A valid isolated take can still enter the wrong bus or interact with another track unexpectedly. Record any new routing decision separately from the recovered item data.
If a plugin remains unavailable, preserve its saved state and any reference render before substituting another processor. Then change one device at a time in the recovery copy and compare the relevant passage. A replacement may be musically useful without reproducing the original parameter behavior. Keep that approximation explicit so another producer knows which controls need further review if the original environment becomes available.
Use saved undo information with a narrow target
A surviving project-and-history set may offer a useful earlier edit, but its availability depends on prior settings and matching data. Preserve the current state before exploring it. Then identify the specific action you want to reverse and inspect the resulting passage. A long uncontrolled rollback can discard valid later work and make it harder to establish which state supplied the accepted recovery.
Reconcile the useful historical state with later work
Suppose undo restores an accidentally removed item but also removes a later level ride. Preserve the restored item and the useful current state separately, then build their verified combination in a new project. Compare the fade, take choice, and automation around the join. This is a deliberate reconstruction from surviving evidence, and a short note makes that provenance clear for future editing.
If the desired action does not exist in surviving history, retain the useful current project and compare other backups. Reopening or changing undo settings now cannot create historical content that was never saved. A clear stopping point for this route prevents time spent repeatedly testing the same missing state while stronger recording or backup candidates remain available elsewhere.
Decide what a stem-based reconstruction can support
An existing stem or mix can preserve sound while flattening items, takes, and device controls. Inspect its range, quality, and revision before building a replacement session. It may support arrangement changes or an immediate review without permitting the same detailed vocal-comp or instrument revisions as the original project. State those limits before adopting it as the production baseline.
Preserve a native milestone before new creative work
Once the recovered session passes its content checks, save a clearly named RPP and render a reference from that exact version. Then begin new edits in another version. This creates a useful boundary between recovery and continued production. Keep the original evidence and rejected candidates separate so a later discovery can still be compared with the accepted milestone.
Finally, test a collected copy from another directory and inspect the same musical passage. This exposes missing external recordings or presets that happened to remain available on the original workstation. Record the accepted source files, reconstructed decisions, and unresolved devices. A portable, reviewable session is more useful than a folder of plausible RPP files whose musical differences remain uncertain.
Keep musical acceptance tied to the saved RPP
After the recovered session passes its passage checks, save and reopen that exact project, then render a reference. Compare the selected take, crossfades, and automation again. This connects the audible result with a persistent native source and helps expose an accidental dependence on the previous session’s state.
Identify flattened sources for future revisions
If a recovered stem replaces editable items or an unavailable instrument, document the replacement and its range. Another producer can then plan suitable balance or arrangement work without expecting controls that no longer survive. Preserve the original native candidate and device state for any later compatible-environment assessment.
For collaboration, test the collected recovery from another directory and inspect the acceptance passage. Then include the concise source and limit record with the project. This confirms the actual files being handed over and prevents a locally functioning session from relying on an unrecorded recording path elsewhere on the workstation.
When storage recovery can help REAPER work
PandaOffice Drecov may help retrieve deleted RPP files, existing backups, or original recordings on readable storage. It cannot reconstruct an unsaved take decision that never reached disk or generate a full performance from a waveform cache. Use native candidates first, and reduce writes to the affected storage while investigating deleted files.
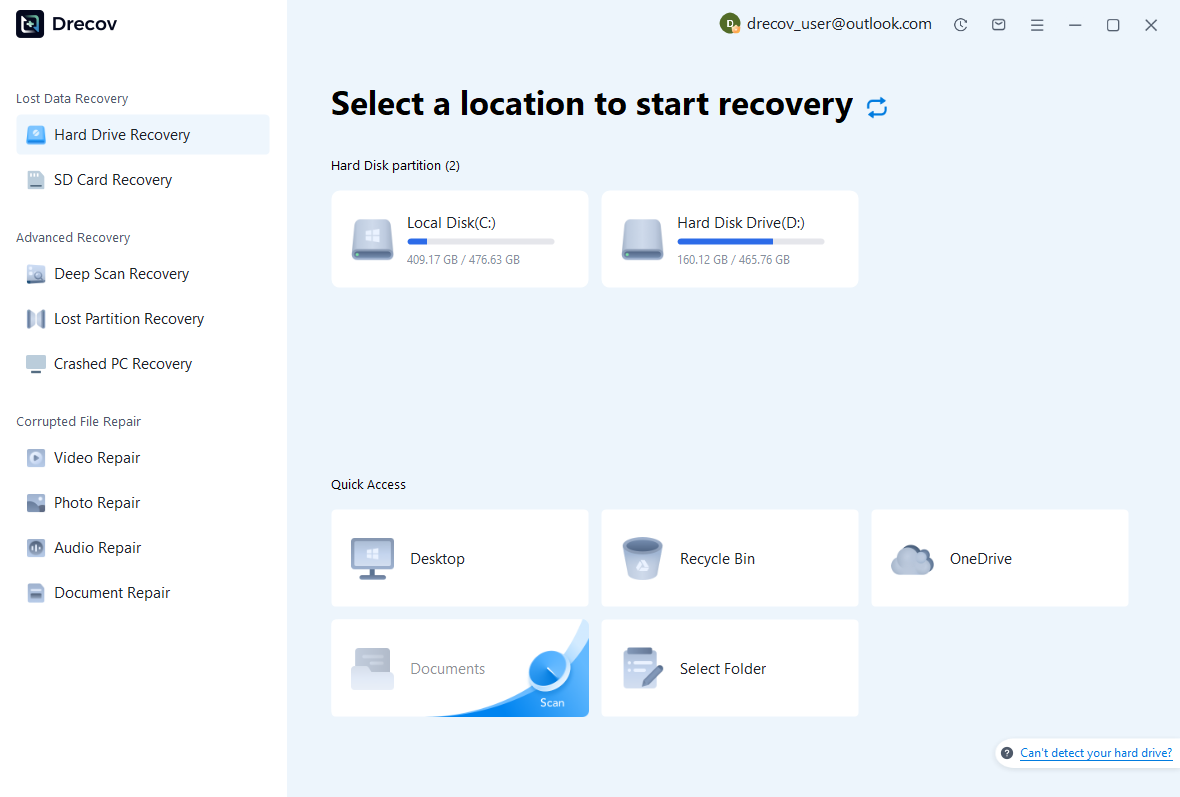
Step 1: identify project and recording locations
Choose the drive or partition that held the RPP, configured autosaves, or missing takes. These can be different locations, so record what each search targets. Keep recovery output elsewhere. Repeated storage disconnections or hardware read failures need assessment before you proceed with an ordinary software scan.
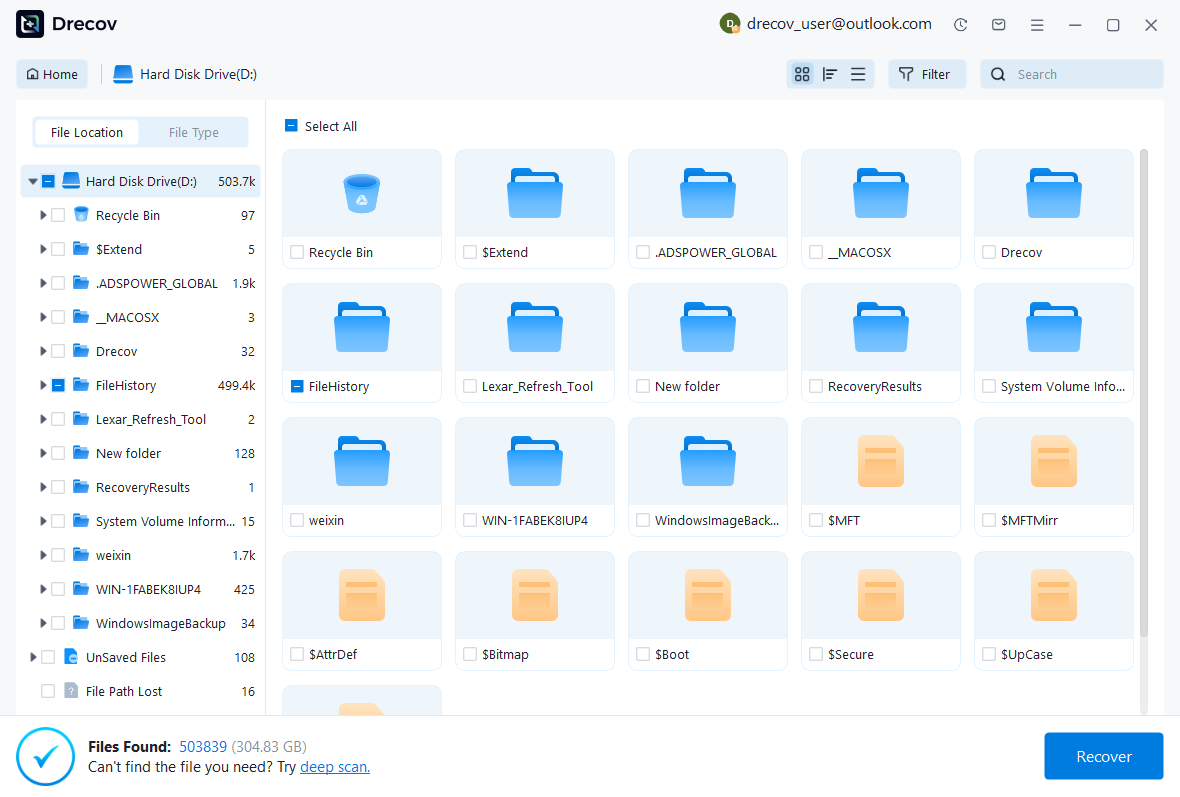
Step 2: compare project and audio candidates
Review available filenames, paths, sizes, dates, and supported audio previews. Preserve plausible RPP revisions alongside their associated recordings where possible. A recognizable take does not establish that the correct comp and routing survived. Keep source details so you can assess those relationships in REAPER after recovery.
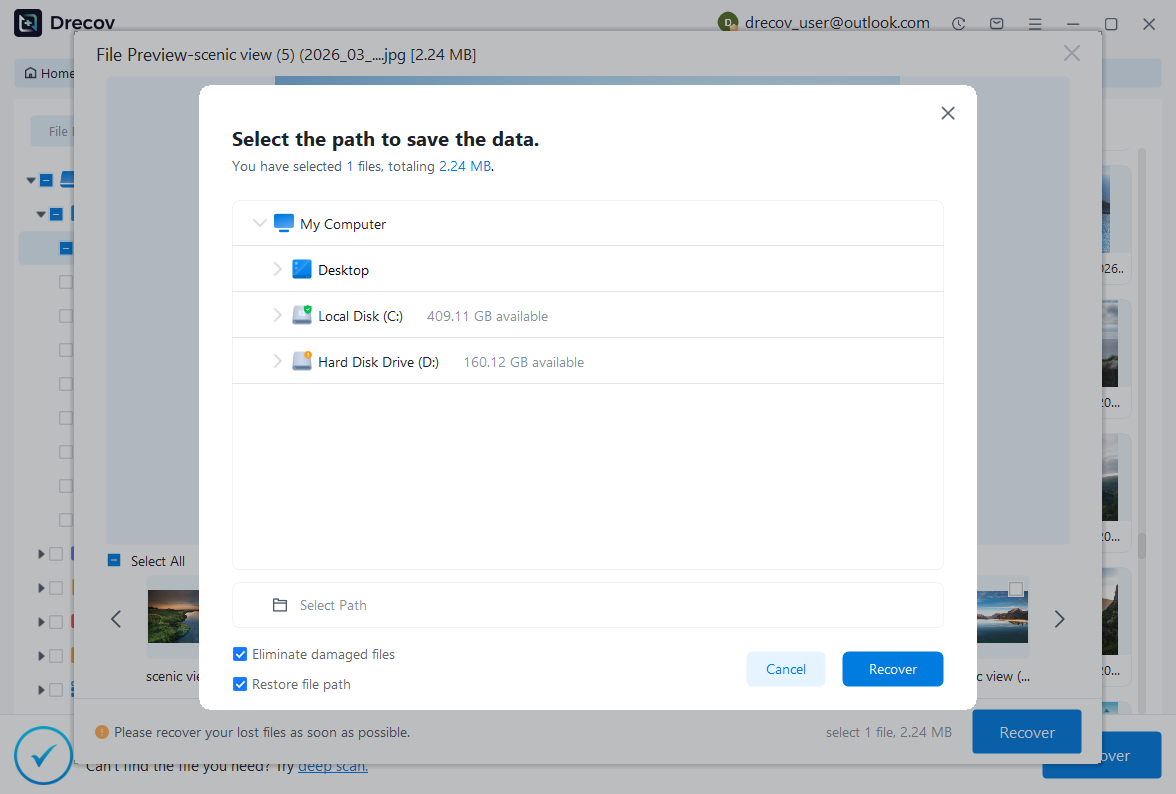
Step 3: restore elsewhere and test the session
Recover selected files to another healthy destination and preserve an untouched set. Open a working project, reconnect verified takes, and inspect items, automation, routing, and device behavior. Save a new RPP and render a representative test. Keep incomplete candidates separate from the session you have already accepted.
Preserve the recovered production milestone
Record the source backup, recordings, reconstructed edits, and unresolved devices. Then reopen the accepted project and compare its important musical landmarks. Keep a reference render and the corresponding native project together. This gives the next production session a reliable baseline without hiding partial recovery behind a warning-free launch.
Test actual backup and media collection behavior
Use a disposable project to verify the configured backup locations and retained versions. Open a copied candidate, then test a collected project from another directory. These practical checks show what your preservation workflow really supplies and help identify external recordings that need explicit inclusion in future backups.
Related recovery resources
Explore the relevant recovery options: Hard drive recovery, External hard drive recovery.
For another recovery case and its practical checks, read the related recovery guide.
Check the vendor guidance for the installed version: official recovery documentation 1, official recovery documentation 2.





