


In the modern digital landscape, the humble flash drive remains an essential tool for carrying everything from critical work presentations to bootable operating systems. However, these portable devices are notoriously fragile. Whether you are upgrading to a larger drive or creating a redundant backup of your most precious files, learning how to clone usb drive procedures is a fundamental skill for anyone who values their data.
Cloning goes beyond a simple “copy and paste.” When you clone usb drive, you create a bit-for-bit replica of the source media, including hidden partitions, boot sectors, and file system structures. This guide will walk you through the nuances of data preservation, hardware selection, and the step-by-step methods to successfully clone usb drive setups regardless of your technical background.
Why You Need to Clone USB Drive Regularly
Before we dive into the technical “how-to,” it is vital to understand the “why.” Relying on a single flash drive for important data is a gamble. USB drives use NAND flash memory, which has a limited number of write cycles. Eventually, every drive will fail.
1. Creating Bootable Backups
If you have a customized Linux environment or a Windows To Go installation on a thumb drive, a standard file copy will not work. To preserve the ability to boot from the device, you must clone usb drive partitions exactly as they exist.
2. Upgrading to Higher Capacity
As files get larger, that old 8GB drive might not cut it anymore. When you clone usb drive data to a larger 128GB or 256GB stick, you ensure that all your settings and folder structures remain intact without manual reconfiguration.
3. Forensic Data Recovery
If a drive is showing signs of physical failure (slow read speeds or occasional “device not recognized” errors), the first rule of data recovery is to stop writing to it. Instead, you should clone usb drive sectors to a healthy disk and perform recovery on the clone to prevent further wear on the failing hardware.
Preparation: What You Need Before You Clone USB Stick
Success starts with preparation. You cannot simply clone usb drive hardware without checking a few prerequisite boxes.
- The Source Drive: The original USB containing the data.
- The Target Drive: This drive must be equal to or larger than the source. If you attempt to clone usb drive contents to a smaller stick, the process will fail or result in data loss.
- Reliable Power: If you are using a laptop, plug it into a power source. A sudden shutdown during a clone usb drive operation can corrupt both devices.
- A Clean Workspace: Ensure no other intensive programs are running that might interfere with the USB ports.
Warning: Cloning will erase everything on the Target Drive. Double-check that you have moved any important files off the destination disk before you begin the clone usb drive process.
Level 1: How to Clone a USB Drive Using Native Windows Tools
For those who want to clone usb drive volumes without downloading third-party software, Windows offers built-in utilities. While this method is more about “partition replication” than true bit-level cloning, it works well for simple data storage.
Step 1: Connect Your Devices
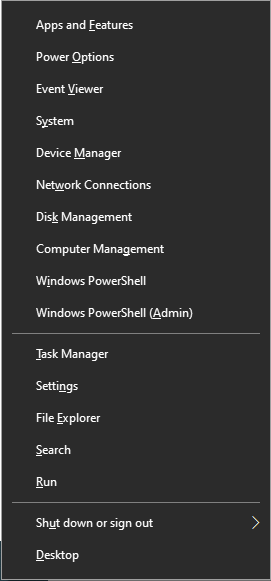
Plug both the source and the target USB drives into your PC. Open Disk Management by right-clicking the Start button and selecting it from the menu.
Step 2: Initialize the Target Drive
If your target drive is new, it might appear as “Unallocated.” Right-click the disk and select Initialize Disk. Choose GPT (for modern systems) or MBR (for older compatibility).
Step 3: Create a Matching Partition
While Windows doesn’t have a “one-click clone” button in Disk Management, you can manually recreate the structure. However, for a true usb clone experience that includes boot sectors, we recommend moving to the software solutions listed in Level 2.
Step 4: Copying Data
For non-bootable drives, you can simply select all files (Ctrl+A) and move them. If you need a more robust solution, read on.
Level 2: Use Disk Imaging Software to Clone USB Drive
To truly clone usb drive structures, you need software that understands “imaging.” This creates a snapshot of the drive.
Method: Using Win32 Disk Imager
This is a lightweight, open-source tool perfect for those who need to clone usb stick contents for Raspberry Pi projects or simple backups.
- Step 1: Download and install Win32 Disk Imager.
- Step 2: Insert your source USB. Under “Image File,” click the folder icon to select a location on your PC to save the
.imgfile. - Step 3: Select the correct “Device” letter.
- Step 4: Click Read. This creates an image of the source.
- Step 5: Unplug the source, plug in the target USB.
- Step 6: Select the newly created
.imgfile, ensure the target “Device” letter is correct, and click Write.
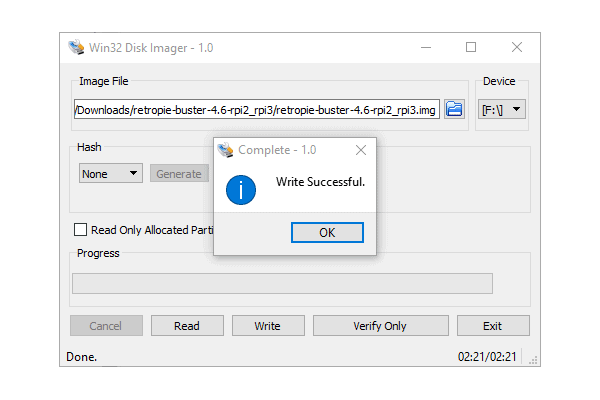
Now you have successfully managed to clone usb drive data onto a new device!
Addressing Data Loss: What if the Clone Fails?
Sometimes, during the attempt to clone usb drive files, the source drive might encounter a “Cyclic Redundancy Check” (CRC) error, or you might accidentally format the wrong drive. This is where data recovery expertise becomes essential.
Do not panic. The data is often still there, just marked as “available space” by the operating system.
Introducing PandaOffice Drecov
PandaOffice Drecov is a premier data recovery solution designed specifically for scenarios where USB drive data is lost. It features an intuitive interface that strips away the complexity of hex editors and raw data carving.
Download the software from the official PandaOffice website and install it on your primary hard drive (never install it on the USB you are trying to recover).
How to Recover Lost Data using PandaOffice Drecov
If your attempt to clone usb drive resulted in lost files, follow these steps:
- Step 1: Select the USB Drive. Launch the app and select the USB drive that suffered data loss.

- Step 2: Deep Scan. Click the “Scan” button. Drecov will perform a deep sector analysis to find fragments of files that were bypassed during the failed clone usb drive attempt.

- Step 3: Preview and Filter. Once the scan is complete, use the filter to find specific file types (like .jpg or .docx). You can even preview images to ensure they are intact.

- Step 4: Recover. Select your files and click “Recover”. Choose a location on your computer’s hard drive to save the files.
Key Point: Always recover files to a different drive than the one being scanned. Saving recovered data back to the same USB could overwrite the very files you are trying to save!
For more information on handling specific file systems during this process, check out this guide on how to format USB to FAT32.
Advanced Techniques: Clone USB Drive via Command Line (Linux/macOS)
For power users who prefer the terminal, the dd command is the ultimate way to clone usb drive devices. It is extremely powerful but carries the nickname “Disk Destroyer” because a single typo can wipe your hard drive.
Step 1: Identify the Drives
Open your terminal and type:
diskutil list (macOS) or lsblk (Linux).
Identify your source (e.g., /dev/sdb) and your target (e.g., /dev/sdc).
Step 2: Execute the Clone
Use the following command structure to clone usb flash drive contents:
sudo dd if=/dev/sdb of=/dev/sdc bs=64K conv=noerror,sync
if: Input File (Source)of: Output File (Target)bs: Block Size (Speeds up the process)conv=noerror: Tells the system to keep going even if it hits a bad sector.
Step 3: Wait for Completion
The terminal won’t show a progress bar by default. Once the cursor returns, the clone usb drive process is finished.
Common Challenges When You Clone USB Stick
Even with the best tools, you might encounter hurdles. Understanding these will help you clone usb flash drive units more effectively.
1. Bad Sectors
If the source drive is old, it may have physical damage. Standard copying will fail. Using the “noerror” flag in dd or professional tools like PandaOffice Drecov’s imaging feature can help bypass these spots to clone usb drive data that is still readable.
2. Write Protection
Some USB drives have a physical write-protect switch. Ensure this is toggled off on the target drive before you start to clone usb drive contents. If it is a software-level lock, you may need to use diskpart in Windows to clear the read-only attribute.
3. Drive Size Mismatch
As mentioned, you cannot clone usb drive data from a 64GB stick to a 32GB stick using bit-for-bit methods. However, you can shrink the partition on the source drive first using a tool like GParted, then clone usb drive only the used space.
Maintaining Your Cloned USB Drives
Once you successfully clone usb flash drive hardware, your job isn’t quite done. To ensure the longevity of your backup:
- Eject Safely: Always use the “Safely Remove Hardware” option. Abruptly pulling a drive during a write cycle is the #1 cause of corruption.
- Store in a Cool, Dry Place: Heat is the enemy of flash memory.
- Label Your Drives: It sounds simple, but knowing which stick is the “Master” and which is the “Clone” prevents accidental overwrites.
If you ever find yourself in a situation where a drive becomes unreadable after storage, refer to this complete guide on recovering deleted files from USB flash drives.
The Role of File Systems in Cloning
When you clone usb flash drive volumes, you are also cloning the file system (FAT32, exFAT, or NTFS).
- FAT32: Great for compatibility (works on everything), but has a 4GB file size limit.
- exFAT: The modern standard for USBs. No file size limit and works on Windows and Mac.
- NTFS: Best for Windows-only environments where you need advanced security permissions.
If your clone usb flash target is intended for use with a smart TV or an older car stereo, you might need to ensure it is formatted correctly. You can learn more about recovering files from various USB drives here.
Table: Comparison of Methods to Clone USB
| Method | Difficulty | Best For | Risk Level |
| Manual Copy | Low | Photos, Documents | Low |
| Win32 Disk Imager | Medium | Bootable SD cards/USBs | Medium |
| Macrium Reflect | Medium | Full OS Migrations | Low |
| Command Line (dd) | High | Professional/Forensic Use | Very High |
Summary and Final Tips
Learning how to clone usb is an investment in your data security. Whether you choose the user-friendly interface of Macrium Reflect, the brute force of the dd command, or the recovery prowess of PandaOffice Drecov, the goal remains the same: ensuring your digital life has a safety net.
Remember these three pillars:
- Verify the capacity of your target drive.
- Back up any data on the target drive before you clone usb flash data onto it.
- Keep a recovery tool like Drecov handy in case of emergencies.
By following this guide, you now have the knowledge to clone usb hardware like a professional. You can move forward with confidence, knowing that your bootable drives and critical archives are protected against hardware failure and accidental loss.


