


Why Lost Photos Can Often Be Recovered
What Happens After Photos Are Deleted
Accidentally deleting pictures is something almost everyone experiences. Whether you removed vacation memories, family portraits, or work-related images, losing photos doesn’t always mean they’re permanently gone. In many situations, it’s still possible to retrieve lost photo files before new data overwrites the original storage space.
When a photo is deleted from your device, the operating system usually removes its directory entry rather than erasing the actual image immediately. The storage blocks remain intact until new files occupy them. That’s why acting quickly significantly increases your chances of recovery.
Different devices manage deleted files differently:
- Android phones often move photos to the Trash for 30 days.
- iPhones store deleted images in the Recently Deleted album.
- Windows computers send files to the Recycle Bin.
- macOS moves deleted files to Trash.
You can still recover deleted photos after emptying these temporary folders by using backups or specialized recovery software, provided you haven’t extensively used the storage device since the deletion.
⚠️ Warning: Continue using your device as little as possible after noticing photo loss. Every new file increases the chance of permanently overwriting deleted images.
Factors That Affect Photo Recovery Success
Not every deleted photo can be recovered. Several factors determine whether recovery will succeed.
The first is how long ago the deletion occurred. Photos deleted only minutes or hours earlier generally have much higher recovery rates than files removed several months ago.
Another factor is where the photos were stored. Images saved on removable SD cards are often easier to recover than those stored in encrypted internal phone storage.
Modern smartphones also use technologies like TRIM and garbage collection that may permanently erase deleted data much faster than traditional hard drives.
Backup availability plays an equally important role. Even if the original file has disappeared, cloud synchronization services may still keep another copy.
Before attempting any recovery process, answer these questions:
- Was cloud synchronization enabled?
- Did you recently back up your phone?
- Was the photo stored internally or on an SD card?
- Has the device been factory reset?
Knowing these details helps determine the safest and most effective recovery approach.
How to Retrieve Lost Photos with Proven Recovery Methods
Method 1: Restore Photos from the Recently Deleted or Trash Album
Best for:
Recently deleted photos within the retention period.
Test Environment
- Windows 11 PC
- Android 15 (Samsung Galaxy S24)
- iPhone 16 (iOS 26)
- Google Photos 7.x
- Apple Photos
The easiest solution is checking your device’s built-in recycle folder before trying advanced recovery techniques.
Most operating systems intentionally delay permanent deletion, allowing users to restore mistakenly deleted files.
On Android Gallery
- Open Gallery.
- Tap Menu.
- Open Trash or Recycle Bin.
- Select the deleted pictures.
- Tap Restore.
On Google Photos
- Launch Google Photos.
- Open Collections.
- Select Trash.
- Choose the photos.
- Tap Restore.
Google Photos typically keeps deleted files for 60 days if backup is enabled.
On iPhone
- Open Photos.
- Go to Albums.
- Open Recently Deleted.
- Authenticate with Face ID if required.
- Select the images.
- Tap Recover.
Apple generally stores deleted photos for 30 days before permanent removal.
On Windows
Open the Recycle Bin, locate the deleted images, right-click them, and select Restore.
On Mac
Open Trash, locate your photos, right-click them, and choose Put Back.
This simple approach solves many cases where users ask how to retrieve lost photos without needing additional software.
⚠️ Warning: Emptying the Trash or Recycle Bin may make recovery significantly more difficult.
Method 2: Recover Photos from Cloud Backup Services
Best for:
Photos synchronized with online backup platforms.
Test Environment
- Google Photos
- Google Drive
- OneDrive
- iCloud Photos
- Dropbox
Many users unknowingly create automatic backups. Even if local copies disappear, cloud storage may still contain the original images.
Start by checking the service your device uses most frequently.
Google Photos
If Backup is enabled:
- Open Google Photos.
- Search by date or location.
- Check the Archive folder.
- Open Trash if necessary.
- Restore the desired images.
iCloud Photos
For Apple users:
- Visit iCloud Photos.
- Sign in.
- Browse your photo library.
- Open Recently Deleted.
- Restore available images.
OneDrive
Microsoft automatically backs up mobile photos if Camera Upload is enabled.
Simply:
- Sign into OneDrive.
- Open Pictures.
- Browse Camera Roll.
- Download missing images.
Dropbox
Dropbox keeps deleted files for a limited period depending on your account type.
Navigate to Deleted Files and restore available photos.
Cloud recovery is especially useful for people wondering how do I retrieve lost photos after accidentally deleting local copies.
Method 3: Retrieve Deleted Photos Using PandaOffice Drecov
Best for:
Photos permanently deleted from hard drives, memory cards, USB drives, and other storage devices.
Test Environment
- Windows 11 Pro
- External HDD
- SanDisk SD Card
- USB Flash Drive
- NTFS and exFAT file systems
When deleted photos are no longer available in the Trash or cloud storage, professional recovery software becomes one of the most effective options.
PandaOffice Drecov can recover deleted and lost files from a wide range of storage devices. It performs both quick and deep scans to locate recoverable image files, including JPG, PNG, RAW, TIFF, BMP, HEIC, and many camera-specific formats.
General recovery process:
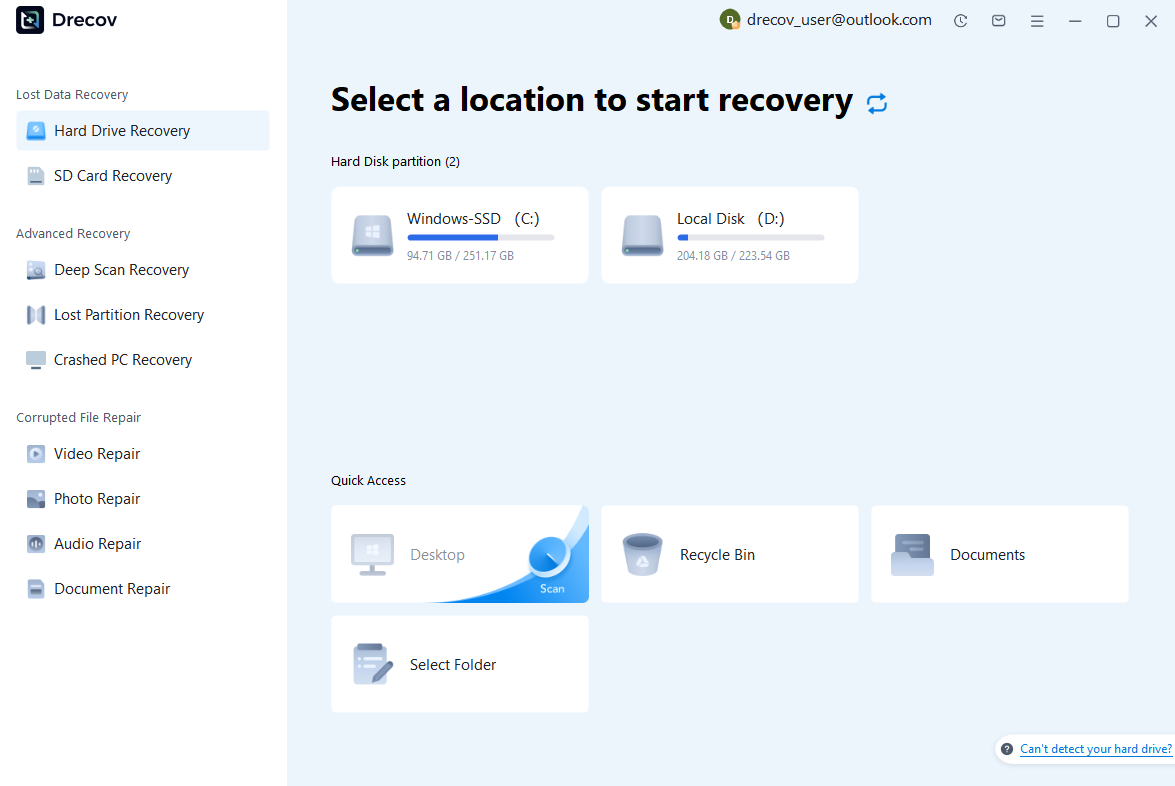
Step 1: Connect the Drive / USB)
Connect your device (SD card, HDD/SSD, or USB drive) to your computer and launch PandaOffice Drecov. Select the target device and start the scan. The software will perform a quick scan and deep scan to detect lost or deleted data.
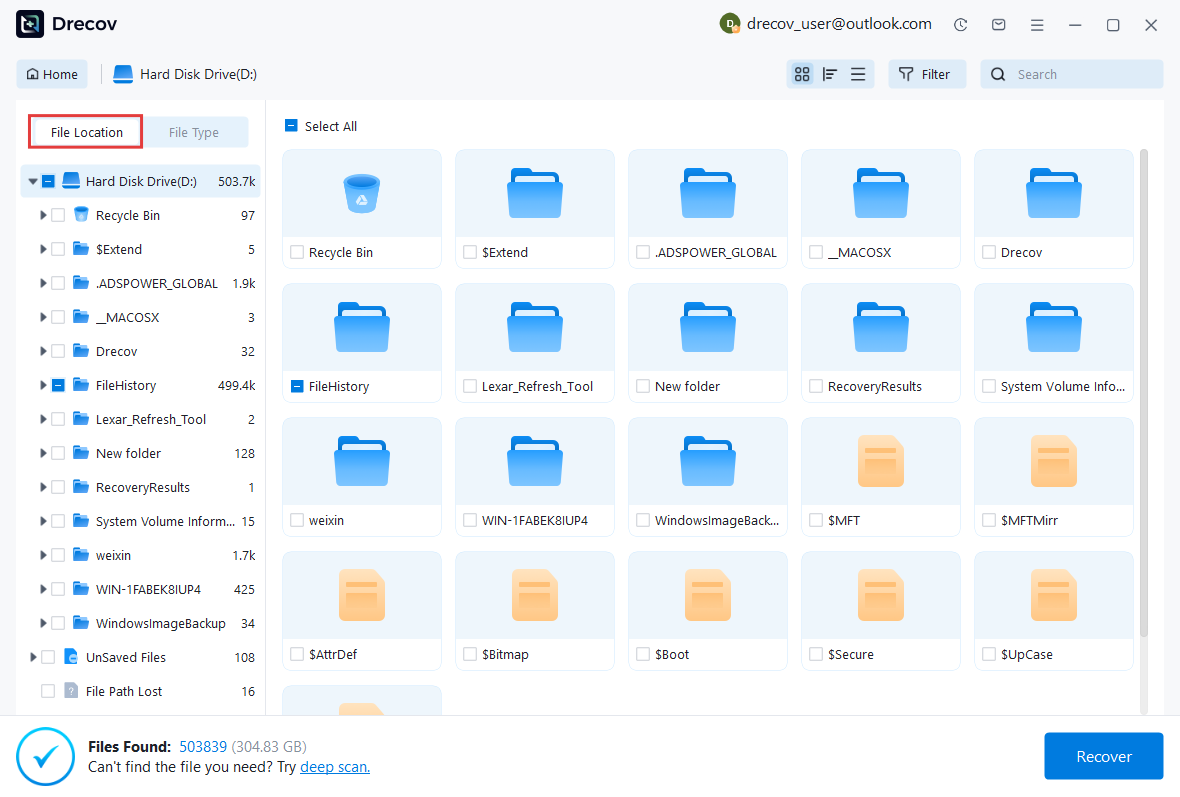
Step 2: Locate and Preview Lost Files
After scanning, browse the detected files and use the preview feature to check recoverable data. You can preview documents (Word, Excel, PDF), photos, and videos to ensure file integrity before recovery.
Step 3: Recover and Save to a New Location
Select the files you want to restore and click recover. Save all recovered data to a different drive or location (not the original device) to avoid overwriting lost data.

Why Choose PandaOffice Drecov Recovery Software?
PandaOffice Drecov offers a fast, secure, and user-friendly solution for recovering lost files across multiple scenarios. Whether you need email recovery, ZIP File Recovery, format data recovery, or help to recover deleted drafts Outlook, the software provides reliable recovery performance for both personal and business users.
PandaOffice Drecov supports recovery from formatted hard drives, SSDs, USB drives, SD cards, and external storage devices. Its advanced scanning engine can locate deleted archives, damaged ZIP files, lost Outlook drafts, and accidentally removed documents with high accuracy. For users searching for how to find deleted messages in Teams, PandaOffice Drecov can also help recover exported chat files, attachments, and related local cache data when available.
After recovery, test the file again. If the audio stream was damaged because of storage issues, a recovered version may play normally.
This method is particularly useful when only a few files exhibit audio problems while VLC works correctly with all other media.
This method can help users recover files from floppy disk storage after accidental deletion, formatting, or logical corruption.
The evaluation used a dedicated desktop workstation running a clean installation of Windows 11 Pro (Build 22631). The system featured an Intel Core i7 processor, 32GB of RAM, and a PCIe Gen4 solid-state drive. A 64GB SanDisk Extreme PRO memory card formatted with the exFAT file system served as the testing media. The test intentionally detached the card’s logical file allocation structures to simulate a realistic file corruption scenario before the recovery process began.
One advantage is the preview function, which helps verify image integrity before recovery.
This approach works well when users need to retrieve lost photo files after accidental deletion, formatting, partition loss, or unexpected system crashes.
⚠️ Warning: Never recover files back to the same drive you are scanning, as doing so may overwrite recoverable data.
Method 4: Recover Photos from Local Computer Backups
Best for:
Users who regularly back up computers or phones.
Test Environment
- Windows File History
- Windows Backup
- macOS Time Machine
- External USB Backup Drive
Many users overlook backups they’ve already created.
Windows File History automatically saves copies of folders such as Pictures, Documents, Desktop, and Videos.
To restore:
- Open the Pictures folder.
- Right-click.
- Select Restore previous versions.
- Choose an earlier version.
- Restore the missing photos.
Mac users can use Time Machine similarly.
Simply connect the backup drive, launch Time Machine, browse to the desired date, and restore the photos.
If your phone was backed up to a computer before deletion, you may also recover older copies through those backups rather than attempting complex recovery procedures.
Method 5: Restore Photos from an SD Card Backup
Best for:
Photos originally stored on removable SD or microSD cards with available backups.
Test Environment
- Windows 11 Pro
- SanDisk Ultra 128GB microSD Card
- Kingston Canvas Go! Plus SD Card
- USB SD Card Reader
Many Android phones and digital cameras save photos directly to an SD card instead of internal storage. If you regularly copy your memory card to a computer, NAS, or external hard drive, restoring those backup files is often faster than running recovery software.
Begin by searching all locations where you may have previously copied the SD card contents. Common backup destinations include:
- External hard drives
- Desktop “Photos” folders
- NAS devices
- USB flash drives
- Personal cloud storage
If you find a backup folder, simply copy the missing images back to your preferred storage location.
For Windows users, you can also search by file extension such as .jpg, .jpeg, .png, .heic, .raw, .cr2, or .nef to locate forgotten copies.
If the SD card itself is still readable but some images are missing, avoid formatting it before checking for backups. Formatting reduces the chances of recovering deleted files if no backup exists.
This method is especially useful for photographers who routinely archive memory cards after important events.
⚠️ Warning: Do not continue taking new photos on the same SD card until recovery attempts are complete, as new images may overwrite deleted ones.
Method 6: Contact Professional Data Recovery Services
Best for:
Physically damaged storage devices or failed memory cards.
Test Environment
- Failed SD cards
- Physically damaged external hard drives
- Water-damaged smartphones
- SSDs with hardware failure
If software solutions fail because the storage device has suffered physical damage, professional recovery services may be your only option.
Professional technicians use specialized equipment capable of reading damaged storage media inside clean-room environments. They can often recover photos from devices affected by:
- Water damage
- Fire damage
- Broken USB connectors
- Failed memory chips
- Mechanical hard drive failures
- Severe file system corruption
Before selecting a recovery provider, ask these questions:
- Do they offer a free evaluation?
- Is there a “no data, no charge” policy?
- What types of devices do they support?
- How long does the recovery process usually take?
Keep in mind that professional recovery can be expensive, especially when physical repairs are required. However, if the lost images contain irreplaceable family memories or business data, the investment may be worthwhile.
To maximize success, avoid repeatedly powering on a damaged device. Additional attempts may worsen the damage and reduce recovery possibilities.
Method 7: Recover Photos Through File History or System Backup
Best for:
Computers with scheduled backup features enabled.
Test Environment
- Windows 10
- Windows 11
- File History
- Backup and Restore (Windows)
- macOS Time Machine
Operating systems often include automatic backup tools that users forget they’ve enabled. These utilities periodically save copies of personal files, making them valuable when photos are accidentally deleted.
Using Windows File History
If File History is enabled:
- Open the folder where the deleted photos were originally stored.
- Right-click inside the folder.
- Choose Restore previous versions.
- Select an available backup date.
- Browse the older version.
- Restore the desired photos.
Using Backup and Restore
Older Windows systems may use Backup and Restore instead of File History.
Open Control Panel, navigate to Backup and Restore, and search available backups for the missing image files.
Using Time Machine on macOS
Mac users can connect their Time Machine backup drive and browse previous snapshots of the Photos Library or image folders.
Because these backups are created automatically, they often contain pictures deleted weeks or even months earlier.
If you’re wondering how do I retrieve lost photos after accidentally deleting files from your computer, built-in backup features should always be checked before attempting more advanced recovery methods.
Best for:
Photos that were previously shared through messaging apps or social media.
Test Environment
- Facebook Messenger
- Telegram
- Google Photos Shared Albums
- Apple Shared Library
Sometimes the easiest recovery solution doesn’t involve recovering the original file at all.
If you’ve previously shared the missing photos with friends, relatives, or coworkers, they may still have copies stored on their own devices or in shared cloud albums.
Places worth checking include:
- WhatsApp chats
- Telegram conversations
- Facebook Messenger attachments
- Email messages
- Shared Google Photos albums
- Apple Shared Library
- Family cloud folders
Ask the recipient whether they still have the original image rather than a compressed preview. Many messaging applications reduce image quality unless photos were sent as documents or in original resolution.
While this approach may not restore metadata such as the original creation date, it can still help recover meaningful memories when every other recovery option has failed.
Tips to Improve Photo Recovery Success
Stop Using the Device Immediately
The moment you realize photos are missing, avoid taking new pictures, installing applications, downloading files, or recording videos. Every write operation increases the possibility that deleted data will be overwritten.
This recommendation is particularly important for smartphones with internal flash storage, where background system processes continuously write temporary files.
Quick action greatly improves the chances to retrieve lost photo files successfully.
Check Every Backup Location
Before assuming your photos are permanently gone, search every possible backup source.
Many users have copies stored in multiple locations without realizing it. Look through:
- Google Photos
- iCloud Photos
- OneDrive
- Dropbox
- External hard drives
- NAS devices
- USB drives
- Old computers
Searching by file name, creation date, or image type can reveal copies you forgot existed.
If you’re trying to retrieve lost photos Android, remember that Google Photos may have synchronized your images even if your phone gallery appears empty.
Avoid Formatting Storage Devices Prematurely
Formatting may seem like a quick fix when a memory card reports errors, but it should only be considered after recovery attempts are complete.
In many cases, formatting removes the file system structure while leaving the underlying image data intact. However, continuing to use the formatted device greatly reduces recovery success.
If a storage device suddenly becomes unreadable:
- Stop using it immediately.
- Do not save new files.
- Avoid running unnecessary repair utilities.
- Attempt recovery before reformatting.
Following these precautions provides the best opportunity to recover valuable photos.
⚠️ Warning: Initializing or repartitioning a storage device before recovery can permanently eliminate recoverable files.
Frequently Asked Questions
How do I retrieve lost photos after permanent deletion?
Even if photos have been permanently deleted from the Recycle Bin or Recently Deleted folder, recovery may still be possible. First, check cloud backups, computer backups, or external storage. If no backup exists, use a trusted recovery tool as soon as possible before new data overwrites the deleted files.
Can I retrieve lost photos Android without root?
Yes. In many situations, you can retrieve lost photos Android without rooting your device. Start by checking the Gallery Trash, Google Photos Trash, and any cloud backups linked to your Google account. If the photos were stored on a removable SD card, recovery software can often scan the card directly without requiring root access.
How to retrieve lost photos on Android phone after factory reset?
If you want to know how to retrieve lost photos on Android phone after a factory reset, begin by restoring any available Google backup. If no backup exists and the photos were stored only in internal memory, recovery may be limited because factory resets often overwrite encryption keys. However, SD card data may still be recoverable if the card wasn’t formatted during the reset.
How to retrieve lost photos on Android after deleting them months ago?
If you’re searching for how to retrieve lost photos on Android, first determine whether new data has overwritten the deleted storage space. Check Google Photos, cloud services, older computer backups, shared albums, and archived storage before concluding that your images are permanently lost. You can also use recovery software to scan removable SD cards if you haven’t replaced the deleted files with new data.
Final Thoughts
Losing important pictures can feel overwhelming, but permanent loss isn’t always inevitable. Whether the images disappeared because of accidental deletion, formatting, software issues, or storage corruption, several recovery methods are worth trying before giving up.
Start with the simplest options by checking the Recently Deleted folder, Trash, and cloud backups. If those don’t help, look for local computer backups or archived copies on external drives. When no backup is available, professional recovery software can often recover deleted photos from supported storage devices, while severe hardware failures may require assistance from a data recovery service.
If you’ve been asking how to retrieve lost photos, how do I retrieve lost photos, or how to retrieve lost photos on android, the most important step is to act quickly. Stop using the affected storage device, avoid writing new data, and choose the recovery method that best matches your situation. With the right approach, many seemingly lost photos can still be recovered successfully.


