


Losing important files is stressful. Losing them again after emptying the Recycle Bin feels even worse. One accidental click and suddenly your documents, photos, videos, spreadsheets, or work projects seem gone forever. Many people believe that once files are removed from the Recycle Bin, recovery becomes impossible. Thankfully, that’s not always true. In many situations, deleted files can still be restored if you act quickly and use the right recovery methods.
This guide explains exactly how to restore data deleted from recycle bin using built-in Windows tools, backups, cloud storage recovery, professional recovery software, and advanced methods. Whether you accidentally deleted family photos, business files, or school documents, this article walks you through every major recovery option step by step.
Understanding How Recycle Bin Deletion Works
Most people think the Recycle Bin works like a digital shredder. You delete a file, empty the Recycle Bin, and the file disappears forever. In reality, Windows handles deletion in a much smarter—and more forgiving—way. When you empty the Recycle Bin, the operating system usually removes only the reference to the file, not the actual contents immediately. The file data often remains hidden on the storage drive until new information overwrites it.
Imagine your hard drive as a giant parking lot. Deleting a file doesn’t bulldoze the parked car instantly. Instead, Windows simply removes the parking reservation and labels the spot as “available.” Until another car parks there, the original vehicle still physically exists. Recovery software searches those unclaimed parking spaces looking for recoverable data fragments.
Microsoft officially states that deleted file recovery becomes harder once the system starts reusing that free storage space. That’s why speed matters so much after accidental deletion.
The chances of successful recovery depend on several factors:
- Time passed after deletion
- Drive type (HDD or SSD)
- Amount of new data written
- File system type (NTFS, FAT32, exFAT)
- Whether TRIM is enabled on SSDs
Traditional hard drives (HDDs) usually offer better recovery success rates because deleted data often remains untouched longer. SSD drives, however, use a feature called TRIM that can permanently erase deleted blocks much faster. Community discussions on Reddit frequently mention SSD recovery becoming nearly impossible once TRIM processes run after deletion.
Understanding how to restore data deleted from recycle bin starts with knowing how deletion works, which gives you one massive advantage: you know there’s still hope.
First Things to Do Immediately After Deletion
The first few minutes after deleting files from the Recycle Bin are critical. Your actions during this window can determine whether your files remain recoverable or disappear forever. The biggest mistake people make is continuing to use the computer normally. Every download, browser tab, app installation, or saved document increases the chance that Windows will overwrite the deleted file space.
Microsoft specifically recommends minimizing or completely avoiding computer usage immediately after data loss. That advice may sound dramatic, but it makes perfect sense when you understand how storage systems operate behind the scenes.
Here’s what you should do immediately:
| Action | Why It Matters |
| Stop using the drive | Prevents overwriting deleted files |
| Avoid downloads | New files may overwrite lost data |
| Don’t install recovery software on the same drive | Installation may destroy recoverable sectors |
| Disconnect external storage safely | Protects remaining data |
| Begin recovery quickly | Improves success rates |
If your deleted files were on an external drive, SD card, or USB device, unplug it immediately until you’re ready to perform recovery. If the deleted files were stored on your Windows system drive, avoid restarting repeatedly or installing large applications.
Think of deleted data recovery like rescuing footprints in wet sand before the tide comes in. The longer you wait, the more the evidence disappears.
Method 1: Restore Files Using Windows File Recovery
One of the most powerful built-in recovery tools available today is Windows File Recovery. This is an official Microsoft command-line utility designed specifically for restoring deleted files after they are removed from the Recycle Bin. This free tool works on Windows 10 (build 2004 and above) and Windows 11 systems. It supports recovery from internal hard drives, SSDs, USB drives, external hard drives, and SD cards.
Microsoft explains that the tool supports both “Regular” and “Extensive” recovery modes depending on the drive condition and deletion circumstances.
How to Install and Use Windows File Recovery
- Step 1: Open the Microsoft Store on your Windows PC.
- Step 2: Search for Windows File Recovery in the search bar.
- Step 3: Click the Get or Install button to download the application.
- Step 4: Once installed, press the Windows Key + S, type
Windows File Recovery, right-click the application, and select Run as administrator.
The tool uses command syntax rather than graphical menus, which can seem intimidating at first. However, once you understand the basics, it becomes surprisingly effective when you need to figure out how to restore data deleted from recycle bin.
Basic Recovery Command Examples
To run a basic recovery, use the following format in the command prompt:
$$\text{winfr source-drive: destination-drive: [/mode] [/switches]}$$
For example:
winfr C: D: /regular /n \Users\YourName\Documents\
This specific command tells Windows File Recovery to:
- Recover files from source drive C:
- Save recovered files to destination drive D:
- Use the Regular recovery mode.
- Search specifically inside the Documents folder.
Warning Prompt: Microsoft recommends saving recovered files to a different drive than the source drive to reduce overwriting risks. Never target the same drive as both source and destination.
The tool also supports wildcard searches for specific file types. If you want to search for deleted images, type:
winfr C: D: /regular /n *.jpg
For deeper recovery situations, such as formatted drives or files deleted a long time ago, Microsoft suggests using Extensive mode instead:
winfr C: D: /extensive /n \ProjectFiles\
Method 2: Recover Deleted Files Using Backup Systems
One of the easiest recovery methods is restoring files from built-in backup systems. Windows includes several backup and restoration features that many users forget even exist until disaster strikes.
Restore Previous Versions
Windows sometimes creates shadow copies and restore points automatically. These backups may contain earlier versions of folders before the deletion occurred.
- Step 1: Open File Explorer and navigate to the folder that originally contained the deleted files.
- Step 2: Right-click the affected folder and select Properties (or select Restore previous versions directly from the context menu if available).
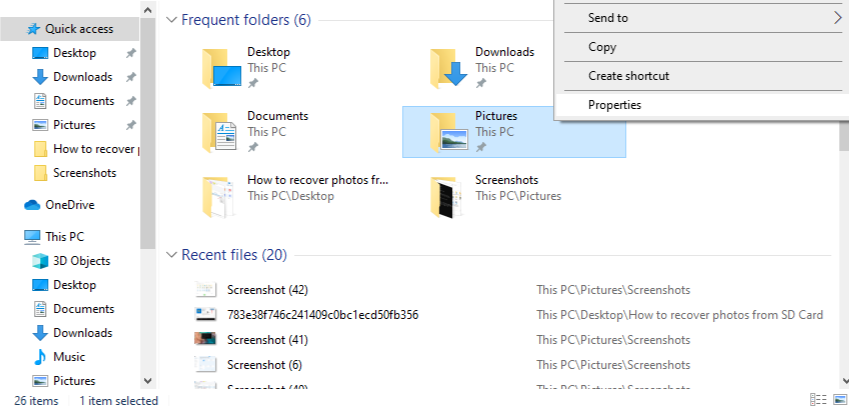
- Step 3: Click on the Previous Versions tab at the top of the properties window.
- Step 4: Browse the available automated backups sorted by date and time.
- Step 5: Select the desired folder version and click Restore to bring your files back.
File History Recovery
If you previously enabled File History, you can use it to roll back your folders to a time before the Recycle Bin was emptied.
- Step 1: Open the Windows Start menu, type
Control Panel, and press Enter. - Step 2: Navigate to System and Security and then click on File History.
- Step 3: Click on Restore personal files in the left-hand menu pane.
- Step 4: Use the left and right arrow buttons at the bottom to browse through different backup snapshots.
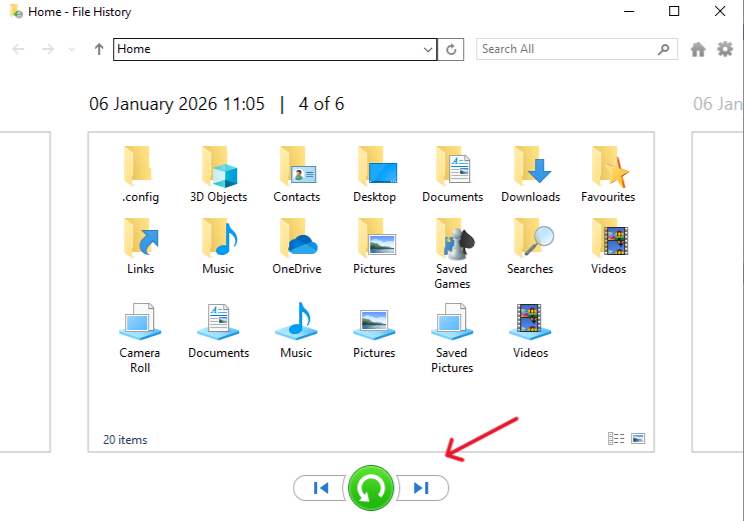
- Step 5: Locate the missing files, select them, and click the green Restore button to return them to their original location.
File History acts like a time machine for your files. It continuously creates backup snapshots that can rescue deleted data even after the Recycle Bin has been emptied.
Method 3: Recover Files From Cloud Storage
Cloud backup systems also play a huge role today. If you sync your desktop, documents, or pictures folders with OneDrive, your files might not be permanently lost. Services like OneDrive maintain their own deleted file retention periods.
Microsoft notes that personal OneDrive accounts generally keep deleted files for 30 days, while business accounts may retain them for up to 93 days depending on administrator settings. That means your “permanently deleted” file might still be quietly sitting in cloud storage waiting to be restored.
How to Restore From OneDrive Recycle Bin
- Step 1: Open your web browser and go to the official OneDrive Login Page.
- Step 2: Sign in using the same Microsoft account associated with your Windows computer.
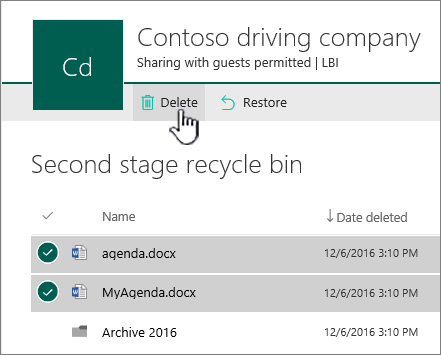
- Step 3: Look at the left-hand navigation pane and click on the Recycle bin option.
- Step 4: Browse through the items deleted from your cloud storage.
- Step 5: Check the selection boxes next to the files you wish to recover and click the Restore button at the top of the screen.
Once restored, OneDrive will automatically sync the files back down to your local hard drive, completing your search for how to restore data deleted from recycle bin.
Method 4: Ultimate Recovery via PandaOffice Drecov Data Recovery Software
When built-in Windows tools fail, command lines feel too complex, or cloud backups are missing, professional software offers the highest chance of success. This is where advanced file carving systems become necessary to piece together lost data blocks.
Why Choose PandaOffice Drecov Data Recovery Software?
The PandaOffice Drecov data recovery software provides an intuitive, highly advanced solution engineered specifically for complex data loss scenarios. Whether you are dealing with a standard emptied Recycle Bin, a shift-deleted file, a formatted partition, or a sudden system crash, this software bypasses operating system restrictions to read raw data sectors directly.
Key benefits of using PandaOffice Drecov data recovery software include:
- Deep Scan Algorithms: Scans deep within raw storage sectors to reconstruct fragments of missing files.
- Real-Time Preview: Allows you to view images, documents, and videos before committing to the recovery process, saving time and storage space.
- Wide File Support: Recognizes over 1,000 file types across documents, multimedia, archives, and system files.
- Safe Sector Analysis: Operates in strict read-only mode, ensuring that the software never accidentally overwrites the very data you are trying to rescue.
⚠ Warning Prompt: Crucially, ensure you do NOT install the software on the same drive where the deleted files were located. For instance, if your lost files were on drive C:, install PandaOffice Drecov on drive D: or an external USB storage drive to prevent data overwriting.
Step-by-Step Guide to Using PandaOffice Drecov
Follow these specific operational steps to learn how to restore data deleted from recycle bin using this powerful tool.
- Step 1: Launch the Program and Choose a Scan Location. Open the application. On the main dashboard, you will see a list of connected storage drives, external devices, and common system locations. Select the Recycle Bin icon or choose the specific local disk (usually Drive C:) where your files lived before deletion. Click the Scan button to begin.

- Step 2: Filter and Preview Discovered Files. Use the search bar in the upper-right corner to type specific keywords or extensions (like
.docxor.png). Double-click on any file in the results list to open the preview window. If the preview displays cleanly without distortion, the file is fully intact and healthy.

- Step 3: Execute the Final File Recovery. Mark the checkboxes next to the files or folders you wish to salvage. Click the prominent Recover button located in the bottom-right corner of the user interface.

- Step 4: Select a Secure Destination Path. A directory browser window will prompt you to choose where to save the recovered files. Select an external hard drive, a secondary storage partition, or a network folder. Click OK to complete the operation.
Warning Prompt: Never save salvaged data back to the same drive partition where it was originally lost. Doing so can cause permanent file corruption by writing over parts of the remaining data blocks.
Useful Internal Links and Knowledge Base Assets
Once you have completed your data recovery process, you may want to address other data preservation, storage mapping, or hardware maintenance issues. Explore these additional step-by-step technical guides for more insights:
- If you need to backup or relocate your web browser configurations, read our detailed look into where Firefox bookmarks are stored on your PC.
- For immediate access to browser profile files across hidden system directories, check out how to find the Firefox bookmarks location to find your data instantly.
- If you are operating a multi-platform environment and external drives run into mounting bugs, use our comprehensive tutorial on how to fix a LaCie hard drive not showing up on Mac.
Common Recovery Mistakes to Avoid
Data recovery failures often happen because users panic and accidentally make the situation worse. One wrong decision can permanently destroy files that were otherwise perfectly salvageable.
- Mistake 1: Keeping the PC Running Normal Background Operations Leaving web browsers open, streaming videos, or playing games writes temporary cache files to your drive every second. This background activity can overwrite the exact storage sectors where your deleted files reside.
- Mistake 2: Running Multiple Aggressive Scans Simultaneously Launching three different data recovery programs at the same time stresses the drive controller, increases internal temperatures, and can lock up file system access handles. Use one reliable solution at a time.
- Mistake 3: Reformatting a Misbehaving Storage Drive If a drive acts sluggish after an accidental deletion, some users decide to format it to “start fresh” before scanning. This overwrites critical root directory tables, making structural file reconstruction far more difficult.
- Mistake 4: Ignoring Cloud and Local Backups First Many users download heavy data tools without checking if an automated backup system already saved a copy of the file 24 hours prior. Always check your backups first.
How to Prevent Permanent Data Loss
The best recovery strategy is preventing catastrophic loss before it happens. Most people only think about backups after losing important files. That’s like buying insurance after the house catches fire.
Implement a 3-2-1 Backup Strategy
To secure your data permanently against accidental deletion, device failure, or theft, use the industry-standard 3-2-1 backup protocol:
- Maintain at least three (3) copies of your data.
- Store backups across two (2) different media types (e.g., your local drive and an external hard drive).
- Keep one (1) copy offsite or in a secure cloud storage environment.
Adjust Windows Recycle Bin Settings
You can customize Windows Recycle Bin storage size settings to retain deleted files longer before automatic removal.
- Step 1: Right-click the Recycle Bin icon on your desktop and select Properties.
- Step 2: Select the specific drive volume you want to configure.
- Step 3: Under Settings for selected location, check the radio box for Custom size.
- Step 4: Increase the maximum size value in Megabytes (MB). For example, entering
20480allocates 20 Gigabytes of holding space. - Step 5: Uncheck the box that says Display delete confirmation dialog if you want fewer popups, or leave it checked for safety. Click Apply and OK.
How to restore data deleted from recycle bin FAQs
1. Can files deleted from the Recycle Bin really be recovered? Yes, absolutely. When you empty the Recycle Bin, Windows does not wipe the actual file content; it simply marks those storage blocks as free space. Until new applications, downloads, or system files overwrite those exact sectors, recovery software can scan the drive and bring your files back.
2. What is the best free tool for Recycle Bin recovery? The best free utility is Microsoft’s official command-line application, Windows File Recovery. For users who prefer a graphical interface, tools like Recuva offer free basic scanning options to look for recently lost data.
3. Can SSD drives recover deleted files? Yes, but the window of opportunity is much smaller compared to traditional hard drives. Because SSDs use the TRIM command to automatically clear deleted blocks for optimal performance, you must run recovery software or shut down the machine immediately after the deletion occurs to beat the TRIM cycle.
4. How long do deleted files remain recoverable? There is no fixed time limit. A file can remain recoverable for weeks if the computer sits idle, or it can be overwritten within minutes if you download a large software application or update your operating system. The volume of drive activity determines file survival, not the calendar.
5. Can OneDrive restore permanently deleted files? Yes, it can. OneDrive maintains an independent cloud-based Recycle Bin separate from your local computer. Personal Microsoft accounts retain files within this web bin for up to 30 days, while enterprise or school business accounts keep them for up to 93 days, allowing for easy cloud restoration.
Conclusion
Accidentally deleting files from the Recycle Bin can feel devastating at first, especially when important work documents, treasured photos, or personal videos suddenly disappear. The good news is that permanently deleted files are often not truly gone immediately. Modern storage systems frequently leave recoverable traces behind until new data overwrites them.
Using an advanced tool like PandaOffice Drecov data recovery software provides a straightforward, highly reliable way to scan, preview, and rescue lost files without needing technical expertise. However, strong backup habits remain the best long-term defense against permanent data loss. Combining cloud backups, external storage, File History, and smart file management creates multiple safety nets that protect valuable information from accidental deletion disasters.


