


Many users purchase high-capacity SSDs only to notice that their drives display less storage than advertised. Situations like ssd not showing up or partitions appearing smaller than expected are common, particularly on Windows systems. Understanding why your laptop won’t recogize a new ssd or why external drives show as unallocated is essential for proper troubleshooting.
Several factors can cause SSDs to show reduced space, including partitioning issues, formatting differences, BIOS settings, and hidden reserved space. In addition, operating system reporting discrepancies can make an SSD appear smaller than its actual capacity. For gamers or heavy users, knowing how to move a gamer to a sdd steam efficiently or whether to choose mbr or gpt for ssd can impact both performance and usable storage.
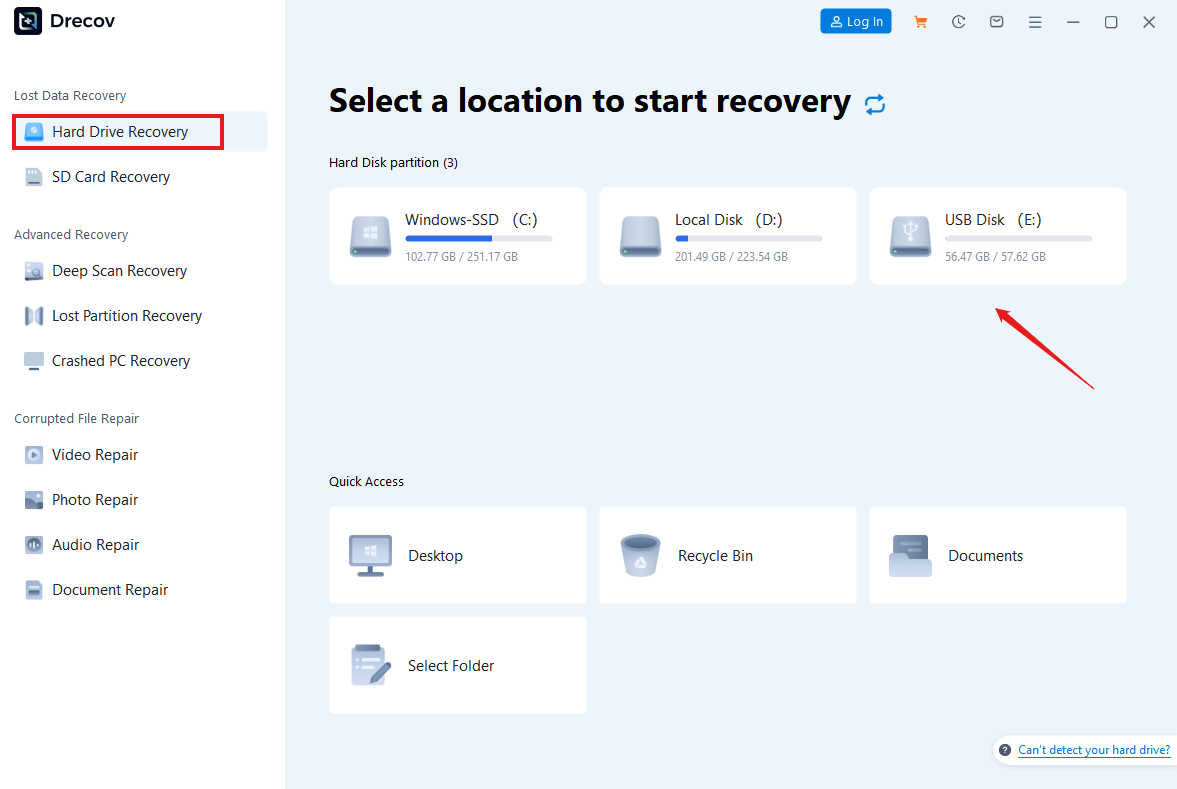
⚠️Warning: Avoid making major changes to your SSD before backing up important data. Improper formatting or partitioning can result in permanent data loss. Tools like Pandaoffice Drecov can assist with data recovery if something goes wrong during troubleshooting.
This guide explains step-by-step methods to address situations where your SSD shows less space than it has, including using disk management tools, formatting options, partition adjustments, and professional recovery when needed.
I have an ASUS U500VZ. The laptop has two pre-shipped SSD disks, each with the capacity of 128Gb. However, Windows shows less capacity (88,4 and 111Gb). How so?—from Microsoft Store
Why SSDs Sometimes Show Less Space
Understanding why SSDs display less capacity than expected helps diagnose issues and choose the right solution. Common reasons include:
Partition and Formatting Differences
Many SSDs come preformatted in a way that reduces visible storage. Windows calculates space using binary measurements (1 GB = 1024³ bytes), while manufacturers use decimal (1 GB = 1000³ bytes). This discrepancy alone can account for several gigabytes of “missing” space.
Unallocated or Hidden Partitions
An external ssd says unallocated is a common message when the disk has not been initialized or partitioned. Similarly, SSDs may contain hidden partitions used for system recovery or firmware, reducing available space for the user.
BIOS and Hardware Recognition
Sometimes the SSD is physically recognized but not properly initialized in BIOS or system firmware. If your laptop won’t recogize a new ssd, updating firmware or checking BIOS settings may resolve the issue.
By understanding these causes, users can plan corrective steps such as partition creation, formatting, or using professional tools like Pandaoffice Drecov to restore accidentally lost data during troubleshooting.
Method 1: Initialize and Format the SSD
If your SSD shows less space or appears unallocated, initializing and formatting it correctly can restore its full usable capacity.
Steps to Initialize an SSD
- Open Disk Management in Windows.
- Locate the new SSD (it may show as “Unallocated”).
- Right-click and select Initialize Disk.
- Choose between MBR or GPT for SSD, depending on your system and requirements. GPT is recommended for drives larger than 2 TB or UEFI systems.
- Create a new volume and format it using NTFS or exFAT.
This method often resolves issues where an external ssd says unallocated and allows the operating system to recognize the full capacity.
⚠️Warning: Initializing the disk will erase all data on it. Make sure to back up any important files or use recovery tools like Pandaoffice Drecov if accidental data loss occurs.
Correctly formatting the SSD ensures it is ready for use and displays the correct storage in Windows, making it suitable for large programs, games, or file storage.
Method 2: Check BIOS and System Recognition
Sometimes, the operating system cannot fully recognize the SSD due to BIOS settings or firmware issues. Ensuring proper recognition is crucial, especially if your laptop won’t recogize a new ssd.
Steps to Verify SSD in BIOS
- Restart your computer and enter BIOS/UEFI settings.
- Check if the SSD is listed under storage devices.
- If the SSD is missing, try changing SATA mode (AHCI vs. RAID) or updating BIOS firmware.
- Save changes and reboot.
If the SSD appears in BIOS but not in Windows, the issue is usually with partitioning or formatting. If it doesn’t appear at all, hardware issues or cable connections may be the cause. Using professional software like Pandaoffice Drecov can help recover data from partially recognized drives or previous storage attempts.
Proper BIOS recognition ensures your SSD can be partitioned and fully utilized, which is essential for gamers moving large libraries or professionals needing maximum storage performance.
Method 3: Recover Lost Data Before Repartitioning
When attempting to fix a ssd not showing up or repartition a drive, you risk losing existing data. Before making changes, it’s crucial to recover any important files.
Steps for Safe Data Recovery
- Avoid writing new data to the SSD.
- Use Pandaoffice Drecov to scan the drive for recoverable files.
- Preview and restore important files to a safe location.
- Proceed with formatting, initializing, or repartitioning.
Why choose Pandaoffice Drecov?
- Selecting the right recovery software is essential when unexpected data loss occurs. Pandaoffice Drecov provides a powerful, secure, and efficient solution designed to handle a wide range of storage failure scenarios across different devices.
- Advanced Recovery for SD Cards and Hard Drives
- Pandaoffice Drecov supports recovering photos from an SD card as well as performing professional hard drive recovery. Whether files were accidentally deleted, a storage device was formatted, or data was lost due to corruption, its deep scan technology thoroughly analyzes storage sectors to locate recoverable content. The software is compatible with internal drives, memory cards, and various file systems, ensuring flexible recovery options in different environments.
- Reliable Support for Recovering External Hard Drives
- The software also specializes in recovering external hard drives that become inaccessible due to accidental formatting, partition loss, or file system damage. It automatically detects connected devices and performs comprehensive scans without altering original data, helping improve recovery success rates.
- Efficient Recovery of Deleted Photos
- One of its strongest capabilities is recovering deleted photos, even after permanent deletion from the Recycle Bin. The built-in preview feature allows users to verify files before restoration, ensuring accurate and controlled recovery.
- With strong scanning performance, broad device compatibility, and an intuitive interface, Pandaoffice Drecov offers a dependable and professional solution for modern data recovery needs.


⚠️Warning: Attempting partition recovery without a backup may overwrite existing files, making them unrecoverable.
Recovering files first ensures that even if the SSD needs full reinitialization, your data remains intact. This is especially important when moving large gaming libraries or professional project files to a new drive.
Method 4: Extend Partitions to Use Full SSD Space
After initializing and formatting, some SSDs may still display less usable space due to unallocated sections or partition misalignment. Extending partitions ensures that the full storage capacity is accessible.
Steps to Extend SSD Partitions
- Open Disk Management in Windows.
- Locate your SSD and check for unallocated space.
- Right-click the main partition and select Extend Volume.
- Follow the wizard to merge unallocated space into the existing partition.
This step is crucial if your ssd not showing up correctly or if the system reports less available space than advertised. Extending partitions also ensures that large files or applications, including games, can be stored without errors.
⚠️Warning: Extending partitions may overwrite data in the adjoining unallocated space. Make sure important files are backed up or recovered first using Pandaoffice Drecov.
Correctly extended partitions prevent storage fragmentation and maximize usable SSD space, which is essential for gamers wanting to move a gamer to a sdd steam efficiently.
Method 5: Migrating Operating Systems or Game Libraries
Users upgrading to SSDs often want to move their OS or large libraries. Migration tools or disk cloning can help, but precautions are necessary to avoid data loss.
Steps for Safe Migration
- Backup important files using Pandaoffice Drecov in case of errors.
- Choose a migration tool or clone the source drive to the SSD.
- Select partitions carefully to avoid overwriting existing data.
- Boot from the SSD and verify all files, including games or software, are intact.
Migrating applications, games, or the OS ensures that your system takes full advantage of the SSD’s speed and capacity. Choosing between MBR or GPT for SSD during migration depends on whether your system uses UEFI or legacy BIOS, and GPT is recommended for drives larger than 2 TB.
Method 6: Handling Hidden or Reserved Partitions
Some SSDs come with hidden or reserved partitions that reduce visible space. These may include recovery partitions or firmware storage.
Steps to Check and Adjust
- Open Disk Management and inspect the SSD for partitions not assigned a drive letter.
- Verify if these partitions are necessary for system recovery.
- If safe, delete unnecessary partitions and merge space into main volumes.
⚠️Warning: Deleting recovery or system partitions without backup can result in irreversible data loss. Always back up essential files using Pandaoffice Drecov before making changes.
By handling hidden partitions properly, users can ensure their laptop won’t recogize a new ssd issue does not limit usable storage.
Preventive Measures for SSD Storage Issues
Preventing future issues is as important as recovery. Proper setup ensures full SSD capacity and smooth performance.
Recommended Practices
- Always check BIOS and firmware compatibility.
- Choose MBR or GPT for SSD correctly based on system architecture.
- Maintain regular backups of important data using Pandaoffice Drecov.
- Avoid abrupt shutdowns or unsafe disconnections, especially for external SSDs.
- Monitor SSD health periodically to detect firmware or wear issues early.
Following these best practices prevents most issues where ssd not showing up or partitions appear smaller than expected.
Final Thoughts: Maximizing SSD Capacity
In conclusion, SSDs showing less space than advertised is common, but it can be resolved with proper troubleshooting:
- Initialize and format the SSD correctly
- Extend partitions to use unallocated space
- Migrate OS and libraries safely
- Handle hidden or reserved partitions carefully
- Use professional tools like Pandaoffice Drecov to recover data before any risky operations
By following these steps, users can fully utilize their SSD, ensure system performance, and prevent data loss while maintaining full storage capacity for applications, games, or personal files.


