


Accidentally losing important work can be a heart-wrenching experience. Whether it is a crucial business proposal, a thesis, or sentimental photos, the panic that sets in after realizing you emptied the trash is universal. However, before you despair, it is vital to understand that “deleted” does not always mean “gone.” This comprehensive guide will teach you exactly how to get back documents deleted from recycle bin using professional strategies and accessible tools.
Understanding What Happens When You Delete Files
To master data recovery, you must first understand the “illusion” of deletion. Windows is designed for efficiency, and its method of handling files reveals why recovery is possible.
What the Recycle Bin Actually Does
When you delete a document on a Windows computer, the system usually sends it to the Recycle Bin rather than erasing it completely. This feature acts as a temporary holding area for deleted files, allowing you to restore them easily if you change your mind. Many users think the Recycle Bin is just a simple trash folder, but it actually serves an important safety purpose. It prevents permanent data loss from accidental deletions.
However, things change when the Recycle Bin is emptied or when files are deleted using Shift + Delete. At that point, the operating system removes the file’s reference from the file system index. This makes the file invisible to the user, giving the impression that it is gone forever. In reality, the data may still exist physically on the storage device until it is overwritten by new data.
Why Files Can Still Be Recovered
File deletion is often misunderstood. Most people assume that deleting a file instantly removes it from the disk. In truth, deletion is more like erasing a table of contents entry in a book. The content is still there—it just isn’t listed anymore.
When Windows deletes a file, the system marks the space previously used by that file as available for new data. Until another file overwrites that space, the original data remains recoverable using specialized tools. This is the core principle behind how to get back documents deleted from recycle bin. These tools scan the storage device at a low level, searching for traces of deleted files and reconstructing them whenever possible. The success rate depends on several factors, including how long ago the file was deleted, how much the computer has been used since then, and whether the drive is a traditional hard disk or a solid-state drive (SSD).
Immediate Actions After Deleting Important Documents
Before we dive into the technical steps of how to retrieve deleted documents from recycle bin, you must follow these “Golden Rules” to prevent permanent data destruction.
Stop Using the Computer Immediately
The moment you realize that a document was deleted from the Recycle Bin, the best action is surprisingly simple: stop using your computer immediately. Every time you create, copy, or download a new file, the operating system writes data to the storage drive. That new data could overwrite the exact space where your deleted document is stored.
Think of it like writing on a whiteboard. If someone erases a sentence but hasn’t written anything else yet, you might still see the faint outline of the original text. But once someone writes over it, the old message disappears completely. Stopping computer activity dramatically improves recovery chances.
Avoid Installing New Programs
Many people make the mistake of immediately downloading recovery software to the same drive where the files were deleted. However, this is risky because installing new software writes large amounts of data to the disk, which may consequently overwrite the deleted documents you are trying to recover.
Instead, the safer approach is to install recovery software on a different drive or an external USB device. From there, you can use it to scan the drive containing the lost files. Ultimately, this simple step can make the difference between successfully recovering documents and losing them permanently.
Method 1 – Using PandaOffice Drecov for Professional Recovery
If you need a reliable, user-friendly way to solve the problem of how to get data deleted from recycle bin, PandaOffice Drecov is a premier choice. This software is specifically engineered to handle complex data loss scenarios where Windows built-in tools might fail. It supports a wide array of file types, including .docx, .pdf, .xlsx, and more.
⚠ Warning: Install it on a drive different from the one where your data was lost to prevent overwriting.
Steps to Use PandaOffice Drecov
Follow these steps carefully to maximize your chances of success:
- Step 1: Select the Location. Launch the program. On the main interface, you will see a list of drives and common locations. Select “Recycle Bin” or the specific local disk (usually C:) where the files resided.

- Step 2: Initiate the Scan. Click the “Scan” button. PandaOffice Drecov will first perform a “Quick Scan” to find recently deleted items, followed automatically by a “Deep Scan” to locate fragmented data.

- Step 3: Filter and Preview. Once the scan is complete, use the search bar or the file type filter to find your documents. You can double-click a file to preview its content, ensuring the data is intact before recovery.

- Step 4: Recover and Save. Check the boxes next to the documents you need and click “Recover.”
Warning: Always save the recovered files to a different drive (like an external HDD) to avoid corruption.
Method 2 – Recover Files Using Windows File Recovery
For those comfortable with a bit of technical “heavy lifting,” Microsoft provides a command-line utility. This is a solid option for how to get back documents deleted from recycle bin if you prefer using official Microsoft tools.
What Is Windows File Recovery
Windows includes a built-in recovery tool called Windows File Recovery, available through the Microsoft Store. This command-line utility can restore files that were deleted from local storage devices such as hard drives, USB drives, or memory cards.
Steps to Use Windows File Recovery
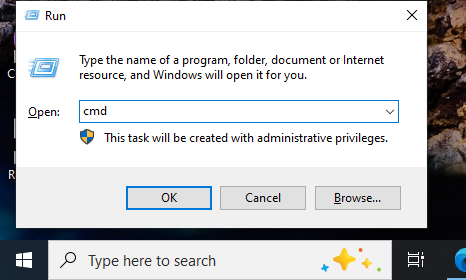
- Step 1: Launch. Open the Start menu, type
cmd, right-click “Command Prompt,” and select “Run as administrator.”
- Step 2: Enter the Command. Use the basic syntax:
winfr source-drive: destination-drive: [/mode] [/switches]. For example, to recover a specific Word document from your C: drive to an E: drive, you might type:winfr C: E: /regular /n \Users\<username>\Documents\*.docx - Step 3: Confirm. Type
Ywhen prompted to start the recovery. - Step 4: View Results. The tool will create a folder named “Recovery_[date_time]” on your destination drive containing the retrieved files.
Method 3 – Restore Documents Using File History
If you have been proactive with your system settings, you might not need third-party software at all. File History is a built-in Windows feature that periodically snapshots your folders.
How File History Works
File History automatically saves versions of your files. If File History was enabled before the documents were deleted, recovering them becomes incredibly simple. Instead of relying on complex recovery software, you can restore an earlier version of the file directly from the backup.
Steps to Restore via File History
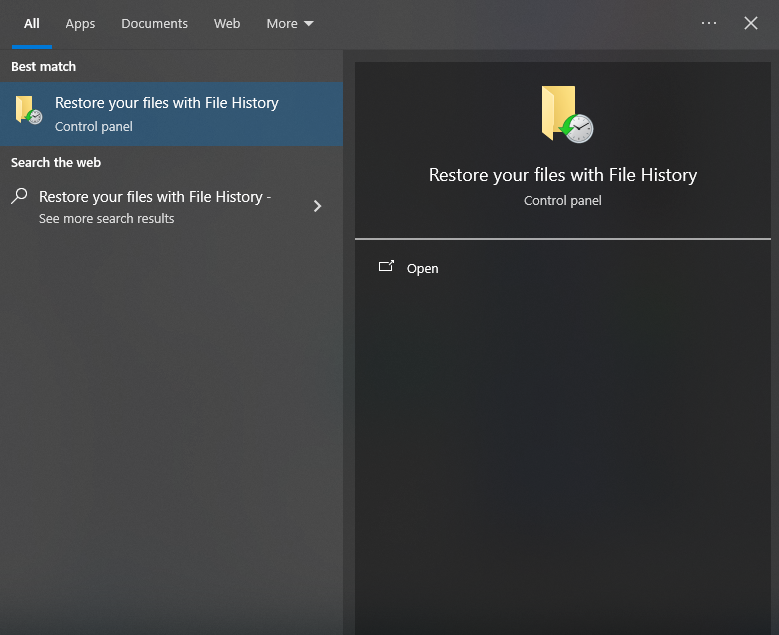
- Step 1: Search for History. Type “Restore your files with File History” in the Windows search bar and press Enter.
- Step 2: Locate the Folder. Navigate to the folder where your document was last seen.
- Step 3: Timeline Navigation. Use the left and right arrows at the bottom of the window to scroll through different versions (dates/times) of that folder.
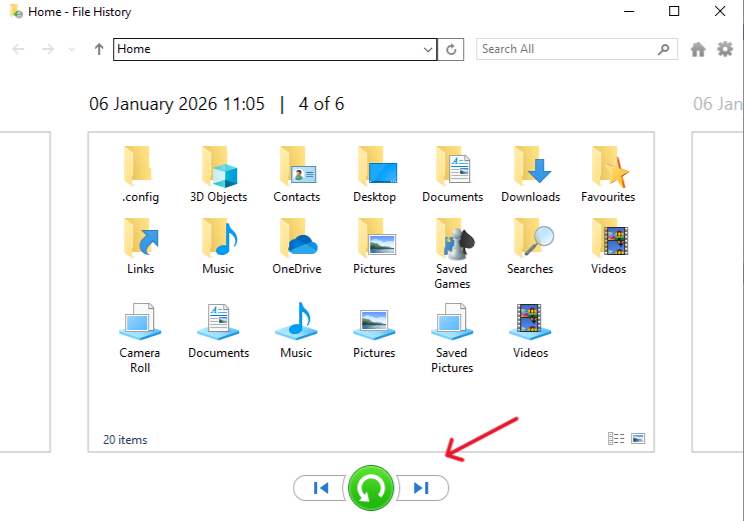
- Step 4: Restore. Once you find the version containing your document, select it and click the green “Restore” button (the circular arrow). This will return the file to its original location.
Method 4 – Restore from Cloud Backup
In the modern era, how to retrieve deleted documents from recycle bin often involves looking at the cloud. Services like OneDrive are integrated into Windows 10 and 11 by default.
Recover Files from OneDrive or Other Cloud Services
Cloud platforms often maintain their own recycle bins. For example, deleted files in Microsoft services can remain recoverable for 14 to 30 days for personal accounts. Even if you emptied the local Recycle Bin on your desktop, the “Cloud Recycle Bin” might still hold your data.
- Step 1: Log in to your OneDrive account via a web browser at OneDrive.live.com.
- Step 2: On the left-hand navigation pane, click on “Recycle bin.”
- Step 3: Browse the list for your deleted documents.
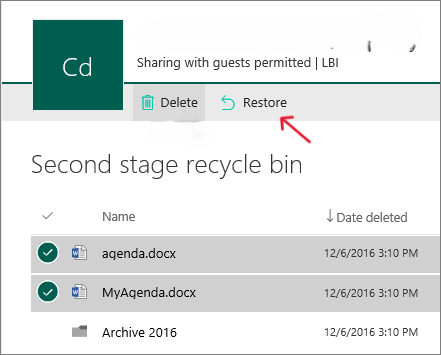
- Step 4: Select the files and click “Restore” at the top of the page. The files will sync back to your computer automatically.
Method 5 – Check Previous Versions
This method is a “hidden gem” within the Windows ecosystem. It relies on Shadow Copies or System Restore points to bring back lost data.
Using Windows Previous Versions Feature
Windows includes a feature called Previous Versions, which allows users to restore earlier versions of files and folders. To use this method:
- Step 1: Navigate to the folder that used to contain your deleted document.
- Step 2: Right-click the folder and select “Properties.”
- Step 3: Click the “Previous Versions” tab at the top.
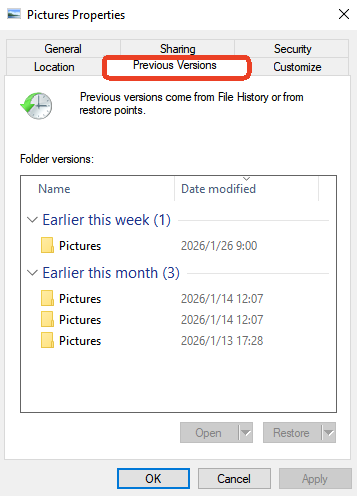
- Step 4: If a list of older versions appears, select the one dated before your deletion.
- Step 5: Click “Restore” (or “Open” to copy just the specific file you need).
Tips to Increase File Recovery Success
While knowing how to get back documents deleted from recycle bin is helpful, your behavior during the process dictates the outcome.
Avoid Overwriting Deleted Files
The success of file recovery depends heavily on timing and disk usage. In fact, the less the drive is used after deletion, the greater the chance of retrieving the documents intact. Conversely, every new file saved on the drive increases the risk that deleted data will be overwritten. Therefore, if possible, you should connect the drive to another computer as a secondary drive and perform the recovery from there. Ultimately, this prevents your operating system from writing temporary files that could destroy your data.
Check for Hidden Files
Sometimes, files aren’t deleted; they are just hidden by a system error or malware.
- Step 1: Open File Explorer.
- Step 2: Click “View” > “Options.”
- Step 3: In the “View” tab, select “Show hidden files, folders, and drives.” This simple check can sometimes reveal “lost” documents.
Preventing Future Data Loss
The best recovery strategy is the one you never have to use. High-level data security involves redundancy.
Enable Backup and File History
Recovering deleted files can be stressful and time-consuming. The best strategy is prevention. Setting up automatic backups ensures that important documents remain safe even if something goes wrong.
Windows offers several backup options:
- File History: Keeps hourly snapshots of your primary folders.
- OneDrive Sync: Ensures a real-time copy exists in the cloud.
- System Image: Creates a complete clone of your hard drive for total system failure recovery.
Think of backups like insurance for your digital life. You hope you never need them, but when disaster strikes, they can save hours of frustration and protect valuable information.
More Data Recovery Resources
If you are looking for more specific tutorials or troubleshooting steps regarding the Windows Recycle Bin and data protection, please explore our detailed technical guides:
- Windows 10/11: How to Remove the Recycle Bin from Desktop
- Step-by-Step: How to Recover Files Deleted from the Recycle Bin
- Troubleshooting: How Do I Recover Items Deleted from Recycle Bin?
- Advanced Methods to Restore Recycle Bin After Empty
How to get data deleted from recycle bin FAQs
1. Can files deleted from the Recycle Bin be recovered?
Yes, in many cases they can. When files are deleted, Windows usually marks the storage space as available rather than immediately erasing the data. Until that space is overwritten, recovery tools may be able to restore the files.
2. Is it possible to recover files without software?
Yes. If you have backups enabled through File History, cloud storage, or system restore points, you can recover files without using specialized recovery software. Simply check your “Previous Versions” or cloud “Recycle Bin.”
3. What is the best tool for recovering deleted documents?
While many options exist, PandaOffice Drecov is highly recommended for its high success rate and ease of use. Other popular tools include Recuva and Disk Drill, which offer varying levels of deep-scan capabilities.
4. How long do I have to recover deleted files?
There is no fixed time limit. Recovery is possible until the deleted data is overwritten by new files. However, on an active computer, overwriting can happen in minutes. Acting immediately after deletion greatly improves success chances.
5. Can SSD drives recover deleted files?
Recovery from SSDs can be more difficult due to technologies like TRIM that erase deleted data quickly to maintain drive speed. However, if you act instantly or if the TRIM command hasn’t executed yet, recovery is still possible.
Conclusion
Accidentally deleting documents from the Recycle Bin can feel devastating, but it doesn’t always mean the files are gone forever. Because Windows typically marks deleted data as free space rather than instantly erasing it, recovery is often possible—especially if you act quickly and avoid using the affected drive.
Whether you choose a built-in solution like File History or a professional-grade tool like PandaOffice Drecov, the key is to remain calm and follow the steps logically. By mastering how to get back documents deleted from recycle bin, you turn a potential catastrophe into a manageable technical task. Moving forward, make sure to enable automatic backups and cloud syncing to ensure your important documents are always protected by a safety net.


