






A flash drive checker is useful only if it answers the question you actually have. If Windows cannot detect the USB stick, a file-system scan cannot begin. If the stick opens but a folder is missing, a capacity test may write over recoverable data. Start by asking whether you need to identify a connection fault, inspect file-system status, verify a new drive’s claimed capacity, or recover missing files. Copy anything important to another healthy device before a test that writes to the stick. Stop direct testing if it disconnects repeatedly or shows the wrong size.
Four Questions That People Call a “Flash Drive Check”
The phrase covers several jobs that should not be mixed. Windows might see the hardware but not a usable volume. A volume might open normally yet contain files that no longer work. A newly bought stick might claim more space than it can reliably store. Alternatively, a slow copy may be due to the port, the file size, or the drive itself. Each question needs different evidence and carries a different risk to existing data.
| What you notice | What to check first | What the check cannot prove |
|---|---|---|
| No USB device appears | Port, connection and Device Manager detection | Whether the file system is healthy |
| Drive letter exists, files fail to open | Copy a sample and assess file-system status | That every file is recoverable |
| New drive claims surprising capacity | Verify the device identity, then test capacity only after emptying or backing it up | That an old file was not deleted |
| Transfers are slow | Try a known-good port and an ordinary copy | That a repair or format is needed |
Do not take a green “Healthy” label in Disk Management as a complete verdict. It describes a recognized volume state, not every flash-memory cell. Conversely, a single failed file does not prove the entire stick is physically broken. The next observation should narrow the problem instead of launching every available checker.
Make a Copy Before a Test Changes the Stick
If the stick still opens, copy the most important documents, photographs and project folders to another physical device. Open examples from the destination, including one large file. A copy dialog that reaches 100 percent is encouraging, but an unreadable result is not a useful backup. Keep the original USB contents unchanged until the copied files pass that simple test.
If one file stalls while other folders remain readable, note its name and continue with the accessible material. Repeating a difficult read for hours can make an unstable device worse. A stick that grows hot, disconnects, changes capacity, or reports severe read errors is not a good candidate for a full-surface test. In that situation, stop scanning and seek a controlled image or professional advice if the data matters.
Capacity and endurance tests often create test files or write across free space. They are appropriate for a new empty device or one whose contents are already secured. They are a poor first move when you are hoping to retrieve deleted files. The USB data recovery overview explains why writes to the original source can reduce later options. A checker that fills the stick does not recover yesterday’s folder.
Check Recognition Without Repairing Anything
Connect the stick directly to a known-good USB port. Avoid an unpowered hub for this first observation. Open File Explorer, then Device Manager and Disk Management. Does the physical USB device appear? Does Disk Management show the expected approximate capacity? Is there a drive letter and a recognizable file system? Write these results down before changing settings. One controlled comparison on another Windows PC may help if the stick remains stable, but do not repeatedly plug an obviously failing device into different computers.
Windows sees the device but File Explorer does not
That gap can mean a missing letter, an unrecognized file system, a partition problem, or failing hardware. These cases are not interchangeable. If the disk shows the right size and a healthy existing volume without a letter, a carefully identified letter assignment may restore access. If it shows RAW, unallocated space, or “Not Initialized” where files used to live, do not create a new volume or accept a format prompt. Protect the data first.
The stick never appears as a stable device
A file checker cannot inspect a source that Windows cannot keep connected. Check one suitable port, remove an unnecessary hub, and observe whether another simple USB device works in the same port. If the stick itself remains absent or changes size, software recovery may not be possible through ordinary Windows access. Drecov does not repair a broken USB controller or electrical connection. Stop rather than running repair commands against a guessed drive letter.
Use Windows Error Checking for a File-System Question
When Windows recognizes a stable volume, you can inspect its file-system status. In File Explorer, right-click the correct drive, choose Properties, open Tools, and find Error checking. Read any message before agreeing to a repair. Microsoft also documents CHKDSK: without repair parameters it reports the volume’s status, while /f corrects logical errors. The repair option changes the source and is not a deleted-file recovery method.
For a read-only command-line check, first verify the current letter in File Explorer. Open an elevated Command Prompt and enter chkdsk E: only if E: is the stick you identified. Replace E: with the actual letter; never paste a placeholder without checking. Read the final report. A reported error is a reason to make sure the files are safe, not an instruction to add /f immediately. On a busy volume, even a status report may be less definitive because Windows cannot obtain exclusive access.
Do not use this route when the USB stick disappears, clicks through an attached enclosure, or returns heavy read errors. A repair switch can modify directory and allocation records. If files matter, extract or image them first. The guide to modern Windows disk checking expands on the status-versus-repair distinction without treating every warning as the same failure.
Capacity, Speed and File Integrity Are Separate Tests
Capacity authenticity
A suspiciously cheap new stick may report a capacity it cannot actually store. A proper capacity test typically writes known data and reads it back, which can take time and occupy space. Do not perform it on the only copy of valuable files. Move the contents elsewhere, verify them, and only then test the emptied device. If a newly purchased stick fails the test, return or replace it rather than trusting it with backups. A capacity result does not tell you whether a document was accidentally deleted last week.
Transfer speed
A slow copy can reflect a USB 2.0 port, a small-file workload, antivirus activity, or the stick. Benchmark tools may write large temporary files. First compare a normal copy on a direct port using a file you can afford to duplicate. Keep speed testing separate from recovery. A stick can be slow yet still hold readable data; another can be fast until a bad area is reached.
Individual file integrity
Opening a document or image from the copied destination is a practical first check. If the creator supplied a cryptographic checksum, comparing the downloaded or transferred copy to that known value can show whether the bytes match. Without a trusted reference hash, a checksum alone cannot tell you what the original should have been. Do not rename a broken file and assume the problem was only its extension.
When the Real Task Is Recovering Missing Files
PandaOffice Drecov is Windows data recovery software, not a general-purpose USB tester. Its read-only recovery workflow fits a stable, recognized stick when files are deleted, missing, or inaccessible because of a logical problem. Quick Scan and Deep Scan look for file candidates; filters and preview help identify likely documents, photos, videos, audio files and archives. Results are saved to another healthy device. Lost Partition Recovery can search for data from a vanished partition, but it does not repair the stick’s electronics or guarantee recovery of overwritten data.
⚠ Warning: Install it on a drive different from the one where your data was lost to prevent overwriting.
Step 1: Select the original stick
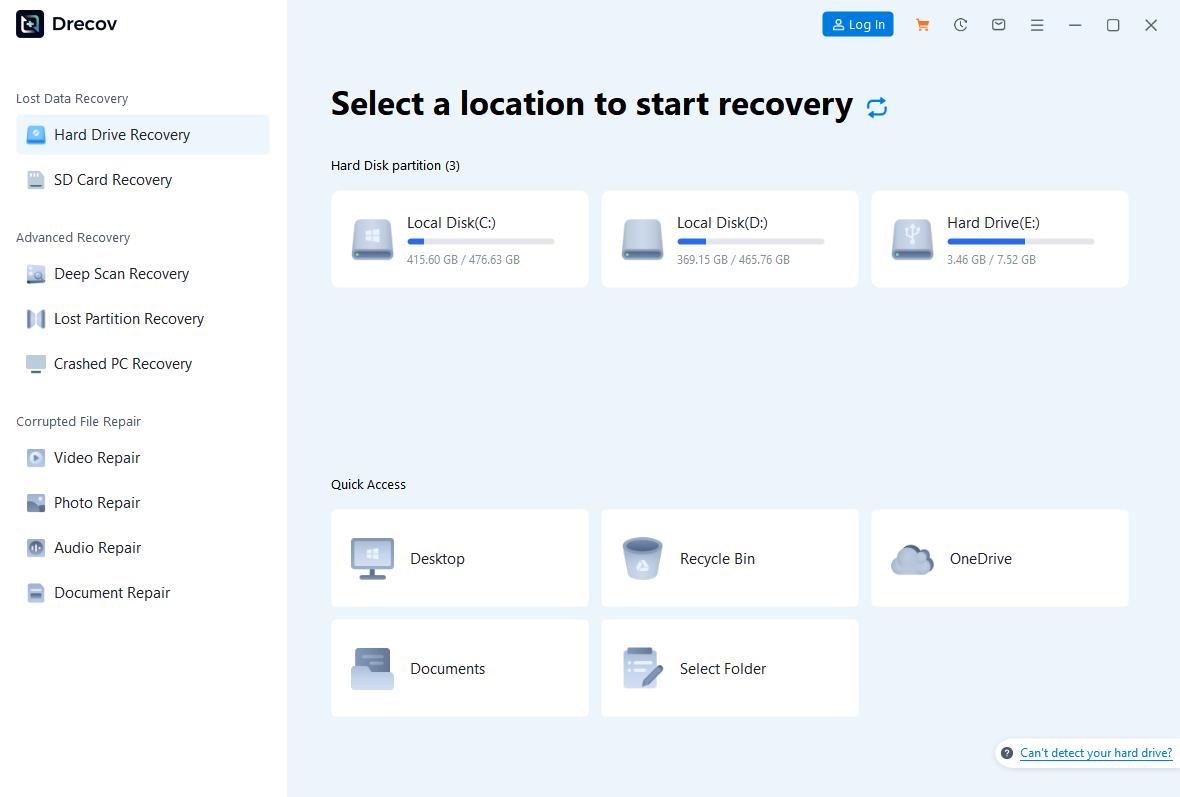
Prepare a separate healthy destination and avoid installing the program on the affected USB stick. Open Drecov on the Windows PC and select the original device, checking its capacity and label. If Windows detects the physical device but its old partition is missing, consider the dedicated lost-partition mode. Do not create a replacement partition first.
Step 2: Run Quick Scan and inspect the former path
Begin with Quick Scan. Search for recognizable filenames or the original folder. A matching name does not prove that the contents survived. If the stick disconnects during the scan, stop and do not retry several times. Software cannot make an unstable connection reliable.
Step 3: Broaden the search on stable media
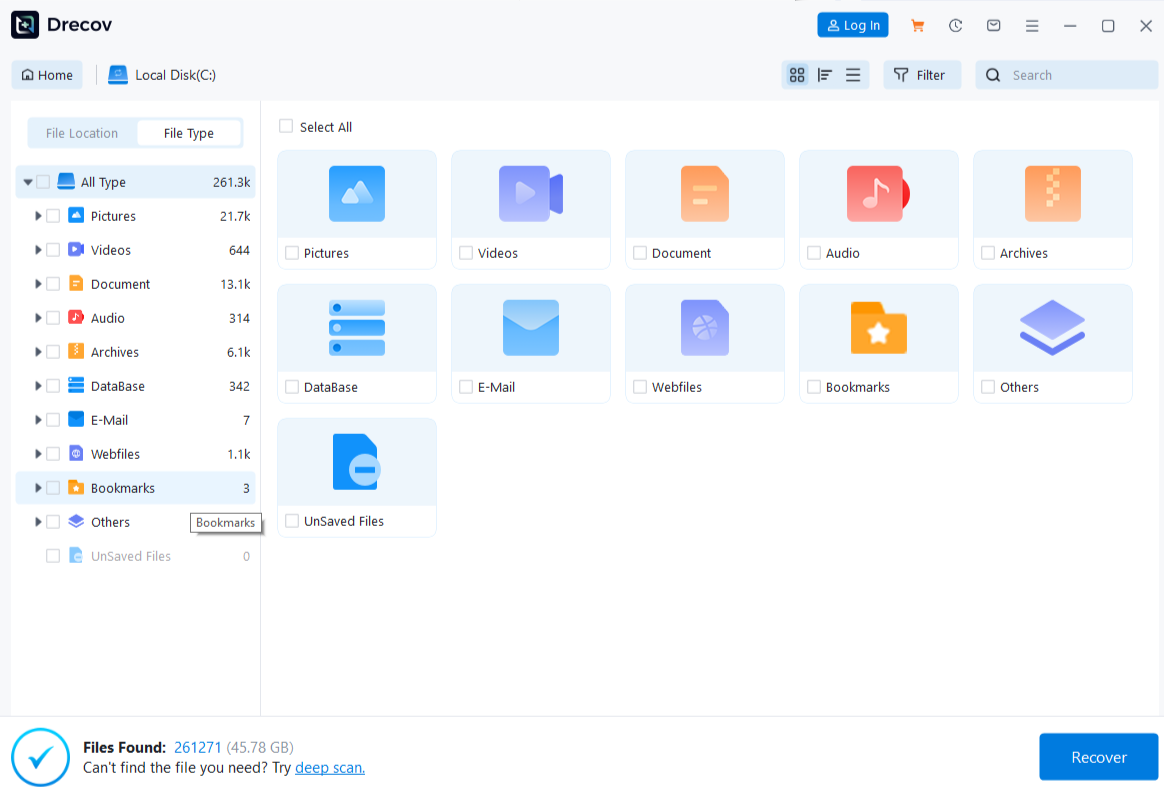
Only if Quick Scan misses the needed files and the stick remains stable, run Deep Scan. Filter by file type, path or name when available. Preview a few representative supported files. A visible first page or thumbnail cannot certify every page, frame or archive member, so plan to test the full recovered copy afterward.
Step 4: Recover elsewhere and verify
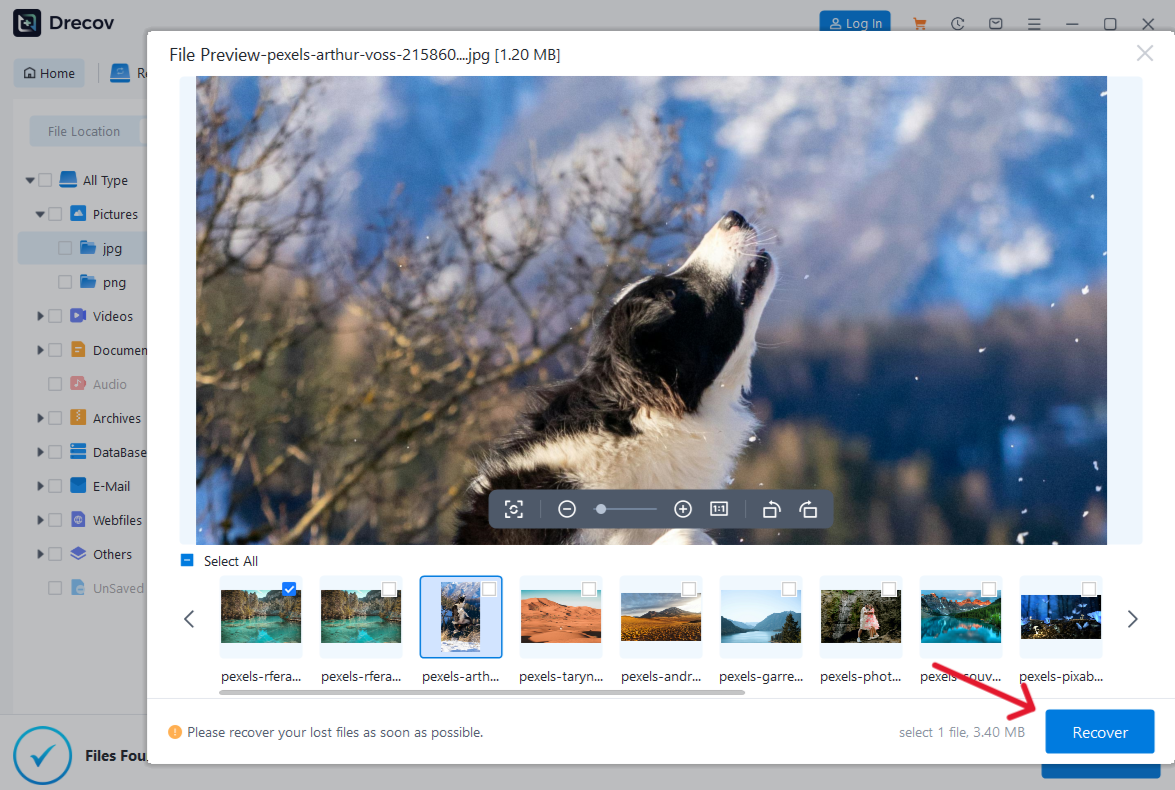
Save selected files to the prepared destination, never back to the USB source. If the output is not in the expected folder, check Drecov Folder or Recovery Folder at the chosen destination. Open several files in their normal applications. Compare important content with another version if you have one. Only after this check should you consider Windows repair, a write-based capacity test or formatting the original stick.
⚠ Warning: Install it on a drive different from the one where your data was lost to prevent overwriting.
FAQs
Is a flash drive checker the same as a recovery tool?
No. A checker answers a particular health, file-system or capacity question. Recovery software searches for missing files and saves candidates elsewhere. Choose based on the task, not the tool name.
Will CHKDSK bring back deleted photos?
It is designed to inspect or repair file-system structures, not to retrieve deleted photos. Check backups, then consider recovery on a stable source before using repair switches.
Can I test a stick that disconnects repeatedly?
Do not run long direct scans or write-based tests on it. Try one known-good connection, then stop if instability continues. Important data may need a controlled image or specialist help.
Does a matching file size prove the copy is good?
No. Open the copied file and inspect the meaningful content. A known source checksum offers stronger byte-level evidence when one exists.
Conclusion
The best flash drive checker is the one that answers your immediate question without putting the last copy at risk. Observe recognition and stability first. Copy and open important files before any write-based capacity test or file-system repair. If a stable USB stick has genuinely lost local files, Drecov can scan the original location, help you preview candidates and recover them to another healthy device. It cannot repair a failing connector or make an unstable stick safe to test. Keep checking, repairing and recovering as separate decisions.
⚠ Warning: Install it on a drive different from the one where your data was lost to prevent overwriting.