








A Git commit can disappear from the visible branch history while its objects still exist locally. A reset, rebase, or deleted branch can remove the convenient reference without immediately erasing every underlying object. That makes Git’s own inspection tools the first recovery route. Start by preserving the repository and current uncommitted work. Then look for the intended commit and create a new reference rather than destructively moving the current branch.
Quick answer: inspect first and create a rescue branch
Use the relevant local reflog to locate a plausible earlier commit, inspect its content, and create a separately named rescue branch when the candidate is correct. Existing stashes or authorized surviving clones provide different sources. If no reference remains, a read-only object inspection can reveal some dangling commits that still exist. None of these routes guarantees recovery after the required objects have been removed or when the missing work never entered Git.
Git’s recovery tools are free. However, the commands have different effects, and a recovery article should not encourage another hard reset as its first step. Preserve the current working state and inspect examples before adapting them. Also distinguish committed work, staged content, untracked files, ignored assets, and unsaved editor buffers. A commit recovery can succeed while a separate untracked file remains missing.
Identify the missing Git state
Lost reference versus missing objects
Record what happened: branch deletion, rebase, reset, repository replacement, or a missing working directory. A commit absent from the current log may remain reachable from another branch or tag. Start with existing references before searching unreachable objects. Also confirm the correct repository and clone. Two folders with the same project name can contain different local histories and reflogs.
Write down a recognizable commit message, changed path, function, or test. This gives you a practical acceptance test when several candidates look similar. A familiar message alone is insufficient because a rebase can create different commits with related descriptions. Inspect the actual changes and relevant parent history. The goal is the intended project state, not merely an object identifier that resembles one remembered from a terminal screenshot.
Preserve current work and repository context
Make an appropriate complete copy of the repository while avoiding concurrent changes. Include the relevant Git metadata, not just the visible source files. Also preserve uncommitted and untracked work independently. A normal clone does not necessarily copy local reflogs or unreachable objects, so it is not automatically a complete evidence copy for this investigation. Record the source folder and Git version used for testing.
For linked worktrees, inspect the actual Git directory relationship before copying only the worktree folder. Its Git metadata may live elsewhere. Keep those relationships documented and use supported Git workflows. Also avoid maintenance commands that prune objects while recovery remains unresolved. A new build or dependency install is usually irrelevant to finding a lost commit and can add unnecessary changes to the working environment.
Free route 1: inspect the local reflog
- Confirm the repository and preserve current work.
- Run a read-only reflog inspection, such as git reflog show –all, in the relevant clone.
- Identify plausible entries around the reset, rebase, or branch change.
- Inspect each candidate’s actual changes before creating any recovery reference.
Reflogs record updates to local references and can reveal where a branch or HEAD previously pointed. They are local evidence, not a universal server-side history. Another clone may have different entries, and retention is not indefinite. Therefore, inspect the clone where the incident occurred promptly. Do not promise a fixed recovery window without checking the actual configuration and surviving objects.
Read the event sequence carefully
Compare entries before and after the operation that changed visibility. A rebase can generate a series of related states, while a reset can move the branch tip directly. Inspect a candidate with a command such as git show followed by the actual object identifier. Treat the identifier as a value to select from your repository, not a placeholder to paste literally. Also compare the affected files and parent history.
If several entries contain the missing change, determine which one represents the complete intended line of work. A single commit may depend on earlier commits that the candidate’s history includes. Preserve a branch at the appropriate tip rather than copying one patch blindly. This keeps the recovered development sequence available for review without forcing the current branch to move immediately.
Free route 2: create a separate rescue reference
- Inspect the candidate and confirm that the required objects remain available.
- Choose a new unused rescue branch name.
- Create the branch at the verified object, for example with git branch and the chosen name and identifier.
- Inspect the new branch and compare it with current work in a controlled workspace.
Creating a new branch provides a durable reference to the candidate without resetting the current branch. The command changes repository references, so preserve evidence and select the target deliberately. It does not automatically merge the recovered changes into production. Keep that integration decision separate. Also verify that the chosen name does not already identify another useful branch before adapting a command example.
A command pattern is git branch recovery-example COMMIT_ID. Here, recovery-example represents a new unused branch name, and COMMIT_ID must be replaced with the actual verified commit identifier from your own repository. Do not paste the placeholder literally. Inspect the candidate first with git show and its real identifier. Creating this rescue branch preserves a reference without requiring git reset –hard, and it does not authorize pushing or replacing shared remote history.
Review before integrating
Compare the recovered branch with the intended base and current branch. Inspect tests, configuration, migrations, and dependencies associated with the change. A commit can be genuine while no longer fitting the present application. Use a separate test workspace where appropriate. Recovery establishes access to a historical state; normal engineering review determines how to integrate it safely into current work.
Do not force-push shared history merely to make the recovered branch look like the previous remote state. Preserve a local rescue reference first. Any publication or shared-history change belongs to the repository’s normal authorized workflow. This distinction prevents a local recovery from accidentally removing colleagues’ newer work or exposing unfinished content that only needed inspection.
Free route 3: inspect an existing stash
- Preserve the repository and current working state.
- List existing stash entries through Git’s supported interface.
- Inspect a relevant stash before applying it.
- Recover verified content in a separate test state without dropping the only stash candidate.
A stash may preserve work that never became a normal branch commit, but its coverage depends on how it was created. Untracked or ignored files are not automatically included in every stash. Therefore, inspect actual contents rather than assuming the stash contains the whole workspace. Also compare the base commit and intended files. A similarly named stash can belong to another task.
Keep inspection and application separate
Read-only stash inspection helps identify a candidate without changing the working tree. Applying a stash can produce conflicts or overwrite assumptions about the current base, so use a controlled workspace and preserve present changes first. Avoid a pop-and-drop workflow as the initial test when it may consume the most useful candidate. Keep the stash until the recovered content is verified and independently preserved.
If a stash entry itself disappeared, its objects may or may not remain in the repository. Treat that as a separate object-recovery assessment rather than promising the same listing command can find it. Also distinguish a stash from editor history. A source buffer that was never saved or included in Git requires another recovery source, even when the repository’s committed history remains completely healthy.
- Identify a legitimate existing clone or reference that may contain the missing commit.
- Preserve its local state before changing references or fetching over it.
- Inspect the candidate’s actual history and content.
- Transfer or reference the verified recovery through an appropriate controlled Git workflow.
A colleague’s authorized clone, another personal machine, or an existing remote reference may preserve a commit that the affected clone no longer references. However, a remote-tracking name does not guarantee the underlying desired state remains available. Inspect actual objects and history. Also avoid using someone else’s private repository or credentials without authorization. The recovery source must be one you legitimately control or have permission to use.
Compare object identity and content
Rebased versions of the same logical change can have different object identifiers. Conversely, a familiar identifier prefix is only a shorthand that must resolve unambiguously in the repository. Compare the actual diff and surrounding history. Also record which clone supplied the candidate. This helps explain why the recovered line differs from a local reflog entry and keeps the investigation traceable.
If the clone contains a useful branch, preserve a new rescue reference before integrating. Do not synchronize every branch indiscriminately as a recovery shortcut. A narrow transfer of the verified history is easier to review and less likely to confuse unrelated work. Afterwards, run the appropriate tests and inspect the resulting diff against the intended project state.
Free route 5: inspect surviving dangling objects
- Preserve a complete relevant repository copy and avoid pruning maintenance.
- Use a read-only integrity and object inspection command appropriate to the repository.
- Inspect plausible dangling commit objects and their contents.
- Create a new reference only after identifying a useful verified candidate.
Git’s object inspection can reveal commits or other objects that remain without a normal branch reference. However, it cannot recover objects already removed from every available source. Also, dangling blobs and trees do not automatically preserve filenames, complete project context, or a ready-to-use commit history. Treat the output as evidence to inspect, not as a guarantee that every reported object belongs to the lost task.
Do not confuse warnings with the target
An object database can contain unrelated unreachable material from normal activity. Compare recognizable paths and content before selecting a candidate. Record the actual error messages separately from informational dangling-object reports. If the repository has genuine corruption, preserve it and seek the appropriate supported repair route rather than running arbitrary write commands until an error disappears.
Keep the original repository evidence even after finding a useful object. A later comparison may reveal that another candidate contains a missing test or follow-up change. Also document whether the result restores a whole commit sequence or only a source fragment. Those are different outcomes, and the integration plan should reflect the remaining context you need to reconstruct.
Example: recover a branch after an unwanted reset
Suppose a developer resets a feature branch to an older point and later realizes that two useful commits disappeared from the visible log. The repository still contains their objects, and HEAD’s reflog shows the earlier branch tip. First preserve current work. Inspect the candidate’s diff and parent history, then create a new rescue branch at the verified tip. The current branch does not need another destructive reset for this first recovery step.
Next, compare the rescue branch with current work and run focused tests in a controlled workspace. If colleagues added newer changes elsewhere, integrate through the normal review process rather than force-pushing the historical state. Finally, preserve the accepted recovery and document the source reflog entry. This restores access to the intended commits while keeping the integration decision separate and reviewable.
Validate more than the commit message
Inspect changed files, parent history, tests, configuration, and required project assets. Then compare the candidate with the actual missing behavior or development milestone. A commit that builds may still represent an incomplete intermediate state. Also preserve untracked material separately where the task needs it. Git recovery can return recorded history while leaving ignored data, local settings, or unsaved buffers unresolved.
Keep the evidence repository, rescue references, and accepted integration until review finishes. Afterwards, protect meaningful branches or exports through the normal backup workflow. Also preserve important non-Git assets independently. A remote repository and a local reflog answer different questions, so neither should be treated as an unlimited backup of every state that once appeared in an editor.
Classify lost work before choosing a command
Committed and uncommitted states
A branch tip can move while committed objects survive, but an untracked file may never enter the object database. Staged content and stashes introduce other possibilities. Record the actual workflow that preceded the loss. This prevents a successful commit rescue from being presented as recovery of every file that once appeared in the working directory. Different states need different evidence.
For missing uncommitted text, inspect surviving editor history or independent workspace copies alongside Git. Also preserve current changes before testing a historical state. Do not force all recovery questions into a reflog search. A clear classification helps you choose the right source quickly and avoids destructive commands that move the current branch without addressing the actual missing material.
Renamed paths and branch identity
A file can appear missing because its path changed or because the wrong branch opened. Inspect repository identity, branch, and relevant history before assuming data loss. Also compare the actual diff around a rename. A filename search alone may miss useful content under another path. Keep the intended behavior and distinctive source fragment in your acceptance checklist.
If several repositories share a project name, record the absolute source folder for each candidate. A clone made after the incident may lack the relevant local evidence even when it contains the same remote branches. Conversely, an older personal clone can preserve useful history. Compare actual object availability and content rather than assuming every clone is interchangeable for recovery purposes.
Inspect historical candidates coherently
Commit parents and dependent changes
A recovered tip can include a whole sequence of work, while one isolated commit may depend on earlier changes. Inspect parent history and related files. For example, a feature implementation can require a schema update or a test fixture from another commit. Restoring only the most recognizable source file can produce an incomplete result even though the recovered commit itself is genuine.
Preserve a rescue reference at a verified useful point and compare the sequence in a controlled workspace. Then decide how the current project should incorporate it through normal review. This separates access to historical work from integration. It also avoids another destructive reset that discards unrelated current changes simply because the recovered sequence once represented the branch tip.
Rebased changes and identifiers
A rebase can create new object identifiers for changes that resemble earlier commits. Therefore, compare actual diffs and surrounding context rather than treating a message or short identifier as complete proof. Also confirm that an abbreviated identifier resolves unambiguously in the relevant repository. A candidate from another clone may require a longer identifier or different reference context for reliable inspection.
Keep the original source of the candidate documented. If two versions implement the same logical change differently, preserve both until review determines the accepted form. Recovery does not require choosing the first familiar message. The strongest candidate is the one that restores the intended behavior and context while remaining understandable and compatible with the current project.
Stash coverage and conflicts
Inspect what a stash actually contains before applying it. Its creation options affect whether untracked or ignored content appears. Also compare its base state with current work. A stash from another task can contain useful fragments alongside unrelated changes. Preserve the candidate and use a controlled test state rather than applying it over a busy working tree without review.
If conflicts occur, keep the original stash and current baseline available. A conflict resolution is new work that needs verification, not proof that the original changes returned automatically. Record any reconstructed sections. This helps the reviewer distinguish recovered source from decisions made during integration and prevents a superficially clean merge from hiding lost behavior.
Treat object inspection as evidence gathering
A repository can contain unreachable objects from ordinary activity that have nothing to do with the incident. Inspect actual content before selecting one. A dangling blob may preserve text without its original filename or project context. A dangling commit may provide a coherent history. Those outcomes have different practical value, so label the result according to what you actually found.
Preserve the evidence repository before any maintenance or repair step. Also keep true integrity errors separate from informational unreachable-object reports. Repeatedly running write operations until the output looks quieter can remove useful recovery material without restoring the target. A controlled read-only investigation provides a clearer path to a verified rescue reference or a bounded partial-source recovery.
Object survival has limits
Reflog entries and objects are not an unlimited archive. Actual retention, maintenance, and available clones determine what remains. Do not promise recovery solely because the incident was recent. Inspect the relevant source promptly and preserve it. If required objects are absent everywhere available, a reflog message alone cannot recreate their full content.
At that point, identify alternative sources such as authorized surviving clones, recorded patches, editor history, or independent file backups. Keep the integration target explicit. A reconstructed implementation may solve the user’s problem while differing from the exact lost commit. Document that distinction rather than manufacturing a historical-looking recovery claim from incomplete evidence.
Validate and preserve a rescue result
Test the intended behavior
Compare the recovered sequence with the actual task requirement. Inspect related tests, configuration, and project assets. Then run focused validation in an appropriate environment. A build success is useful but may not exercise the lost behavior. Also review any conflict resolution or reconstructed source, because those are new decisions layered onto the recovered history.
Keep publication separate from local acceptance. A verified rescue branch need not immediately replace shared remote history. Use the repository’s normal authorized review and integration workflow. This protects colleagues’ newer work and keeps unfinished or sensitive local material from being distributed merely because a recovery command succeeded.
Keep coherent recovery points
After acceptance, preserve a meaningful reference or other supported repository backup appropriate to the workflow. Also protect important non-Git assets independently. Test a representative restore that includes the project state you actually need. A remote branch, local reflog, and full evidence copy provide different coverage; none should be described as a universal backup of every keystroke and ignored file.
Document the accepted rescue source and any remaining gaps. Retain original evidence until review finishes. This gives a future investigator enough context to distinguish the recovered sequence from later integration changes. The durable outcome is a coherent, tested project state with understandable provenance, rather than a collection of object identifiers that no one knows how to connect to the intended work.
When PandaOffice Drecov may help
A storage scan may help when the repository directory or source files are genuinely absent from supported local storage. PandaOffice Drecov does not recreate Git’s graph from a few arbitrary recovered object fragments or restore a remote server’s deleted history. Check current support and inspect actual candidates. Prefer Git’s native recovery tools when the relevant object database still exists and can provide a coherent history.
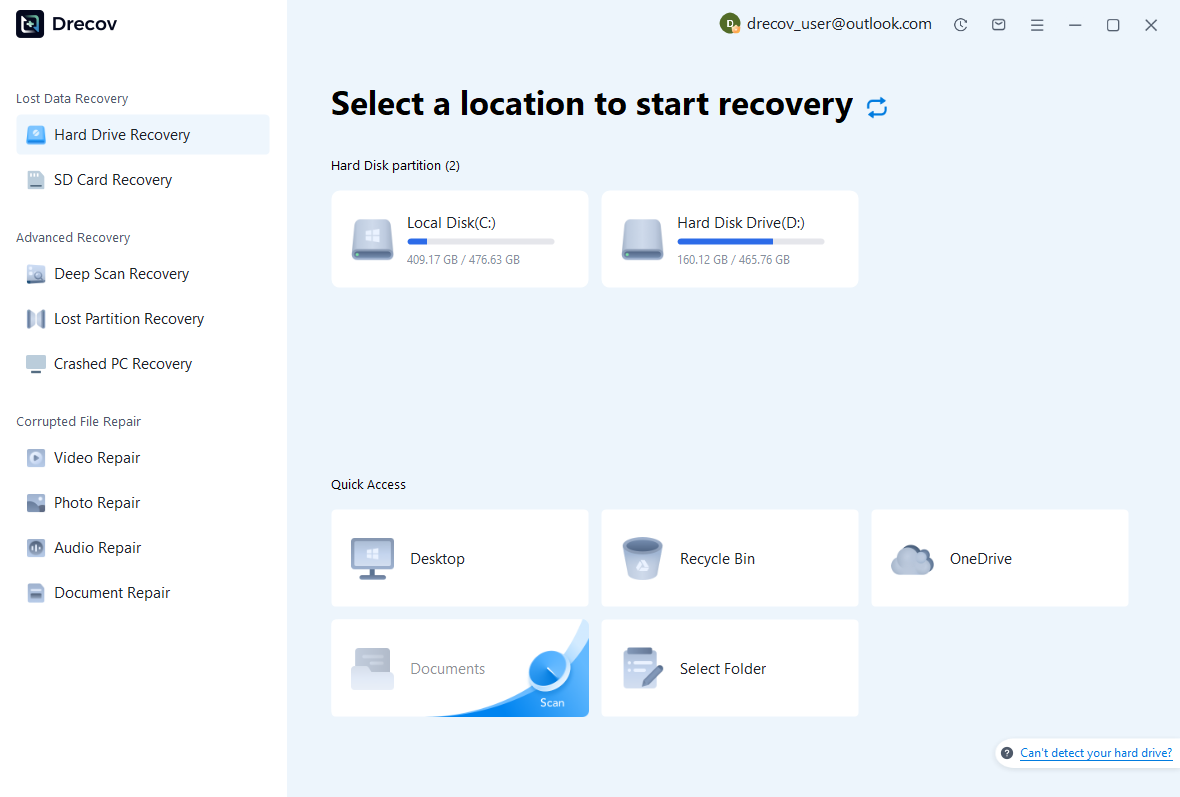
Step 1: select the actual repository storage
Identify the disk that held the working directory and relevant Git metadata. Linked worktrees can place metadata elsewhere, so preserve the relationship. Avoid new builds, dependency downloads, or recovery-software installation on affected storage. If the device becomes unstable, stop repeated scans and assess its condition. A healthy clone on another disk may provide a more coherent source than a fragmented storage recovery.
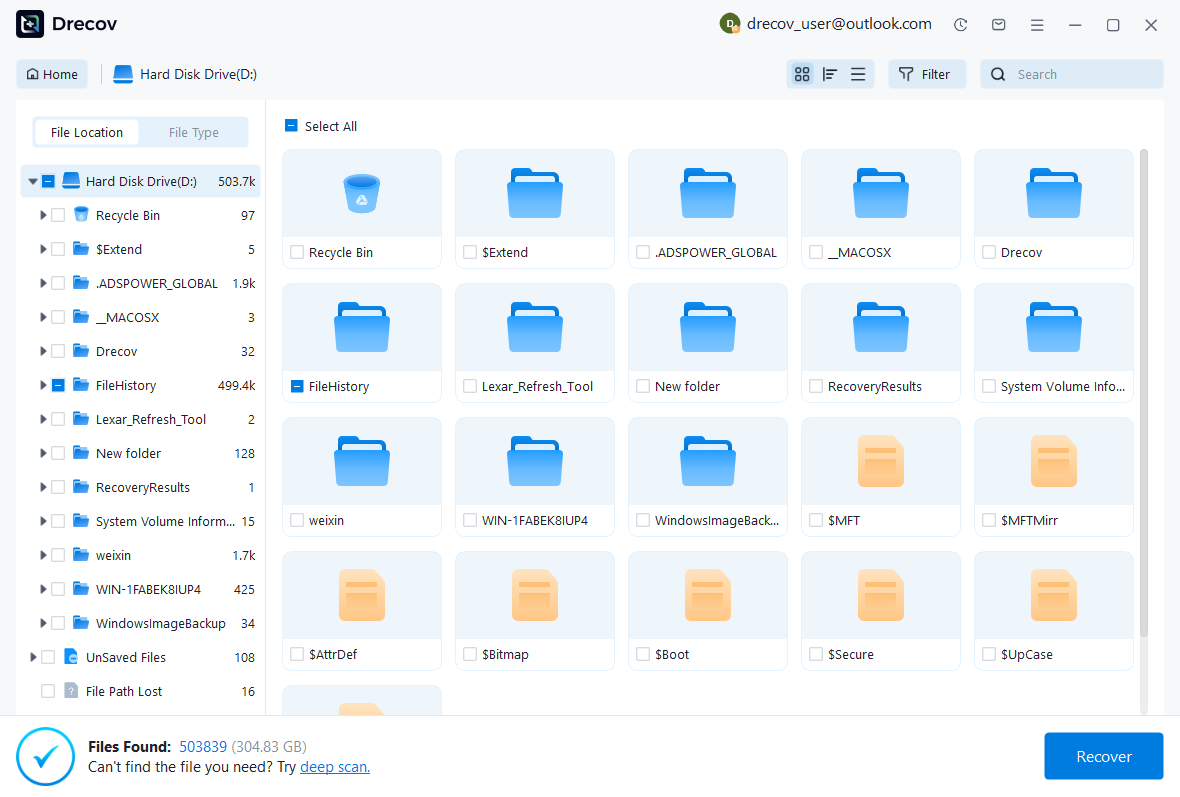
Step 2: preserve complete candidate context
Use available path, date, name, and format filters. Recover relevant directory structure where possible rather than selecting only visible source files. Also preserve several plausible repository copies. A source folder can be useful without containing the missing local history, while metadata fragments may not reconstruct a valid repository. Keep those limitations visible and record each candidate’s origin.
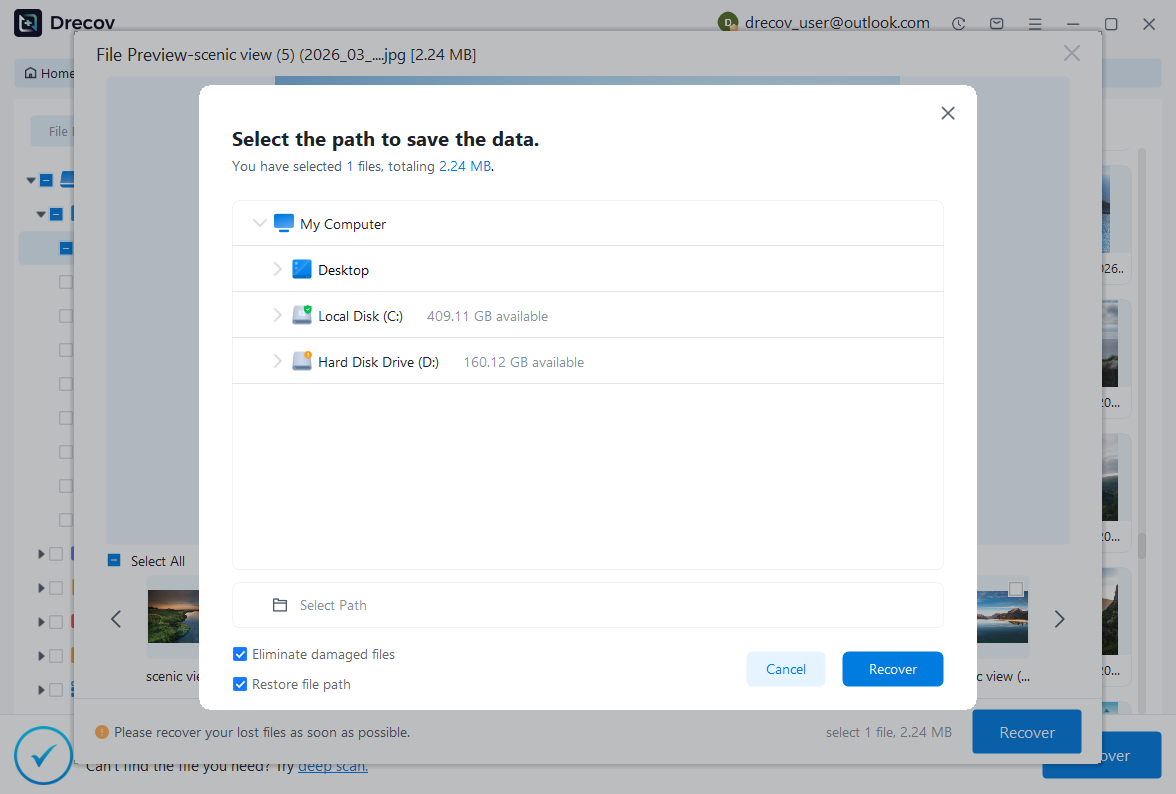
Step 3: recover elsewhere and inspect through Git
Save candidates to a different healthy physical disk. Review licensing and preview limitations before purchasing. Then inspect copies through appropriate Git and source-level tools without executing recovered code automatically. Validate object availability and project content separately. The storage utility supplies potential files; Git inspection establishes whether a coherent commit history survives and which work still needs reconstruction.
Related recovery resources
Explore the relevant recovery options: Hard drive recovery, External hard drive recovery.
For another recovery case and its practical checks, read the related recovery guide.
Check the vendor guidance for the installed version: official recovery documentation 1, official recovery documentation 2, official recovery documentation 3, official recovery documentation 4.





