


Managing digital clutter is a fundamental part of maintaining a healthy computer. Whether you are running out of storage space or simply organizing your desktop, knowing how to empty recycle bin folders effectively is a skill every Windows user should master. While it seems like a simple task, the mechanics behind how Windows handles deleted data are quite sophisticated. This guide provides a deep dive into the technical side of file deletion, step-by-step instructions for various Windows versions, and professional insights into data recovery.
Understanding the Recycle Bin in Windows
What the Recycle Bin Does
Every Windows computer includes a feature called the Recycle Bin, which works like a digital trash can for deleted files. When you remove a document, photo, or folder from your computer, Windows usually doesn’t delete it immediately. Instead, it sends the file to the Recycle Bin, where it remains temporarily until you decide what to do next.
This system exists to protect users from accidental deletions. Everyone has experienced that moment of panic after deleting the wrong file. The Recycle Bin acts as a safety net, allowing users to recover files easily with just a few clicks. If a file lands in the bin by mistake, you can simply open it and select Restore to return the file to its original location.
Why Deleted Files Go to the Recycle Bin
Technically, the Recycle Bin is not just a single folder. Windows creates a hidden directory called $Recycle.Bin on each storage drive. Deleted files are moved into this location along with metadata that records the original file path and deletion date. This information allows Windows to restore files exactly where they came from.
The Recycle Bin has existed in Windows operating systems since the mid-1990s and remains a core part of file management today. Its primary function is simple but powerful: prevent permanent data loss from accidental deletion. You might wonder why Windows doesn’t just delete files permanently right away. The answer lies in user safety and system efficiency. File deletion mistakes happen frequently, and without a safety buffer, recovering files would require specialized recovery software.
What Happens When You Empty the Recycle Bin
The Technical Process Behind Permanent Deletion
When you choose to empty recycle bin contents, the operating system performs a specific set of actions. From the user’s perspective, the files simply vanish. However, in the backend, Windows is actually modifying the file system index.
Windows uses a file system (usually NTFS) that maintains a “map” of where every piece of data lives on your hard drive. When you empty the bin, Windows removes the pointers to those files. This tells the computer that the space previously occupied by those files is now “Free” and ready to be written over by new data.
Why Files Are Sometimes Recoverable After Deletion
Because the data blocks remain on the disk temporarily, it is often possible to recover files even after you empty recycle bin folders. The actual binary data (the 1s and 0s) stays on the physical platters of a Hard Disk Drive (HDD) or the cells of a Solid State Drive (SSD) until new information is saved directly on top of it.
This is a critical concept in data recovery. If you realize you made a mistake, the most important thing is to stop using the computer immediately to prevent new data from overwriting your lost files.
How to Empty the Recycle Bin on Windows
Depending on your version of Windows, the interface might look slightly different, but the core logic remains the same. Below are the most common methods to clear your digital trash.
How do i empty recycle bin: Method 1 – Desktop Shortcut
This is the most direct way to clear your files. It works across almost all versions of Windows, including Windows 7, 8, 10, and 11.
- Step 1: Locate the Recycle Bin icon on your desktop.
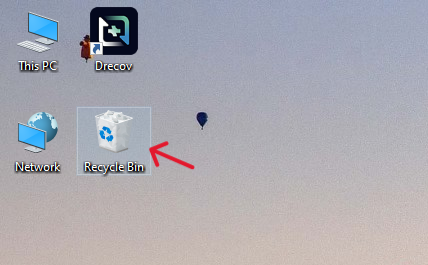
- Step 2: Right-click the icon to open the context menu.
- Step 3: Click on Empty Recycle Bin.
- Step 4: A confirmation dialog will appear asking, “Are you sure you want to permanently delete all of these items?” Click Yes.
How to empty recycle bin windows 11: Method 2 – Using the Settings Menu
Windows 11 introduced a more centralized way to manage storage. If your desktop icons are hidden, this is the best path.
- Step 1: Press
Windows Key + Ito open Settings. - Step 2: Navigate to System > Storage.
- Step 3: Click on Temporary files.
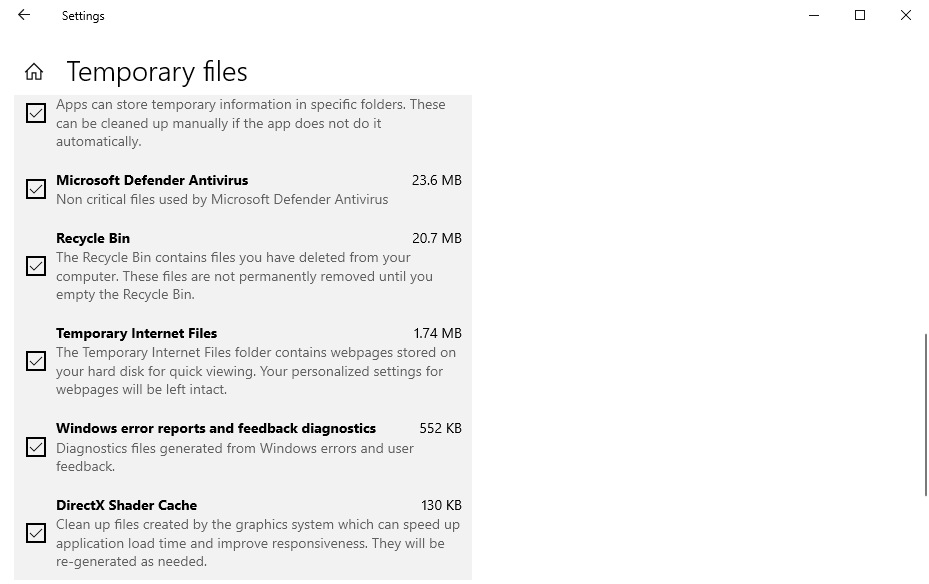
- Step 4: Look for the Recycle Bin checkbox. Ensure it is checked.
- Step 5: Click Remove files at the top of the list to empty recycle bin data.
How to empty recycle bin in windows 10: Method 3 – Using File Explorer
If you are already browsing your files, you don’t need to go back to the desktop.
- Step 1: Open File Explorer (press
Windows Key + E). - Step 2: On the left-hand navigation pane, find and click on Recycle Bin. If you don’t see it, you may need to click the arrow next to “Desktop” to expand the list.
- Step 3: Once inside the folder, look at the top menu ribbon. Click the Recycle Bin Tools tab.
- Step 4: Select Empty Recycle Bin.
How to empty recycle bin: Method 4 – Using Command Prompt (Advanced)
For those who prefer a more technical approach or need to automate the process, you can use the command line.
- Step 1: Type
cmdin the Windows Search bar, right-click it, and select Run as Administrator.
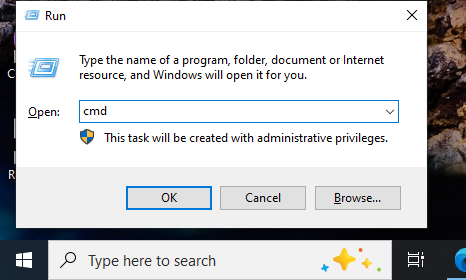
- Step 2: Type the following command:
rd /s /q C:\$Recycle.Bin - Step 3: Press Enter. This will forcefully empty recycle bin directories on the C drive without a confirmation prompt.
Automatic Recycle Bin Cleanup
Using Windows Storage Sense
Storage Sense is a brilliant feature that acts like a digital janitor. It can automatically empty recycle bin items that have been sitting there for a certain number of days.
- Step 1: Go to Settings > System > Storage.
- Step 2: Toggle Storage Sense to “On.”
- Step 3: Click on Configure Storage Sense or run it now.
- Step 4: Under the “Temporary Files” section, set the dropdown for “Delete files in my recycle bin if they have been there for over:” to 30 days (or your preferred duration).
Setting Automatic Cleanup Schedules
You can also use the Task Scheduler to create a custom script that runs a cleanup every time the computer boots up. This is highly recommended for workstations that handle large amounts of temporary data daily. For more official documentation on storage management, you can visit Microsoft Support.
Managing Recycle Bin Storage Space
Changing the Maximum Size of the Recycle Bin
Did you know that the Recycle Bin has a size limit? If you delete a file larger than the allocated space, Windows will ask if you want to delete it permanently because it “is too large for the Recycle Bin.”
- Step 1: Right-click the Recycle Bin icon and select Properties.
- Step 2: Select the drive you want to configure (e.g., C: or D:).
- Step 3: Under Settings for selected location, choose Custom size.
- Step 4: Enter the maximum size in Megabytes (MB).
- Step 5: Click Apply and then OK.
What Happens When the Recycle Bin Is Full
When the bin hits its maximum capacity, Windows follows a “First In, First Out” (FIFO) rule. This means it will automatically empty recycle bin items that are the oldest to make room for newly deleted files. If you aren’t careful, an old file you intended to restore might be pushed out permanently.
Recovering Files Before or After Emptying the Recycle Bin
If you have already clicked that “Empty” button and realized a split second later that your important taxes or wedding photos were in there, don’t panic. There is a solution.
Introducing PandaOffice Drecov
PandaOffice Drecov is a professional-grade data recovery tool designed to handle the “permanent” deletion caused when you empty recycle bin folders. It uses advanced deep-scanning algorithms to find those orphaned data blocks we discussed earlier.
⚠ Warning: Install it on a drive different from the one where your data was lost to prevent overwriting.
Steps to Recover Data Using PandaOffice Drecov:
- Step 1: Select Location. Open the program and select Recycle Bin from the list of locations to scan.

- Step 2: Start the Scan. Click the Start button. The software will perform a Quick Scan followed by a Deep Scan to locate every recoverable fragment.

- Step 3: Preview Files. Once the scan is complete, you can browse the files. PandaOffice Drecov allows you to preview images and documents to ensure they aren’t corrupted.

- Step 4: Recover. Select the files you need and click Recover. Choose a safe destination (like an external USB drive) to save your restored data.
Warning Prompt: Never recover files back to the same partition they were deleted from. Doing so can overwrite other deleted data that you might still need to recover!
Common Problems When Emptying the Recycle Bin
Sometimes, Windows glitches and refuses to empty recycle bin contents. You might see an “Access Denied” error or the icon might show it’s full even when it’s empty.
- Corrupted Recycle Bin: This is usually fixed by resetting the bin via Command Prompt using
rd /s /q C:\$Recycle.Bin. - File in Use: If a background program is still using a file that was moved to the bin, Windows won’t let you delete it. Restarting your computer usually releases the lock.
- Administrator Permissions: Some files require elevated privileges to be permanently removed. Ensure you are logged in as an administrator.
Tips to Use the Recycle Bin Safely
- Avoid Shift + Delete: Pressing
Shift + Deletebypasses the Recycle Bin entirely. Use this only if you are 100% sure you never want to see that file again. - Enable Confirmation Dialogs: If you find yourself accidentally clicking “empty,” go to Recycle Bin Properties and check Display delete confirmation dialog.
- Regular Backups: No matter how good the Recycle Bin is, it isn’t a backup. Use cloud services or external drives for important data.
For more information on navigating your system to find these settings, check out these helpful guides:
- Where is Recycle Bin in Windows 10? 3 Quick Ways to Find It
- Windows 10/11: How to Remove the Recycle Bin from Desktop
- Where Do I Find Recycle Bin in Windows 10?
Emptying the Recycle Bin FAQs
1. Does emptying the Recycle Bin speed up my computer?
Generally, no. It only frees up disk space. However, if your drive is nearly 100% full, clearing the bin can improve system performance by giving Windows more “breathing room” for virtual memory.
2. Can I recover a file if I used Shift + Delete?
Yes, but you will need a tool like PandaOffice Drecov. Since the file never went to the bin, there is no “Restore” button to click.
3. Why does my Recycle Bin icon look full when it’s empty?
This is a common icon cache glitch. Right-clicking the desktop and selecting “Refresh” usually fixes the visual bug.
4. Where is the Recycle Bin stored?
It is stored in a hidden system folder named $RECYCLE.BIN at the root of every drive partition.
5. How do I empty the Recycle Bin if the icon is missing?
You can use the Storage Sense method in Settings or type shell:RecycleBinFolder into the “Run” dialog (Win + R) to open it directly.
Conclusion
Mastering how to empty recycle bin folders is more than just a housekeeping task; it’s about understanding how your data is managed and protected. By using the methods outlined above—from simple desktop clicks to automated Storage Sense schedules—you can keep your Windows 10 or Windows 11 system running smoothly. Remember, while emptying the bin is “permanent” for the average user, tools like PandaOffice Drecov offer a powerful second chance if you act quickly. Keep your storage organized, stay mindful of what you delete, and always maintain a secondary backup of your most precious files.


