







Successful recovery of a database starts with identifying what failed. A deleted database file, an accidentally removed record, and an application that cannot connect need different solutions. Preserve the current files and backups, stop avoidable changes, and identify the application before attempting a restore or scanning local storage.
You do not need to become a database administrator to take a useful first step. First establish whether the data lives on your PC or on a service managed elsewhere. Recovering files from your laptop cannot restore a remote business database that never existed there.
Describe what is missing without guessing the database engine
The file disappeared from a local folder
Check the actual location used by the application, not only its recent-items list. A shortcut can break while the original remains elsewhere. Search known folders by filename and inspect backups without moving or renaming every candidate. Record the last location where you successfully opened the data.
For a genuinely deleted local file, check the Recycle Bin and independent backups. A network deletion or cloud operation may use a different deleted-items system. For a server or shared location, ask its owner to check the available recovery options. Your PC’s bin may not contain the deleted server file.
The application opens but records are absent
First check the selected account, database, date range, and filters. A different company file or filtered view can look like missing data. Note a known record identifier and ask whether other authorized users can see it. Do not insert replacement records before you understand the discrepancy.
If records truly were deleted inside an existing database, ordinary file recovery is usually the wrong first route. The responsible administrator must assess native backups, retained history, or transaction recovery supported by that particular system. Scanning for a file does not undo a database transaction.
The application cannot connect or open the database
Save the exact error and the point at which it appears. A failed connection can concern a service, network, credentials, or permissions rather than lost data. Compare the configured location with the expected server or file. Avoid changing connection settings randomly because doing so can hide the original fault.
Damage reported for an existing file calls for assessment using that application’s guidance. Preserve it unchanged and work on a copy when a supported repair procedure allows that. Do not run SQL Server commands against an Access, SQLite, or unrelated application database because the word “database” appears in both descriptions.
Make a small recovery record before changing anything
Write down the application name, visible version, database location, last known good time, and recent changes. Include whether other people are still using it. These details let support distinguish a local personal project from a shared production system where stopping a service affects many users.
Find the actual owner and scope
For a hosted website or subscription application, contact the provider or organization managing the database. Ask what backups exist and what restoring them would overwrite. Keep any local export, but check what it contains. Useful exported records do not necessarily form a backup that can restore the hosted service.
For a desktop application, use its displayed file path or documented data-location instructions. An extension is a clue, not a complete diagnosis. Several programs may use DB or BAK filenames differently, so identify the application that created the file before choosing a tool.
Preserve the current state appropriately
Ask users to stop unnecessary changes while the responsible person plans recovery. Preserve existing backup files and logs. Do not manually delete unfamiliar companion files to make a folder look tidy. Some databases require related files to recover a consistent state after an interruption.
For a running database, use the application’s supported backup procedure rather than assuming an Explorer copy captures everything consistently. SQLite’s database corruption guidance explains why copying an active database carelessly or separating necessary journal information can cause trouble. That is a reason to use the proper method, not a request to run developer commands without understanding them.
Prefer a native backup, but restore it somewhere separate first
Check what the backup actually contains
Find the most recent backup from before the loss and record its completion time. Distinguish a database backup from a PDF report, spreadsheet export, or synchronization copy. An export can preserve visible information without retaining relationships, permissions, attachments, or the ability to reopen the whole application.
Check the destination’s available space and the required application version. Encryption keys and credentials may be necessary. Keep these secure and involve the authorized administrator; possession of a backup file alone does not guarantee that you can restore or read its contents.
Use the restore workflow documented for that product
Open the application’s documented backup or restore interface and identify the selected backup by its actual path and date. Choose a separate test database or recovery location when the product supports it. Stop before confirmation if the interface would overwrite the only live copy or if you cannot determine the target.
A production SQL Server restore, a desktop accounting restore, and an application-managed SQLite restore do not share one universal menu. Give the product and version to its support team when the entry point is unclear. Before proceeding, obtain the restoration instructions for that application and backup type.
Compare the recovered state with the work you need
Open the restored copy through its normal application. Check recent and older records, a few important attachments, and a representative report. Work out whether the backup includes the last transaction you need. A technically successful restore can still leave a business gap that requires a planned reconciliation.
Keep the current state until that comparison is complete. Decide with the owner how to move from the test copy to live use, including access and downtime. Never replace files underneath a running database service simply because a recovered filename looks correct.
Use local file recovery only for files that actually disappeared
This route fits a deleted local database file or backup archive on stable readable Windows storage. It does not retrieve individual rows from a live server. The file recovery page explains the underlying missing-file task. Native backups remain preferable when they provide a known usable state.
Drecov searches for lost local files using read-only recovery mode, Quick Scan, Deep Scan, filtering, and supported previews. Lost Partition Recovery can help locate data from a missing partition. These functions retrieve candidate files; they do not repair database structures, replay transactions, or guarantee that a recovered database is consistent.
Prepare before Step 1
Stop avoidable writes to the affected location. Prepare another healthy device for recovered files and do not install Drecov on the source partition. Repeated disconnects, physical symptoms, or severe read errors require advice about imaging or professional recovery. Overwriting and SSD TRIM can limit remaining data.
⚠ Warning: Install it on a drive different from the one where your data was lost to prevent overwriting.
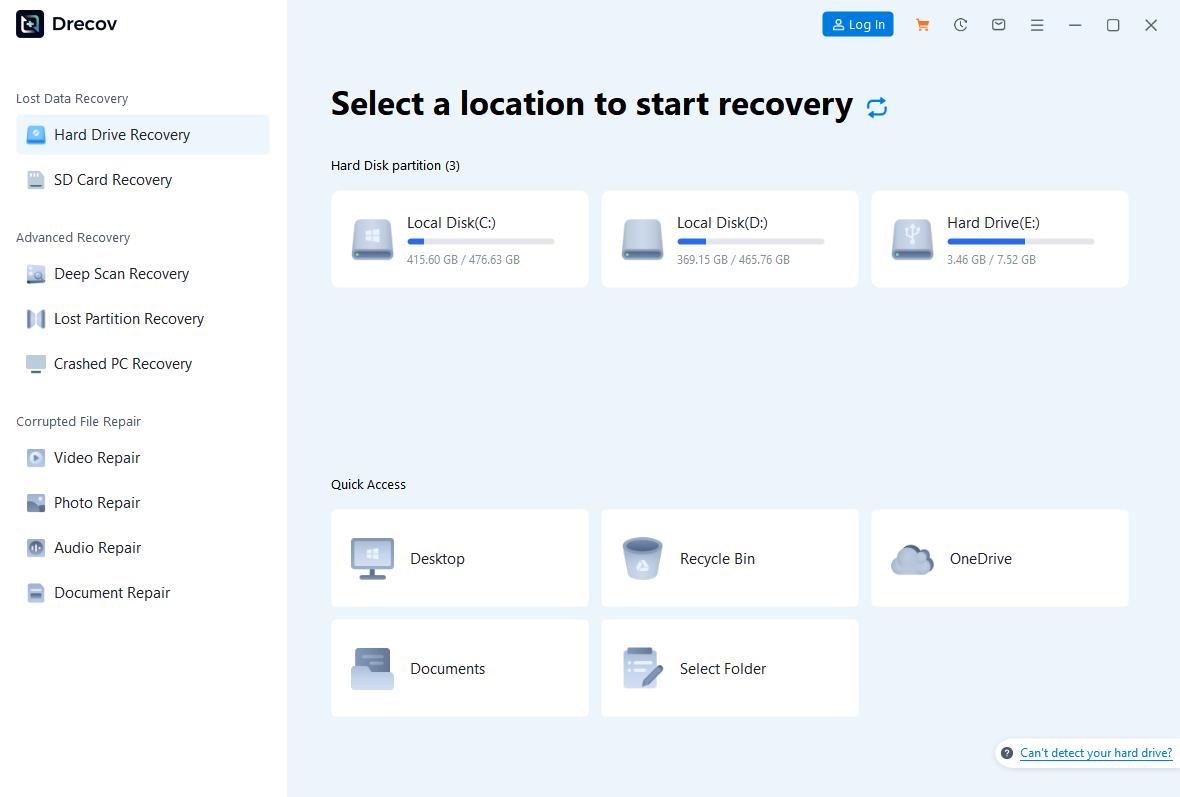
Step 1: Open Drecov and select the original local location
Choose the stable Windows volume or original folder that held the deleted file or backup. Identify the file you need: the main database, an application backup, or an exported report. A scan of your PC cannot retrieve a remote database that was never stored there.
Step 2: Run Quick Scan and identify plausible versions
Search for expected names and the application’s documented file types. Compare original paths, sizes, and dates when available. Keep several plausible candidates if the newest filename does not establish which one contains the required records. Preserve related files together rather than mixing versions casually.
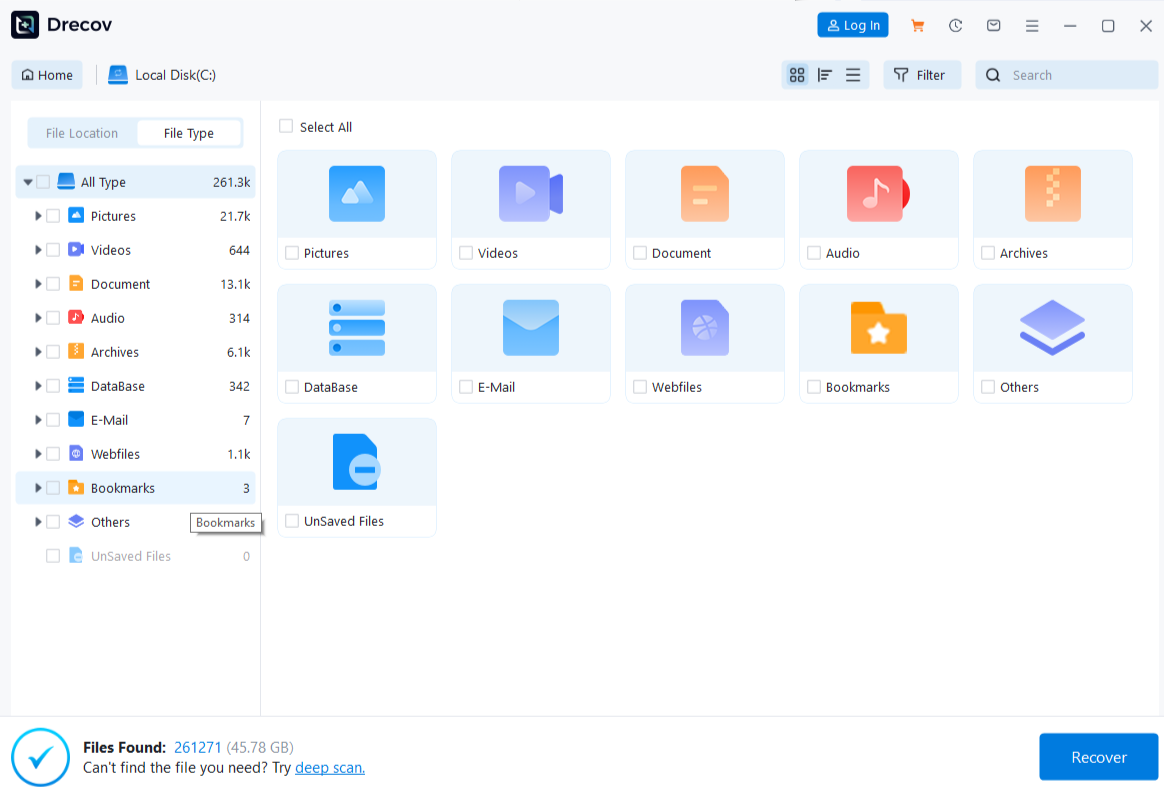
Step 3: Use Deep Scan if needed and the source remains stable
Continue only when Quick Scan does not find the files and reading stays reliable. Stop if errors worsen. A deeper search cannot guarantee a consistent database or undo overwritten pages. It searches remaining file data, not the application’s transaction history.
Step 4: Examine supported previews without overinterpreting them
Use available type, name, path, and date information to narrow the results. Preview supported ordinary files where possible, but do not expect a database preview or treat its absence as definitive failure. A report found through PDF recovery may help confirm information without replacing the database itself.
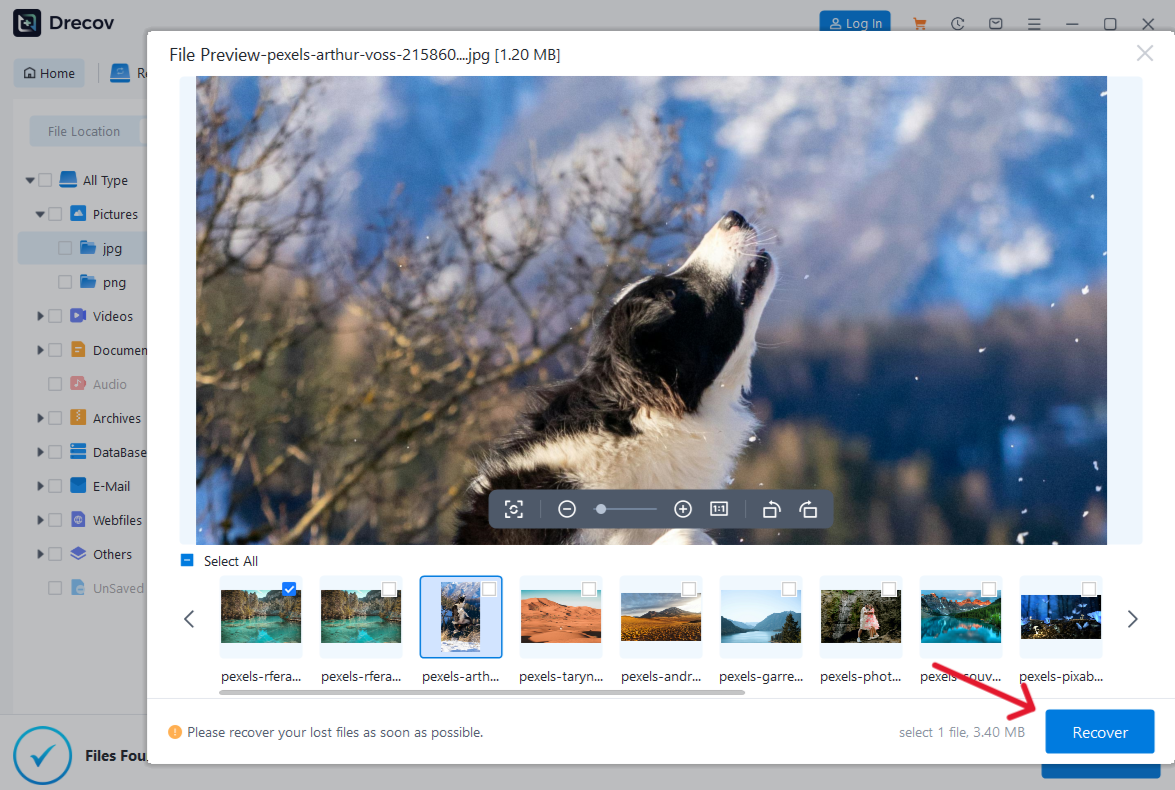
Step 5: Save elsewhere and test through the owning application
Recover candidates to the other healthy device, never the source. Check Drecov Folder or Recovery Folder if output is not in the expected location. Preserve this recovered set unchanged and let the appropriate application or administrator test a separate working copy using its supported restore or attachment procedure.
⚠ Warning: Install it on a drive different from the one where your data was lost to prevent overwriting.
Decide whether the result is usable before returning to normal work
A recovered filename, a readable backup, and a usable database are different milestones. The meaningful test is whether the owning application opens the copy and shows the required information correctly. An archive check or backup-verification message alone does not complete that assessment.
Inspect the data that matters to the task
Choose a few known records with dates, totals, or attachments you can independently recognize. Test a normal read-only report where possible. Ask the responsible administrator to run the product’s appropriate consistency checks if needed. Do not improvise destructive repair options simply because ordinary opening failed.
Record any gap between the restored point and the last successful work. Separate verified information from recollection before entering replacements. This prevents duplicate transactions and makes the eventual return to live use more controlled.
Keep a rollback route
Retain the original failed files, recovered candidates, and the previous live state until the owner approves the result. Store keys securely and restrict access to sensitive copies. After recovery, establish application-native backups with a test restore rather than relying only on copied filenames.
FAQs about database recovery
Can file recovery restore one deleted row?
It retrieves files, not arbitrary records within a working database. Ask the database owner about native history, backups, and engine-specific transaction options.
Does an opening error prove the database is corrupt?
No. Connection, permission, account, service, and location problems can prevent access. Preserve the exact message and verify the target first.
Is a BAK file always a database backup?
The extension alone is insufficient. Identify the application that created it and use its supported restore procedure rather than renaming the file.
Can I copy a running database in Explorer?
Do not assume that creates a consistent backup. Use the application’s supported backup mechanism or obtain engine-specific guidance from its administrator.
What if the recovered file still will not open?
Keep the candidate unchanged and test another plausible version or native backup. Product-specific assessment may be necessary; repeated generic repair attempts can make comparison harder.
Conclusion
Choose database recovery by the actual loss: connection, records, damaged content, or missing local files. Native backups and a separate test restore offer the clearest route when available. Drecov can retrieve genuinely deleted local candidates, but the database application must verify their usefulness. Keep live data unchanged until verification is complete and the owner approves the recovery plan.
⚠ Warning: Install it on a drive different from the one where your data was lost to prevent overwriting.





