


Imagine Sarah, a freelance photographer who just finished a grueling 12-hour shoot for a high-profile destination wedding. After arriving home, she inserts her 128GB SD card into her workstation, ready to begin the editing process. Suddenly, her screen flashes a terrifying prompt: ‘The disk in drive G: is not formatted. Do you want to format it now?’ Her stomach drops. Thousands of irreplaceable moments—the first kiss, the tearful toasts, the laughter—seem to have vanished into a digital void. At this moment, her only hope lies in finding an effective sd card data recovery software to bypass the error and rescue her work before it is lost forever.

Sarah’s panic is something many of us have felt, but her story doesn’t have to end in tragedy. In the modern age, the right sd card data recovery software acts as a powerful safety net, capable of pulling files back from the brink of permanent deletion. Whether you are dealing with a “RAW” partition, accidental deletion, or a corrupted file system, this guide will provide you with the knowledge and tools to reclaim your digital life.
Part 1: The Magic Behind the Screen—How Data Recovery Actually Works
To understand why sd card data recovery software can perform what seems like a miracle, we need to look at how storage works through a simple analogy.
The Library and the Index
Think of your SD card as a massive local library. When you save a photo, the library stores the actual “book” (the data) on a shelf (a sector on the memory chip). Simultaneously, the library creates an entry in its “Index” (the File Allocation Table or FAT). This index tells the computer exactly which shelf holds which book.
When you delete a file or format a card, the computer doesn’t actually burn the books. Instead, it simply takes an eraser to the Index. It marks that specific shelf space as “Empty and Available for New Books.” As long as you haven’t brought in a truckload of new books to fill those shelves (a process called “overwriting”), the original books are still sitting there, silent and invisible.
How the Software “Sees” the Invisible
Professional sd card data recovery software ignores the broken or empty index. Instead, it walks through every single “shelf” in the library, looking for recognizable patterns. For instance, a JPEG image always starts with a specific sequence of hexadecimal code (FF D8 FF). When the software identifies these patterns, it can reconstruct the file and present it back to you, even if the “Index” says the card is completely empty.
Part 2: Critical Precautions Before You Begin
Before you download any sd card data recovery software, you must adhere to three non-negotiable rules to ensure the highest success rate:
- Cease All Activity: Immediately remove the SD card from your camera or phone. Do not take more pictures, as new data will overwrite the “empty” sectors where your lost files reside.
- Avoid In-Place Installation: Never download or install recovery tools onto the same SD card you are trying to rescue. Always install the software on your computer’s internal C: or D: drive.
- The “Cancel” Rule: If Windows or macOS prompts you to “Format the drive to use it,” always click Cancel. Formatting creates a new file system that makes the job harder for even the best sd card data recovery software.
Part 3: Step-by-Step Restoration Methods
We will now explore different technical approaches to data retrieval, ranging from free community tools to high-performance professional suites.
Method 1: The Classic Approach with Recuva
Recuva remains a popular entry-level sd card data recovery software for simple accidental deletions. It is lightweight and provides a user-friendly wizard.
- Step 1: Connect your SD card to the computer using a high-quality card reader. Open Recuva and the “Recuva Wizard” will appear. Click “Next.”
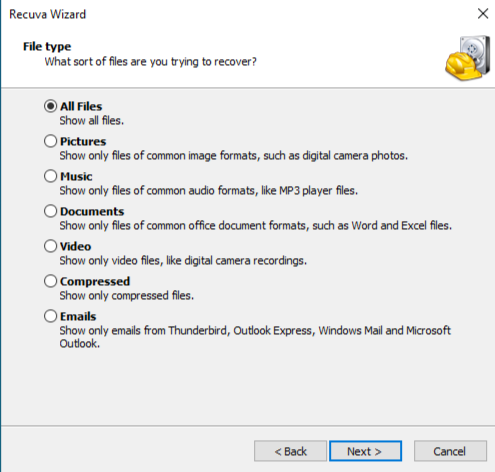
- Step 2: Select the file type. If you only lost photos, select “Pictures.” If you aren’t sure, select “All Files.”
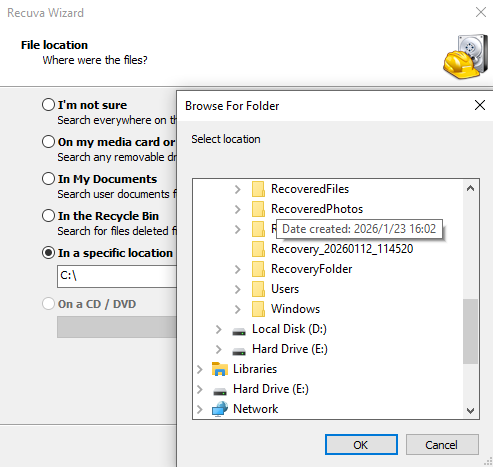
- Step 3: Under “File Location,” choose “In a specific location” and browse to your SD card’s drive letter (e.g.,
E:\).

- Step 4: Click “Start.” If the initial scan finds nothing, rerun it and check the box for “Enable Deep Scan.” This performs a signature-based search that is much more thorough.
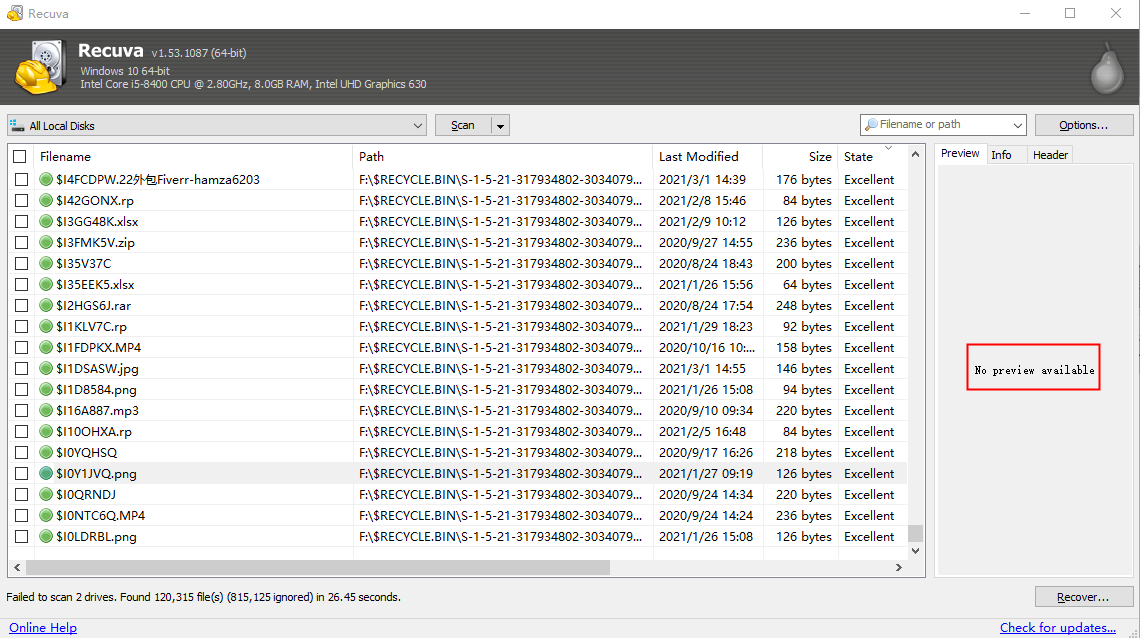
- Step 5: Once the results appear, look for the green circles (indicating excellent health). Select your files and click “Recover,” choosing a folder on your computer’s hard drive as the destination.
Method 2: High-Success Restoration with PandaOffice Drecov (The Three-Step Method)
When dealing with more complex scenarios like “Drive Not Formatted” errors or RAW partitions, PandaOffice Drecov stands out as a premier sd card data recovery software. It uses an advanced scanning engine that reconstructs file fragments more efficiently than basic tools.Before we dive into the detailed steps, you can watch this brief 60-second demonstration video. It visually captures the seamless transition from a corrupted “RAW” card to a fully restored folder, giving you a clear roadmap of the process.
Here is the streamlined Three-Step Operation that makes it a favorite for both pros and beginners:
- Step 1: Select and Connect (Select the Target)Launch PandaOffice Drecov. On the main dashboard, you will see a list of all storage devices. Identify your SD card under the “Removable Drives” section. Simply click on the drive icon to highlight it.
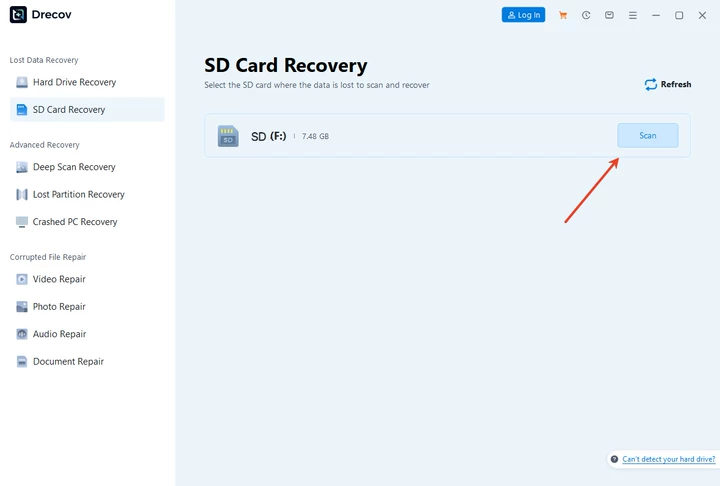
- Step 2: Intelligent Deep Scan (Start the Scan)Click the “Scan” button at the bottom right. The software automatically initiates a dual-mode scan. First, it performs a “Quick Scan” to find recently deleted items, immediately followed by an “Intelligent Deep Scan” that digs into the raw sectors. You can watch the files appear in real-time, categorized by type (Images, Videos, Documents).

- Step 3: Preview and One-Click Recovery Once the scan is complete (or even while it is running), you can double-click any file to open a Preview Window. This allows you to verify that the photo or video is intact and not corrupted. Check the boxes next to the files you want and click the “Recover” button. Choose a safe location on your PC to save the recovered data.
Why choose this? PandaOffice Drecov is specifically optimized for high-capacity cards (SDXC) and can handle the complex file structures of modern 4K video files that often trip up other sd card data recovery software.
- Versatility: It recovers photos, videos, audio, compressed files (ZIP/RAR), and even system files like EXEs.
- Accidental deletion from your computer desktop.
- Files lost after emptying the Recycle Bin.
- Data loss from disk formatting.
- Accidental deletion or formatting of SD cards/U disks.
- Sync error occurring with deleted OneDrive files
- Restore deleted Chrome bookmarked
- Privacy First: All recovery happens locally on your machine, so you don’t have to worry about your private data leaking to the web.
Method 3: Using Windows Command Prompt (For Hidden Files)
Sometimes your data isn’t deleted, but a virus has altered the attributes of your files to make them invisible. You don’t always need full sd card data recovery software if the files are just “hidden.”
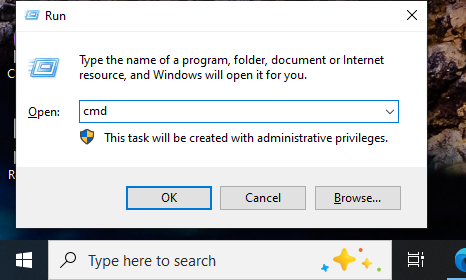
- Step 1: Press the shortcut
Win + R, typecmd, and pressCtrl + Shift + Enterto run as Administrator.
- Step 2: Type your SD card’s drive letter followed by a colon (e.g.,
E:) and hit Enter.
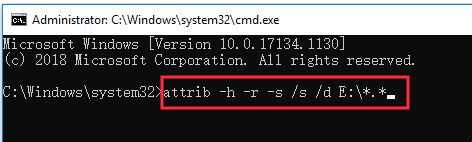
- Step 3: Type the following command:
attrib -h -r -s /s /d *.*and press Enter. - Step 4: Open your SD card in File Explorer. If your files were hidden, they will now appear in their original folders.
Method 4: Advanced Recovery via PhotoRec (Open Source)
If you are comfortable with a text-based interface and need a completely free, powerful sd card data recovery software, PhotoRec is a solid choice. It ignores the file system and searches for raw data.
- Step 1: Download the TestDisk/PhotoRec folder and run
photorec_win.exe.
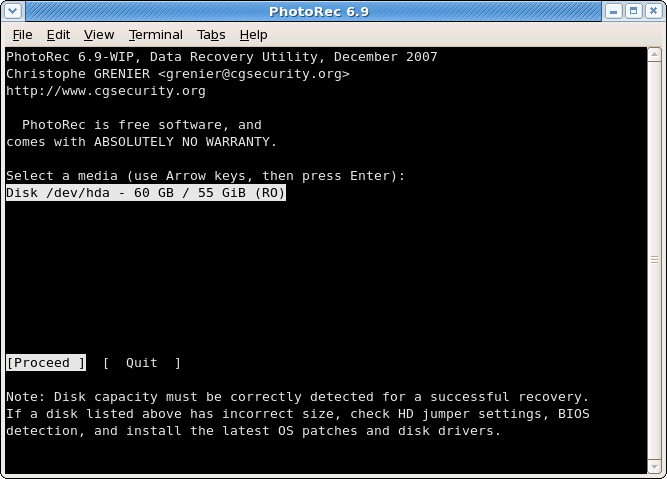
- Step 2: Use the arrow keys to select your SD card from the list and press Enter.
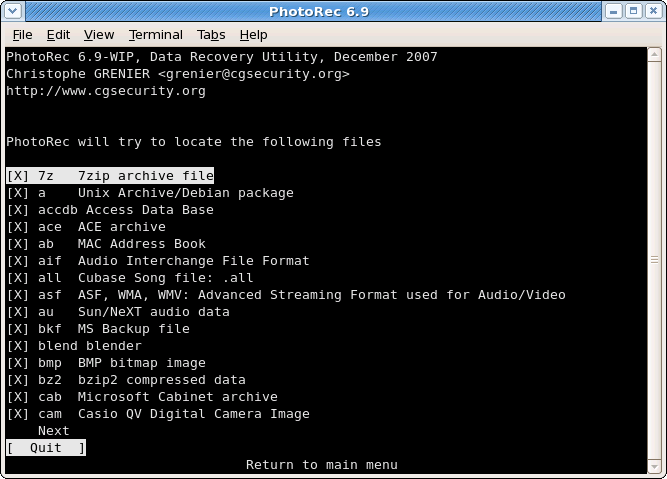
- Step 3: Select the partition (usually labeled “Unknown” or “Whole Disk”) and choose the
[File Opt]menu to specify which file extensions to search for. - Step 4: Select a destination folder on your C: drive to save the “recup_dir” folders and press
Cto start the process.
Part 4: Comparing the Top Solutions
To help you choose the best sd card data recovery software for your specific situation, refer to this comparison table:
| Feature | Recuva | PandaOffice Drecov | CMD (Attrib) | PhotoRec |
| Primary Use Case | Basic Accidental Deletion | Corrupted, RAW, Formatted Cards | Hidden/Virus-infected files | Total File System Failure |
| User Interface | Wizard-based (Easy) | Visual 3-Step (Easiest) | Command Line (Difficult) | Text-based (Advanced) |
| Success Rate | Moderate | Very High | Low (Specific cases) | High |
| Preview Ability | Partial | Full Real-time Preview | None | None |
| Key Advantage | Completely Free | Handles Complex Formatting | No Software Needed | Open Source Power |
Part 5: Proactive Prevention—Shielding Your Data
While sd card data recovery software is a lifesaver, the best strategy is never needing to use it. Implement these habits to protect your media:
- The “Format in Camera” Rule: Always format your SD card using your camera’s internal menu rather than your computer. This ensures the file system structure perfectly matches the device’s requirements.
- The 3-2-1 Backup Strategy: 3 copies of your data.
- 2 different media types (e.g., SD card and External Hard Drive).
- 1 copy off-site (Cloud storage like Google Drive or Dropbox).
- Use High-Quality Hardware: Invest in “Class 10” or “V30/V60” cards from reputable brands like SanDisk or Samsung. Cheap, unbranded cards have a significantly higher failure rate.
- Safely Eject: Always click the “Safely Remove Hardware” icon in your Windows system tray before pulling the card out. Sudden power loss is the leading cause of partition corruption.
Part 6: Frequently Asked Questions
1.Can sd card data recovery software recover photos from a physically snapped card?
No. If the memory chip inside the card is physically cracked or broken, software cannot communicate with the data. You would need to contact a specialized hardware forensic lab, which is often very expensive.
2.Why do some recovered files refuse to open?
This usually happens due to “overwriting.” If new data was saved to the card after the deletion, it might have overwritten parts of the old file. While the sd card data recovery software can find the file name, the actual data inside might be corrupted or incomplete.
3.Is it safe to use “Cracked” versions of professional software?
Absolutely not. “Cracked” sd card data recovery software often contains trojans or ransomware that can encrypt your entire computer. Always use official versions like PandaOffice Drecov to ensure your data remains private and secure.
4.How long does a “Deep Scan” typically take?
Depending on the speed of your card reader and the size of the SD card (e.g., 256GB), a deep scan can take anywhere from 30 minutes to several hours. Patience is key!
Conclusion
Data loss on an SD card can feel like a disaster, but as we’ve explored, the data is rarely “gone” immediately. By understanding the library-and-index principle, you can remain calm and use the right tools to solve the problem.
For quick, accidental deletions, Recuva is a great starting point. However, for serious issues like formatted disks or RAW errors, a professional sd card data recovery software like PandaOffice Drecov offers the highest probability of success through its intuitive three-step process and deep-scanning technology. Remember: stop using the card, scan with a reliable tool, and always maintain a backup for the future.


