


Imagine finishing a critical client presentation at 11 PM, only to accidentally delete it—and then empty the Recycle Bin in a late-night cleanup spree. Panic sets in fast, but you don’t have to start over. Learning how to recover a file from the recycle bin is a vital skill for anyone who uses a computer, and the process is simpler than you might think. This guide walks you through common scenarios and step-by-step fixes to get your data back.
Why Files Disappear (And Why They’re Often Recoverable)
First, let’s clear up a myth: deleting a file (even from the Recycle Bin) rarely erases it permanently. Your OS just removes the “address” that points to the file and marks its disk space as “available.” The data stays until new files overwrite it. But why do some files skip the Recycle Bin entirely? Common reasons include:
- Hitting Shift + Delete: This shortcut bypasses the Recycle Bin entirely.
- File size limits: Large files (exceeding the Recycle Bin’s allocated space) get deleted directly.
- External drives: Files deleted from USBs or external HDDs don’t go to your PC’s Recycle Bin. For external drive data recovery
- Auto-empty settings: Some systems or tools empty the Recycle Bin automatically after a set period.
Solution 1: Data Recovery Software (Most Reliable for Quick Fixes)
If you act fast (before new data overwrites the old), data recovery software is your best bet. PandaOffice Drecov is a user-friendly option that works for both Windows and Mac, and it’s designed specifically to help you recover a file from the recycle bin efficiently.
Step-by-Step with PandaOffice Drecov:
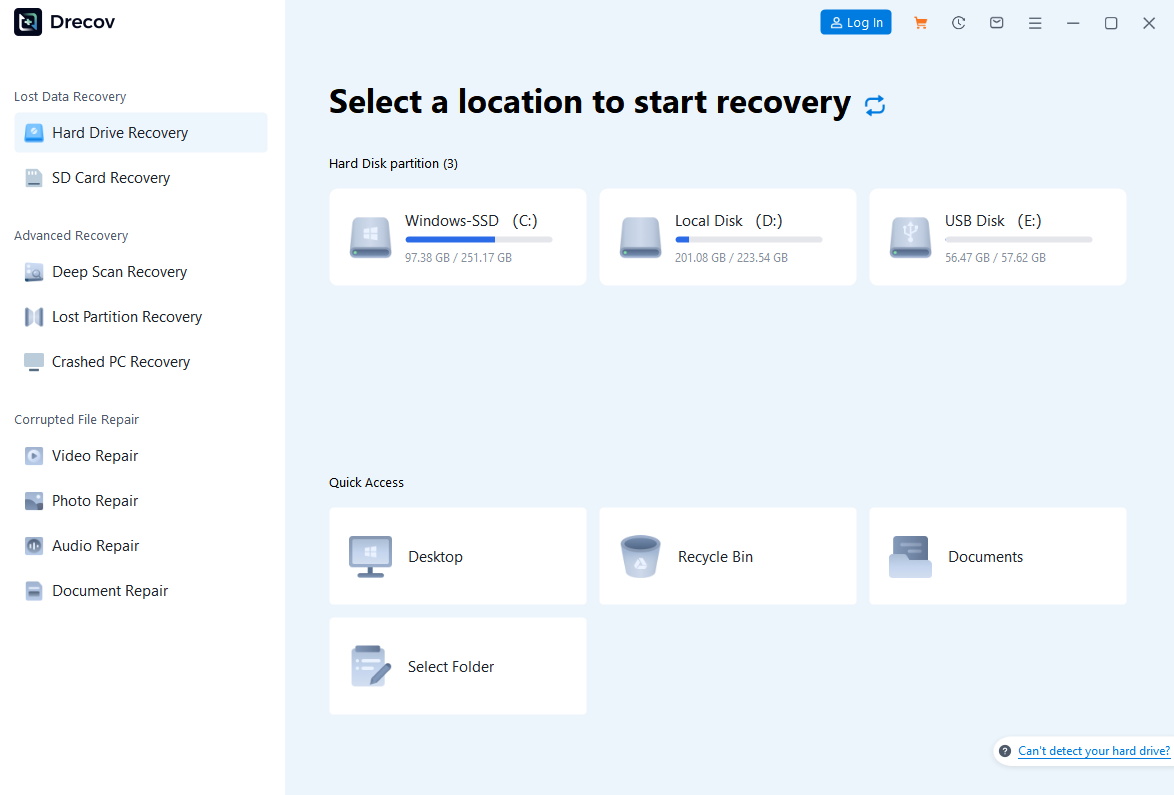
1.Download and install the software from the official site—don’t install it on the disk where your file was lost (this avoids overwriting).
2.Launch the app and select the “Recycle Bin Recovery” mode from the main menu.
3.Start the scan. Use “Deep Scan” for older or harder-to-find files (it takes longer but is more thorough).
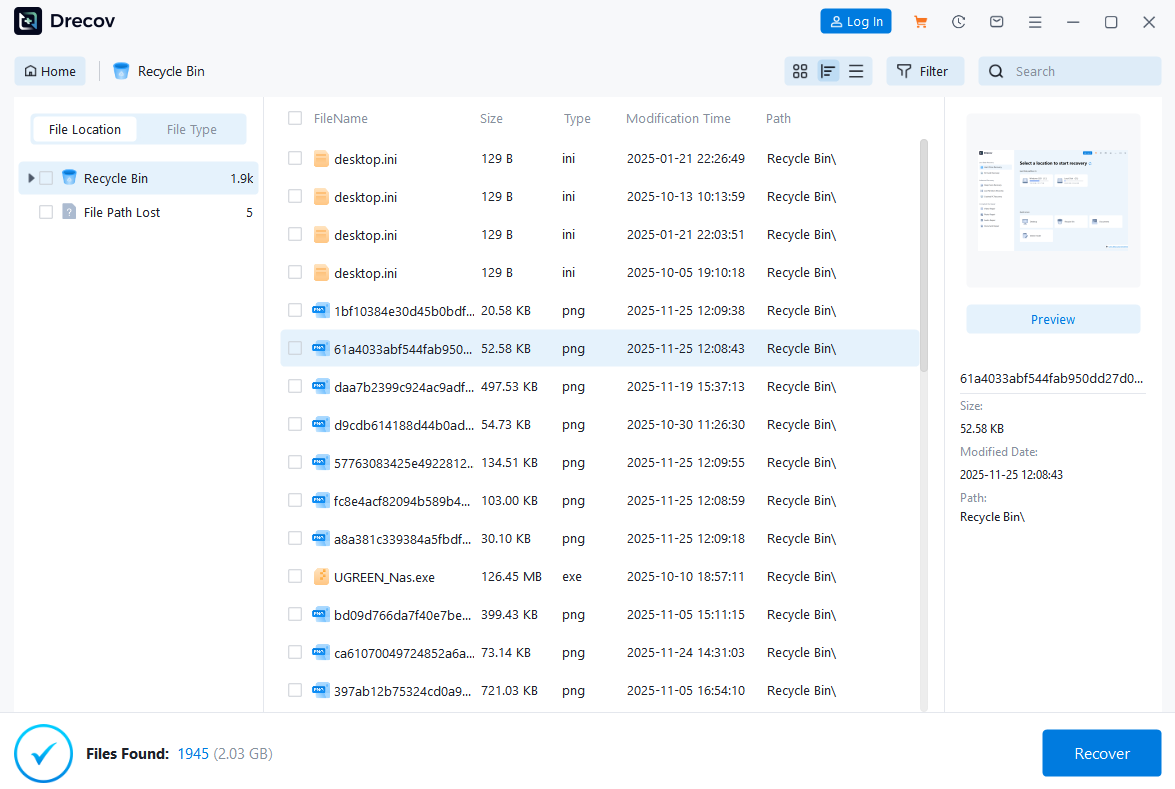
4.Filter results by filename, type, or date. Preview files to confirm they’re intact, then click “Recover.”

5.Save the recovered file to a different disk or USB drive—never save it back to the original location.
Solution 2: System Backups (For Those Who Planned Ahead)
If you enabled backups beforehand, this method is foolproof. It’s also a great reminder: regular backups eliminate the stress of figuring out how to recover a file from the recycle bin in the first place.
Windows Users
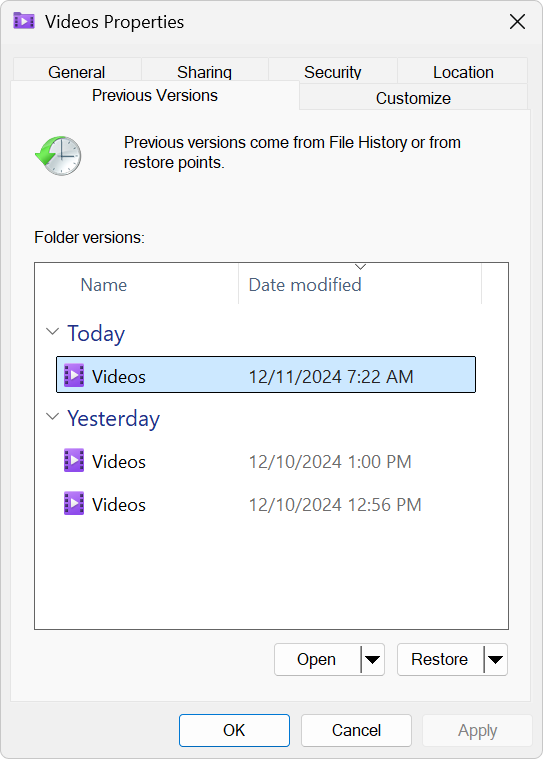
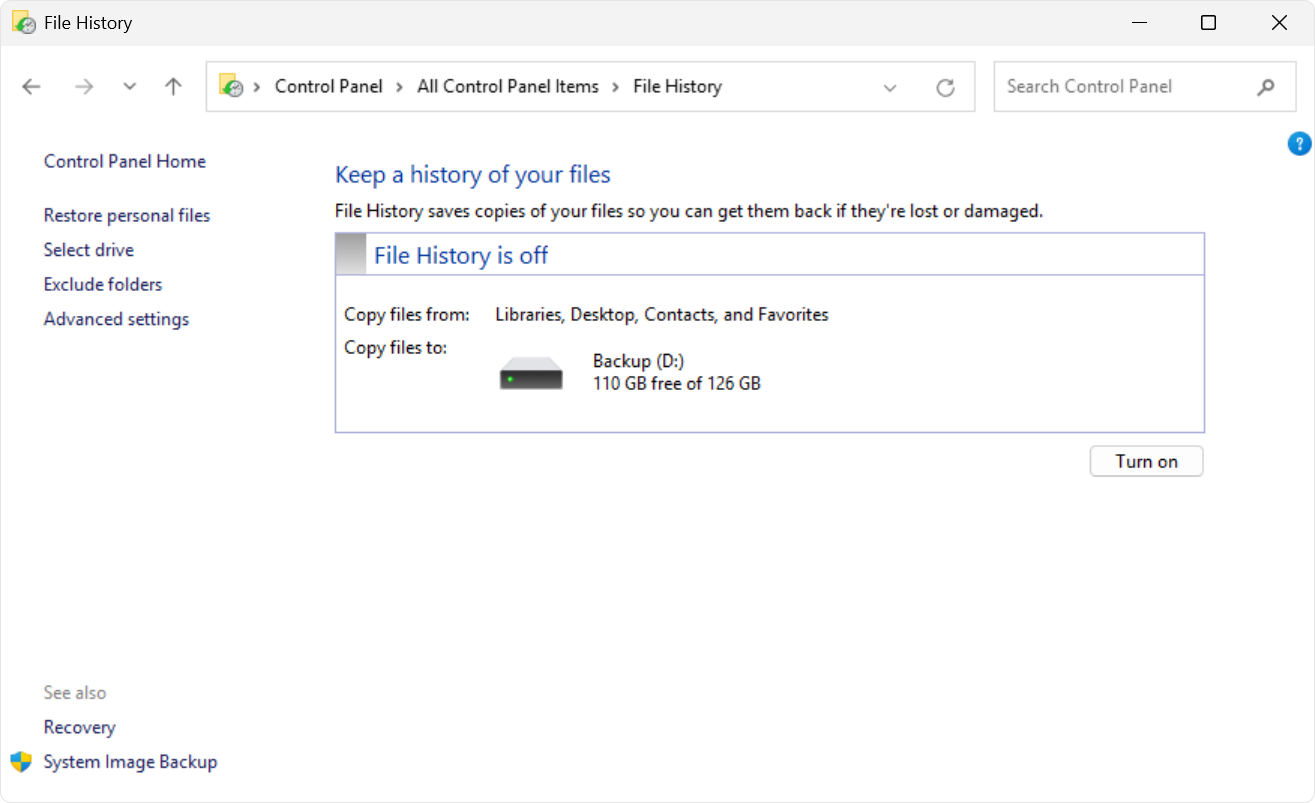
- File History: Right-click the folder where the file was stored > “Properties” “Previous Versions.” Select a version from before deletion and click “Restore.” Enable File History on your PC via Windows 11 File History Setup Guide
- Backup and Restore (Windows 7): Go to Control Panel > “Backup and Restore” > “Restore my files.” Follow the wizard to retrieve your data Microsoft Windows 7 Backup Tutorial
Mac Users
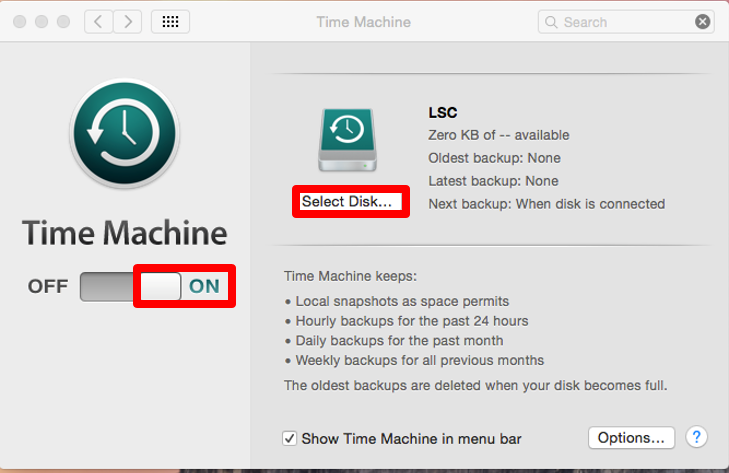
Time Machine: Connect your backup drive, click the Time Machine icon in the menu bar, and use the timeline to find the file. Select it and click “Restore.” Set up Time Machine with this Apple Official Time Machine Guide.
Solution 3: Advanced Fixes (For Tech-Savvy Users)
Windows Registry Tweak (For Missing Recycle Bin Entries)
If the Recycle Bin is empty but you suspect files are still there, try this (back up the registry first!)
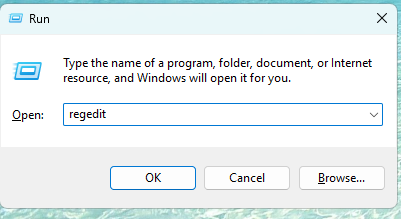
1.Press Win + R, type “regedit,” and hit Enter to open the Registry Editor.
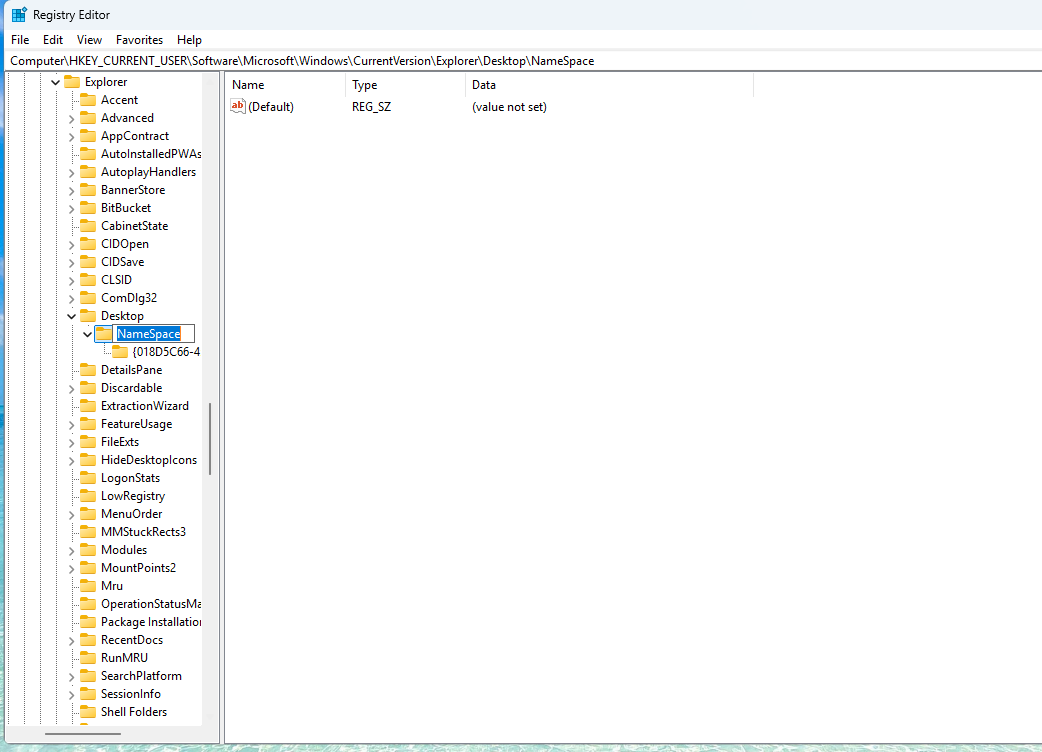
2..Navigate to: HKEY_LOCAL_MACHINE\SOFTWARE\Microsoft\Windows\CurrentVersion\Explorer\Desktop\NameSpace

3.Right-click “NameSpace” > “New” > “Key.” Name it {645FFO40-5081-101B-9F08-00AA002F954E}.
4.Double-click the “Default” value, enter “Recycle Bin,” and restart your PC. Check if files reappear.
Command Prompt (Fix File System Errors)
1.Press the Win + S keys, then type “CMD” in the search box.
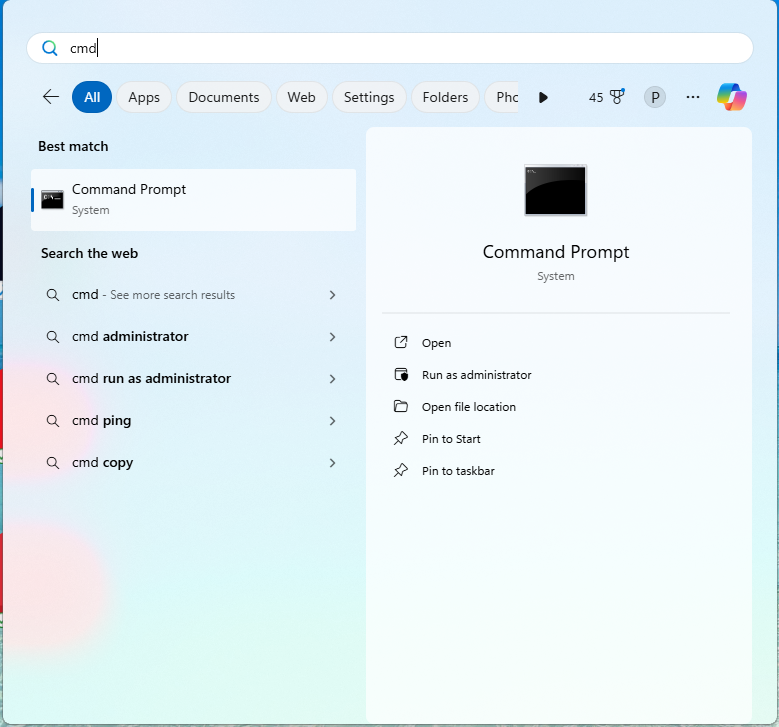
2.Right-click “Command Prompt” in the search results and select “Run as administrator”
3.When the User Account Control (UAC) pop-up appears, click “Yes” to authorize.
4.In the opened CMD window, enter the command chkdsk X: /f (replace X with the target drive letter, e.g., enter chkdsk D: /f for drive D).
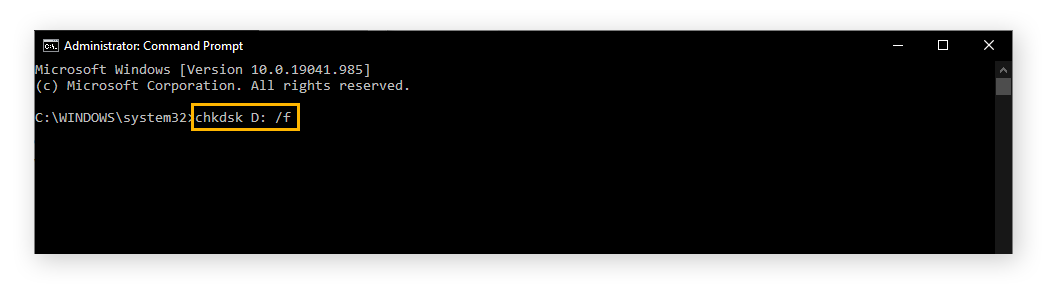
5.Press Enter to start the disk error check and automatic repair:
- For non-system drives (e.g., D/E drives): The check runs directly. A progress bar may appear—wait for completion (duration ranges from a few minutes to dozens of minutes, depending on disk size and number of errors).
- For system drive (drive C): A prompt will appear stating “Cannot execute immediately. Schedule to run on next system restart?”. Type “Y” and press Enter, then restart your computer. The system will automatically run chkdsk during startup—do not interrupt until the repair finishes and the system boots up normally.
6.After chkdsk completes, keep the CMD window open and enter the command ATTRIB -H -R -S /S /D X:\*.* (replace X with the target drive letter, e.g., enter ATTRIB -H -R -S /S /D D:\*.* for drive D).
7.Press Enter to start scanning the target disk and removing “Hidden (-H)”, “Read-only (-R)”, and “System file (-S)” attributes:
File paths will scroll during the process—no manual operation is needed. Wait for the scan to finish, which depends on the number of files on the disk.
Solution 4: Professional Help (For Critical Data)
If software fails and the file is irreplaceable:
- Local Tech Services: Shops offer physical recovery (e.g., hard drive repairs) for hardware issues.
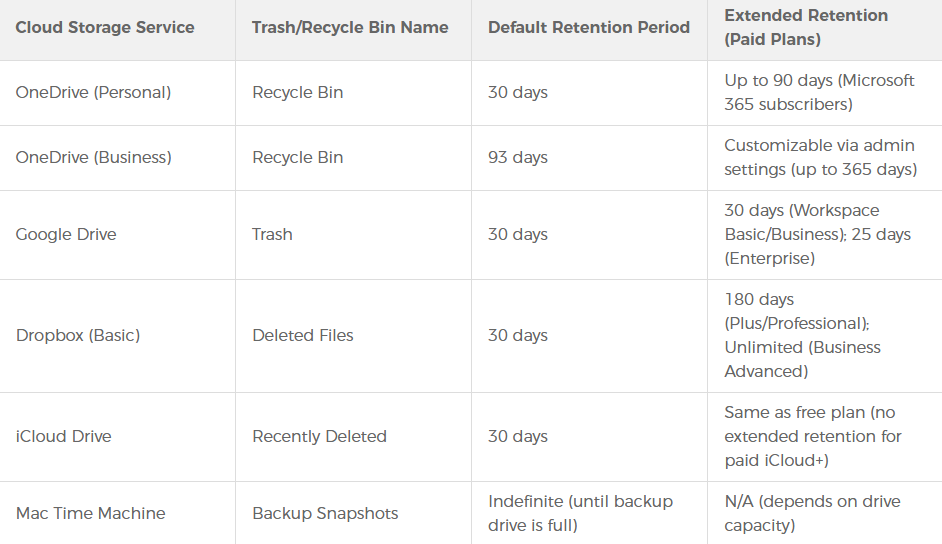
- Cloud Recycle Bins: For files synced to OneDrive, Google Drive, or Dropbox, check the service’s web-based “Trash”—this is often an overlooked way to recover a file from the recycle bin of your cloud storage.
Key Do’s and Don’ts
- ✅ Do stop using the affected disk immediately—no new downloads or installs.
- ❌ Don’t save recovered files to the original disk.
- ✅ Do use free scans first (most tools let you verify files exist before paying).
The key to successful data recovery is acting fast—before new data overwrites the old. Whether you use PandaOffice DRecov for a quick fix, rely on backups, or turn to professionals, these methods take the guesswork out of how to recover a file from the recycle bin. And remember: the best recovery tool is a regular backup habit—so set one up today to avoid future panic.


