


Data loss is a digital nightmare that most computer users will face at some point. Whether it is an accidental click of the “Delete” button or a sudden drive failure, the panic is real. Fortunately, software solutions like Recuva recover deleted files by tapping into the way operating systems handle storage. However, while Recuva is a household name, the landscape of data recovery has evolved. Modern users often require more robust engines and higher success rates, leading many to transition to professional-grade tools like PandaOffice Drecov.
In this comprehensive guide, we will explore the mechanics of data retrieval, how to use traditional tools, and why Drecov has become the gold standard for those who cannot afford to lose their precious memories or critical business documents.
Understanding File Deletion
What Happens When You Delete a File
When you delete a file on Windows, the operating system doesn’t immediately grind the data into dust. Instead, it performs a logical deletion. It modifies the file allocation table to mark the space occupied by that file as “available.” To the user, the file is gone. To the hard drive, the raw binary data stays exactly where it was until a new file needs that specific “shelf space” to sit on.
This is why you might find yourself searching for where is recycle bin in windows 10 immediately after a mistake. If the file is still in the bin, recovery is instant. If you’ve emptied the bin, you enter the realm of professional recovery software.
Why Deleted Files Can Still Be Recovered
The reason we can recover deleted files is due to this “lazy” deletion method. Erasing every bit of a 10GB movie would take significant processing power and time. By simply “unlinking” the file, Windows stays fast. Until that physical space is overwritten by a new photo, a Windows update, or a temporary internet file, the original data is “ghosting” on your platter or flash cells. Tools like Drecov and Recuva scan these unlinked sectors to rebuild the file headers and restore your data to a visible state.
Introduction to Recuva
What Makes Recuva Popular
Recuva gained fame because it offered a functional free tier during an era when most recovery software was locked behind expensive paywalls. Its lightweight installer and “Wizard Mode” made it accessible to the average person who just wanted to recover deleted files without a computer science degree.
Key Features and Capabilities
The software is known for its ability to handle basic FAT and NTFS partitions. It provides a simple color-coded system (Green, Orange, Red) to indicate the health of a deleted file. While it is a solid entry-level tool, users often find that for complex partition loss or formatted drives, they need the deeper heuristic analysis provided by PandaOffice Drecov.
Types of Files Recuva Can Recover
Documents, Photos, Videos, and More
Standard recovery tools focus on common extensions. If you are trying to recover deleted files such as .docx, .jpg, or .mp4, most tools will suffice. However, data recovery is often about the “hidden” files. For instance, if you lose your browser data, you might need to know where are firefox bookmarks stored on your pc to target the specific database files for recovery.
Storage Devices Supported
Most users assume recovery is only for internal hard drives. In reality, modern tools support:
- External USB Hard Drives
- SD Cards (from cameras or drones)
- Virtual Drives
- MP3 Players
The Superior Alternative: PandaOffice Drecov
While the keyword recuva recover deleted files is popular, seasoned IT professionals often lean toward PandaOffice Drecov. Drecov utilizes a more advanced “Deep Sensing” algorithm that can piece together fragmented files that simpler tools often miss. It is specifically optimized for Windows 10 and 11, ensuring compatibility with the latest system file changes.
⚠ Warning: Install it on a drive different from the one where your data was lost to prevent overwriting.
Step-by-Step Guide to Using Drecov Data Recovery
If you have tried other methods and failed, or if you want the highest success rate on your first attempt, follow these steps to use Drecov.
Step 1: Select the Recovery Location
Launch Drecov. You will see a clean dashboard listing all connected drives. Select the specific partition or folder. If you are unsure where the files went, you can select the “Desktop” or “Recycle Bin” specifically.

Step 2: Choose the Scan Mode
Drecov offers a Quick Scan for recently deleted items and a Deep Scan for formatted or “lost” partitions. For the best results in finding recuva recover deleted files alternatives, we recommend the Deep Scan.

Step 3: Filter and Preview
As the scan progresses, Drecov populates a list. Use the Filter sidebar to narrow down results by file type (e.g., Pictures, Documents). You can double-click a file to Preview it. If you can see the image in the preview, it is 100% recoverable.

Step 4: Execute Recovery
Check the boxes next to the files you need. Click the Recover button.
Important: Save the recovered files to a completely different physical disk to prevent data corruption.
Advanced Recovery Techniques
Deep Scan Explained
A Deep Scan doesn’t just look at the file table; it looks at the “raw signatures” of the data. Every file type has a unique “header.” For example, a PNG file always starts with a specific set of bytes. Drecov can find these headers and “carve” the file out of the raw data.
Using Filters and File Preview
When you attempt to recover deleted files, you might be faced with 100,000 results. Efficiency is key. Professional tools allow you to filter by:
- Size: Ignore tiny system thumbnails.
- Date Modified: Focus only on files lost yesterday.
- File Extension: Search only for
.pdf.
Step-by-Step Guide: How to Recuva Recover Deleted Files Like a Pro
If you have decided to use this classic utility, following a precise workflow is essential to maximize your chances of success. Below is a detailed, technical walkthrough on how to Recuva recover deleted files using the built-in wizard and advanced options.
- Step 1: Launch the Recuva Wizard. When you first open the application, the Recuva Wizard will greet you. This is the most user-friendly way to initiate a search.
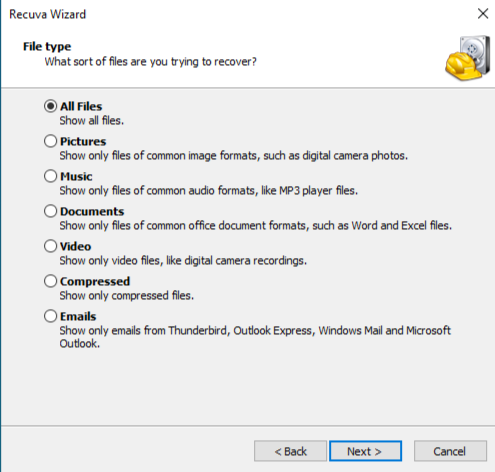
- Step 2: Define the File Type. The software will ask what type of files you are trying to retrieve. You can choose from Pictures, Music, Documents, Video, Compressed, or Emails.
- Action: Select the specific category to speed up the scanning process.
- Note: If you are trying to recover deleted files of multiple formats (e.g., a mix of
.jpgand.docx), select All Files.
- Step 3: Specify the File Location. To save time, tell the software where the files were originally located.
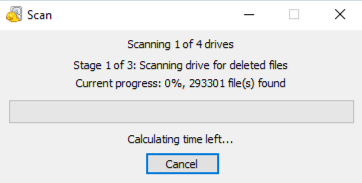
- Step 4: Enable Deep Scan. Before clicking “Start,” you will see a checkbox for Enable Deep Scan.
- When to use it: Only check this if a previous “Quick Scan” failed to find your data. A Deep Scan can take several hours as it analyzes the drive sector-by-sector, but it is much more effective for formatted disks.
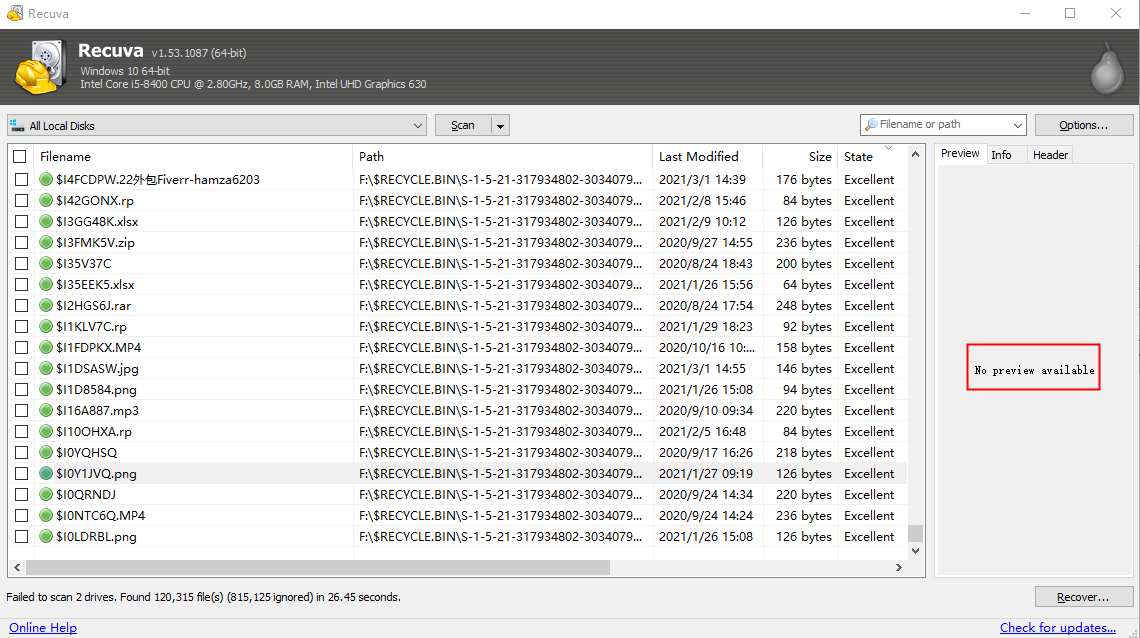
- Step 5: Analyze the Scan Results. Once the scan concludes, a list of files will appear. Recuva uses a simple traffic-light system to indicate the “health” of the data:
- Green Circle: Excellent condition; the file is fully intact.
- Orange Circle: The file is partially overwritten; recovery may be corrupted.
- Red Circle: The file is unrecoverable because its clusters have been taken over by new data.
- Step 6: Execute the Recovery
- Action: Tick the checkboxes next to the files you wish to restore.
- Final Step: Click the Recover… button in the bottom-right corner.
Critical Warning: When the file explorer pops up, select a destination drive different from the source. For example, if you are recovering from Drive C, save the output to a USB flash drive or an external HDD.
Recovery Success Factors
File Overwriting Risks
The moment you realize data is missing, STOP. Do not browse the web, as browser caches write data to the disk. Do not download large files. If the deleted file’s sectors are overwritten by a new Windows update, no software on earth—not even Drecov—can bring it back.
Timing and Best Practices
The “Golden Hour” of data recovery is the first 60 minutes after deletion. The less the OS moves data around, the better. This is especially true if your windows save as default location is stuck on onedrive, as cloud syncing can trigger immediate write operations that overwrite local deleted bits.
Common Problems and Fixes
Files Not Found
If a standard scan for recuva recover deleted files fails, it is usually because the file system was slightly corrupted. In these cases, using Drecov’s “Partition Recovery” mode is the next logical step. It can find “lost” volumes that Windows doesn’t even recognize in File Explorer.
Corrupted Files After Recovery
Sometimes a file is recovered but won’t open. This happens when the file was “fragmented” (scattered in different places on the disk). While Recuva might struggle with fragmentation, Drecov’s intelligent rebuilding engine is designed to stitch these fragments back together.
Recuva vs. PandaOffice Drecov
| Feature | Recuva | PandaOffice Drecov |
| Ease of Use | High (Wizard based) | Very High (Modern UI) |
| Deep Scan Power | Standard | Advanced Heuristics |
| Success Rate | Moderate | High |
| File Preview | Basic | Full High-Res Preview |
| System Support | Legacy Windows | Windows |
Tips to Prevent Data Loss
Backup Methods
The only 100% effective way to recover deleted files is to have a backup. We recommend the 3-2-1 rule:
- 3 copies of your data.
- 2 different media types (Local Drive + Cloud).
- 1 copy off-site (External drive at a friend’s house or specialized cloud storage).
Safe Computing Habits
Before you perform a major system change, like learning how to factory reset a chromebook, always verify your backups. Furthermore, using a high-quality Surge Protector can prevent the drive head crashes that lead to physical data loss.
Recover Deleted Files FAQs
1. Can Recuva recover files from a formatted drive?
Yes, but it is limited. For a “Quick Format,” it can usually find the data. For a “Full Format,” or if a new OS was installed, you will likely need the deeper scanning capabilities of Drecov.
2. Is it safe to recover files back to the same drive?
No. This is the most common mistake. If you recover “File A” and save it onto the same drive, “File A” might be written directly on top of “File B,” which you also wanted to save. Always recover to an external USB or a different partition.
3. Does Drecov support SSD recovery?
Yes, though SSDs have a feature called TRIM that makes recovery harder than on traditional HDDs. Drecov is optimized to work with SSD controllers to find data before the TRIM command fully clears the cells.
4. How long does a Deep Scan take?
This depends on the size of the drive. A 1TB drive might take 2-4 hours to scan every single sector. Patience is key when you want to recover deleted files properly.
5. Can I recover files that were deleted years ago?
Only if that specific area of the hard drive has never been used since. In practice, this is very rare, but it is always worth running a scan with Drecov just to see what remains in the “digital dust.”
Conclusion
While the search for recuva recover deleted files often starts the journey, most users find that data recovery is a nuanced field. Recuva is a fantastic starting point for simple tasks, but for those dealing with irreplaceable photos or vital business records, PandaOffice Drecov offers the precision and power needed for modern storage environments. Remember: stay calm, stop writing to the drive, and use a tool that offers a clear preview before you commit to the recovery.


