


Cleaning out the Recycle Bin is a simple but crucial task for maintaining optimal computer performance. While it serves as a safety net for deleted files, it can accumulate quickly, taking up valuable disk space. In this guide, we will walk you through multiple methods of cleaning out the Recycle Bin, arranged by ease of use and technical complexity, with a special focus on the PandaOffice Drecov tool for file recovery.
Understanding the Recycle Bin
What Happens When You Delete Files
When you delete a file, it isn’t instantly gone—it gets moved to the Recycle Bin, a temporary storage area on your computer. Think of this as your computer’s trash can. Files remain there until you manually delete them permanently. This provides a safety net for users, allowing you to recover files you may have accidentally deleted. However, files in the Recycle Bin continue to take up valuable storage space on your hard drive.
Why Cleaning the Recycle Bin Matters
Regularly cleaning out the Recycle Bin is essential for several reasons:
- Storage Efficiency: Files in the Recycle Bin still consume storage space. Over time, they can accumulate and reduce the available space on your hard drive.
- Performance: A cluttered Recycle Bin can slow down your computer’s performance. By clearing it out, you free up space for new files and maintain system efficiency.
- Privacy: Files in the Recycle Bin are not permanently deleted, which means they can be recovered. If you want to permanently erase sensitive data, it’s important to clean out the Recycle Bin.
Methods to Empty the Recycle Bin
1. Using Desktop Icon (Simple and Quick)
The most common and easiest method to clean out the Recycle Bin is directly through the desktop icon.
Step-by-Step Instructions:
- Step 1: Locate the Recycle Bin icon on your desktop.
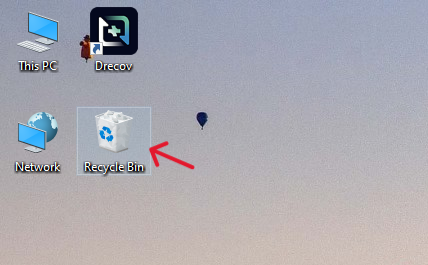
- Step 2: Right-click the icon.
- Step 3: Select “Empty Recycle Bin” from the context menu.
- Step 4: A confirmation window will appear asking if you’re sure you want to permanently delete the files. Click Yes.
This method is fast, simple, and perfect for users who want to empty the Recycle Bin without any extra effort. It’s ideal for basic cleaning.
2. Using PandaOffice Drecov Tool (For Recovery & Cleanup)
In some cases, you might not want to permanently delete files right away but prefer to review or recover them first. The PandaOffice Drecov tool is an excellent solution for this. PandaOffice Drecov helps recover files before you empty the Recycle Bin, ensuring you don’t accidentally lose something important.
⚠ Warning: Install it on a drive different from the one where your data was lost to prevent overwriting.
Step-by-Step Instructions:
- Step 1: Select the Recycle Bin drive or folder from the list of available locations in the app.

- Step 2: Click Scan to start searching for deleted files inside the Recycle Bin.

- Step 3: After the scan, preview the recoverable files. If you find any important ones, select them and click Recover to restore them to a safe location.

- Step 4: Once you’ve recovered your files, return to the desktop and right-click the Recycle Bin icon to “Empty Recycle Bin”.
Warning: Always double-check the files you are about to permanently delete. Use PandaOffice Drecov to ensure nothing important is lost before cleaning out your Recycle Bin.
This method combines file recovery with cleaning, offering a more thorough and careful way of managing your Recycle Bin. It’s perfect for users who may accidentally delete files they still need.
3. Using File Explorer (For More Control)
Another common method for cleaning the Recycle Bin is via File Explorer, especially if you are used to working within that environment.
Step-by-Step Instructions:
- Step 1: Open File Explorer by pressing
Windows + E. - Step 2: In the left sidebar, locate the Recycle Bin and click on it.
- Step 3: In the File Explorer toolbar, click on “Empty Recycle Bin”.
- Step 4: A confirmation dialog will pop up. Click Yes to permanently delete all the files in the Recycle Bin.
This method is perfect for users who are already in File Explorer and want to empty the Recycle Bin without switching contexts. It’s slightly more integrated but still easy to perform.
4. Using Storage Sense (Automatic Cleanup)
If you want to automate the process and don’t want to remember to manually empty the Recycle Bin, Windows offers a built-in feature called Storage Sense. You can set it to empty your Recycle Bin automatically.
Step-by-Step Instructions:
- Step 1: Press
Windows + Ito open Settings. - Step 2: Go to System > Storage.
- Step 3: Scroll down and click on Storage Sense under the Local Disk (C:).
- Step 4: Turn on Storage Sense and click on Configure Storage Sense or run it now.
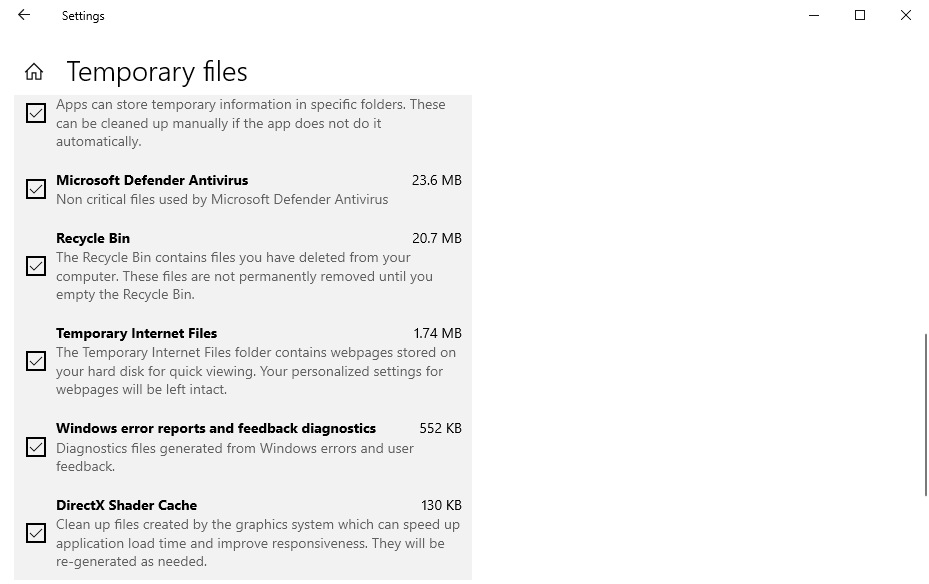
- Step 5: Choose how often you want the system to clean out the Recycle Bin (e.g., every 30 days).
- Step 6: Click Apply to save your settings.
This method is ideal for those who prefer a hands-off approach. Storage Sense will take care of regular maintenance, ensuring your system stays clean and optimized without manual effort.
5. Using Command Prompt (Advanced Users)
For advanced users who are comfortable with command-line tools, you can use the Command Prompt to clean out the Recycle Bin.
Step-by-Step Instructions:
- Step 1: Open Command Prompt as Administrator by typing cmd in the Windows search bar and selecting Run as Administrator.
- Step 2: Type the following command to empty the Recycle Bin for the C: drive:
rd /s /q C:\$Recycle.bin
- Step 3: Press Enter.
Explanation:
- rd stands for remove directory.
- /s removes all files and subfolders within the Recycle Bin.
- /q suppresses the confirmation prompt.
Warning: Make sure you’re using the correct drive letter (e.g., C, D) based on where your Recycle Bin is located.
This method is highly efficient for users who want a quick, no-nonsense way of cleaning out the Recycle Bin, but it requires familiarity with command-line interfaces.
Managing Storage Space Efficiently
Setting Size Limits for Recycle Bin
To prevent the Recycle Bin from growing too large, you can set a size limit, ensuring it doesn’t consume too much disk space.
Step-by-Step Instructions:
- Step 1: Right-click the Recycle Bin icon on your desktop.
- Step 2: Select Properties.
- Step 3: Under the Settings for selected location tab, select Custom size and set a maximum size limit for the Recycle Bin.
- Step 4: Click Apply and then OK.
This will help ensure that the Recycle Bin doesn’t take up more space than you want, and it will automatically delete older files when the set limit is reached.
Common Issues While Emptying Recycle Bin
Files Won’t Delete
If you encounter issues where files won’t delete, it’s often due to system errors or locked files. Try restarting your computer to resolve the issue, as this can unlock files and allow you to empty the Recycle Bin.
Corrupted Recycle Bin
If your Recycle Bin becomes corrupted, it might fail to empty properly. In such cases, you may need to manually delete the $Recycle.Bin folder and restart your system. This forces Windows to rebuild the Recycle Bin.
Safety Tips Before Cleaning
Checking Important Files
Before you empty the Recycle Bin, double-check its contents to ensure you’re not deleting anything important. Once the files are deleted, they are much harder to recover without specialized tools like PandaOffice Drecov.
Backup Recommendations
To avoid losing important files, make sure you back them up regularly to an external drive or cloud storage. This ensures that even if you accidentally delete something, you’ll be able to recover it.
For more detailed help on managing your Recycle Bin and recovering files, check out these
articles:
- Where is Recycle Bin in Windows 10? 3 Quick Ways to Find It
- How to Remove the Recycle Bin from Desktop in Windows 10/11
- Where Do I Find Recycle Bin in Windows 10?
How to Clean Out Recycle Bin FAQs
1. How Often Should I Empty the Recycle Bin?
It’s a good habit to empty the Recycle Bin at least once a month or whenever storage space becomes limited. Regularly cleaning the bin helps free up valuable disk space and ensures your system remains optimized. If you’re working with large files, you might want to do this more frequently.
2. Can I Recover Files After Emptying the Recycle Bin?
Yes, it’s possible to recover files even after emptying the Recycle Bin, but it depends on how much time has passed and whether the space has been overwritten. Tools like PandaOffice Drecov can help you recover deleted files, but the sooner you attempt recovery, the higher the chances of success.
3. Does Emptying the Recycle Bin Improve Computer Performance?
Emptying the Recycle Bin can indeed improve performance. When files accumulate in the bin, they continue to take up disk space, which can slow down your system. By clearing it regularly, you free up storage, which can contribute to faster processing and better system efficiency.
4. Is There a Way to Automatically Empty the Recycle Bin?
Yes, Windows has a feature called Storage Sense that allows you to set automatic cleanup for your Recycle Bin. You can configure it to empty files older than a certain number of days, ensuring the bin doesn’t accumulate too much data and freeing up space automatically.
5. Why Are Some Files Not Deleting from the Recycle Bin?
If certain files won’t delete, it could be due to permissions issues or files being locked by running programs. Try restarting your computer to release any locks on the files. If the problem persists, consider using PandaOffice Drecov to restore the files and troubleshoot further.
Conclusion
In summary, cleaning out the Recycle Bin is a simple yet vital task for maintaining your computer’s performance and ensuring efficient storage management. Whether you prefer using the desktop icon, File Explorer, or automated tools like Storage Sense, regular maintenance is key to avoiding unnecessary space usage. For those who accidentally delete important files, PandaOffice Drecov offers a powerful solution for recovering lost data before you permanently empty the bin. With these methods, you can ensure that your system stays clean, efficient, and secure, while easily managing your files and storage space.


