


In the modern digital landscape, data is the lifeblood of both personal productivity and professional success. Whether you are a student saving your thesis or a business owner managing client contracts, knowing how to use OneDrive effectively is no longer just a “nice-to-have” skill—it is a fundamental necessity. Microsoft’s cloud storage solution offers a seamless way to store, sync, and protect your files, yet many users barely scratch the surface of its potential.
However, even with the most robust cloud systems, data loss can occur. A frantic accidental deletion or a synchronization error can leave you feeling helpless. This comprehensive guide will walk you through everything from the initial setup to advanced data restoration techniques, including how to leverage professional tools like PandaOffice Drecov data recovery software when standard methods fail.
The Foundation of Cloud Storage: How to Setup OneDrive on Windows 10/11
Before you can harness the power of the cloud, you must ensure the foundation is solid. Windows 10 and 11 come with OneDrive pre-installed, but the configuration process determines how efficiently your files are managed.
Step 1: Sign in to your Microsoft Account
Click on the Start menu and type “OneDrive.” Open the application. If you aren’t signed in, a setup window will appear. Enter your Microsoft credentials (email and password). If you don’t have an account, you can create one at the official Microsoft account page.
Step 2: Choose Your Folder Location
OneDrive will suggest a default path, usually C:\Users\[Username]\OneDrive. While this works for most, you can click Change location if you prefer to store your local cloud cache on a different drive partition to save space on your primary SSD.
Microsoft will present a few introductory slides. Pay attention to the “Sync files from your PC” screen. Here, you can choose to backup your Desktop, Documents, and Pictures folders automatically.
Step 4: Complete the Configuration
Once finished, the OneDrive icon (a small blue or white cloud) will appear in your System Tray (bottom right corner of the taskbar).
Expert Tip: To ensure you always have the latest features and security patches, verify your version by right-clicking the cloud icon > Settings > About. The latest builds ensure maximum compatibility with Windows 11’s fluid design.
Optimizing Your Workflow: How to Sync Folders to OneDrive
Learning how to use OneDrive effectively means mastering the art of synchronization. You don’t have to move every single file into the main OneDrive folder manually; instead, you can dictate which parts of your digital life live in the cloud.
Step 1: Open Settings
Right-click the OneDrive cloud icon in your taskbar and select the gear icon, then click Settings.
Step 2: Manage Backup
Navigate to the Sync and backup tab and select Manage backup. This allows you to toggle the synchronization of your main system folders (Desktop, Documents, etc.).
Step 3: Select Specific Folders
If you want to choose specific subfolders within your OneDrive to appear on your PC, go to the Account tab and click Choose folders. Unchecking a folder doesn’t delete it from the cloud; it simply hides it from your local File Explorer to save disk space.
Step 4: Use the “Always Keep on This Device” Feature
Open File Explorer (Win + E), right-click any file or folder within the OneDrive directory, and select Always keep on this device. This ensures that the files are downloaded to your hard drive and available even without an internet connection.
One of the primary reasons users want to know how to use OneDrive is for its collaboration capabilities. However, sharing “safely” is the keyword here.
Step 1: Locate the File
In your File Explorer, right-click the file or folder you wish to share and select the Share icon (the arrow pointing out of a box).
Step 2: Set Permissions
Do not just copy a link immediately. Click the Settings (gear icon) within the share window. Here, you can choose:
- Anyone with the link: Best for public documents.
- People in your organization: For work/school accounts.
- People with existing access.
- Specific people: The most secure option.
Step 3: Add Extra Protection
Under “More settings,” you can toggle Can edit or Can view. Crucially, for sensitive data, you should Set expiration date and Set password. This ensures the link becomes useless after a certain timeframe.
Step 4: Send the Invitation
Enter the email address of the recipient or click Copy link to send it via your preferred messaging app. You can manage or revoke access at any time by right-clicking the file and selecting Manage Access.
Protecting Sensitive Data: How to Use OneDrive Personal Vault
For your most confidential documents—like passport scans, tax returns, or legal contracts—standard cloud storage might feel insufficient. This is where the Personal Vault comes in. It is a protected area within OneDrive that requires a second factor of authentication.
Step 1: Initialize the Vault
Open your OneDrive folder in File Explorer and double-click the Personal Vault icon. If it’s your first time, follow the prompts to “Set up.”
Step 2: Identity Verification
You will be asked to verify your identity via the Microsoft Authenticator app, a text message, or an email code. This ensures that even if someone gains access to your unlocked PC, they cannot open the Vault.
Step 3: Moving Files
Simply drag and drop your sensitive files into the Personal Vault folder.
Step 4: Automatic Locking
The Personal Vault will automatically lock after a period of inactivity (20 minutes by default on PC). You can manually lock it by right-clicking the Vault icon and selecting Lock Personal Vault.
Warning: Do not lose your two-factor authentication method! If you lose access to your phone or backup email, recovery of Personal Vault files becomes significantly more difficult.
Staying Productive Anywhere: How to Access OneDrive Files Offline
A common misconception is that cloud files are only available when you have Wi-Fi. Understanding how to use OneDrive involves leveraging “Files On-Demand.”
Step 1: Enable Files On-Demand
Go to OneDrive Settings > Sync and backup > Advanced settings. Ensure that Files On-Demand is turned on. This saves space by downloading files only when you need them.
Step 2: Mark Files for Offline Use
If you are about to board a flight, browse to the folders you need in File Explorer. Right-click them and select Always keep on this device. The status icon will change from a blue cloud to a solid green circle with a white checkmark.
Step 3: Open Files Without Internet
You can now open, edit, and save these files as usual while offline.
Step 4: Re-syncing
Once you reconnect to the internet, OneDrive will automatically detect the changes and upload the new versions to the cloud, keeping all your devices in sync.
The Crisis Management Guide: How to Recover Permanently Deleted Files
We have all been there: the “Shift + Delete” shortcut was pressed too hastily, or the Recycle Bin was emptied before you realized a crucial document was inside. When standard methods fail, you need a structured approach to data recovery.
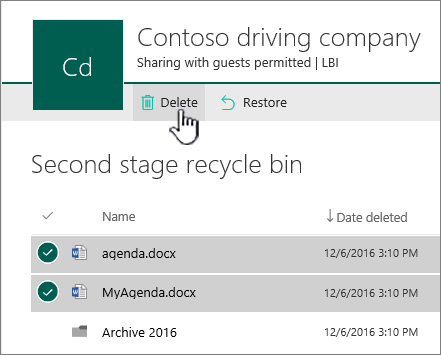
Level 1: The OneDrive Recycle Bin
Before panicking, check the cloud’s safety net.
- Log in to OneDrive.com.
- Click on Recycle bin in the left-hand navigation pane.
- Select your files and click Restore. Note: OneDrive keeps deleted files for 30 days (personal) or 93 days (work/school).
Level 2: Version History
If you accidentally saved over a file with wrong information:
- Right-click the file in File Explorer.
- Select Version history.
- Browse the previous versions by date and click Restore on the one you need.
Level 3: Using PandaOffice Drecov Data Recovery Software
When files are deleted from the local disk and the cloud Recycle Bin has been emptied, you need professional-grade intervention. PandaOffice Drecov data recovery software is designed to scan the physical sectors of your hard drive to find traces of “permanently” deleted data that the operating system can no longer see.
⚠ Warning: Do not install the software on the same drive partition where the lost files were located. This prevents “overwriting” the very data you are trying to save.
Step 1: Select the Drive for Scanning
Launch the application. You will see a list of available drives. Select the drive where your OneDrive local folder was stored (usually the C: drive) and click Scan.

Step 2: Filter and Preview
As the scan progresses, you can use the filter sidebar to look for specific file types (e.g., .docx, .jpg, .pdf). PandaOffice Drecov provides a preview feature. Click on a file to see if it is intact before committing to the recovery.

Step 3: Execute Recovery
Check the boxes next to the files you wish to retrieve. Click the Recover button and choose a different storage device (like a USB flash drive or external HDD) to save the recovered files.
Post-Recovery Maintenance and Further Reading
Once you have successfully navigated the complexities of data loss, it is vital to optimize your system to prevent future issues. Sometimes, the best way to manage your data is to clean up your sync settings or remove redundant integrations.
If you found that a specific folder was causing sync conflicts or data duplication, you might want to learn how to disable a folder from OneDrive and recover lost files to keep your workspace tidy.
For users who prefer a more manual approach to file management and find the sidebar integration distracting, understanding how to remove OneDrive from File Explorer can significantly streamline your interface.
Finally, if you have decided to migrate to a different cloud service or simply want a fresh start, you can follow this guide on how to completely remove OneDrive Personal from your computer without leaving behind registry clutter.
Conclusion
Mastering how to use OneDrive is a journey of balancing accessibility with security. By setting up your environment correctly, utilizing the Personal Vault for sensitive items, and knowing exactly how to act when data goes missing—whether through the cloud Recycle Bin or via PandaOffice Drecov data recovery software—you ensure that your digital life remains resilient. Remember, the best defense against data loss is a proactive sync strategy, but having the right recovery tools in your arsenal is the ultimate safety net.


