


Mastering the PlayStation 3 ecosystem often leads enthusiasts to one specific goal: efficiency. Learning how to install PS3 ISO games from USB is the gold standard for preserving your physical media while enjoying faster load times and a decluttered living room. However, working with external storage devices and custom firmware involves more than just dragging and dropping files. It requires a solid understanding of file systems, directory structures, and—perhaps most importantly—how to handle potential data loss during the transfer process.
In this comprehensive guide, we will walk through every technical layer of the process, from formatting your hardware to executing high-level data recovery if your USB drive fails during a critical game transfer.
Understanding PS3 ISO Files
What Is a PS3 ISO File?
A PS3 ISO file is essentially a full digital copy of a PlayStation 3 game disc. Think of it like a perfect clone—every byte of data from the original Blu-ray disc is preserved inside a single file. Instead of inserting a physical disc into your console, you’re loading that entire game image from storage, such as a USB drive or internal hard drive.
This format is incredibly popular among gamers who want faster load times, easier backups, or simply a more convenient way to manage their game library. It’s like having a shelf full of discs condensed into a portable drive that fits in your pocket. However, while the concept sounds simple, the PS3 system itself wasn’t originally designed to handle ISO files directly.
Can PS3 Play ISO Files Natively?
Here’s the reality: the PlayStation 3 does not support ISO files out of the box. To run ISO games, your console must be modified using custom firmware (CFW) or HEN (Homebrew ENabler). These modifications unlock the system, allowing it to run unofficial applications and load ISO files like real discs.
Without this step, plugging in a USB with ISO files won’t do anything useful—the console simply won’t recognize them. According to documentation at DVDFab, the encryption on retail discs prevents standard file browsers from seeing game data as a mountable image without these modifications. So, before you even think about transferring games, you need to make sure your PS3 is properly set up to handle them.
Requirements Before Installing PS3 ISO Games
Hardware Requirements
Before jumping into the process, let’s make sure you’ve got everything ready. You’ll need:
- A PlayStation 3 console: Must be jailbroken or HEN-enabled.
- A USB flash drive or external HDD: At least 16GB is recommended; 64GB+ is ideal for multiple titles.
- A computer: For transferring and managing ISO files.
- High-quality USB cable: To ensure stable connections if using an external HDD.
The quality of your USB device matters more than you might think. Faster drives significantly reduce transfer times, especially when dealing with large ISO files that can exceed 20GB. Furthermore, using a reliable brand reduces the risk of file system corruption, which is a common headache in the modding community.
Software Requirements (CFW / HEN)
On the software side, you’ll need:
- Custom Firmware (CFW) or PS3 HEN: The “operating system” modification.
- multiMAN: A versatile backup manager and file explorer.
- webMAN MOD: A plugin that allows mounting games directly from the XMB (XrossMediaBar).
These tools act as bridges between your ISO files and the PS3 system. Without them, your console won’t know how to mount or run the games. Installing custom firmware also involves updating via USB and placing files in specific directories, typically inside a PS3/UPDATE folder, as noted by BlogHong.
Preparing Your USB Drive
Formatting USB to FAT32
This step is non-negotiable for standard compatibility. The PS3 legacy hardware primarily supports the FAT32 file system. While some homebrew tools can read NTFS or exFAT, FAT32 remains the baseline for the console to detect the drive in the “Package Manager” or standard menus.
To format your drive:
- 1. Insert the USB into your PC.
- 2. Open File Explorer, right-click the drive, and select Format.
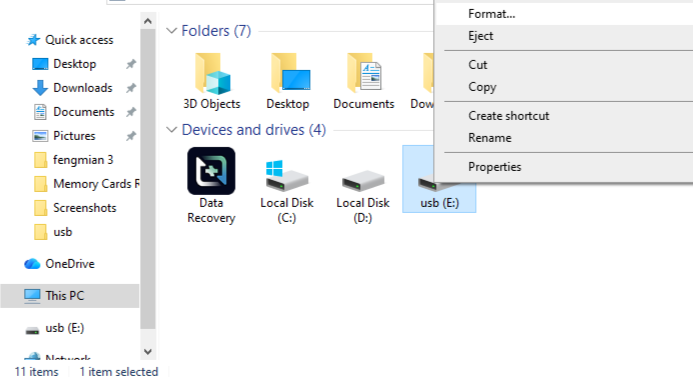
- 3. Choose FAT32 from the File System dropdown. (Note: Windows native formatter won’t allow FAT32 for drives over 32GB; use “GUIFormat” for larger drives).
- 4. Set the Allocation Unit Size to Default and click Start.
Warning: Formatting erases all data. If you mistakenly format a drive containing important files, you will need to perform a data recovery usb drive procedure immediately before writing new game data to the disk.
Creating Correct Folder Structure
Once formatted, you must create a specific directory so the PS3 software knows where to look. In the root of your USB drive, create a folder named:
PS3ISO
This folder must be in all caps and placed at the very top level of the drive. If you skip this step or place files incorrectly, your PS3 tools won’t detect the games. It’s like putting books in the wrong section of a library—they exist, but no one can find them. According to Saint Augustines University technical guides, the PS3 operating environment is case-sensitive and directory-strict when scanning for external media.
Critical Interlude: How to Recover USB Data
Before we proceed to the game transfer, we must address a common pitfall. Many users accidentally format the wrong partition or experience a “Drive must be formatted” error when plugging their USB into a PC after using it on a PS3. If you find your game library or personal files missing, do not panic. You can recover usb data using professional tools like PandaOffice Drecov.
⚠ Warning: Install it on a drive different from the one where your data was lost to prevent overwriting.
Using PandaOffice Drecov for Data Recovery
PandaOffice Drecov is a powerful data recovery product designed to handle logical errors and accidental deletions on external media. Here is how to use it:
- Step 1: Connect the “problem” USB drive to the PC. Launch the software. From the main dashboard, select the USB Drive under the “External Devices” section.

- Step 2: Click Scan. The tool will perform a Quick Scan followed by a Deep Scan to locate fragments of ISO files or deleted documents.

- Step 3: Once the scan is complete, use the filter to look for files. Select the files you wish to retrieve.
- Step 4: Click Recover and choose a destination on your internal hard drive (never save the recovered data back to the same USB drive immediately).
Key Operation Point: Always ensure the USB remains connected throughout the scan. A disconnection can lead to file table corruption.
Warning Prompt: If your USB drive is making clicking sounds or is physically hot, stop immediately; this indicates hardware failure that software cannot fix.
After restoring your files, you may find these resources helpful for future maintenance:
- How to repair corrupted USB flash drive without losing data
- How to recover data from USB drive
- How to recover deleted files from USB drive
Transferring ISO Files to USB
File Naming Rules
Naming might seem trivial, but it actually matters for the database builders in webMAN and multiMAN. Stick to simple formats:
Game_Name.isoMetal_Gear_Solid_4.iso
Avoid special characters like #, %, or &, as these can cause paths to break within the PS3’s Unix-like file system. Clean naming ensures that when you learn how to install PS3 ISO games from USB, the artwork and metadata are pulled correctly from the internet.
Handling Large ISO Files
The biggest hurdle with FAT32 is the 4GB file size limit. Since most PS3 games are between 8GB and 40GB, a single ISO won’t fit on a FAT32 drive. You have two primary solutions:
- ISO Splitting: Use a tool like “PS3ISOStats” or “multiMAN’s split tool” to break the ISO into
.iso.0,.iso.1chunks. multiMAN will automatically join them when copying to the internal HDD. - NTFS Preparation: Use a drive formatted to NTFS. While the PS3 doesn’t see this natively, webMAN MOD includes a “PrepISO” tool that allows the console to read NTFS drives.
Installing Required PS3 Tools
MultiMAN Installation
multiMAN is the “Swiss Army Knife” of the PS3. To install it:
- Download the
multiMAN.pkgfile. - Place it on the root of your FAT32 USB drive.
- On the PS3, go to Game > Package Manager > Install Package Files > Standard.
- Select the PKG file and press X to install.
webMAN MOD Setup
webMAN MOD is a background plugin. Once installed, it adds a folder called “webMAN Games” directly to your XMB. This is the fastest way to launch games because it doesn’t require loading a separate application. Simply run the installer PKG, hold L1 during the reboot process to ensure a full installation, and you are ready.
Copying ISO Games from USB to PS3
Using File Manager
While you can play games directly from the USB, copying them to the internal HDD provides the best performance and prevents stuttering in FMVs (Full Motion Videos).
- Open multiMAN and navigate to the mmOS (File Manager) view.
- Open PS3 Root and go to
dev_usb000(your USB drive). - Go into the
PS3ISOfolder, highlight your game, press Circle, and select Copy.
Correct Internal Directory Path
Now, navigate back to PS3 Root and open dev_hdd0. This is your internal hard drive. Locate the folder:
/dev_hdd0/PS3ISO/
Press Circle and select Paste. The transfer will begin. Depending on the size, this can take 10 to 40 minutes. Ensure your console is well-ventilated during this high-stress read/write operation.
Running PS3 ISO Games
Mounting ISO Files
Once the file is on your internal drive (or still on the USB), you must “mount” it.
- In webMAN Games, select PlayStation 3.
- Find your game and press X.
- The system will “eject” any virtual disc and “insert” your ISO.
Launching from XMB
After mounting, you will be kicked back to the main XMB menu. A new disc icon will appear, usually showing the game’s original retail icon. Simply press X to start the game. It’s a seamless experience that mimics having the physical disc in the drive.
Common Errors and Fixes
USB Not Detected
If your drive isn’t showing up, the most common culprit is the partition table. PS3 only recognizes MBR (Master Boot Record) partitions. If your drive is set to GPT, it will be invisible to the console. You will need to convert the drive back to MBR on your PC, which again highlights the importance of knowing how to recover usb data if you lose files during the conversion.
Game Not Showing
If the ISO is on the drive but the list is empty:
- Go to webMAN Setup.
- Click Refresh XML and Refresh HTML.
- Restart the console. This forces the software to re-scan the
PS3ISOdirectories.
Pros and Cons of Using USB for ISO Games
| Pros | Cons |
| Protects your physical disc laser from wear. | Requires initial technical setup (CFW/HEN). |
| Faster loading times from Internal HDD. | FAT32 4GB limit requires file splitting. |
| Can store hundreds of games on one drive. | Risk of data corruption during transfers. |
| Easy to backup and organize digitally. | Potential for system bans if playing online. |
Safety, Legal, and Performance Considerations
When learning how to install PS3 ISO games from USB, one must tread carefully. Modifying system software voids any remaining warranties and carries a small risk of “bricking” the console if power is lost during a firmware update.
Legally, you should only create and use ISO files for games you physically own. Piracy is a violation of copyright laws and can lead to account bans on the PlayStation Network (PSN). From a performance standpoint, always prefer the right-hand USB port (closest to the disc drive) on Slim and Fat models, as it often shares a more direct bus with the system controller, leading to slightly more stable data rates.
How to Install PS3 iso games from USB FAQs
1. Can I install PS3 ISO games without jailbreaking?
No. The official Sony firmware strictly blocks the execution of unsigned code and disc images. You must have HEN or CFW installed.
2. What is the best format for USB on PS3?
FAT32 is the most compatible, but it requires splitting files over 4GB. NTFS is better for large files but requires the “PrepISO” plugin to be seen by the PS3.
3. Why is my ISO file not showing on PS3?
The folder name must be PS3ISO (all caps) in the root of the drive. Also, ensure the drive is using the MBR partition scheme.
4. Can I play games directly from USB without copying?
Yes, but USB 2.0 speeds on the PS3 are slower than the internal SATA connection. Some high-bandwidth games may experience stuttering during cutscenes.
5. How long does it take to transfer ISO games?
A 20GB game typically takes about 25–30 minutes to transfer over USB 2.0.
Conclusion
Installing PS3 ISO games is a rewarding project that breathes new life into the classic console. By learning how to install ps3 iso games from usb with the correct FAT32/MBR settings, organizing your PS3ISO folders, and utilizing tools like multiMAN and webMAN MOD, you create a high-performance gaming hub. Remember that data integrity is the backbone of this process; if you encounter a drive error, performing a data recovery usb drive scan is essential. Always keep a backup of your ISOs and keep a tool like PandaOffice Drecov handy to recover usb data should a transfer fail or a drive become unreadable.


