


Picture this: You are organizing years of family memories or a decade’s worth of tax returns. You intend to move a single subfolder, but your finger slips. With one accidental click and a quick confirmation, an entire directory containing thousands of files vanishes. You check the Recycle Bin, but it is empty because the folder was too large or you used the “Shift + Delete” shortcut. Panic sets in. However, before you assume your files are gone forever, you should know that recuva folder recovery is a highly effective solution that can bring your lost data back from the brink of digital destruction.
In this comprehensive guide, we will explore the science of data retrieval and provide you with actionable steps to restore your missing folders. Whether you are a casual user or a tech enthusiast, understanding these methods will ensure you never have to fear the “Delete” key again.
Why Files Don’t “Die” Immediately: The Logic of Data Retrieval
To understand how recuva folder recovery works, we should look at your computer’s hard drive like a massive city library. This library has a “Master Catalog” (the File System) and “Bookshelves” (the physical storage sectors).
When you create a folder and fill it with files, the library creates an entry in the Master Catalog. This entry tells the system exactly which bookshelf and which page each piece of data occupies. When you delete that folder, Windows does not send a shredder to destroy the books. Instead, it simply takes a black marker and crosses out the entry in the Master Catalog. It labels that specific shelf space as “Vacant.”
The books (your data) stay on the shelf until the library gets new books and needs that space. This is the “window of opportunity” for data recovery. As long as the system has not written new information over those specific sectors, recovery software can bypass the damaged catalog and find the original “books” still sitting on the shelves.
Critical Warning: The moment you realize a folder is missing, stop writing data to that drive. Do not download new files, do not install software on that partition, and do not even browse the web extensively, as your browser creates temporary cache files that could overwrite your lost data.
Essential Precautions for Successful Folder Restoration
Before we jump into the tools, keep these three rules in mind to maximize your success:
- The Target Drive Rule: Never install recovery software on the same drive where the lost folder was located. If you lost a folder on the C: drive, install your tools on a USB or the D: drive.
- Power Stability: Ensure your laptop is plugged in. A sudden shutdown during a deep scan can lead to permanent directory corruption.
- The “Recover To” Rule: Always save your recovered folders to a completely different physical drive. Recovering files back onto the same drive while the process is running is the fastest way to corrupt your own data.
Method 1: Performing Recuva Folder Recovery for Deleted Directories
Recuva is a household name in the Windows world. It is lightweight, efficient, and specifically designed to navigate the messy aftermath of accidental deletions. Here is how to handle the process.
Step 1: Initialize the Wizard
Launch the software. The “Recuva Wizard” will appear by default. This is the best starting point for recuva folder recovery because it asks the right questions to narrow down the search. Click “Next.”
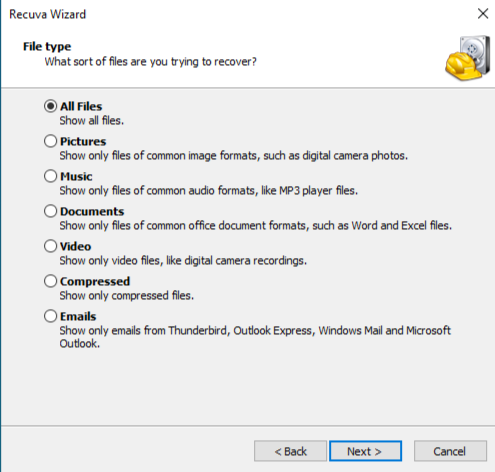
Step 2: Define File Types and Location
The wizard will ask for the file type. Since you are looking for a folder that likely contained various files, select “All Files.” Next, it will ask for the location. Select “In a specific location” and browse to the parent directory where your folder used to live (e.g., C:\Users\Documents\Work).
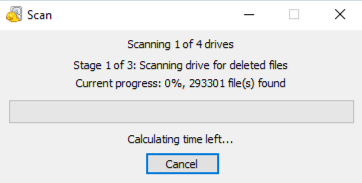
Step 3: Execute the Deep Scan
On the final screen of the wizard, you will see a checkbox for “Enable Deep Scan.” For a single file, a quick scan is fine. However, for a full recuva folder recovery, we recommend the Deep Scan. It looks for file headers across the raw disk surface. Click “Start” and wait; this can take anywhere from minutes to hours depending on your drive size.
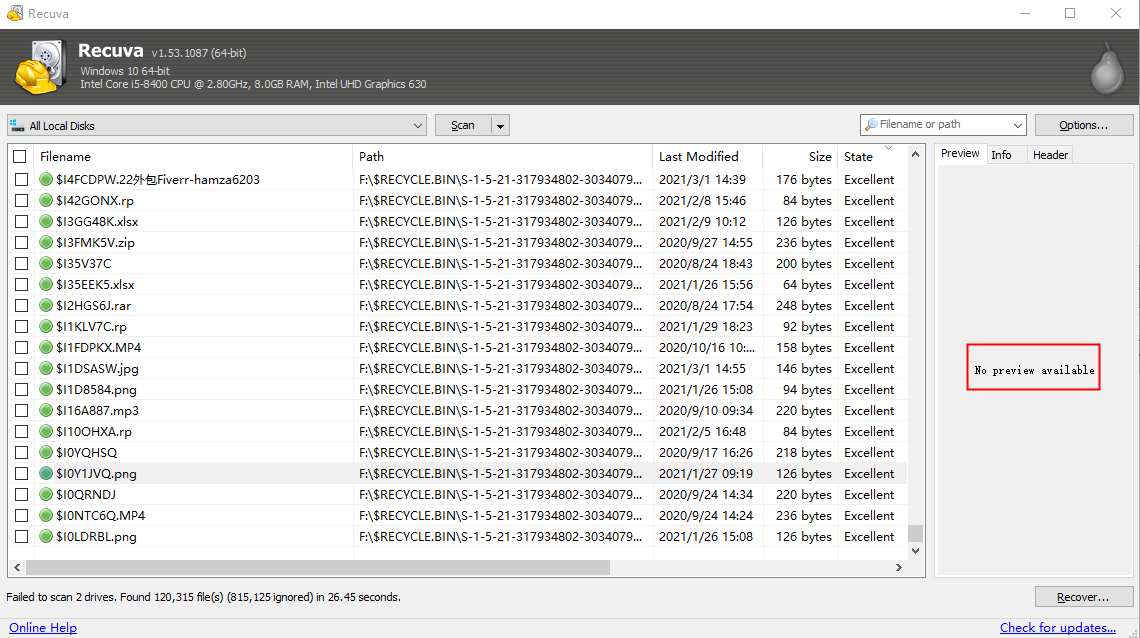
Step 4: Restore the Directory Structure
Once the scan finishes, you will see a list of files. Click “Switch to advanced mode.” This allows you to see the original folder paths. Check the boxes for the files belonging to your lost folder, click the “Recover” button, and select a safe destination drive.
Method 2: Advanced Folder Restoration with PandaOffice Drecov
While Recuva is excellent for simple tasks, it sometimes struggles with complex directory trees or drives that have been formatted. This is where PandaOffice Drecov comes in. This tool uses a sophisticated “Intelligent Reconstruction” engine that is much better at putting the “folder pieces” back together in their original hierarchy.
Beyond standard folder issues, it’s address a wide range of data crises:
- Accidental Desktop Deletions: Instantly retrieving files wiped from your Windows 11.
- Disk Formatting Errors: Salvaging files from drives that have been completely wiped or reformatted.
- External Media Rescue: Recovering lost data from formatted or corrupted SD cards and USB flash drives.
- Sync Conflict Resolution: Reversing data loss caused by synchronization errors between your PC and the OneDrive cloud.
- Browser Metadata Recovery: Restoring lost Chrome bookmarks and other essential application data.”
The Three-Step Recovery Process
Step 1: Select the Lost Location
Open PandaOffice Drecov and navigate the modern dashboard. You will see a clear list of all internal hard drives and external USB devices. Simply click on the partition where your folder was last seen and hit the “Scan” button.

Step 2: Preview and Organize
The software will run a two-layered scan. One of the best features of PandaOffice Drecov is the “Tree View.” This allows you to browse through the deleted data as if you were using Windows File Explorer. You can open folders and even preview photos or documents in high definition to verify they are not corrupted before you spend time recovering them.

Step 3: One-Click Export
Tick the checkbox next to the entire folder you wish to rescue. Click the “Recover” button at the bottom right. Choose a destination—such as an external SSD or a cloud drive—and the software will rebuild your folder structure exactly as it was before the deletion.
Visualize the Process
Sometimes, reading isn’t enough to feel confident. To ensure you handle your hardware correctly and navigate the interface like a pro, we have provided a detailed visual guide below.
Method 3: Using Windows Native “Previous Versions” (Shadow Copies)
If you have a habit of keeping Windows features turned on, you might be able to perform a recuva folder recovery alternative using the system’s built-in “Shadow Copies.”
- Step 1: Open “This PC” and navigate to the parent folder that used to contain your deleted directory.
- Step 2: Right-click the parent folder and select “Restore previous versions.”
- Step 3: A list of “Folder versions” will appear with different dates and times. Look for a version created before the deletion happened.
- Step 4: Select the version and click “Open” to browse the contents. If you see your folder, click “Restore” to bring it back to its original spot.
Method 4: The Official Microsoft File Recovery Tool
For users who want a first-party solution and don’t mind a command-line interface, Microsoft offers “Windows File Recovery” in the Microsoft Store.
- Step 1: Download and install the app from the Store. Launch it as an Administrator.
- Step 2: You must use specific syntax. To recover a folder named “Photos” from drive C: to a recovery folder on drive E:, you would type:
winfr C: E: /regular /n \Users\YourName\Pictures\Photos\ - Step 3: Press ‘Y’ to start the scan. The tool will create a directory on the E: drive containing the recovered data.
Comparing the Top Folder Recovery Solutions
Not all recovery paths are created equal. Use this table to decide which method fits your current crisis:
| Feature | Recuva Folder Recovery | PandaOffice Drecov | Windows Previous Versions |
| Ease of Use | High (Wizard) | Highest (Modern UI) | High |
| Recovery of Folder Structure | Moderate | Excellent (Tree View) | Excellent |
| Success Rate on Formatted Drive | Low | High | None |
| Preview Quality | Basic | High-Definition | N/A |
| Scan Speed | Fast | Optimized Multi-Core | Instant (if available) |
| Best Use Case | Quick deletions | Important/Broken Drives | Accidental changes |
How to Prevent Future Folder Loss
While recuva folder recovery is a lifesaver, the best strategy is to never need it in the first place. Follow these proactive steps to harden your data security:
1. Configure the “3-2-1” Backup Strategy
- Keep 3 copies of your data.
- Store them on 2 different types of media (e.g., your PC and an external drive).
- Keep 1 copy off-site (e.g., OneDrive, Dropbox, or Google Drive).
2. Adjust Your Recycle Bin Settings
Many people lose folders because they are “too large for the Recycle Bin.”
- Right-click the Recycle Bin > Properties.
- Select your drive and increase the “Maximum size (MB)” so it can hold larger folders.
- Ensure “Don’t move files to the Recycle Bin” is unchecked.
3. Enable System Protection
Go to Control Panel > System and Security > System > System Protection. Ensure it is “On” for your main drives. This allows Windows to create those “Previous Versions” we mentioned in Method 3 automatically.
Common Questions on Recuva Folder Recovery
1. Why is the folder I recovered empty?
This happens when recuva folder recovery finds the directory entry but the actual file data inside has already been overwritten. This is common if you continued using the PC for a long time after the deletion. Using a more advanced tool like PandaOffice Drecov can sometimes find these “orphaned” files through a deep signature scan.
2. Can I recover a folder from a “Shift + Deleted” operation?
Yes! Shift + Delete simply skips the Recycle Bin and marks the space as available immediately. The data is still there, and both Recuva and PandaOffice Drecov are specifically designed to handle this exact scenario.
3. Does Recuva work on SSDs?
It depends on a feature called TRIM. When you delete a folder on an SSD, Windows sends a TRIM command that tells the SSD to clean those cells immediately to maintain speed. If TRIM has already run, recovery is very difficult. However, if you act within minutes, you may still be successful.
4. How long does the recovery process take?
A “Quick Scan” takes less than a minute. A “Deep Scan” for recuva folder recovery on a 1TB drive can take 2 to 5 hours. PandaOffice Drecov is generally faster as it uses more modern multi-threading technology to scan your hardware.
5. Is it safe to use free recovery software?
Generally, yes, if you download from official sources. However, be wary of “cracked” versions of premium software, as they often contain malware that could further damage your data or steal your personal information.
Conclusion
Losing an entire folder can feel like losing a piece of your history, but as we have explored, the digital world is very forgiving if you know the right moves. By understanding the principles of data storage and using tools like recuva for simple tasks or PandaOffice Drecov for more complex reconstructions, you can navigate these tech-troubles with ease.
Always remember the golden rule: Stop using the drive immediately. If you stay calm, follow the steps outlined above, and maintain a solid backup moving forward, your data will always be safe.


