


Imagine this: You have spent weeks perfecting a presentation or organizing a decade’s worth of family vacation photos. You plug your thumb drive into the computer, but instead of your folders, a chilling message pops up: “The disk in drive G: is not formatted. Do you want to format it now?” Or worse, you accidentally hit “Delete” on the wrong folder and realized the Recycle Bin doesn’t catch files from removable drives.
That cold sweat and heart-pounding panic are feelings many of us know too well. However, I have some reassuring news: your data isn’t truly “gone.” In the world of digital forensics, your files are likely just hiding. This article will walk you through the essential science of recuva usb recovery and other professional methods to bring your digital life back from the brink.
Part 1: Why is Data Recoverable?
To understand why a recuva usb recovery is even possible, we need to demystify how a USB drive stores information.Think of your USB drive as a massive Library. When you save a file, the system does two things:
- It writes the actual content of the file (the “Book”) onto a shelf.
- It records the location of that book in the Library Catalog (the File System, like FAT32 or NTFS).
When you delete a file or format the drive, the computer doesn’t actually go to the shelf and burn the “Book.” Instead, it simply takes an eraser to the Library Catalog. It marks that specific shelf space as “Empty” and “Available for new books.”
The “Book” (your data) stays on the shelf until you save a new file that happens to be placed on that exact same spot. This is why Data recovery software works so well—it ignores the corrupted Catalog and scans the shelves directly to see what is still sitting there.
The Golden Rule: If you lose data, STOP using that USB drive immediately. Every new file you save or move increases the risk of “overwriting” the old books on those shelves.
Part 2: Essential Precautions Before Starting
Before we dive into the recuva usb recovery steps, keep these three warnings in mind:
- Do Not Format: If Windows asks you to format the drive, click “Cancel.” Formatting can complicate the recovery process.
- Target Location: Never recover files back onto the same USB drive. Save them to your desktop or an external hard drive first.
- Physical Integrity: If your USB is physically broken or getting extremely hot, software cannot fix it. You may need a hardware specialist.
Part 3: Step-by-Step Methods for USB Data Recovery
Method 1: Using Recuva for Standard File Retrieval
Recuva is a fantastic entry-level tool for recuva usb recovery. It is lightweight and perfect for accidental deletions.You need to visit the official CCleaner website and download Recuva. Install it on your C: Drive, not the USB.
Step 1: Connect and Launch
Plug in your USB and open Recuva. The “Recuva Wizard” will appear. Click Next.
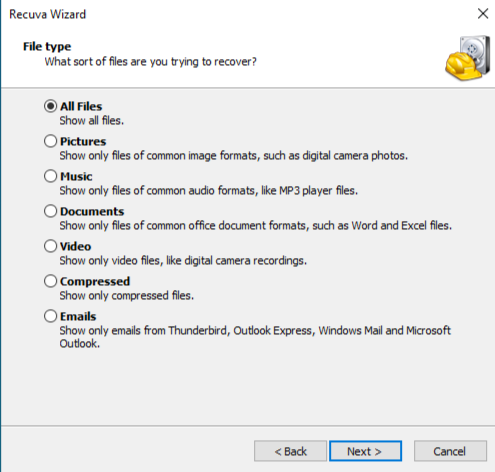
Step 2: Select File Type
Choose whether you want to find Pictures, Music, or Documents. If you want everything, select All Files.
Step 3: Specify the Location
Select “In a specific location” and browse to your USB drive (usually E:, F:, or G:). This focuses the recuva usb recovery power on the correct device.
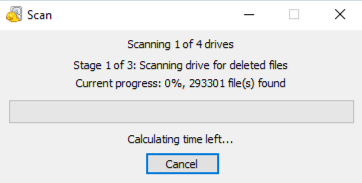
Step 4: The Scan Process
Click Start. If the quick scan fails, Recuva will ask to enable Deep Scan. This takes longer but is much more effective for formatted drives.
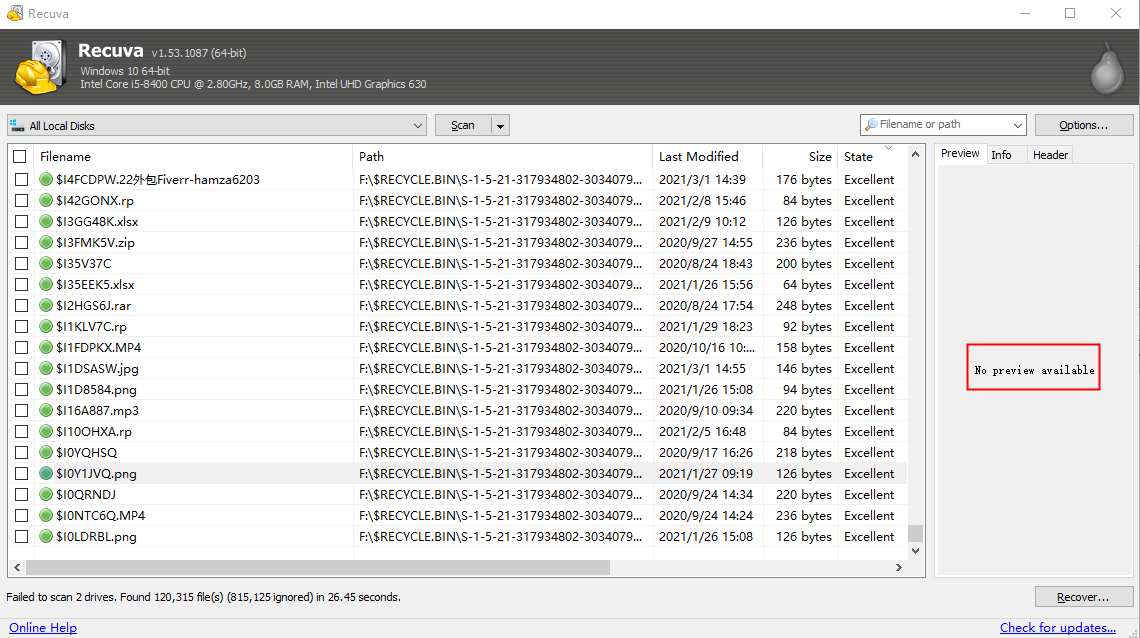
Step 5: Recover Your Files
Review the list. Files with a Green icon are in perfect shape. Select them and click Recover. Choose a safe folder on your PC to save them.
Method 2: Professional Recovery with PandaOffice Drecov
While a recuva usb recovery is often effective for simple deletions, it may fail to locate every file if the file system has become “RAW” or suffered heavy corruption. In these complex scenarios, PandaOffice Drecov stands out as a superior alternative. It utilizes sophisticated algorithms to “stitch” fragmented data back together, ensuring a higher restoration rate. Furthermore, its interface is designed to be cleaner and more intuitive than legacy tools, making professional-grade recovery accessible to everyone.
Beyond standard USB issues, these tools address a wide range of data crises:
- Accidental Desktop Deletions: Instantly retrieving files wiped from your Windows 11.
- Disk Formatting Errors: Salvaging files from drives that have been completely wiped or reformatted.
- External Media Rescue: Recovering lost data from formatted or corrupted SD cards and USB flash drives.
- Sync Conflict Resolution: Reversing data loss caused by synchronization errors between your PC and the OneDrive cloud.
- Browser Metadata Recovery: Restoring lost Chrome bookmarks and other essential application data.”
Step 1: Select the Drive
On the main dashboard, you will see a list of “External Devices.” Locate your USB drive.

Step 2: Intelligent Scan
Click Scan. Drecov will automatically perform a high-level scan and a deep-sector analysis simultaneously. This ensures a higher success rate than a basic recuva usb recovery.

Step 4: Filter and Preview
One of Drecov’s best features is the Preview. While the scan is running (or after), you can click on images or documents to see if they are intact. Use the file-type filter on the left to find your .docx or .jpg files quickly.

Step 5: Secure Restoration
Mark the checkboxes for the files you need. Click the Recover button and select a destination on your computer’s internal storage.
To help you visualize the process and ensure every click is performed with precision, we have provided a concise video tutorial below. This visual guide demonstrates the professional restoration power of PandaOffice Drecov in action, walking you through its high-speed scanning interface and the intuitive file preview feature.
Method 3: Fixing Hidden Files via CMD (The “No-Software” Way)
Sometimes, a virus doesn’t delete your files; it just changes their “attributes” to make them invisible. You don’t even need recuva usb recovery for this.
- Step 1: Press
Win + R, typecmd, and press Enter. - Step 2: Type your USB drive letter (e.g.,
F:) and press Enter. - Step 3: Type the following command:
attrib -h -r -s /s /d *.* - Step 4: Press Enter and wait a few seconds. Check your USB for a new, unnamed folder containing your files.
Method 4: Windows File Recovery (For Power Users)
If you prefer a Microsoft-native tool and don’t mind a command-line interface, this is a solid alternative to recuva usb recovery.
- Step 1: Download “Windows File Recovery” from the Microsoft Store.
- Step 2: Run the app and use the syntax:
winfr source-drive: destination-folder /extensiveExample:winfr E: C:\RecoveredFiles /extensive - Step 3: Allow the process to finish. It is slower but very reliable for NTFS-formatted USBs.
Part 4: Comparing the Methods
| Method | Best For | Success Rate | Ease of Use |
| Recuva USB Recovery | Simple accidental deletions | Medium | High |
| PandaOffice Drecov | RAW drives, corrupted partitions, deep recovery | Very High | High (Intuitive) |
| CMD Attrib | Files hidden by malware | Low (Specific) | Medium |
| Windows File Recovery | Technical users, NTFS drives | Medium-High | Low (Command-based) |
Why PandaOffice Drecov? Unlike a standard recuva usb recovery, Drecov is optimized for modern flash memory controllers. It can often find file signatures that Recuva misses, and its preview feature saves you time by letting you check file integrity before recovery.
Part 5: Prevention – How to Never Lose Data Again
While knowing how to perform a recuva usb recovery is great, avoiding the situation is better.
- The “Safely Remove” Habit: Always right-click the USB icon and select Eject. This prevents “cached” data from being corrupted.
- Enable Automatic Backups: Use Windows “File History” to automatically back up folders when your USB is plugged in.
- Physical Care: Keep your USB drive in a dry place and avoid cheap, unbranded “knock-off” drives which have high failure rates.
- Cloud Sync: For vital documents, keep a copy on Google Drive or OneDrive. A USB should be a transfer tool, not a storage tool.
FAQs: Expert Insights on Recuva USB Recovery and Drive Restoration
1.Is it possible to retrieve files if I have already saved new data to the thumb drive?
It depends on whether the specific digital sectors were replaced. New data acts like writing over old pencil marks. While a recuva usb recovery might still find some fragments, the success rate for those specific overwritten files decreases significantly. Always prioritize the restoration process before adding any new content to the storage device.
2.Does Recuva work on a “Device Not Recognized” USB?
If the computer doesn’t see the drive at all in “Disk Management,” recuva usb recovery software cannot access it. Try a different USB port or a different computer first.
3.Are there file size limitations during the restoration process?
While a standard recuva usb recovery handles most common file sizes well, extremely large video files or database backups may require the advanced deep-scanning algorithms found in professional tools like Drecov to ensure no data fragments are missed during the extraction and reassembly process.
Conclusion
In summary, losing data from a USB drive is a stressful but usually reversible event. By starting with a recuva usb recovery for simple tasks or moving to PandaOffice Drecov for more complex corruption, you have a professional toolkit at your fingertips. Remember to act fast, stop using the drive immediately, and always verify your files with a preview before saving them.


