


Think about Chloe, a freelance journalist who just spent three days undercover documenting a significant social event. Her high-capacity SD card holds interviews, candid snapshots, and primary source documents that are vital for her upcoming front-page story. After a long day of work, she connects the card to her laptop to upload the files. Instead of her familiar folders, the system greets her with a cold, blank screen and the dreaded message: “The file or directory is corrupted and unreadable.” Her pulse quickens. The data isn’t just work; it is history. In this high-stakes moment, her primary tool for salvation is professional data recovery software for sd card.
Chloe’s situation is more common than you might think. Whether it is a professional project or family vacation photos, we entrust our most precious memories to tiny pieces of plastic and silicon. When those pieces fail, it feels like a catastrophe. However, the data is rarely truly gone. This guide will walk you through the inner workings of memory storage and show you how to leverage data recovery software for sd card to perform your own digital rescue.
Part 1: The Magic of Deletion—How Data Recovery Works
To use data recovery software for sd card effectively, you first need to understand a surprising truth: your computer is quite lazy when it comes to deleting things.
The Blackboard Analogy
Imagine a massive blackboard in a classroom. On this blackboard, you have written hundreds of important notes. To keep track of where each note is, you have a small “Index” in the corner of the board. When you want to “delete” a note, you don’t actually get a wet cloth and scrub the board clean. Instead, you simply go to the Index and draw a line through the title of that note. You then write a small message next to it that says: “This space is now free; feel free to write over it.”
The original notes stay on the blackboard, perfectly legible, until a new student comes along and writes something new over that exact spot. Professional data recovery software for sd card acts like a detective with a magnifying glass. It ignores the crossed-out Index and scans every inch of the blackboard to find the original notes that haven’t been covered by new writing yet.
Part 2: Critical Steps and Safety Protocols
Before we dive into the specific tools, you must follow these safety protocols to ensure the highest success rate.
- Read-Only Operations: Ensure your recovery environment is “Read-Only.” You should never write any data to the damaged SD card.
- Hardware Check: Ensure your SD card reader is functioning correctly. Sometimes a faulty $5 reader is the cause of the “corruption” message.
- The Target Drive: Always prepare a destination folder on your computer’s internal SSD or a different external drive. Saving recovered data back to the same SD card is a recipe for permanent data destruction.
Part 3: Step-by-Step Restoration Strategies
The following methods are organized by their technical approach and ease of use, starting with a built-in Windows utility and moving to specialized data recovery software for sd card.
Method 1: The Disk Utility Approach
If your SD card shows up as “Unreadable” but the computer still recognizes the drive letter, you might be facing a logical file system error rather than actual deletion.
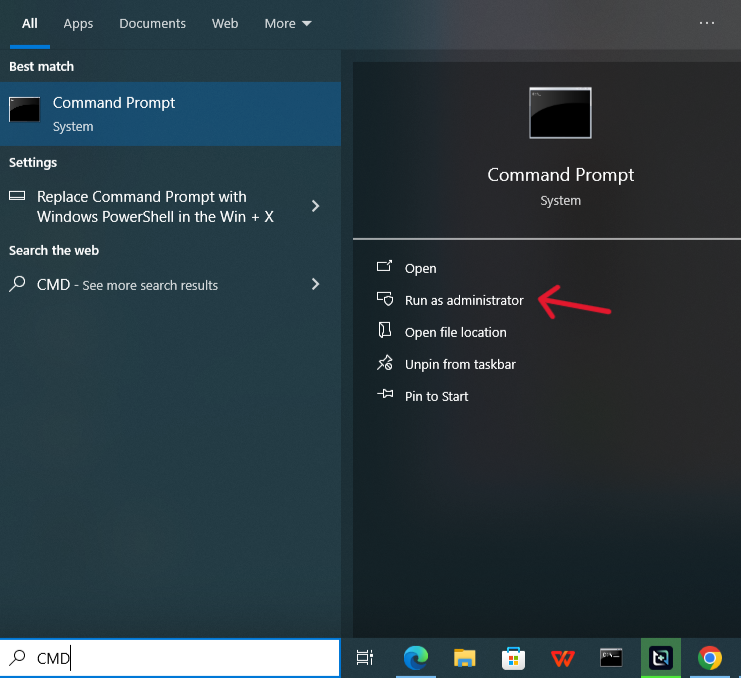
- Step 1: Press
Win + Xand select Terminal (Admin) or Command Prompt (Admin).
- Step 2: Identify your SD card’s drive letter in File Explorer (e.g., Drive
E:).
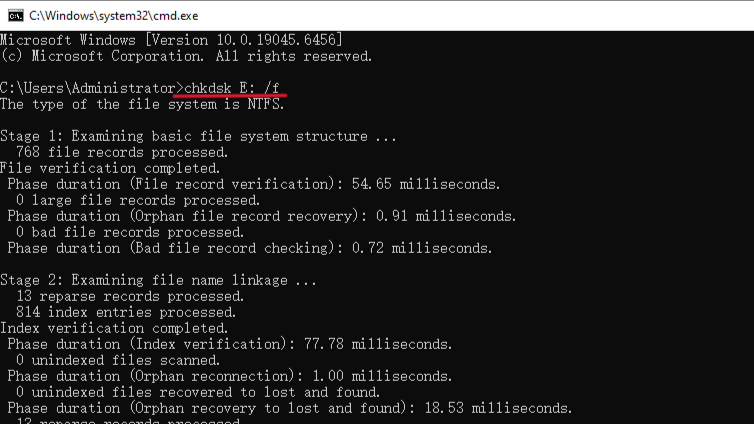
- Step 3: Type
chkdsk E: /fand press Enter. The/fflag tells Windows to “fix” any errors it finds in the index. - Step 4: If the command finishes successfully, your files might reappear instantly.
⚠️ Critical Warning: Do not use the /r or /b flags with chkdsk on an SD card. These flags attempt to locate and repair “bad sectors” by writing data to them, which can permanently overwrite the very files you are trying to rescue.
Method 2: High-Performance Recovery with PandaOffice Drecov
When basic system tools fail, you need a specialized data recovery software for sd card that can reconstruct file fragments.
- Versatility: It recovers photos, videos, audio, compressed files (ZIP/RAR), and even system files like EXEs.
- Accidental deletion from your computer desktop.
- Files lost after emptying the Recycle Bin.
- Data loss from disk formatting.
- Accidental deletion or formatting of SD cards/U disks.
- Sync error occurring with deleted OneDrive files
- Restore deleted Chrome bookmarked
- Privacy First: All recovery happens locally on your machine, so you don’t have to worry about your private data leaking to the web.
PandaOffice Drecov is widely recognized for its high success rate with “RAW” drives and formatted cards using an intuitive Three-Step Operation.
- Step 1: Locate and ConnectPlug your SD card into your PC and open PandaOffice Drecov. The software interface will list all available storage volumes. Under the “External Devices” tab, click on your SD card icon.
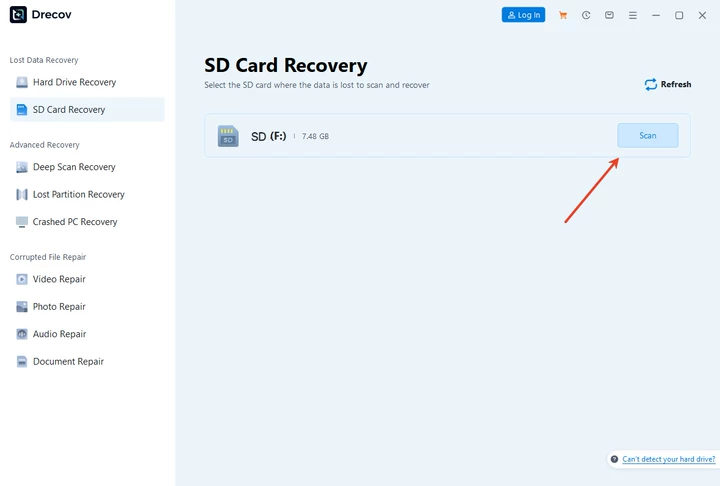
- Step 2: Deep AnalysisClick the Scan button. PandaOffice Drecov initiates a “Deep Sector Scan” looking for “digital signatures” of files. You will see the files appear in real-time, organized by category.

- Step 3: Verification and ExportDouble-click on any found file to use the Instant Preview. If the photo or video looks correct, check the box and click Recover. Choose a safe folder on your computer’s Desktop.
⚠️ Critical Warning: Ensure your laptop is plugged into a power source before starting the scan. If the computer goes into “Sleep Mode” or shuts down during the deep scan, it can cause the SD card’s controller to hang, potentially leading to permanent hardware “lock-up.”
Method 3: R-Studio
R-Studio is a heavy-duty data recovery software for sd card designed for technicians. It excels at managing heavily damaged file systems.
- Step 1: Open R-Studio and locate your SD card in the “Drives” panel.
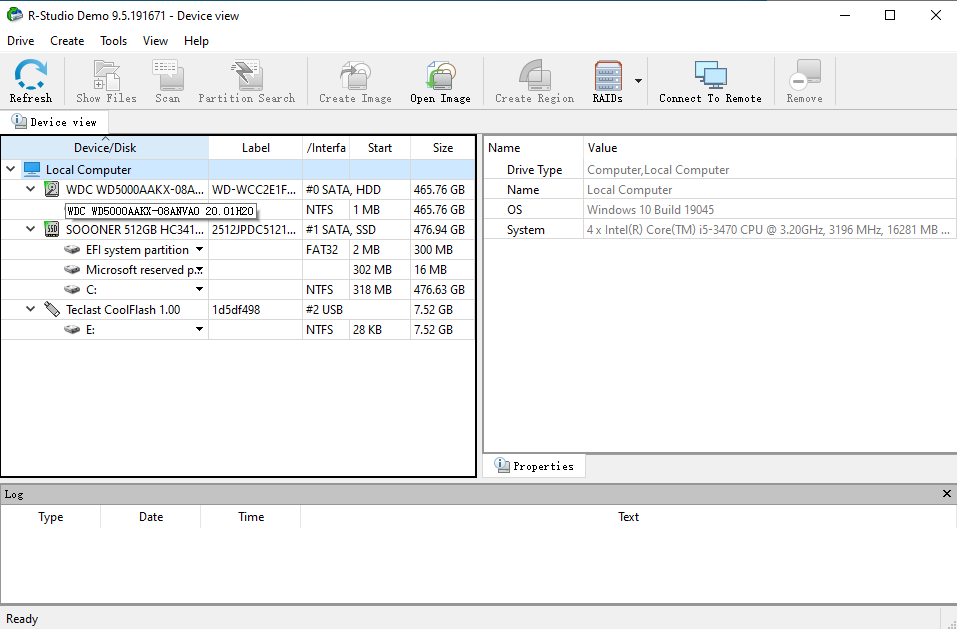
- Step 2: Right-click the card and select Create Image. Save this
.dskor.rdrfile to your internal hard drive.
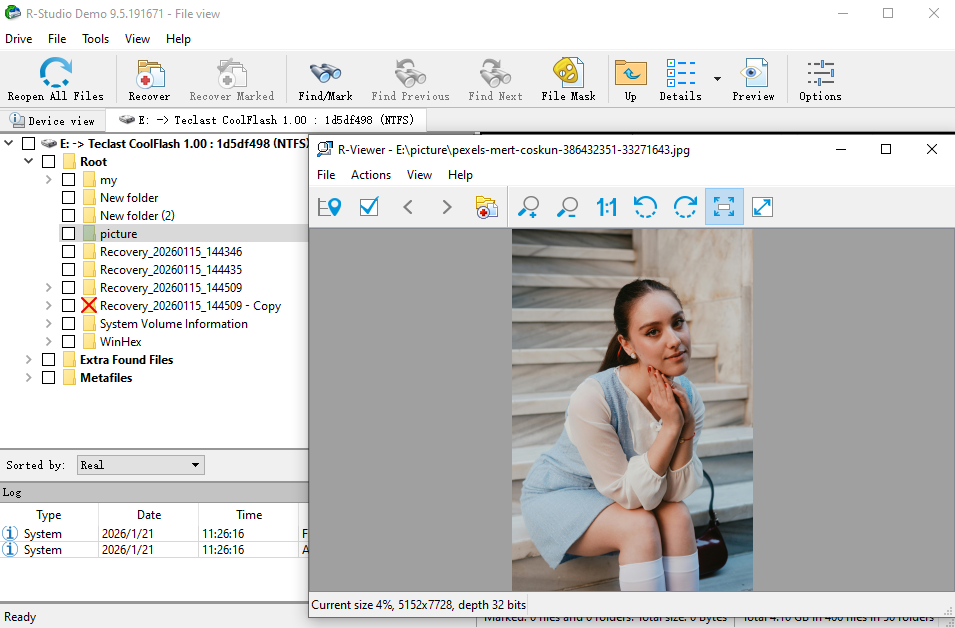
- Step 3: Select the virtual image file in the R-Studio interface and click Scan.
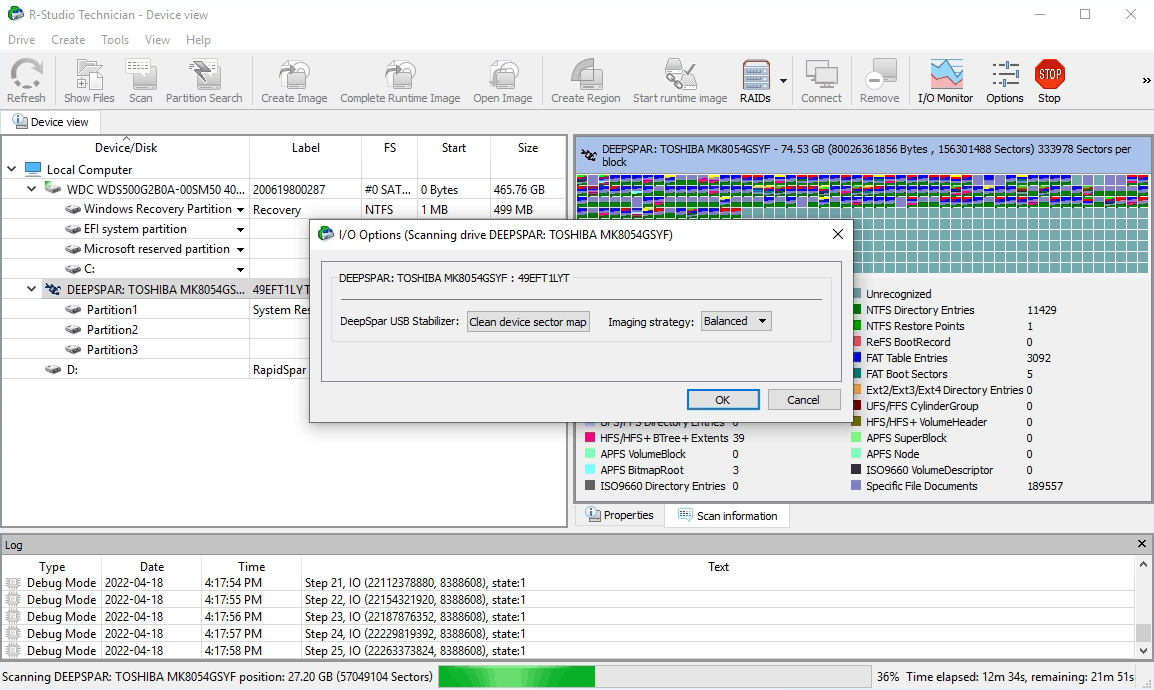
- Step 4: Once the scan finishes, click Show Files to browse the directory. Select your files and click Recover Marked.
⚠️ Critical Warning: R-Studio is extremely powerful and allows you to “Write” to the drive. Never use the “Initialize” or “Clear Partition” features on your lost SD card, as this will wipe the data beyond the reach of any software.
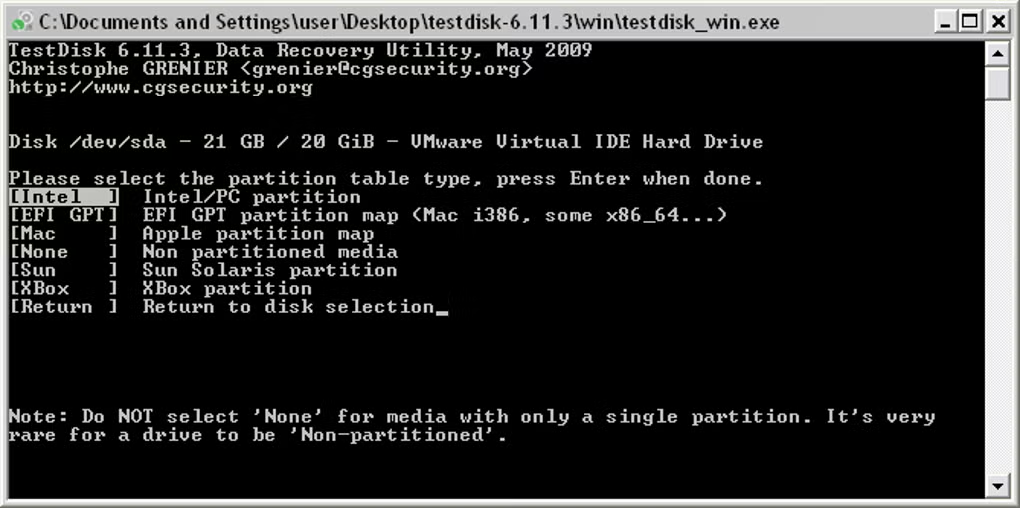
Method 4: TestDisk
TestDisk is a text-based data recovery software for sd card that focuses on repairing the partition table.
- Step 1: Run
testdisk_win.exeand select[ Create ]for a log file.
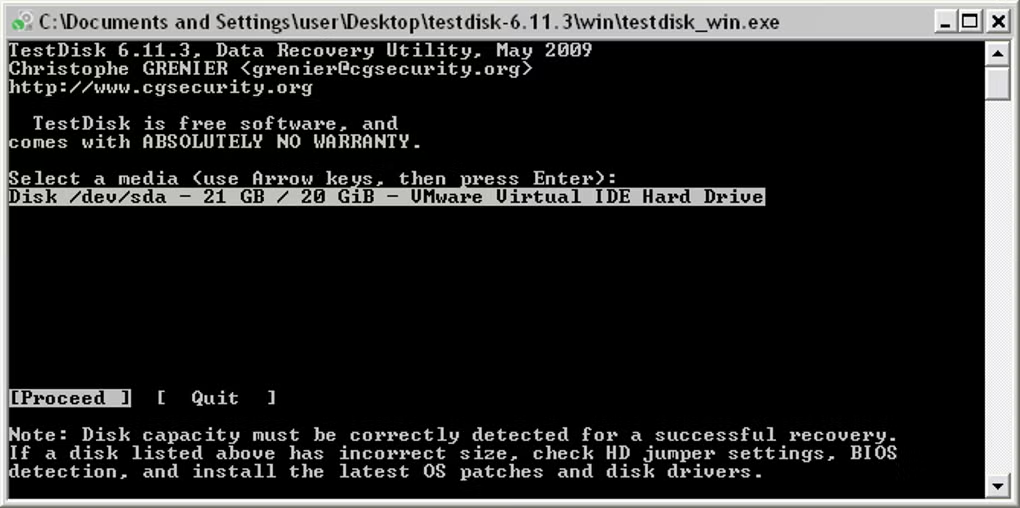
- Step 2: Choose your SD card and select the partition table type (usually
[ Intel ]).
- Step 3: Choose
[ Analyse ]and then[ Quick Search ]. - Step 4: If it finds your partition, press
Pto list files. If they are there, use theWritecommand to fix the card.
⚠️ Critical Warning: TestDisk has no “Undo” button. If you select the wrong partition table type (e.g., selecting EFI GPT for a card formatted as MBR), you could corrupt the card’s boot sector, making the data inaccessible even to other recovery tools.
Part 4: Comparing Different Data Recovery Solutions
| Feature | Windows CHKDSK | PandaOffice Drecov | R-Studio | TestDisk |
| Success on RAW Drives | No | Yes (Excellent) | Yes (High) | Yes |
| Ease of Use | Moderate | Very Easy (GUI) | Complex | Difficult (CLI) |
| Preview Feature | None | Real-time Visuals | Limited | None |
| Best For… | Minor index errors | Accidental Deletion | Pro Forensics | Lost Partitions |
| Safety Level | Moderate | High (Read-Only) | High (with Imaging) | Low (Write-back) |
Part 5: Prevention Strategies—The Best Recovery is None at All
- The 3-2-1 Backup Habit: Keep 3 copies of data, on 2 different media types, with 1 copy offsite.
- Format in the Camera: This reduces the risk of file system mismatches.
- Safe Ejection Protocol: Always use the “Safely Remove Hardware” icon.
- Replace Your Cards Regularly: Replace primary SD cards every 2 years.
Most Practical Recovery Questions
1. My card shows “0 Bytes” or “No Media” in Disk Management. Can software help?
If the capacity is listed as “0 Bytes,” the card’s internal controller is likely dead. Data recovery software for sd card cannot communicate with a card that has no logical capacity. You will need a professional hardware repair service.
2. Why are my recovered videos “choppy” or unable to play?
High-resolution video files are often stored in non-contiguous fragments. While basic software recovers the pieces, it may not stitch them correctly. Using advanced data recovery software like PandaOffice Drecov is better for this, as it features specific algorithms for video reassembly.
3. Is there a time limit on how long I can wait to recover data?
Technically, no. Digital data doesn’t “rot.” However, the physical SD card can degrade over years of storage. The real “time limit” is usage—every second the card is powered on in a camera, the risk of background system processes overwriting your data increases.
4. Can I recover data if I’ve already clicked “Format” by accident?
Yes. A “Quick Format” only rewrites the index. As long as you didn’t perform a “Full Format” (which wipes every sector) and haven’t saved new files, your data is still there.
5. Does using a microSD adapter affect the recovery success?
The adapter is just a bridge. However, a cheap or damaged adapter can cause read errors. If your data recovery software is struggling, try a different high-quality adapter or a dedicated microSD-to-USB reader.
Conclusion
Data loss on an SD card can feel like a digital disaster, but it is often just a temporary hurdle. If the error is a minor file system glitch, Windows CHKDSK might solve it. For more serious issues like accidental formatting or RAW drive errors, using a professional and intuitive data recovery software for sd card like PandaOffice Drecov is your best bet. Its three-step process—Select, Scan, and Preview—makes it accessible for everyone. Always remember: act quickly, follow the safety rules, and maintain a backup to keep your memories safe.


