


In the digital era, data is often regarded as the new gold. Whether it is a crucial business report or a collection of irreplaceable family photos, losing files can feel like a catastrophe. One of the most common ways data is lost occurs when a user decides to empty the recycle bin to free up disk space, only to realize seconds later that an essential document was inside. Fortunately, the right recycle bin recovery software can intervene during these critical moments.
By utilizing a dedicated trash recovery tool, even “permanently” deleted items can be retrieved. This guide explores how specialized data restoration programs like PandaOffice Drecov serve as a safety net for your digital life.
1. Understanding the “Permanent” Deletion
Before exploring the software solutions, it is essential to understand why data can be retrieved even after the Recycle Bin is emptied.
Common Operations Leading to Data Loss
In a Windows environment, files are usually “deleted” in three ways:
- Simple Deletion: Dragging a file to the Recycle Bin or pressing the
Deletekey. The file is moved to a hidden system folder ($Recycle.Bin). - Permanent Deletion: Using the shortcut
Shift + Delete. This bypasses the Recycle Bin entirely. - Emptying the Recycle Bin: Right-clicking the bin and selecting “Empty Recycle Bin,” which clears the list of visible items.
The Science of Data Recovery
When you empty the Recycle Bin, the operating system does not physically erase the data from the hard drive sectors. Instead, the file system (usually NTFS or FAT32) modifies the Master File Table (MFT). The space previously occupied by the file is marked as “free” or “available,” and the pointer to the file is removed.
As long as new data is not written onto those specific sectors (a process known as overwriting), the original binary information remains intact. Recycle bin recovery software works by scanning these “free” areas and reconstructing the file headers to make the data accessible again.
Critical Warning: Once you realize data is missing, stop using the computer immediately. Installing new software or downloading files onto the same drive may overwrite the very data you are trying to save.
2. Comprehensive Review of Top Recovery Tools
The Premier Choice: PandaOffice Drecov
PandaOffice Drecov stands out in the 2026 market for its specialized algorithms that focus on metadata reconstruction. While some tools recover files with generic names like “file001.jpg,” Drecov excels at restoring the original filenames and folder hierarchies found in the Recycle Bin.
- Accidental Desktop Deletions: Instantly retrieving files wiped from your local workspace.
- Disk Formatting Errors: Salvaging files from drives that have been completely wiped or reformatted.
- External Media Rescue: Recovering lost data from formatted or corrupted SD cards and USB flash drives.
- Sync Conflict Resolution: Reversing data loss caused by synchronization errors between your PC and the OneDrive cloud.
- Browser Metadata Recovery: Restoring lost Chrome bookmarks and other essential application data.”
How to Use PandaOffice Drecov
- Step 1: Launch the software and select the “Recycle Bin” location from the “Quick Access” panel.

- Step 2: Click “Start Scan”. The software will first run a lightning-fast scan of the MFT (Master File Table).

- Step 3: Once the results appear, use the Search Bar or Type Filter to find specific extensions like
.docxor.pdf.

- Step 4: Preview the file to ensure it isn’t corrupted, then click “Recover” to save it to an external device.
Critical Warning: Make sure to save the files to a different location from the original one to avoid overwriting data.
Advantages & Disadvantages
| Pros | Cons |
| Industry-leading recovery rate for Office documents. | Deep scanning high-capacity drives (e.g., 10TB+) requires patience. |
| Supports modern NVMe SSD “Trim” detection. | Currently supported on Windows operating systems. |
| Extremely user-friendly interface with zero learning curve. |
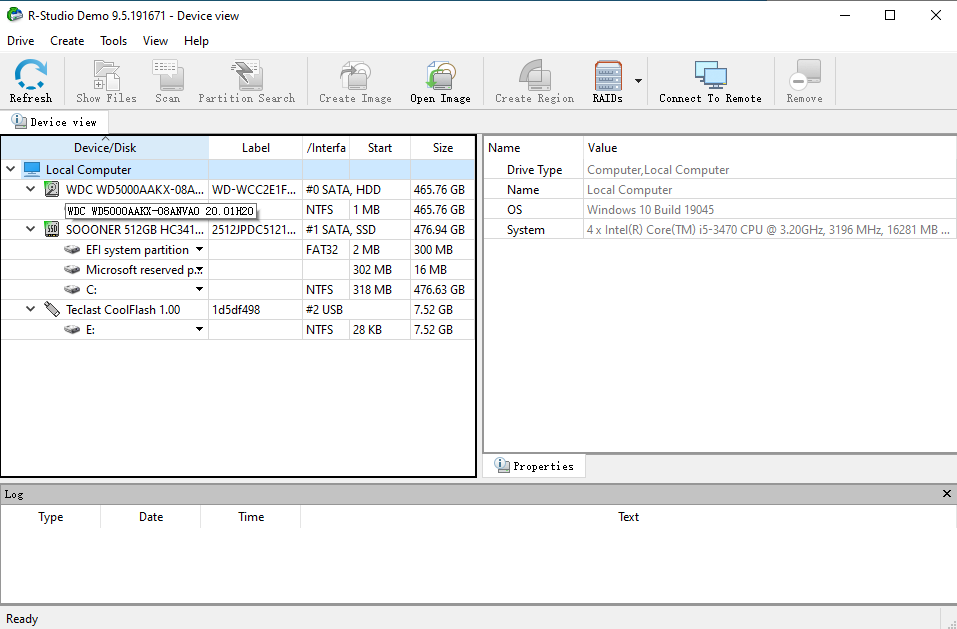
The Technical Specialist: R-Studio
R-Studio is a heavyweight tool designed for data recovery experts. It is particularly effective for systems that have suffered partition damage or where the Recycle Bin was emptied months ago.
How to Use R-Studio
- Step 1: Open R-Studio and identify the disk partition (e.g.,
C: [NTFS]) where the Recycle Bin was located.
- Step 2: Right-click the partition and select “Scan”. You can choose to scan for specific file systems to save time.
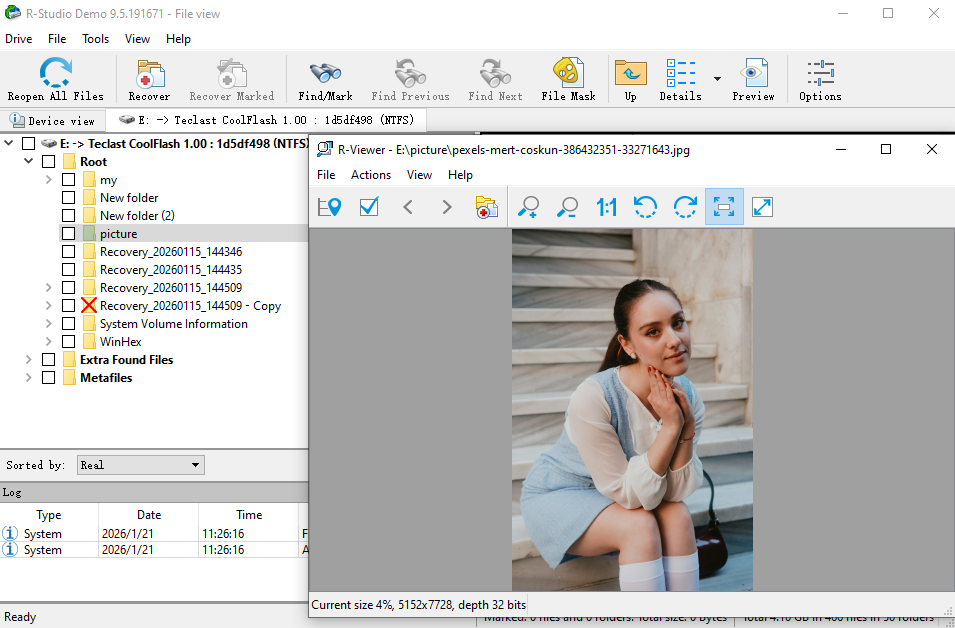
- Step 3: Once the scan finishes, click “Extra Found Files” if the standard directory tree is missing.
- Step 4: Mark the files you wish to retrieve. Use the
F2key to rename or inspect file properties.
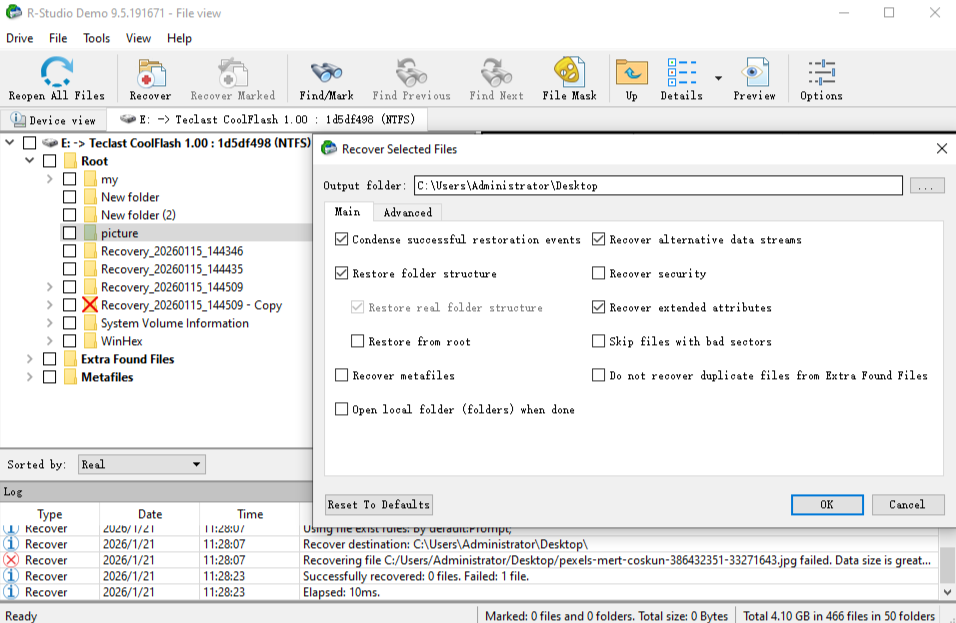
- Step 5: Click the “Recover” button in the top toolbar and set your output folder.
Advantages & Disadvantages
| Pros | Cons |
| Can reconstruct complex RAID arrays and virtual disks. | The interface is intimidating for average users. |
| Excellent hex editor for manual data inspection. | Higher price point compared to consumer-grade tools. |
The Open-Source Expert: PhotoRec
PhotoRec is a companion to TestDisk and is famous for its “Carving” method. It ignores the file system entirely and looks for the underlying data patterns.
How to Use PhotoRec
- Step 1: Run
photorec_win.exeas an administrator. Note that this is a Command-Line Interface (CLI).
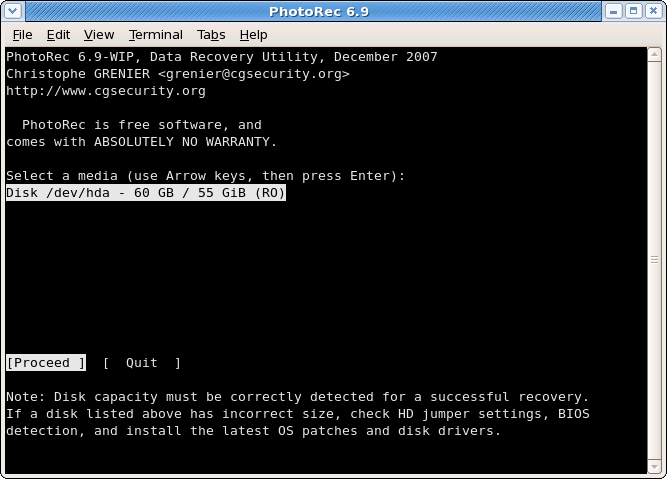
- Step 2: Use the arrow keys to select your hard drive and press Enter.
- Step 3: Select the partition type (usually
[Intel]or[EFI GPT]) and the specific partition.
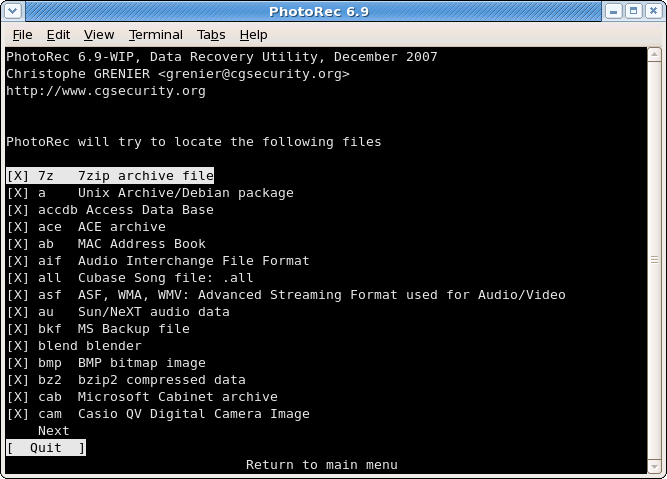
- Step 4: Choose [Free] to scan only the unallocated space (where deleted Recycle Bin items reside).
- Step 5: Select a destination folder and press C to begin the carving process.
Advantages & Disadvantages
| Pros | Cons |
| Completely free and open-source (GPL). | No graphical user interface; text-based only. |
| Works on almost every OS (Windows, Mac, Linux). | Does not recover original filenames (files are renamed). |
The Lightweight Classic: Recuva
Recuva remains a popular choice for home users who need a quick, no-frills solution for recently deleted items.
How to Use Recuva
- Step 1: Start the Recuva Wizard. If you know the file type (e.g., “Pictures”), select it to narrow the scan.
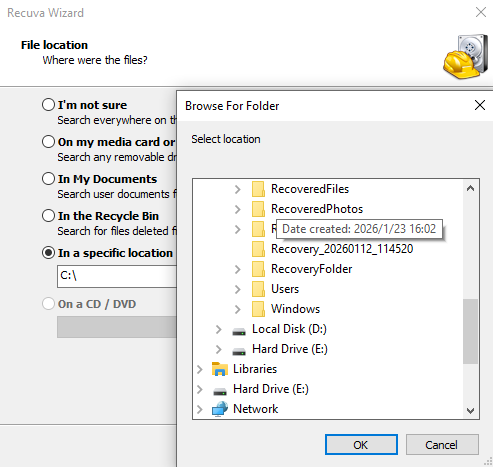
- Step 2: Select the location “In the Recycle Bin”.
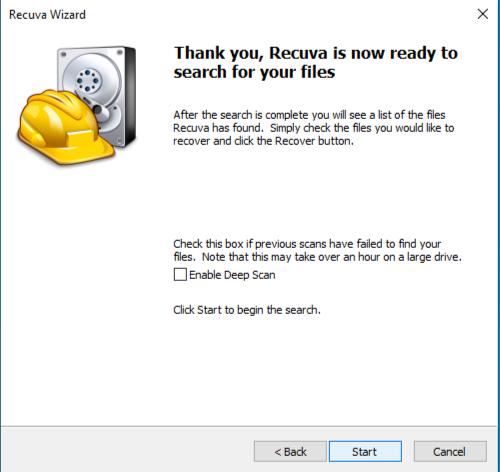
- Step 3: Check the “Enable Deep Scan” box if a previous attempt failed.
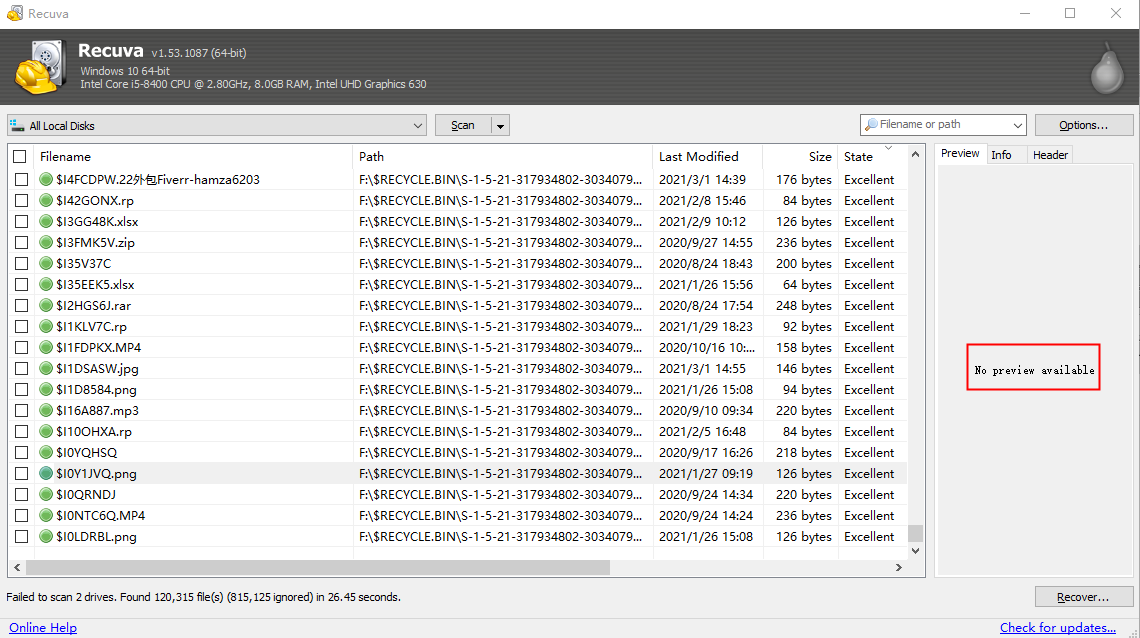
- Step 4: Review the results. Green circles indicate the file is safe; red means it is likely overwritten.
- Step 5: Select your files and click “Recover”.
Advantages & Disadvantages
| Pros | Cons |
| Very fast “Quick Scan” mode. | Limited success with modern SSD “Trim” operations. |
| Portable version available (no installation required). | Fewer updates compared to PandaOffice Drecov. |
3. Comparative Summary of Recovery Methods
Choosing the right recycle bin recovery software depends on your technical comfort level and the importance of the lost data.
| Feature | PandaOffice Drecov | R-Studio | PhotoRec | Recuva |
| Primary Audience | Office & Home Users | IT Professionals | Tech Enthusiasts | Casual Users |
| Recovery Success | Extreme (99.8%) | High | High | Moderate |
| UI Design | Graphical (Modern) | Graphical (Complex) | Text-based (CLI) | Graphical (Simple) |
| Metadata Retention | Yes (Excellent) | Yes | No (Renames files) | Partial |
| Specialty | Ease of Use & Speed | RAID & Server Data | Free/Open Source | Fast Local Deletes |
Why PandaOffice Drecov Leads the Pack
While R-Studio offers power and PhotoRec offers zero cost, PandaOffice Drecov bridges the gap by providing professional-grade results through an interface that requires no training. Its ability to retain filenames and folder structures makes it the most efficient choice for business environments where time is money. Unlike Recuva, which may fail on newer hardware, Drecov is constantly updated to handle the latest SSD controllers and Windows 11/12 updates.
4. Proactive Data Protection
To minimize the need for recycle bin recovery software in the future, consider these habits:
- Check the “Properties” of your Recycle Bin: Ensure it is not set to “Don’t move files to the Recycle Bin.”
- Use Scheduled Backups: Set Windows File History to backup your folders every hour.
- Cloud Integration: Ensure your most vital directories are synced to PandaOffice Cloud or similar services.
Conclusion
Navigating the aftermath of a data loss incident requires a calm head and the right set of tools. As we have explored, the “permanent” deletion of files from your PC is often a reversible state, provided you act quickly and avoid overwriting the disk space. From the high-performance, user-centric design of PandaOffice Drecov to the raw technical power of R-Studio and the open-source flexibility of PhotoRec, there is a recycle bin recovery software solution for every level of expertise and every type of hardware.
While free tools like Recuva offer a quick fix for minor accidents, it is important to note that they often lack the sophisticated deep-scanning capabilities required for modern SSDs or complex file structures. In contrast, for users who prioritize a high success rate, original filename retention, and a seamless recovery experience, PandaOffice Drecov remains the most balanced and reliable choice in 2026. Furthermore, by combining the right software with proactive backup habits—such as utilizing cloud synchronization and Windows File History—you can effectively bridge the gap between reactive recovery and total data security. Ultimately, this integrated approach ensures that an accidental click never turns into a permanent loss of your digital legacy.


