


Introduction: Understanding the Benefits of Upgrading to SSD
Why Replace a Hard Drive with an SSD
Replacing a traditional hard drive with a solid state drive has become increasingly common due to the significant performance improvements offered by SSDs. Users searching for replace hard drive with ssd windows 10 are typically motivated by the following advantages:
- Faster system boot times
- Quicker application launches
- Reduced noise and lower power consumption
- Enhanced durability due to no moving parts
⚠️ Warning: Always backup important files before attempting a hardware upgrade to prevent data loss.
Overview of SSD Technology
Unlike conventional hard drives that use spinning platters, SSDs rely on flash memory. This provides higher read/write speeds and greater reliability. Solid state drives are available in several formats, including:
- 2.5-inch SATA SSDs: Most compatible with laptops and desktops
- M.2 NVMe SSDs: High-performance drives suitable for newer motherboards
- PCIe SSDs: Offer the fastest speeds for gaming and professional tasks
Choosing the right SSD depends on your system’s compatibility and performance goals. Users exploring how to replace hard drive to ssd should ensure they understand both the physical interface and storage capacity requirements.
Reasons for Upgrading: Limitations of Traditional Hard Drives
Hard Drive Performance Bottlenecks
Mechanical hard drives often become the bottleneck in modern systems:
- Slower boot times and longer application loading
- Higher risk of mechanical failure
- Noisy operation due to moving parts
- Increased power usage and heat generation
Signs You Need to Replace Your Hard Drive
Common indicators include:
- Frequent system crashes or freezing
- Long boot or shutdown times
- Delays when opening files or folders
- Strange noises like clicking or grinding
Recognizing these symptoms can help determine when to replace hard drive to ssd, ensuring a smoother computing experience.
Preparing for SSD Installation
Data Backup Before Replacement
Before starting any hardware upgrade, backing up existing data is essential. Recommended steps:
- Copy all important files to an external hard drive or cloud storage
- Ensure backups include documents, photos, and application settings
- Verify the integrity of the backup before proceeding
⚠️ Warning: Failure to backup data may result in permanent data loss during the drive replacement process.
Choosing the Right SSD
Factors to consider when selecting an SSD:
- Storage capacity based on current and future needs
- Connection type compatible with your system (SATA, NVMe, PCIe)
- Brand reliability and warranty coverage
Users searching windows 10 replace hard drive with ssd should check manufacturer specifications and system manuals to ensure compatibility.
Step-by-Step Methods to Replace Hard Drive with SSD
Method 1: Cloning Your Current Hard Drive to an SSD
Cloning transfers all data, including the operating system, from your old hard drive to the new SSD. This method avoids the need for a fresh Windows installation.
Test Environment: Desktop PC with SATA SSD, Windows 10 installed, 1TB HDD being replaced
Steps:
- Connect SSD to your system using a SATA cable or USB adapter
- Launch disk cloning software
- Select the source drive (HDD) and the destination drive (SSD)
- Start cloning and wait for completion
- Swap drives physically if the SSD was connected externally
- Boot the system and verify all data and applications are intact
Cloning ensures a seamless transition to a faster drive without losing configurations or installed software.
Method 2: Fresh Installation of Windows 10 on the SSD
For users wanting a clean start, reinstalling Windows on a new SSD ensures optimized performance.
Test Environment: Laptop with M.2 SSD, Windows 10 installation media on USB
Steps:
- Create a bootable USB drive with Windows 10
- Power off the computer and replace the old hard drive with the SSD
- Boot from the USB drive and follow installation instructions
- Format the SSD during setup to ensure a clean installation
- Complete Windows setup and reinstall essential applications
⚠️ Warning: Reinstalling Windows requires reinstalling all programs and restoring user data from backup.
Method 3: Migrating Specific Files Instead of Full Cloning
Some users may prefer to migrate only important files rather than the entire operating system.
Test Environment: Desktop with SATA SSD, secondary HDD as temporary storage
Steps:
- Connect SSD to the system
- Copy essential data such as documents, pictures, and projects to the SSD
- Adjust Windows settings to store user folders on the SSD
- Format the old hard drive for additional storage or backup
This method is simpler but does not transfer system settings or applications.
Method 4: Using PandaOffice Drecov for File Restoration
If any files are accidentally lost during the transition, PandaOffice Drecov can assist in recovering data from the old hard drive.
Test Environment: Windows 10 desktop, old HDD with partial data loss, SSD as new drive
Steps:
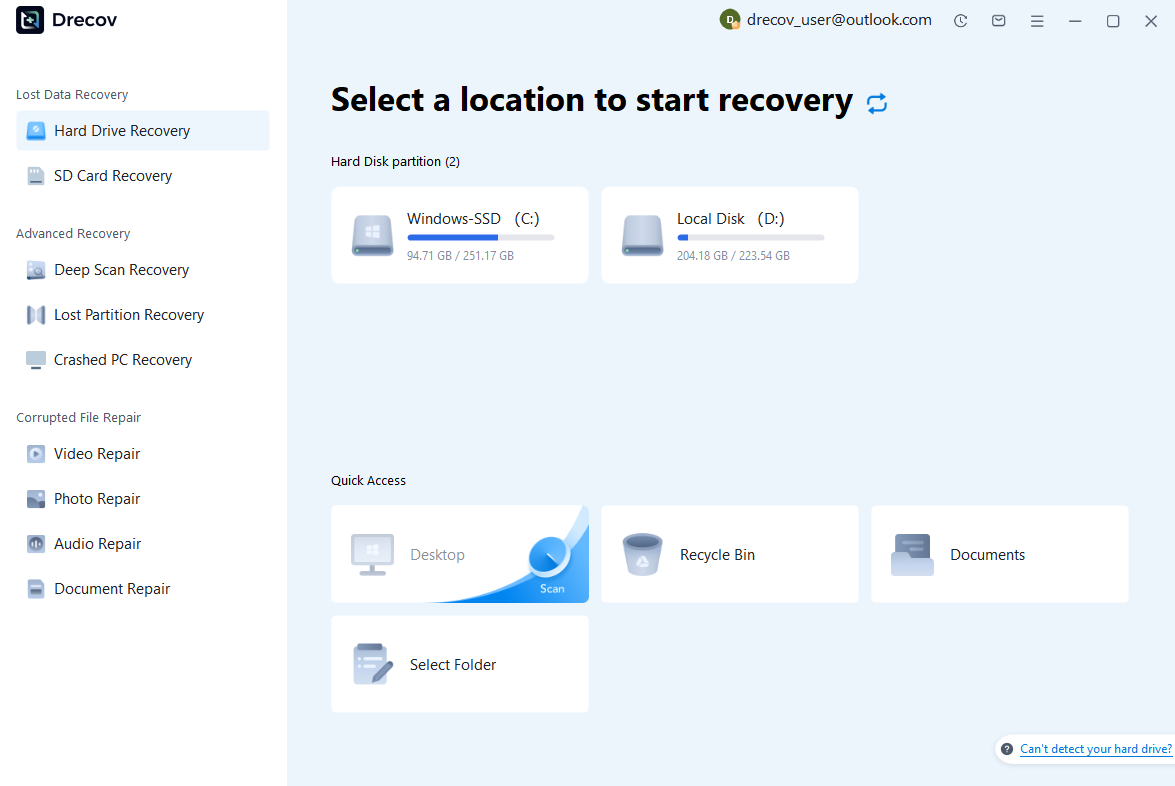
Step 1: Scan the Storage Device (SD Card / Hard Drive / USB)
Connect your device (SD card, HDD/SSD, or USB drive) to your computer and launch PandaOffice Drecov. Select the target device and start the scan. The software will perform a quick scan and deep scan to detect lost or deleted data.
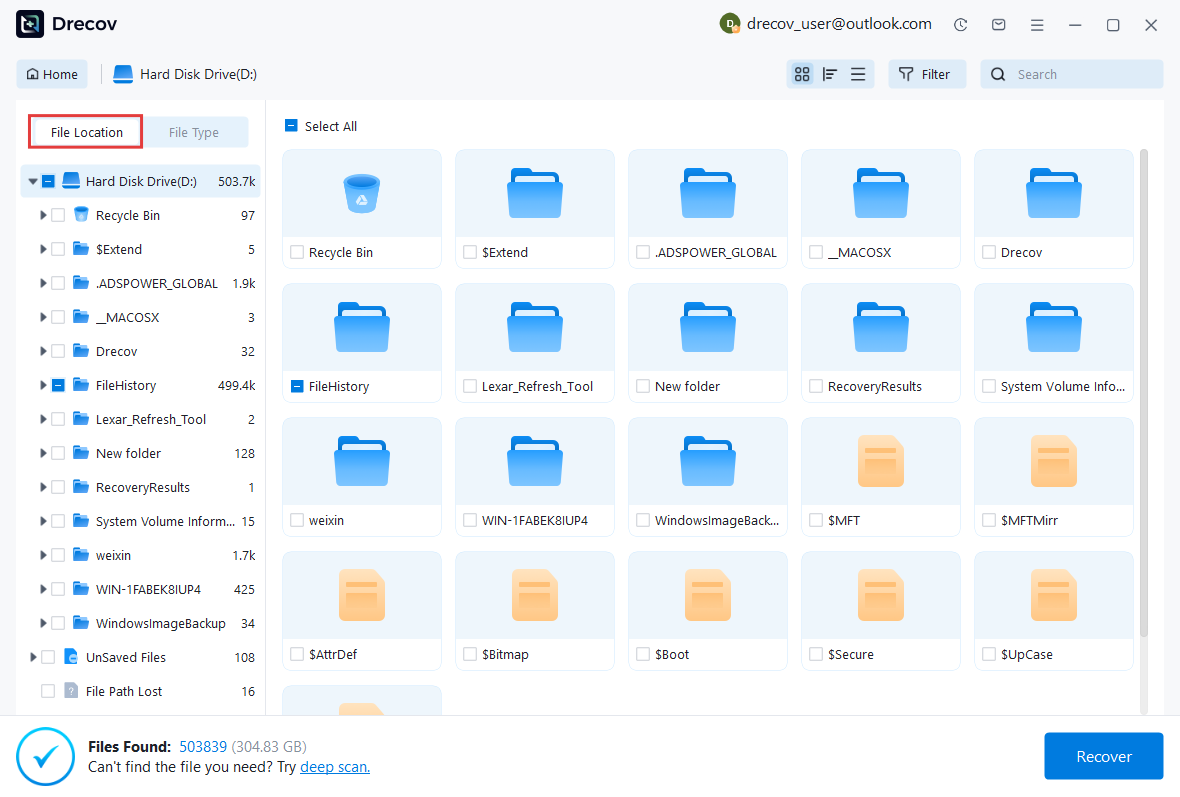
Step 2: Locate and Preview Lost Files
After scanning, browse the detected files and use the preview feature to check recoverable data. You can preview documents (Word, Excel, PDF), photos, and videos to ensure file integrity before recovery.
Step 3: Recover and Save to a New Location
Select the files you want to restore and click recover. Save all recovered data to a different drive or location (not the original device) to avoid overwriting lost data.

Why Choose PandaOffice Drecov Recovery Software?
PandaOffice Drecov offers a fast, secure, and user-friendly solution for recovering lost files across multiple scenarios. Whether you need email recovery, ZIP File Recovery, format data recovery, or help to recover deleted drafts Outlook, the software provides reliable recovery performance for both personal and business users.
PandaOffice Drecov supports recovery from formatted hard drives, SSDs, USB drives, SD cards, and external storage devices. Its advanced scanning engine can locate deleted archives, damaged ZIP files, lost Outlook drafts, and accidentally removed documents with high accuracy. For users searching for how to find deleted messages in Teams, PandaOffice Drecov can also help recover exported chat files, attachments, and related local cache data when available.
Key advantages include:
- Deep scan technology for complex data loss situations
- Support for emails, archives, videos, photos, and office documents
- Recovery from accidental deletion, formatting, corruption, and system crashes
- Easy preview before restoring files
- Compatible with Windows and multiple storage devices
Unlike complicated enterprise recovery tools, PandaOffice Drecov keeps the recovery process simple. Users can scan, preview, and restore files in just a few steps without technical expertise.
Whether you are dealing with lost Outlook drafts, corrupted ZIP archives, formatted drives, or missing communication data, PandaOffice Drecov provides an efficient and practical recovery experience designed to minimize downtime and protect important files.
Post-Installation System Optimization
Enabling TRIM and SSD Features
Once the SSD is installed:
- Confirm TRIM is enabled to maintain performance
- Disable scheduled defragmentation for SSDs
- Enable AHCI mode in BIOS for SATA SSDs for optimal speed
These settings help prolong the lifespan and speed of the SSD.
Adjusting Boot and Startup Settings
Optimizing startup includes:
- Setting the SSD as the primary boot device in BIOS
- Reducing startup programs through Task Manager
- Ensuring antivirus or backup software does not overload the SSD
These tweaks improve boot times and overall system responsiveness.
Monitoring Drive Health
- Use built-in Windows tools or SSD manufacturer utilities
- Monitor SMART attributes and drive temperature
- Schedule periodic health checks to detect early signs of failure
⚠️ Warning: Ignoring drive health may lead to unexpected data loss.
Understanding SSD Performance Benefits
Why SSDs Are Faster Than HDDs
After replacing a hard drive with a solid state drive, users immediately notice performance improvements. Unlike HDDs, SSDs have:
- No moving parts, reducing access time
- Significantly higher read/write speeds
- Lower latency for applications and games
- More consistent performance under heavy workloads
Understanding these advantages helps users plan further optimizations, especially for tasks involving windows 10 replace hard drive with ssd setups.
Impact on System Boot and Application Launch
An SSD dramatically reduces system boot times, often from minutes to seconds. Applications and files stored on SSDs also open much faster, improving productivity and gaming experiences. Users replacing hard drives to SSD should measure boot times before and after replacement to quantify performance gains.
Partition Management and Storage Optimization
Creating Optimal Partition Layouts
Post-installation, proper partitioning ensures efficient storage use:
- C Drive: OS and essential applications
- D Drive: Games or large applications
- E Drive: Personal files and backups
For replace hard drive with solid state drive setups, this structure improves speed and reduces fragmentation risks.
Advanced Partition Tips
- Avoid excessive small partitions, which can complicate management
- Keep at least 20% of SSD free for optimal performance
- Use NTFS formatting for Windows systems
- Consider separate partitions for frequently accessed files
⚠️ Warning: Modifying partitions incorrectly can result in data loss.
Boot Optimization Techniques
BIOS/UEFI Settings for SSDs
Proper BIOS configuration enhances SSD performance:
- Enable AHCI mode for SATA SSDs
- Confirm the SSD is set as the primary boot device
- Disable legacy IDE or RAID modes if unnecessary
- Enable Secure Boot for added security
These steps help fully leverage how to replace hard drive with ssd improvements.
Startup Program Management
Limiting startup programs improves boot times:
- Open Task Manager > Startup tab
- Disable non-essential programs
- Monitor system performance after changes
This is especially useful for laptops or desktops upgraded from HDDs.
Driver and Firmware Updates for Maximum Performance
SSD Firmware Updates
Manufacturers release SSD firmware updates to:
- Improve read/write speed
- Enhance compatibility with Windows 10
- Fix bugs or security issues
Check your SSD manufacturer’s website for updates after completing replace hard drive to ssd procedures.
Updating System Drivers
Critical drivers to update include:
- Chipset and motherboard drivers
- GPU drivers for graphics-intensive tasks
- Network and storage drivers
Keeping drivers current ensures optimal SSD performance and system stability.
Windows Optimization for SSDs
Enable TRIM for Longevity
TRIM maintains SSD performance by:
- Allowing the OS to manage deleted data efficiently
- Preventing write slowdown over time
Check TRIM status in Windows Command Prompt using fsutil behavior query DisableDeleteNotify. A value of 0 indicates TRIM is enabled.
Disabling Unnecessary Background Services
Certain services, like scheduled defragmentation or indexing of large storage drives, can be disabled:
- Open Windows Services
- Identify non-critical background services
- Disable or set to manual
- Monitor system stability
⚠️ Warning: Avoid disabling essential security or update services.
System Monitoring and Health Maintenance
Monitoring SSD Health
Regular monitoring ensures early detection of issues:
- Use Windows tools or third-party SSD utilities
- Monitor SMART attributes, temperature, and write cycles
- Schedule periodic health checks
Proactive monitoring prevents sudden SSD failure and potential data loss.
Storage Management Tips
- Periodically clean temporary files
- Use Storage Sense to automate disk cleanup
- Organize files in logical folders for faster access
- Avoid filling SSD to maximum capacity
These measures maintain consistent performance and reduce wear.
Backup Strategy for SSD Systems
Importance of Regular Backups
Replacing a hard drive with an SSD improves speed but doesn’t eliminate risks. Recommended backup strategies include:
- Full system images on external drives
- Cloud backups for critical files
- Incremental backups for daily updates
Backup Tools and Techniques
- Use Windows built-in Backup and Restore feature
- Schedule automated backups for convenience
- Keep multiple copies of essential files in different locations
Following these practices ensures windows 10 replace hard drive with ssd systems are protected against unexpected failures.
Long-Term Optimization and Performance Tuning
Virtual Memory and Pagefile Adjustments
Adjusting virtual memory improves responsiveness:
- Set paging file on the SSD for faster access
- Allow Windows to manage size automatically for most users
- Monitor memory usage during heavy workloads
Gaming and High-Performance Applications
For users replacing HDDs to SSDs for gaming:
- Install games on the SSD for faster load times
- Keep frequently accessed assets on SSD, less critical files on secondary storage
- Optimize GPU and CPU settings for best performance
Periodic System Maintenance
Even after replacing a hard drive with an SSD, ongoing maintenance ensures longevity:
- Perform periodic disk checks for errors
- Monitor system logs for warnings
- Update Windows and applications regularly
- Review startup items and running services quarterly
⚠️ Warning: Neglecting maintenance can degrade SSD performance over time.


