


Understanding How Photos Are Stored on a Hard Drive
How image files are organized and indexed
Before you attempt to recover photos from hard drive, it’s important to understand how image files are actually stored. A hard drive doesn’t organize files the way you visually see them in folders. Instead, it uses a file system (like NTFS or FAT32) that tracks file locations through metadata tables.
Photos—such as JPG, PNG, or RAW files—are scattered across sectors. Even when grouped in folders, they are physically stored in fragments. This is why hard drive photo recovery is possible even after deletion.
Operating systems index files using search databases. However, these indexes can become outdated or corrupted, meaning some images may exist on the disk but remain invisible in normal searches.
Photos may disappear due to:
- Accidental deletion
- Formatting errors
- File system corruption
- Malware or system crashes
In such cases, the file entries are removed, but the actual data often remains intact until overwritten. This is the foundation of file recovery hard drive techniques.
⚠️Warning: Avoid saving new files to the same drive after losing photos, as this can overwrite recoverable data.
Why You Might Need to Find or Recover Photos
Common scenarios of missing or lost pictures
There are many situations where users need data recovery hard drive solutions:
- You deleted photos accidentally and emptied the recycle bin
- A system crash caused files to disappear
- External drives stopped responding
- Photos were lost after formatting a partition
In professional environments, recovering images is even more critical—especially for photographers or businesses handling visual assets.
Understanding the risks and recovery limitations
Not all lost photos can be recovered. Success depends on:
- Time elapsed since deletion
- Whether new data has overwritten old sectors
- The condition of the hard drive
The cost data recovery hard drive services can be high when physical damage is involved, sometimes ranging from $100 to $1000+, depending on severity.
⚠️Warning: If your drive is making unusual noises (clicking or grinding), stop using it immediately and consider professional recovery.
Effective Methods to Find All Pictures on a Hard Drive
Method 1: Use Built-in Search Features (Windows/Mac)
Test Environment
- OS: Windows 11 / macOS Ventura
- Drive Type: Internal HDD/SSD
- Scenario: Files not deleted, just hard to locate
Using the operating system’s search function is the simplest way to locate images.
Steps
- Open File Explorer (Windows) or Finder (Mac)
- Navigate to “This PC” or your main drive
- Use the search bar and type:
*.jpg*.png*.jpeg
- Wait for indexing to complete
- Sort results by date or size for easier filtering
This method helps locate all visible images but won’t recover deleted ones.
⚠️Warning: Indexing may miss files if the system database is corrupted.
Method 2: Search by File Type Using Command Tools
Test Environment
- OS: Windows 10/11
- Tool: Command Prompt
- Scenario: Large drives with scattered files
For deeper scanning, command-line tools can locate hidden files.
Steps
- Open Command Prompt as administrator
- Enter the command: dir /s /b *.jpg
- Repeat for other formats like PNG or BMP
- Export results if needed: dir /s /b *.jpg > photos.txt
This method scans directories more thoroughly than standard search tools.
It’s useful for advanced users performing file recovery hard drive operations without software.
Method 3: Use Free Hard Drive Recovery Software
Test Environment
- OS: Windows 11
- Scenario: Deleted or formatted photos
- Drive: External USB hard drive
When photos are no longer visible, specialized tools are required. Many free hard drive recovery software options can scan sectors directly.
Steps
- Download and install a recovery tool
- Select the target drive
- Start a deep scan
- Filter results by image type
- Preview and recover selected files
These tools reconstruct lost file structures, making hard drive photo recovery possible even after deletion.
However, free versions may limit how much data you can restore.
Method 4: Recover Photos Using PandaOffice Drecov
Test Environment
- OS: Windows 11 / macOS
- Scenario: Deleted, formatted, or corrupted photo files
- Drive Type: HDD, SSD, USB
When basic tools fail, using a professional solution like PandaOffice Drecov significantly improves success rates in data recovery hard drive tasks.
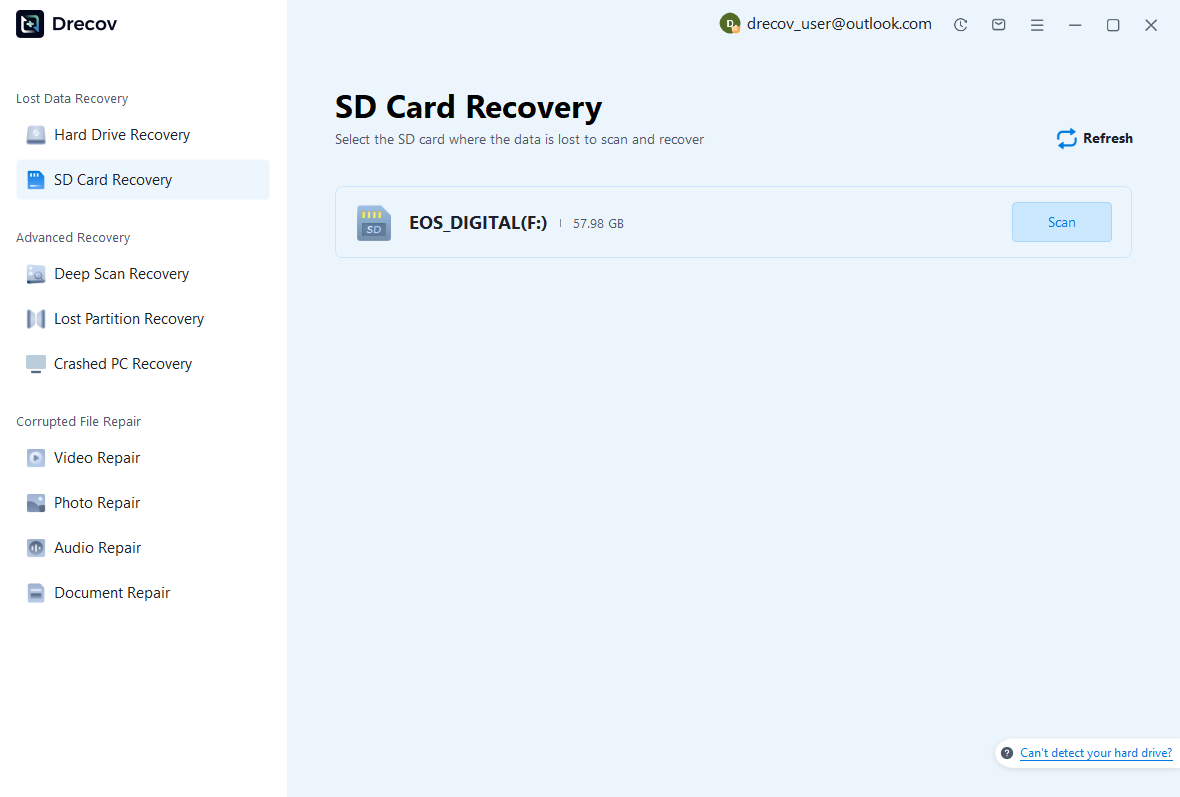
Steps
- Install PandaOffice Drecov on a separate drive
- Launch the program and choose the affected disk
- Select “Photo Recovery” mode
- Run a deep scan
- Preview recoverable images
- Save recovered photos to another storage location
The software uses advanced algorithms to rebuild fragmented files, making it highly effective for recover photos from hard drive scenarios.
Unlike basic tools, it supports RAW formats and damaged file repair.


Why Choose PandaOffice Drecov Data Recovery Software?
When it comes to reliable data recovery, PandaOffice Drecov stands out as a powerful, all-in-one solution designed to handle a wide range of data loss scenarios. Whether you’re trying to perform TikTok deleted video recovery, restore files after formatting, or recover important documents, Drecov delivers fast and dependable results.
One of its biggest advantages is versatility. From format data recovery to lost partition recovery, the software can scan deeply and accurately locate files that other tools often miss. Even if your drive has been accidentally formatted or a partition has disappeared, Drecov uses advanced algorithms to reconstruct and retrieve your data with high success rates.
Drecov also supports specialized recovery needs. If you’ve lost important documents, its PDF recovery tool ensures that files retain their original structure and quality. For media users, the audio recovery feature helps restore music, recordings, and other sound files without corruption, making it ideal for both personal and professional use.
Ease of use is another key benefit. The intuitive interface allows beginners to recover files in just a few clicks, while still offering advanced options for more experienced users. Plus, it supports a wide range of storage devices, including HDDs, SSDs, USB drives, and memory cards.
In short, PandaOffice Drecov combines powerful recovery capabilities with user-friendly design, making it a trusted choice for anyone facing data loss.
Method 5: Restore from Backup or Cloud Storage
Test Environment
- Platforms: Windows Backup / Time Machine / Google Drive
- Scenario: Photos previously backed up
If you regularly back up your data, recovery becomes much easier.
Steps
- Open your backup system
- Locate the image folder
- Select the desired files
- Restore them to your system
This is the safest method with the highest success rate.
What Happens During the Hard Drive Recovery Process
Understanding how recovery software works
When the hard drive recovery process has been selected, software scans the disk at a sector level. Instead of relying on file tables, it identifies file signatures such as headers and footers.
This allows recovery even when:
- File names are lost
- Folder structures are damaged
Stages of recovery scanning
Typical stages include:
- Quick scan (recent deletions)
- Deep scan (sector-by-sector analysis)
- File reconstruction
- Preview and export
The deeper the scan, the longer it takes—but the better the results.
Factors That Affect Hard Drive Photo Recovery Success
Key elements that determine recovery results
When performing hard drive photo recovery, success is never guaranteed. Several technical factors influence whether your images can be restored completely or only partially.
First, the condition of the storage device plays a major role. Logical damage (like deletion or formatting) is easier to handle than physical damage (such as head crashes or bad sectors). Second, the time between data loss and recovery is critical. The longer you wait, the higher the chance that new data overwrites your photos.
Another important factor is fragmentation. If images were stored in multiple segments, recovery tools must reconstruct them accurately, which is not always possible.
How user behavior impacts recovery chances
Your actions immediately after losing files can either improve or destroy recovery potential. Continuing to use the same drive increases overwrite risks significantly.
⚠️Warning: Installing recovery software on the affected drive may overwrite lost images permanently.
To improve success rates:
- Stop using the drive immediately
- Use another device to install recovery tools
- Avoid saving new files
These practices are essential for effective data recovery hard drive operations.
Cost and Options for Hard Drive Data Recovery
Typical pricing for recovery services
The cost data recovery hard drive varies depending on the situation. For software-based recovery, many tools are free or low-cost, typically ranging from $0 to $100.
However, if the drive has physical damage, professional labs are required. These services often involve:
- Cleanroom environments
- Specialized hardware tools
- Manual data reconstruction
Prices can range from:
- $100–$300 for minor logical recovery
- $300–$800 for complex cases
- $1000+ for severe physical damage
Choosing between DIY and professional recovery
Deciding whether to attempt recovery yourself depends on the severity of the issue.
DIY recovery is suitable when:
- Files were accidentally deleted
- The drive is still accessible
- No unusual noises are present
Professional recovery is necessary when:
- The drive is not detected
- You hear clicking or grinding sounds
- Data is extremely valuable
Balancing cost and risk is essential when planning a file recovery hard drive strategy.
Advanced Techniques to Locate Hidden or Lost Images
Scanning raw sectors for image signatures
Advanced recovery tools go beyond standard indexing by scanning raw sectors. They look for file signatures like JPEG headers (FFD8) or PNG markers.
This method ignores the file system entirely, making it effective when:
- The partition is corrupted
- File tables are missing
- The drive has been formatted
It is one of the most reliable approaches for recover photos from hard drive scenarios involving severe corruption.
Filtering and sorting recovered files efficiently
After scanning, you may see thousands of recovered files. Efficient filtering is essential:
- Sort by file type (JPG, PNG, RAW)
- Use preview features to identify valid images
- Filter by file size to exclude corrupted fragments
These techniques streamline the hard drive photo recovery process and save time when dealing with large datasets.
Common Mistakes to Avoid During Photo Recovery
Errors that reduce recovery success rate
Many users unintentionally reduce their chances of recovery by making avoidable mistakes.
One common issue is continuing to use the affected drive. Even simple actions like browsing or downloading files can overwrite lost data.
Another mistake is using unreliable or outdated recovery tools. Poor-quality software may corrupt files further or fail to detect recoverable data.
Best practices for safe recovery
To ensure safe and effective data recovery hard drive, follow these guidelines:
- Always scan the drive in read-only mode
- Save recovered files to a different storage device
- Avoid interrupting the scanning process
⚠️Warning: Interrupting a deep scan may result in incomplete recovery results.
Taking a cautious approach significantly improves your chances of success.
Frequently Asked Questions About Finding Photos on a Hard Drive
Can I recover photos after formatting a hard drive?
Yes, in many cases you can recover photos from hard drive even after formatting. Formatting usually removes file references rather than the actual data. Recovery software can scan for file signatures and reconstruct images.
However, success depends on whether new data has overwritten the original files.
Is free hard drive recovery software reliable?
Many free hard drive recovery software tools are effective for basic recovery tasks. They can recover recently deleted files and perform quick scans.
However, they often have limitations:
- Restricted recovery size
- Limited deep scan capabilities
- Fewer file format supports
For complex cases, advanced tools provide better results.
How long does the recovery process take?
When the hard drive recovery process has been selected, the duration depends on:
- Drive size
- Scan type (quick vs deep)
- Drive condition
A quick scan may take minutes, while a deep scan can take several hours or even longer.
Final Thoughts on Finding and Recovering Photos
Key takeaways for successful recovery
Finding and restoring lost images requires a combination of the right tools and proper techniques. Whether you are using built-in search functions or advanced recovery software, understanding how data is stored is essential.
For basic cases, system tools and backups may be enough. But for deleted or corrupted files, specialized file recovery hard drive solutions are necessary.
Always remember:
- Act quickly after data loss
- Avoid overwriting the drive
- Choose the appropriate recovery method
When to seek professional help
If your drive shows signs of physical damage or critical data is at risk, professional recovery services are the safest option despite the higher cost data recovery hard drive.
In less severe cases, using reliable tools can successfully restore your files without needing expert intervention.
By following the strategies in this guide, you can maximize your chances of completing a successful hard drive photo recovery and retrieving your valuable memories.


