


Accidentally deleting important files is one of the most common problems Windows users face. Whether you removed documents, images, videos, or project folders, your first instinct is usually to check the Recycle Bin. In many situations, you can restore files from Recycle Bin without installing any third-party tools. But what happens if the files are no longer visible there?
The good news is that Windows provides several built-in solutions that may help with recovery recycle bin issues, even when the Bin appears empty. From restoring files directly inside the Recycle Bin to using system features such as File History and previous versions, there are multiple ways to attempt recovering recycle bin data without extra software.
However, timing is critical. The longer you wait, the higher the chance that deleted data will be overwritten. Acting quickly increases your success rate significantly.
In this detailed guide, you’ll learn:
- How to restore from recycle bin step by step
- What to do if the Recycle Bin is empty
- Built-in Windows recovery options
- Situations where recovery without software is possible
- When professional recovery tools like Pandaoffice Drecov become necessary
Let’s start with understanding how the Recycle Bin actually works behind the scenes.
I recently encountered a problem where I accidentally emptied my Recycle Bin on my Windows 11 PC, and lost several important files that I hadn’t intended to delete. I understand that once the Recycle Bin is emptied, the files aren’t easily recoverable, but I’m hoping there might still be a way to get them back. Has anyone else experienced this issue and successfully recover deleted files after emptying the recycle bin?—from Microsoft Store
How the Recycle Bin Works in Windows
Before attempting any recovery recycle bin procedure, it’s important to understand what really happens when you delete a file.
When you press the Delete key on a file in Windows, the file is not immediately erased from your hard drive. Instead, it is moved to the Recycle Bin, which acts as a temporary storage folder. The file remains there until one of the following happens:
- You manually empty the Recycle Bin
- The Bin exceeds its storage limit
- You use Shift + Delete (permanent deletion)
The Recycle Bin stores files separately for each drive and maintains metadata such as original location and deletion date. This is why you can easily restore files from Recycle Bin to their original folders with just a few clicks.
However, once the Bin is emptied, Windows simply marks the storage space as available for reuse. The data may still physically exist on the disk until overwritten.
⚠️Warning: Continuing to use your computer after deleting files increases the chance of overwriting the data you want to recover.
Understanding this mechanism helps you choose the right method when attempting recovering recycle bin files without software.
Method 1: Restore Files Directly from Recycle Bin
If the deleted files are still present in the Recycle Bin, recovery is simple and does not require any additional tools.
Step-by-Step: How to Restore from Recycle Bin
- Double-click the Recycle Bin icon on your desktop.
- Locate the file or folder you want to restore.
- Right-click on the item.
- Select Restore.
The file will automatically return to its original location.
You can also select multiple files by holding the Ctrl key while clicking. This is useful when performing bulk recovery recycle bin operations.
If you do not remember the original location, you can sort files by deletion date or use the search bar inside the Recycle Bin window.
⚠️Warning: If you empty the Recycle Bin before restoring, this method will no longer work.
This method is the simplest way to restore files from Recycle Bin, but it only works if the Bin has not been cleared.
If the files are missing from the Recycle Bin, continue to the next method.
Method 2: Use “Restore All Items” Option
If you accidentally deleted multiple files and want to recover everything at once, Windows provides a bulk restoration option.
How to Recovering Recycle Bin Items in Bulk
- Open the Recycle Bin.
- Click the Restore all items button in the top menu.
- Confirm the action.
Windows will return every item to its original folder automatically.
This approach is helpful if you are unsure which files were deleted. It ensures complete recovery recycle bin restoration without manually selecting individual items.
However, restoring everything may also bring back files you intentionally deleted. After restoration, you may need to sort and delete unwanted files again.
⚠️Warning: Make sure your original file locations still exist. If the original folder was deleted, Windows may recreate it automatically.
This built-in method works only if the files are still inside the Recycle Bin. If the Bin has been emptied, you’ll need alternative solutions discussed below.
Method 3: Check File History Backup
If the Recycle Bin is empty, you can still try restoring previous backups using File History.
File History is a built-in Windows feature that automatically backs up copies of files stored in Documents, Pictures, Videos, Desktop, and other selected folders.
How to Restore from Recycle Bin Using File History
- Open Control Panel.
- Navigate to System and Security.
- Select File History.
- Click Restore personal files.
- Browse for the deleted file version.
- Click the Restore button.
If File History was enabled before deletion, you may successfully complete recovering recycle bin data using this feature.
⚠️Warning: File History must have been activated before the file was deleted. Otherwise, no backup will exist.
File History is one of the most effective built-in options when direct recovery recycle bin restoration fails.
Method 4: Restore Previous Versions of Folders
Another native Windows feature allows you to recover earlier versions of folders through system restore points.
When System Protection is enabled, Windows creates restore points that include previous versions of files and folders.
Steps to Restore Previous Versions
- Navigate to the folder where the deleted file was originally located.
- Right-click the folder.
- Select Properties.
- Open the Previous Versions tab.
- Choose an available version.
- Click Restore.
This method works well if you need to restore files from Recycle Bin that were permanently deleted but existed at the time of a restore point.
⚠️Warning: Restoring a previous version may overwrite current folder contents. Consider copying files instead of directly restoring.
If no previous versions appear, System Protection was likely disabled.
Method 5: Recover Files Using Windows Backup
If you have previously set up Windows Backup, you can retrieve deleted files from backup archives.
How to Restore from Backup
- Open Control Panel.
- Select Backup and Restore (Windows 7).
- Click Restore my files.
- Browse or search for deleted files.
- Choose the restore location.
This method allows recovering recycle bin content even if the Bin was emptied, provided that backups were created beforehand.
Backup recovery is often overlooked but can be extremely effective.
⚠️Warning: Always restore files to a different drive if possible to avoid overwriting recoverable data.
Method 6: Recover Files Deleted with Shift + Delete
When you press Shift + Delete, Windows bypasses the Recycle Bin entirely. The file does not appear inside the Bin, which makes many users believe it is permanently gone. However, in reality, the data may still physically exist on the storage drive until overwritten.
In this case, direct recovery recycle bin restoration is not possible because the file never entered the Bin. Instead, Windows marks the storage space as available. The data remains recoverable only as long as new information has not overwritten it.
Unfortunately, Windows does not provide a built-in graphical tool to restore files deleted using Shift + Delete. Your only native options are:
- File History (if enabled earlier)
- Previous Versions
- Windows Backup
⚠️Warning: Stop using the affected drive immediately. Installing programs or copying files may overwrite recoverable data.
If none of the built-in backup options were configured beforehand, recovery without software becomes extremely limited. This is where professional data recovery tools such as Pandaoffice Drecov become necessary for deeper disk scanning.
Method 7: Recover Files from a Hidden Recycle Bin Folder
Many users are unaware that each drive contains a hidden system folder that stores Recycle Bin data. Sometimes files may still exist there due to corruption or interface errors.
How to Access the Hidden Recycle Bin Folder
- Open File Explorer.
- Enable “Show hidden files” in View options.
- Navigate to the root of your drive (e.g., C:).
- Locate the folder named $Recycle.Bin.
Inside this directory, you may see subfolders identified by security IDs. These folders contain deleted files and metadata.
If you find your missing file, you can manually copy it to another location.
⚠️Warning: Do not delete or modify system files inside $Recycle.Bin unless you are certain of what you are doing.
This method sometimes works when users think they need recovering recycle bin solutions, but the issue is only a display error.
Method 8: Use Command Prompt to Restore Deleted Files
The Command Prompt provides limited options for file recovery, but it can sometimes help retrieve hidden or corrupted files.
Using the ATTRIB Command
- Open Command Prompt as Administrator.
- Type:
attrib -h -r -s /s /d X:\*.*(Replace X with the drive letter.) - Press Enter.
This command removes hidden, read-only, and system attributes from files.
While this method does not truly perform recovery recycle bin operations, it can restore visibility to files affected by malware or system corruption.
⚠️Warning: Command-line tools cannot recover overwritten files.
If files were genuinely deleted and the Recycle Bin emptied, this method may not help. It is mainly useful for fixing file visibility issues rather than deep recovery.
Common Reasons Files Disappear from Recycle Bin
Understanding why files vanish can improve your recovery recycle bin success rate.
1. Recycle Bin Storage Limit Exceeded
Windows automatically removes older items when the Bin reaches its storage capacity.
2. Manual Emptying
Emptying the Recycle Bin permanently removes visible files.
3. Disk Cleanup Utility
Using Disk Cleanup can clear Recycle Bin contents.
4. Corrupted Recycle Bin
File system errors may prevent proper display of items.
5. External Drive Deletion
Files deleted from USB drives may bypass the Recycle Bin entirely.
⚠️Warning: External storage devices often skip the Recycle Bin, meaning immediate recovery action is required.
Knowing the cause helps determine whether you can restore files from recycle bin directly or need advanced recovery.
How to Fix a Corrupted Recycle Bin
A damaged Recycle Bin may prevent proper recovering recycle bin operations.
Steps to Reset Recycle Bin
- Open Command Prompt as Administrator.
- Type:
rd /s /q C:\$Recycle.Bin - Press Enter.
- Restart your computer.
Windows will automatically recreate a new Recycle Bin.
⚠️Warning: Resetting the Recycle Bin deletes all current contents permanently.
This fix resolves display errors but does not restore deleted data. It simply ensures the Bin functions correctly going forward.
Limitations of Recovering Recycle Bin Without Software
While built-in tools are useful, they have significant limitations:
- They require prior backup activation.
- They cannot scan raw disk sectors.
- They cannot recover overwritten files.
- They offer limited deep recovery functionality.
Windows is not designed as a professional recovery system. Its native tools focus on prevention and backup rather than forensic restoration.
If your files were permanently deleted and no backup exists, the probability of recovery using only built-in features drops dramatically.
⚠️Warning: Every minute of continued disk activity reduces recovery success rates.
When built-in methods fail, specialized recovery software becomes the only realistic solution.
When to Use Pandaoffice Drecov for Deep Recovery
If none of the above methods work, you need a dedicated recovery solution. Pandaoffice Drecov is designed for advanced recovery recycle bin scenarios, including:
Why choose Pandaoffice Drecov?
- Selecting the right recovery software is essential when unexpected data loss occurs. Pandaoffice Drecov provides a powerful, secure, and efficient solution designed to handle a wide range of storage failure scenarios across different devices.
- Advanced Recovery for SD Cards and Hard Drives
- Pandaoffice Drecov supports recovering photos from an SD card as well as performing professional hard drive recovery. Whether files were accidentally deleted, a storage device was formatted, or data was lost due to corruption, its deep scan technology thoroughly analyzes storage sectors to locate recoverable content. The software is compatible with internal drives, memory cards, and various file systems, ensuring flexible recovery options in different environments.
- Reliable Support for Recovering External Hard Drives
- The software also specializes in recovering external hard drives that become inaccessible due to accidental formatting, partition loss, or file system damage. It automatically detects connected devices and performs comprehensive scans without altering original data, helping improve recovery success rates.
- Efficient Recovery of Deleted Photos
- One of its strongest capabilities is recovering deleted photos, even after permanent deletion from the Recycle Bin. The built-in preview feature allows users to verify files before restoration, ensuring accurate and controlled recovery.
- With strong scanning performance, broad device compatibility, and an intuitive interface, Pandaoffice Drecov offers a dependable and professional solution for modern data recovery needs.
Unlike built-in Windows features, Pandaoffice Drecov performs deep disk scans that analyze file signatures and raw sectors. This increases the chance of retrieving permanently deleted files.
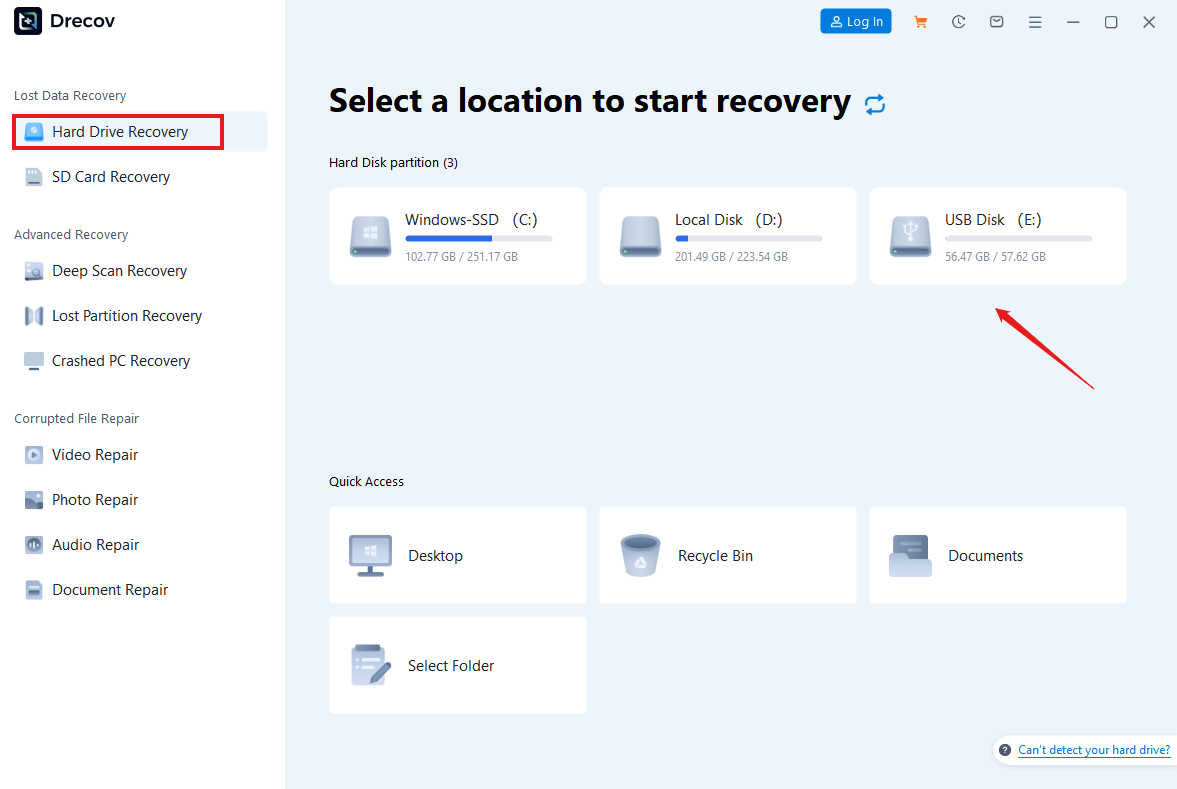
Basic Steps Using Pandaoffice Drecov
Download Drecov- Install the software on a different drive.
- Select the affected disk.
- Run a deep scan.
- Preview recoverable files.
- Restore them to a safe location.


⚠️Warning: Always recover files to a separate storage device to prevent overwriting.
When standard recovering recycle bin approaches fail, Pandaoffice Drecov provides a professional-level alternative.
Best Practices to Prevent Future Data Loss
Prevention is always better than recovery. To avoid future recovery recycle bin emergencies:
- Enable File History
- Create regular system backups
- Increase Recycle Bin storage size
- Avoid using Shift + Delete unless necessary
- Back up important files to cloud storage
- Use reliable storage hardware
You can also configure Windows to display a deletion confirmation dialog to reduce accidental removal.
Regular backups significantly reduce reliance on recovering recycle bin techniques.
Final Thoughts: Is Recovery Without Software Always Possible?
So, is there a way to recover files from Recycle Bin without software? The answer depends on the situation.
If the files are still inside the Recycle Bin, recovery is easy. If backups or restore points exist, success is still possible. However, if the Recycle Bin has been emptied and no backup was created, Windows alone may not be sufficient.
In such cases, professional tools like Pandaoffice Drecov become essential for deep scanning and advanced restoration.
Act quickly, minimize disk usage, and choose the right recovery method based on your specific scenario.
The sooner you respond to accidental deletion, the higher your chances of successful file recovery.


