


We’ve all been there: that heart-stopping moment when you realize the “Empty Recycle Bin” click you just performed included a folder you actually needed. Perhaps it was a critical work presentation, a thesis you spent months on, or precious family photos from a decade ago. It feels like the digital equivalent of dropping your keys down a storm drain—once they disappear from the bin, they seem gone for good. The good news? They aren’t truly gone. In this guide, we will explore exactly how can you recover deleted files from recycle bin using a variety of methods, ranging from built-in system features to professional-grade recovery software.
1. Crucial Pre-Recovery Tips: Stop! Don’t Do This!
Before we dive into the “how-to,” you must understand the “golden rule” of data recovery. When you empty the Recycle Bin, Windows doesn’t physically erase the data from your hard drive immediately. Instead, it marks the space as “available” for new data.
If you keep using your computer, downloading new apps, or saving new files, the system might overwrite those “invisible” deleted files. Once overwritten, they are gone forever.
- Minimize Activity: Stop saving new files to the drive where the data was lost.
- Don’t Restart Excessively: While it seems counter-intuitive, constant rebooting can trigger system updates or background logs that write data to the disk.
- Act Fast: The sooner you attempt a recovery, the higher your success rate will be.
2. Proven Methods to Retrieve Your Data
There are several ways to tackle this problem. We have ranked these from the easiest built-in fixes to the most powerful professional solutions.
Method 1: The “Ctrl+Z” Instant Fix (If you just did it)
If you deleted a file and haven’t closed your File Explorer window yet, you might be in luck with the simplest shortcut in existence.
- Open the folder where the file was originally located.
- Press Ctrl + Z on your keyboard simultaneously.
- Alternatively, right-click anywhere in the empty space of the folder and select Undo Delete.
Method 2: Professional Recovery with PandaOffice Drecov
When the standard “Undo” button fails and the Recycle Bin is empty, you need a specialized tool. PandaOffice Drecov is a premier choice for this scenario. It is a robust, local recovery engine that prides itself on a ultra-high data recovery success rate.
Whether you are dealing with a cleared Recycle Bin, a formatted disk, or an accidentally wiped SD card/USB drive, this tool handles it with ease. It supports over a hundred file formats, including images, videos, audio, compressed archives, and even EXE files. Most impressively, it can even repair corrupted or “garbled” files that won’t open after recovery.
Because it operates locally, you never have to worry about data leaks. Its reliability is backed by partnerships and features on platforms like Trustpilot, Microsoft Store, TechBullion, and Sourceforge.
Here is how to use it in three simple steps:
Step 1: Select File Type and Location
Launch the software. On the main interface, you will see various file categories (Photos, Documents, Videos, etc.). Select the file types you are looking for. Next, specifically check the “Recycle Bin” option as your target scanning location. This tells the software to focus its deep-search algorithms on the area where deleted headers are stored.

Step 2: Scan and Preview
Click the “Scan” button. PandaOffice Drecov will perform a high-speed analysis of your storage sectors. Once the scan is complete, you can browse through the results. A standout feature here is the “Preview” function—you can view the files (even if they were previously unreadable) to ensure they are the correct ones before proceeding.

Step 3: Recover and Save
After identifying your lost items, tick the boxes next to the files you need. Click the “Recover” button. Important: Always save the recovered files to a different drive (like an external USB) to prevent any risk of overwriting other deleted data. Within seconds, your files are back, fully functional and repaired.
Method 3: Using Windows File Recovery (Command Line)
For those who are a bit more tech-savvy but still want a free tool, Microsoft offers a command-line utility. It doesn’t have a graphical interface, but it is effective.
- 1.Download Windows File Recovery from the Microsoft Store.
- 2.Open the app, which will launch a Command Prompt window.
- 3.Enter the command:
winfr source-drive: destination-drive: /regular- Example:
winfr C: E: /regular /n \$Recycle Bin\
- Example:
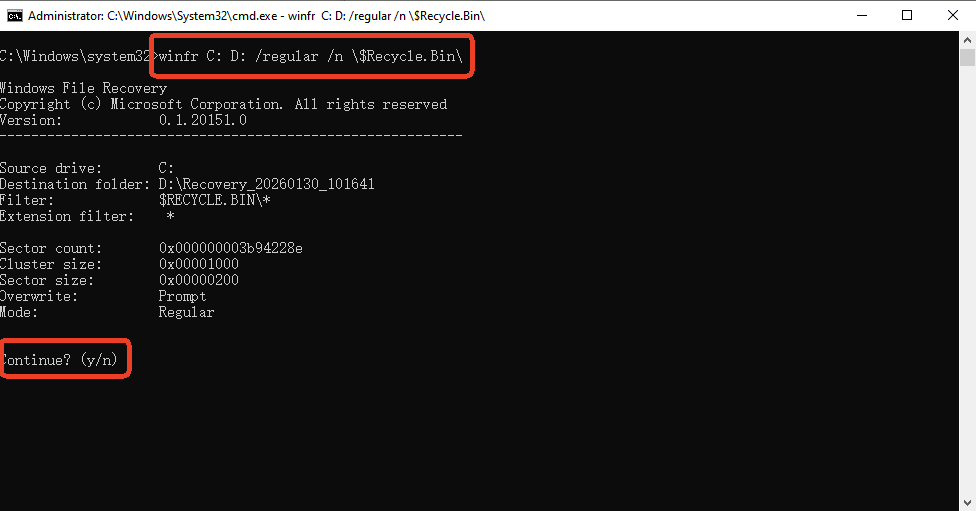
This tool will scan the drive and attempt to reconstruct files from the file table.
Method 4: Restoring from “Previous Versions” (Shadow Copies)
Windows has a hidden feature called “Shadow Copies” which are part of a System Restore point or File History.
- 1.Navigate to the folder that used to contain the deleted file.
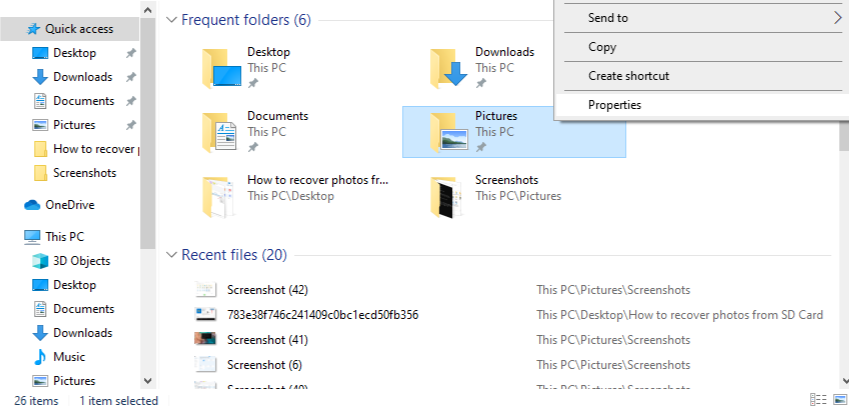
- 2.Right-click the folder and select Properties.
- 3.Click the Previous Versions tab.
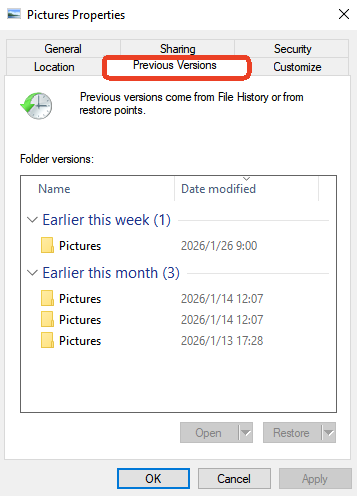
- 4.If you have File History turned on, you will see a list of older versions of that folder.
- 5.Select a version dated before the deletion and click Restore.
3. The Science Behind the “Ghost” Files: How Recovery Works
You might wonder: How can you recover deleted files from recycle bin if I already emptied it? Think of your hard drive like a massive library. Every file is a book, and the File Allocation Table (FAT) or NTFS is the library’s “Index Catalog.”
When you delete a file and empty the bin, Windows doesn’t go into the “library stacks” and burn the book. It simply goes to the Index Catalog and rips out the page for that book. It also puts a “For Rent” sign on the shelf where the book sits.
The book (your data) stays on the shelf until a new book (new data) comes along and is placed on that exact same spot. Professional software like PandaOffice Drecov ignores the catalog entirely. Instead, it walks through the library stacks, looks at every “shelf,” and identifies books that no longer have an entry in the catalog. It then re-indexes them so your computer can read them again.
This is why “Local Recovery” is so much safer than cloud-based recovery—the data never leaves your “library,” ensuring your privacy remains intact.
4. Why Traditional Methods Sometimes Fail
Many users ask how can you recover deleted files from recycle bin when they’ve already tried “System Restore.” It’s important to note that a System Restore primarily affects system files and registry settings—it rarely brings back deleted personal photos or Word documents.
Furthermore, if you are using an SSD (Solid State Drive), a feature called TRIM often wipes the “shelves” much faster than an old-fashioned HDD. This is why having a specialized tool that can bypass standard system protocols is vital for modern computers.
5. Conclusion
Losing data is stressful, but it’s rarely a permanent disaster. By following the steps above—starting with simple undos and moving toward powerful solutions like PandaOffice Drecov—you can reclaim your digital life.
Remember, the key factors are speed and using the right tools. Avoid installing unnecessary software on the drive you are trying to save, and always keep a backup strategy for the future.


