


Imagine the sinking feeling in your chest when you plug your USB drive into your laptop, only to find the “Photos” folder empty or, worse, a prompt asking you to “Format the disk before using it.” Whether it’s a decade of family memories, a crucial thesis, or a high-stakes business presentation, the panic of losing digital data is a modern-day nightmare.
However, before you succumb to despair, here is a piece of vital information: your lost USB data is almost certainly still there. Digital files rarely vanish into thin air immediately after deletion. With the right tools and a calm head, you can bring your files back from the digital brink.
This guide will serve as your comprehensive roadmap for Recuva USB data recovery and explore professional-grade alternatives. We will dive deep into why data disappears, the science of how it stays hidden, and provide step-by-step tutorials to help you reclaim your digital life.
Why Does USB Data Disappear?
To master Recuva USB data recovery, one must first understand the “enemy.” Data loss isn’t a singular event; it happens for various reasons, ranging from simple human error to complex hardware failure.
1. Accidental Deletion
The most common culprit. You intended to delete a shortcut but accidentally sent the entire project folder to the digital void. On a USB drive, files usually bypass the Recycle Bin, making them feel permanently lost.
2. File System Corruption (RAW Drive)
Sometimes, the “map” your computer uses to find files on the USB becomes corrupted. The PC might label the drive as “RAW” or “Unrecognized,” even though the physical data is untouched.
3. Improper Ejection
We’ve all done it—yanking the drive out while the light is still flashing. This “unsafe removal” can interrupt a write process, leading to fragmented files or a corrupted partition table.
4. Malware and Viruses
Malicious software can hide your files, encrypt them, or alter the file attributes so they appear missing to the Windows Explorer.
5. Physical Wear and Tear
USB flash drives use NAND flash memory, which has a limited number of write cycles. Eventually, components can fail, though software-based Recuva USB data recovery is often still possible if the computer can detect the drive.
The Science of Hope: Why Data is Recoverable
You might wonder, “If I deleted it, why isn’t it gone?” To understand this, think of your USB drive like a giant library with a Table of Contents (the File System, like FAT32 or NTFS).
When you delete a file, the computer does not go into the “stacks” and shred the pages of your book. Instead, it simply crosses the entry off the Table of Contents and marks that space as “Available.”
- The Data Remains: The actual 1s and 0s stay on the flash memory chips.
- The “Available” Status: The computer only overwrites that data when it needs room for a new file.
- The Golden Rule: As long as you do not save new files onto the USB drive, the old data remains intact and recoverable. This is why Recuva USB data recovery works so effectively.
Method 1: Recuva USB Data Recovery Step-by-Step
Recuva is a household name in the world of file restoration. Developed by CCleaner, it is praised for its simplicity and efficiency. Here is how to perform a Recuva USB data recovery effectively. Visit the official CCleaner website to download Recuva. We recommend the portable version if you are trying to avoid installing more software on your main system, though installing it on your C: drive is perfectly fine for USB recovery.
Step 1: Connect Your Drive
Plug your USB drive into a functional port. Ensure Windows recognizes a device is connected, even if it says the drive needs formatting (if prompted to format, click Cancel).
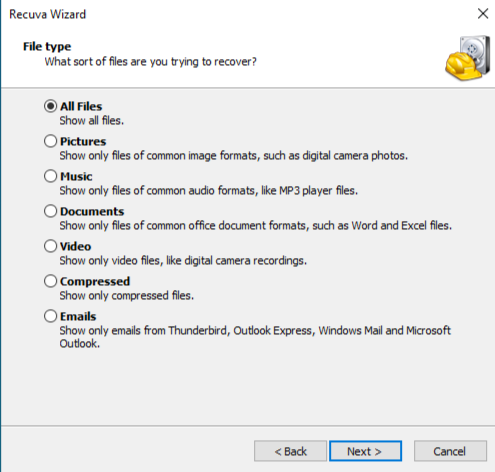
Step 2: Launch the Recuva Wizard
When you open the program, the Wizard will guide you.
- Select the File Type (Pictures, Music, Documents, etc.). If you aren’t sure, select “All Files.”
- Select the File Location. Choose “In a specific location” and browse to your USB drive letter (e.g., E: or F:).
Step 3: Initial Scan vs. Deep Scan
Click “Start.” Recuva will quickly scan the drive’s index. If the initial scan doesn’t find your files, the program will suggest a Deep Scan.
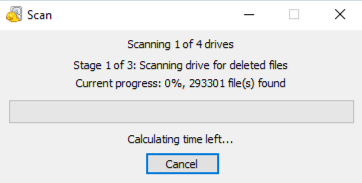
Note: A Deep Scan can take anywhere from 30 minutes to several hours depending on the size of your USB, but it is much more thorough at finding formatted data.
Step 4: Review and Recover
Once the scan finishes, Recuva shows a list of files with color-coded bullets. Check the boxes next to your files and click Recover.
- Green: Excellent condition, likely fully recoverable.
- Yellow: Poor condition, some data might be missing.
- Red: Unrecoverable (already overwritten).
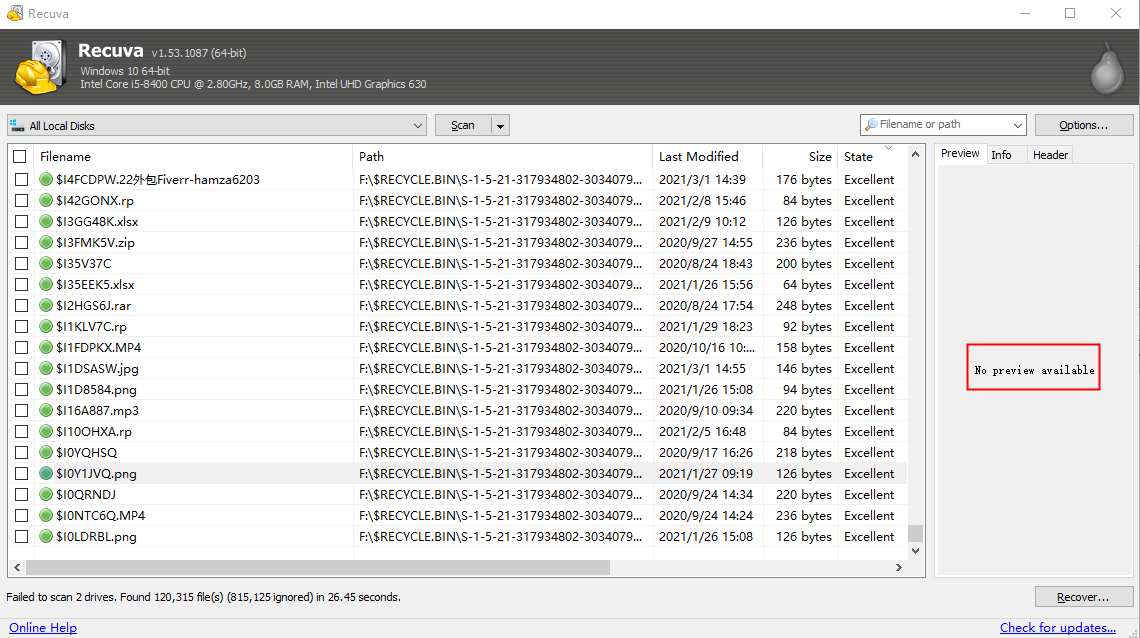
Crucial Tip: Always save the recovered files to your computer’s hard drive, never back onto the same USB drive you are recovering from.
Method 2: Professional Recovery with PandaOffice Drecov
While Recuva USB data recovery is excellent for simple deletions, it sometimes struggles with complex partition losses or heavily corrupted drives. For these scenarios, we recommend PandaOffice Drecov.Drecov is a premium-grade tool designed with more advanced algorithms that can reconstruct file headers that standard freeware might miss.This tool handles it all, whether you are dealing with:
- Accidental Desktop Deletions: Instantly retrieving files wiped from your local workspace.
- Disk Formatting Errors: Salvaging files from drives that have been completely wiped or reformatted.
- External Media Rescue: Recovering lost data from formatted or corrupted SD cards and USB flash drives.
- Sync Conflict Resolution: Reversing data loss caused by synchronization errors between your PC and the OneDrive cloud.
- Browser Metadata Recovery: Restoring lost Chrome bookmarks and other essential application data.”
Why Choose PandaOffice Drecov?
- High Success Rate: It excels at “RAW” drive recovery where the file system is missing.
- Preview Function: You can see a preview of images and documents before committing to the recovery.
- User-Friendly Interface: It simplifies complex data forensics into a few clicks.
Step-by-Step Guide for Drecov:
- 1.Select the USB Drive: open the application. You will see a clean dashboard listing all connected drives and choose your USB drive.

- 2.Full Scan: Click the “Scan” button. Drecov uses a dual-scanning approach, running a quick scan followed automatically by a deep sector-by-sector analysis.

- 3.Filter and Locate: Use the sidebar to filter by file type (e.g., .jpg, .docx, .pdf). This saves you from sifting through thousands of system files.

- 4.Preview and Secure: Double-click a file to preview it. If it looks correct, click Recover and select a secure folder on your local PC.
Method 3: Alternative Solutions for Specific Needs
If Recuva USB data recovery and Drecov aren’t quite what you need, consider these alternatives categorized by complexity.
1. Windows File Recovery (Command Line)
For those comfortable with a terminal, Microsoft offers a free tool called “Windows File Recovery” via the Microsoft Store. It lacks a graphical interface but is powerful for NTFS drives.
- Complexity: Medium-High
- Best for: Tech-savvy users who want a native Microsoft solution.
2. Using CMD (To Fix “Hidden” Files)
Sometimes data isn’t deleted; it’s just hidden by a virus.
- Step 1: Open CMD as Administrator.
- Step 2: Type
attrib -h -r -s /s /d G:\*.*(Replace ‘G’ with your USB drive letter). - Step 3: Check your USB drive for a newly appeared folder.
3. PhotoRec (Open Source)
If you are dealing with a severely damaged drive and don’t mind a “1990s” text-based interface, PhotoRec is incredibly powerful at carving data out of raw sectors.
- Complexity: High
- Best for: Extreme cases of corruption.
Bonus Tips: Prevention is Better Than Cure
Successful Recuva USB data recovery is a relief, but not having to recover data at all is even better. Here is how to safeguard your future files:
- The 3-2-1 Backup Rule: Keep 3 copies of your data, on 2 different media types, with 1 copy stored offsite (Cloud storage).
- Always Eject Safely: Right-click the USB icon and select “Eject” before physically removing it. This ensures all “cached” data is written to the disk.
- Use Quality Hardware: Cheap, unbranded USB drives are more prone to controller failure. Invest in reputable brands like SanDisk, Kingston, or Samsung.
- Check Drive Health: Periodically use tools like “Chkdsk” in Windows to repair minor file system errors before they become major problems.
Common Questions About USB Recovery
1.Can I recover data from a USB that was physically snapped?
Software like Recuva USB data recovery cannot help if the hardware is physically broken. In these cases, you must contact a professional data recovery lab that can desolder the memory chips.
2.How long does the recovery process take?
For a 16GB drive, a standard scan takes 2-5 minutes. A deep scan might take 20-40 minutes. Larger drives (128GB+) can take several hours.
3.What should I do if my USB asks to be formatted?
Do NOT format it. Formatting creates a new file system and can overwrite the structures that help recovery software find your old files. Run your recovery software first.
Conclusion
Losing data is a stressful experience, but it doesn’t have to be a permanent one. By utilizing Recuva USB data recovery for everyday mishaps or PandaOffice Drecov for more stubborn data loss scenarios, you have a very high chance of getting your files back.
The most important thing to remember is to stop using the drive immediately once you realize data is missing. Any further use could overwrite your precious files forever.


