


My Macbook Pro (2019 or 2020 but I know it was still intel based) recently stopped turning on/charging. There didn’t seem to be any hard drive damage. The Genius bar detected old liquid damage so my repair cost was more than a new computer and I decided to just take advantage of a Prime Day deal to get a new Air with an M3 chip. Most of my data/documents were backed up on the icloud, but there’s one specific folder that wasn’t backed up that I’d like to get back, but it isn’t vital. Is there any easy-ish way to access this hard drive? I don’t know all the specifics other than it was an SSD with 512 GB of storage and an intel chip. What equipment would be needed?—from Reddit
Introduction to Mac SSD Recovery
Overview of SSD Data on Mac
Solid-state drives (SSDs) are the standard storage solution for modern MacBook SSDs, thanks to their speed, reliability, and durability. However, data loss can still happen due to accidental deletion, formatting, system crashes, or hardware failures. Understanding Mac SSD recovery methods is essential to avoid permanent data loss.
⚠️Warning: Always create a backup of your SSD before attempting any recovery process to prevent further data loss.
Why Mac SSD Data Loss Happens
Common Causes of Data Loss on Mac SSDs
Data loss on a MacBook SSD can result from accidental deletion, corrupted system files, failed updates, physical damage, or malware attacks. SSDs have a unique structure compared to HDDs, including wear-leveling and TRIM operations, which can complicate recovery. Identifying the cause helps select the best Mac SSD data recovery method.
Understanding the Importance of Recovery Tools
High-quality recovery tools are critical for SSD data recovery Mac, as they can manage the complexities of SSD architecture and reduce the risk of overwriting lost files. Tool selection impacts recovery speed and success rate.
Solutions for Mac SSD Recovery
Method 1: Recovering Deleted Files Using Mac Trash and Time Machine
Step 1: Open the Trash
- Click the Trash icon in the Dock.
- Browse or search for the deleted files.
- Select the files and click “Put Back” to restore them to the original location.
Step 2: Use Time Machine Backup
- Connect your Time Machine backup drive to the Mac.
- Open Time Machine from the Applications folder.
- Navigate to the date and location where the files existed.
- Select the files and click “Restore.”
Test Environment: macOS Ventura 13.4, 512GB MacBook SSD, Time Machine backup on external 1TB drive.
⚠️Warning: Avoid saving new data to the SSD before recovery to prevent overwriting deleted files.
Method 2: Restoring Data Using macOS Built-in Recovery Mode
1: Boot into Recovery Mode
- Restart your Mac and immediately hold Command + R.
- Wait until the macOS Utilities window appears.
2: Use Disk Utility
- Select Disk Utility → choose the SSD.
- Click “First Aid” → “Run” to repair logical errors on the volume.
3: Recover Files
- Check if files are restored in Finder after repair.
- Copy any recovered files to an external drive for safety.
Test Environment: MacBook Pro 2021, 1TB SSD, macOS Recovery Mode, Disk Utility First Aid function.
⚠️Warning: This method cannot recover overwritten files.
Method 3: Using Third-Party Software – Pandaoffice Drecov
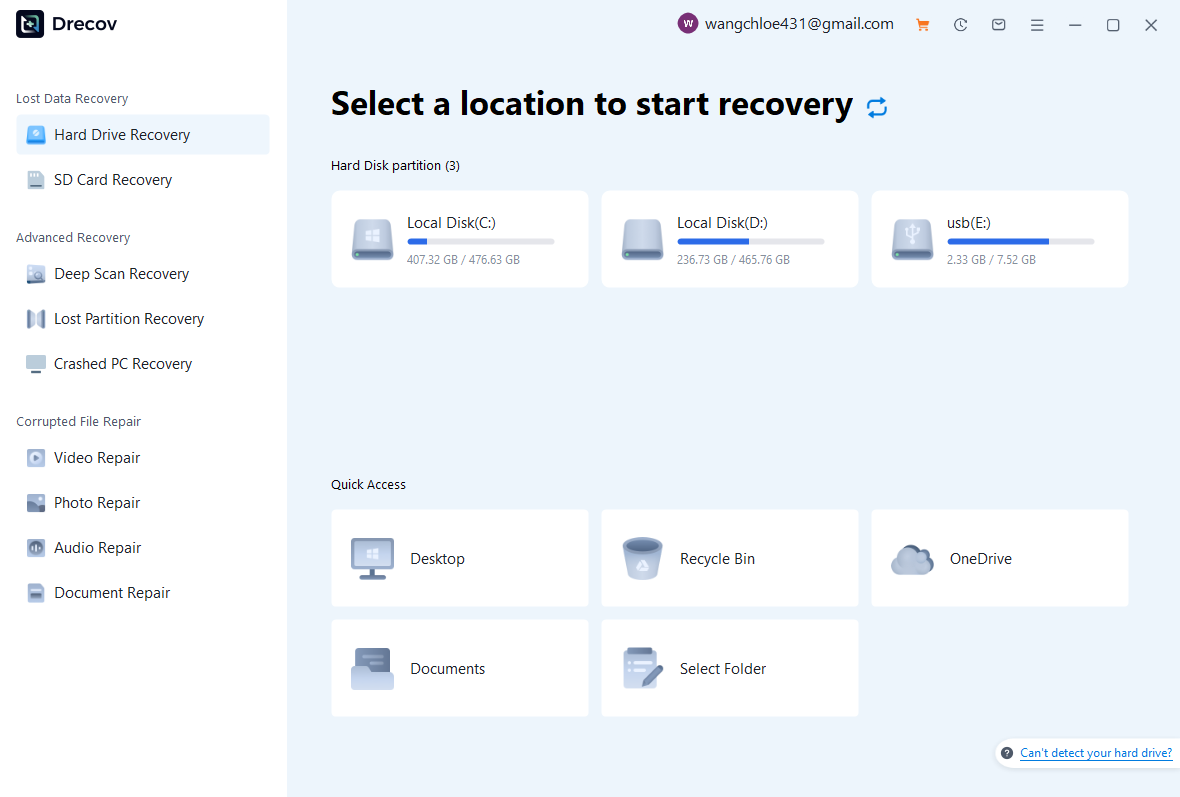
Download Drecov1: Connect Mac SSD to Windows
- Remove the SSD from your MacBook carefully.
- Insert the SSD into a SATA-to-USB adapter or external enclosure.
- Connect it to a Windows 11 PC.
2: Launch Pandaoffice Drecov
- Open Drecov on the Windows PC.
- Select the connected Mac SSD as the target drive.
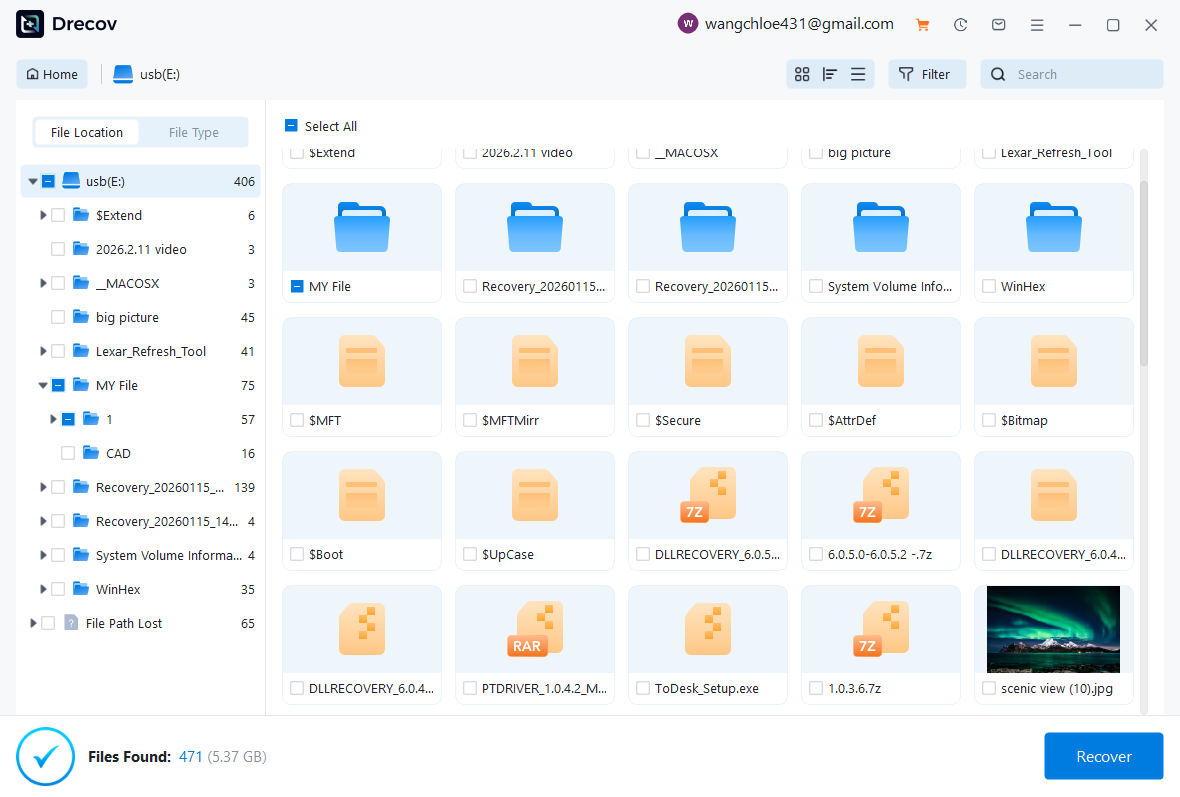
3: Scan and Recover Files
- Choose a Quick Scan for recently deleted files.
- For more severe cases, run a Deep Scan to locate lost or formatted files.
- Preview files and select the ones to recover.
- Save recovered files to a different drive to avoid overwriting.

Why Choose Pandaoffice Drecov?
Data loss can occur unexpectedly due to accidental deletion, system crashes, formatting errors, or software failures. Whether you need to restore Windows previous date, perform recover Excel files,or handle deleted PowerPoint recovery, Pandaoffice Drecov provides a reliable and efficient solution designed to restore important documents quickly and safely.
Pandaoffice Drecov is a professional PowerPoint Recovery Software that supports recovery for multiple document types, including Excel spreadsheets, Word documents, and PowerPoint presentations. With advanced scanning technology, the software can detect and recover files even after deletion, formatting, or unexpected system shutdowns. This makes it an ideal tool for users who urgently need Document Recovery from hard drives, SSDs, USB drives, memory cards, and other storage devices.
One of the key advantages of Pandaoffice Drecov is its intelligent deep-scan engine. It carefully analyzes storage sectors to locate lost or hidden files that standard recovery tools often miss. Whether you accidentally deleted a presentation and require deleted PowerPoint recovery, or you lost critical spreadsheets and need to recover Excel files, the software provides fast scanning and high recovery success rates.
The software also features a user-friendly interface that allows beginners and professionals alike to complete recovery tasks in just a few steps. Users can preview recoverable files before restoring them, ensuring that only the needed data is recovered. In situations where files were lost due to system errors, the software can also help recover documents after attempts to restore Windows previous date.
Test Environment: 1TB MacBook Air SSD, connected via SATA-to-USB adapter to Windows 11, Pandaoffice Drecov v5.2.
⚠️Warning: Always mount the SSD in read-only mode to prevent data overwriting.
Method 4: Recovering Data Using Terminal Commands
1: Open Terminal
- Launch Terminal from Applications → Utilities.
2: Navigate to Directory
- Use
cdto navigate to the folder where files were located.
3: Copy or Move Files
- Use
cpormvcommands to copy files from hidden or damaged directories to a safe location. - Example:
cp /Volumes/MacSSD/Users/username/Documents/* /Volumes/ExternalDrive/Backup/
Test Environment: MacBook Pro M2, 512GB SSD, macOS Ventura 13.4 Terminal.
Method 5: Recovering Formatted SSDs
1: Connect SSD to Recovery Environment
- Remove SSD from MacBook.
- Connect via USB/SATA to a Windows PC or secondary Mac.
2: Scan for Lost Files
- Use recovery software capable of detecting formatted partitions.
- Perform a full or deep scan.
3: Restore Recovered Files
- Preview files and select important data.
- Save recovered files to a separate storage drive.
Test Environment: 512GB MacBook Air SSD, accidentally formatted, scanned using Windows PC with Pandaoffice Drecov.
⚠️Warning: Do not save new files to the formatted SSD until recovery is complete.
Method 6: Recovering Data After System Crashes
1: Boot in Safe Mode
- Restart Mac → hold Shift until login screen appears.
- Safe Mode prevents further corruption.
2: Access Data
- Try accessing files from Finder or Terminal.
- Copy critical files to an external drive.
3: Use Recovery Software if Needed
- If files remain inaccessible, remove SSD and connect to Windows for deep scan with Pandaoffice Drecov.
Test Environment: MacBook Pro 2021, macOS Ventura, SSD connected via SATA-to-USB to Windows 11.
⚠️Warning: Repeated crashes can worsen data loss; act immediately.
Method 7: Recovering Corrupted SSD Volumes
1: Check with Disk Utility
- Use macOS Recovery Mode → Disk Utility → First Aid.
2: Transfer to Recovery Software
- If corruption persists, connect SSD to Windows.
- Use Pandaoffice Drecov to scan and recover files from corrupted partitions.
3: Recover Selectively
- Focus first on critical documents, then proceed to larger data sets.
Test Environment: 1TB MacBook Pro SSD, corrupted partition, scanned via Windows PC.
⚠️Warning: Avoid performing repairs on the original SSD; work on a clone if possible.
Method 8: Recovering Encrypted SSDs (FileVault)
1: Unlock SSD
- Enter the FileVault password to decrypt the drive.
2: Connect to Recovery Environment
- Remove SSD and attach to Windows PC via adapter.
3: Scan for Files
- Use Pandaoffice Drecov to locate decrypted files.
- Preview and recover essential files to a safe drive.
Test Environment: 512GB MacBook Air SSD with FileVault, connected to Windows 11 via SATA-to-USB adapter.
⚠️Warning: Attempting to bypass encryption without a password may permanently destroy data.
Frequently Asked Questions (FAQ)
Q1: How long does Mac SSD recovery take?
Recovery time depends on SSD size, damage severity, and method used. A 1TB SSD full scan can take several hours. Use a stable recovery environment and avoid interruptions.
Q2: Can I recover overwritten files on a Mac SSD?
Overwritten files are extremely difficult to recover. Immediate scanning with Pandaoffice Drecov increases the success rate, but recovery is not guaranteed.
Q3: Is it safe to remove the SSD from my MacBook for recovery?
Yes, if proper anti-static precautions are followed. Removing the SSD allows connection to a recovery environment like Windows for scanning with Pandaoffice Drecov.
Q4: Does TRIM affect Mac SSD recovery?
Yes, TRIM actively erases deleted data blocks, reducing recovery chances. Immediate action after data loss significantly improves recovery success.
Q5: Can I recover data from a physically damaged SSD?
Physical damage may require professional lab services. Software recovery like Pandaoffice Drecov is mostly effective for logical errors, deleted files, or corruption, not severe physical failures.
Conclusion and Key Takeaways
Summary of Mac SSD Recovery Methods
Mac SSD recovery involves multiple approaches depending on the type of data loss: accidental deletion, formatting, corruption, crashes, or encryption. Built-in macOS tools, Terminal commands, and third-party software can all contribute to successful recovery.
Why Choose Pandaoffice Drecov
For complex recovery scenarios, Pandaoffice Drecov provides a reliable solution. By transferring your MacBook SSD to a Windows environment, Drecov can recover deleted, overwritten, or formatted files efficiently. Its advanced scanning algorithms maximize recovery success while minimizing the risk of data loss.
Final Recommendations
- Maintain regular backups via Time Machine or cloud services.
- Avoid writing new data to the SSD after data loss.
- For critical recoveries, professional tools like Pandaoffice Drecov offer the highest success rates.
- Follow proper anti-static and handling procedures when removing SSDs.
⚠️Warning: Delay or improper recovery attempts can permanently destroy SSD data. Immediate, careful action is essential.


