


We have all experienced that heart-stopping moment: you open your cloud folder to find a crucial presentation or a decade of family photos missing. Whether it was a clumsy click, a sync error, or a frustrated “Clean Up” session gone wrong, the result is the same—total panic. However, the most important thing to know right now is that you can still recover deleted OneDrive files if you act quickly.
This article, titled How to Recover Deleted OneDrive Files: The 2026 Rescue Guide, serves as your roadmap to data restoration. Microsoft understands that human error is part of the digital experience; therefore, the system doesn’t just “erase” files immediately. Instead, it moves them through several safety layers. In this guide, we will walk you through every possible recovery path—from simple cloud-based bins to professional-grade tools—to ensure your digital life returns to normal.
The First Line of Defense: The OneDrive Web Recycle Bin
When you delete a file on your PC or through the web interface, it usually lands in the cloud-based Recycle Bin first. This is your quickest “Undo” button.
How to Retrieve Files via Web
- Step 1: Sign in to the OneDrive website using your Microsoft credentials.
- Step 2: Look at the left-hand navigation pane and click on Recycle bin.
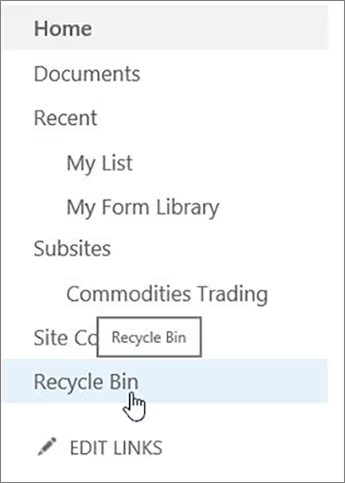
- Step 3: Browse the list. If you see your missing file, select it by clicking the checkbox next to the filename.
- Step 4: Click the Restore button at the top of the page.
⚠️ Critical Note: For personal accounts, files stay here for 30 days. For work or school accounts, you have 93 days. If you don’t see your files here, they might have moved to the second stage.
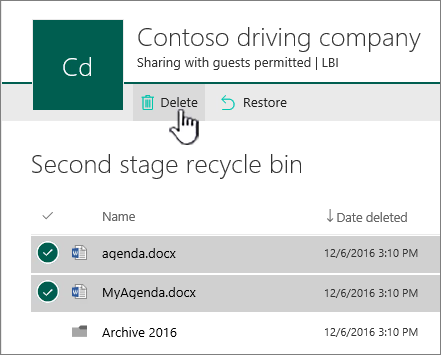
The “Secret” Layer: The Second-Stage Recycle Bin
If you emptied your primary Recycle Bin, your files aren’t necessarily gone. Business and school accounts feature a “hidden” safety net.
- Step 1: Scroll to the bottom of the Recycle bin page.

- Step 2: Click the link that says Second-stage recycle bin.
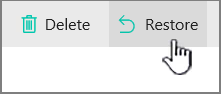
- Step 3: Identify your items and click Restore. This will move them back to their original location in your OneDrive.
Professional Rescue: Using PandaOffice Drecov
When the cloud retention period expires, or if a local synchronization error caused the files to vanish entirely from the server, you need a specialized tool. PandaOffice DRecov is a powerful data recovery solution that scans your local hard drive for the “shadow” copies of files that were once synced to your OneDrive folder.
Why is PandaOffice Drecov Highly Recommended?
This software is a favorite among IT professionals, maintaining strong reputations on Trustpilot and collaborating with industry leaders like the Microsoft Store, TechBullion, and Sourceforge. It serves as a comprehensive “safety net,” capable of retrieving everything from accidentally deleted desktop files to formatted SD cards.
- Versatility: It recovers photos, videos, audio, compressed files (ZIP/RAR), and even system files like EXEs.
- Accidental deletion from your computer desktop.
- Files lost after emptying the Recycle Bin.
- Data loss from disk formatting.
- Accidental deletion or formatting of SD cards/U disks.
- Simple for Beginners: You don’t need to know a single line of code. It’s a “point-and-click” experience.
- File Repair: It can often fix files that are “corrupted” or “unreadable” during the recovery process.
- Privacy First: All recovery happens locally on your machine, so you don’t have to worry about your private data leaking to the web.
🚨 Important Warning: Do not install this on the same drive where the lost files were. Use an external USB drive to keep the data safe from being overwritten.
Steps to Recover Using PandaOffice Drecov
- Step 1: Open the software and select the disk partition where your OneDrive folder lived (usually the C: Drive under ).Users\YourName\OneDrive

- Step 2: Click the Scan button. The software will run a Quick Scan first, followed by a Deep Scan to find fragmented data that the operating system no longer recognizes.
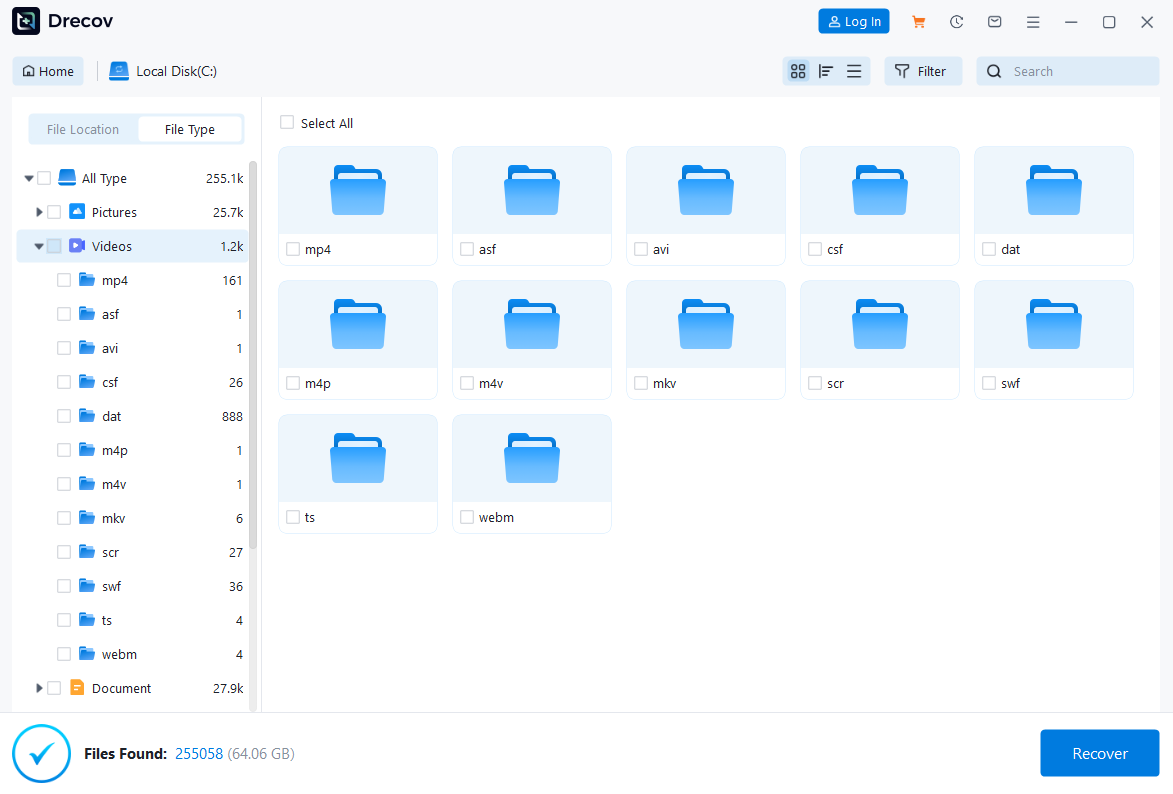
- Step 3: Use the file type filter (e.g., Photos, Documents) to find your lost files. You can click on a file to Preview its content to ensure it is intact.

- Step 4: Select the files you need and click Recover. Choose an external USB drive or a different partition as the destination to ensure a 100% successful recovery.
The “Time Machine” Method: Restore Your Entire OneDrive
If your account was hit by ransomware or a mass-deletion event, you can “roll back” your entire library to a previous state.
- Step 1: Click the Settings ⚙ (Gear icon) in the OneDrive web interface.
- Step 2: Choose Options and click Restore your OneDrive.
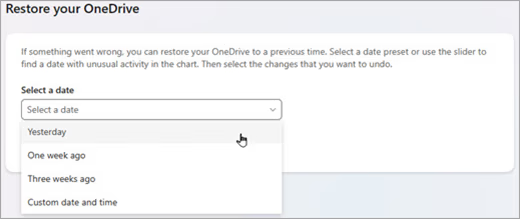
- Step 3: Select a date (e.g., “Yesterday” or “Custom date”).

- Step 4: Use the activity chart to find the moment before the disaster happened and click Restore.
If you selected Custom date and time, select the earliest activity that you want to undo. When you select an activity, all other activities that occurred after that are selected automatically.
Note: Before you select Restore, scroll to the top of the activity feed to review all the activities you are about to undo. When you pick a day in the activity chart, the more recent activities are hidden in the feed, but they’re still selected when you select an activity.
When you’re ready to restore your OneDrive, select Restore. This action will undo all the activities you selected.Your OneDrive file(s) will be restored to the state before the first activity you selected.
Notes:
- When restoring, any files or folders created after the Restore point date will be sent to your OneDrive Recycle Bin.
- If a file has been permanently deleted from your OneDrive Recycle Bin, then it can never be recovered.
- If you change your mind about the restore you just did, you can undo the restore by running Restore again and selecting the restore action you just did.
- Albums are not restored.
Proactive “Insurance”: Better Ways to Protect Your Data
The best way to handle data loss is to ensure that such incidents never happen again. This comprehensive guide, “How to Recover Deleted OneDrive Files: The 2026 Rescue Guide,” will teach you that beyond relying solely on OneDrive, you should also consider the following “insurance” policies for your digital life:
Method A: Set Up Windows File History (The Local Safety Net)
Windows File History is a built-in feature that takes snapshots of your files every hour. If a file is deleted from the cloud and the local drive, File History can bring it back.
- Step 1: Connect an external hard drive to your computer.
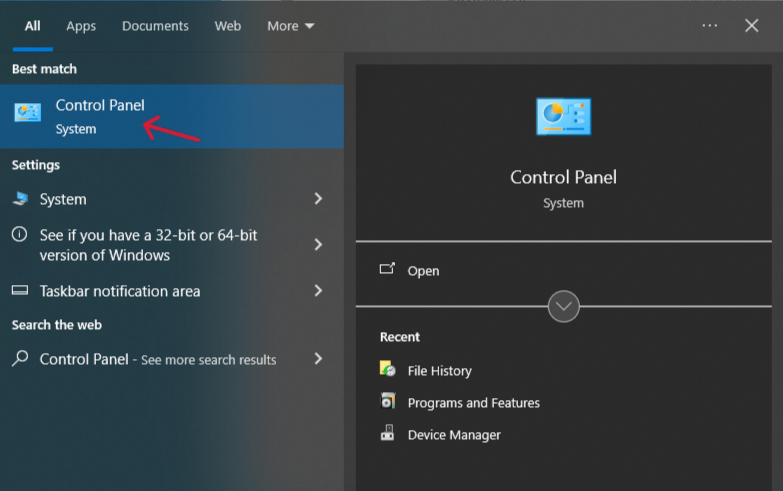
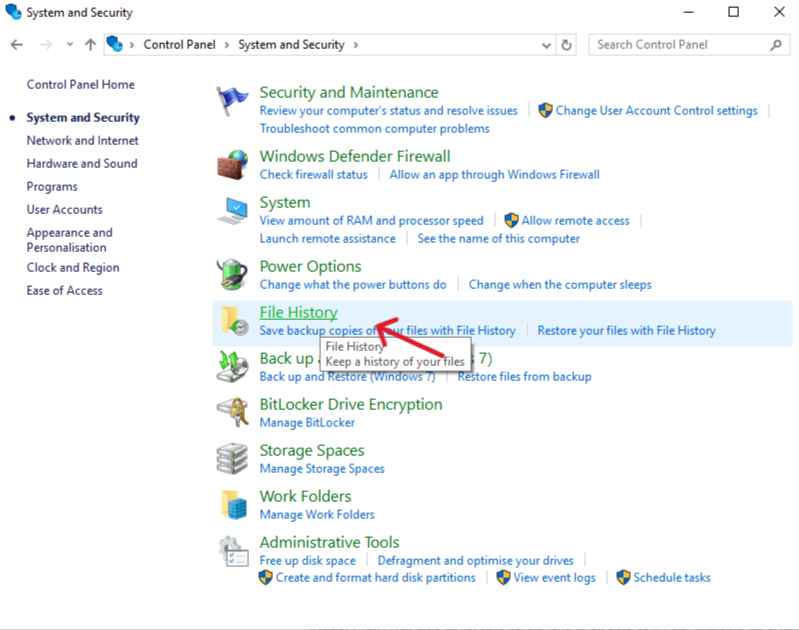
- Step 2: Open the Control Panel and navigate to System and Security > File History.
- Step 3: Click Select drive on the left and choose your external drive.
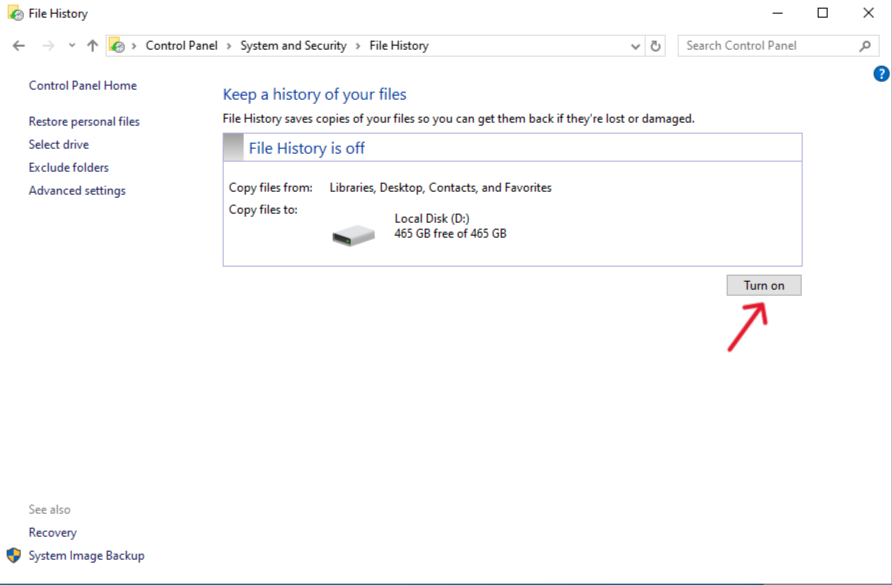
- Step 4: Click Turn on.
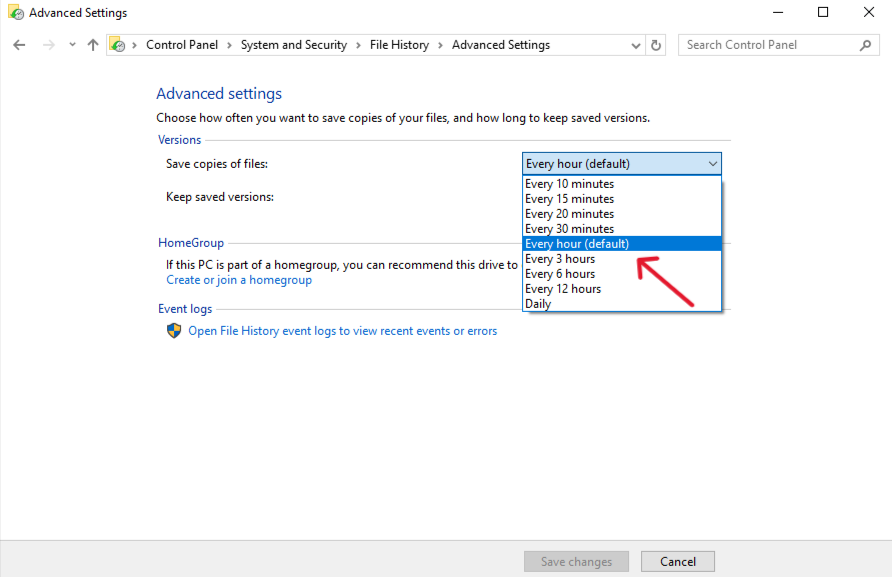
- Step 5 (Customization): Click Advanced settings to choose how often you want to save copies (e.g., every 10 minutes or daily).
Method B: The 3-2-1 Backup Rule
Maintain 3 copies of your data, on 2 different media types (e.g., OneDrive and an external SSD), with 1 copy kept off-site. This prevents a single point of failure from destroying your work.
Conclusion
Losing critical documents doesn’t have to be a permanent tragedy. By moving systematically through the steps provided—checking the cloud bin, utilizing the second-stage recovery, and employing powerful tools like PandaOffice DRecov—you can overcome almost any data loss scenario. Always remember that speed is your best ally; the sooner you begin the recovery process, the higher your chances of total success. Act now, follow the guide, and protect your digital legacy.


