


We have all experienced that split-second of pure dread when we realize we need to Recover Files from Emptied Recycle Bin. Perhaps you were tidying up your desktop, selected a stack of folders you thought were duplicates, and performed the final “Empty Recycle Bin” command, only to realize your primary work presentation or a decade of family photos was in that batch. You look at the empty folder icon, and your heart sinks as the reality of the loss sets in. During such a crisis, having A Guide on How to Recover Files from Emptied Recycle Bin becomes an essential resource to navigate the restoration process.
Is it gone forever? Most users assume that “emptying” is the final act of digital destruction. However, learning how to recover files from emptied recycle bin is not just possible; it is a scientifically grounded process. This guide will walk you through the forensic “why” and the practical “how” of data rescue, ensuring you have the best chance of a full recovery even if you aren’t a “tech person.”
Part 1: The Forensic Reality of “Deleted” Data
To successfully navigate how to recover files from emptied recycle bin, you must understand how your hardware handles data. Your computer is designed for efficiency, and physically wiping a file takes time. Consequently, Windows chooses to simply “hide” the file instead of destroying it.
Logical vs. Physical Deletion
Think of your hard drive as a massive encyclopedia. When you save a file, the system creates a “Table of Contents” entry that tells the computer exactly which page (sector) the data lives on. When you empty the Recycle Bin, Windows takes a digital eraser only to the Table of Contents. It marks the space as Available. The actual data—the photos, the text, the code—remains physically etched on the disk as “ghost data” until new information overwrites it.
The SSD Factor: Why 2026 is Different
Most modern laptops use SSDs (Solid State Drives) rather than traditional HDDs. SSDs use a feature called TRIM. When you empty the bin, TRIM tells the SSD to proactively “clean” those empty blocks during idle time. This makes the window to Recover Files from Emptied Recycle Bin much smaller on an SSD. Therefore, speed is your absolute priority.
Part 2: The “Negative List” — What NOT to Do
Before attempting any recovery, you must avoid these common mistakes that “kill” your data:
- Do Not install software on the C: drive (use a USB instead).
- Do Not download large files or stream high-definition videos.
- Do Not run “Disk Cleanup” or “System Optimizers” like CCleaner.
- Do Not restart your computer repeatedly, as Windows writes log files during every boot.
Part 3: Detailed Restoration Pathways
Method 1: Previous Versions via Shadow Copies
Windows often creates “Shadow Copies” of your files during system checkpoints. This is a powerful, built-in way to go back in time without installing extra software.
- Step 1: Navigate to the folder that used to hold your deleted files and right-click on that folder and select Properties from the menu.
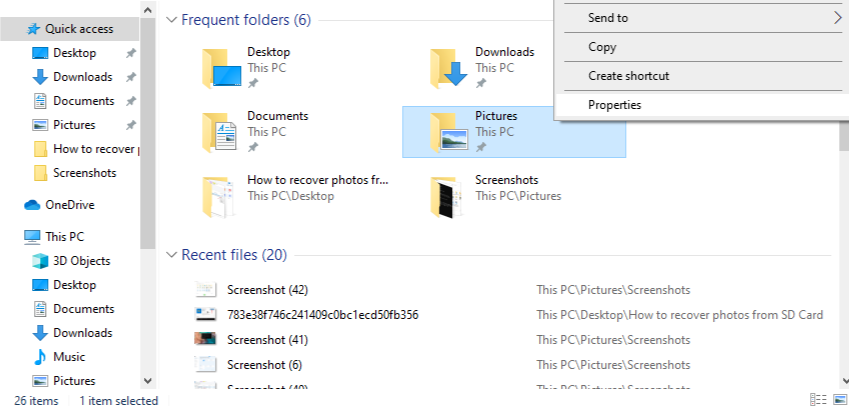
- Step 2: Click on the tab labeled Previous Versions. Look for a version dated before your accidental deletion.
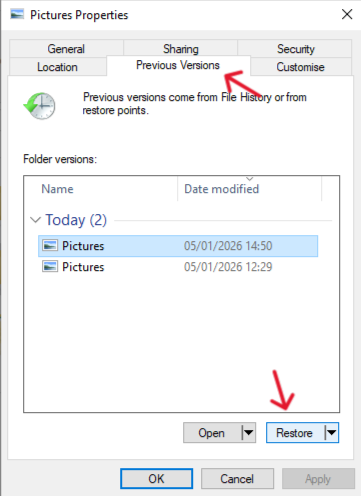
- Step 3: If you see one, click Open to verify the files. Select the files and click Restore.
Method 2: High-Performance Restoration with PandaOffice Drecov
Sometimes, a file is partially overwritten or the file system index is broken. In these high-stakes cases, PandaOffice Drecov is the most effective way to Recover Files from Emptied Recycle Bin because it uses deep-sector reconstruction.
Why is PandaOffice Drecov Highly Recommended?
This software is a favorite among IT professionals, maintaining strong reputations on Trustpilot and collaborating with industry leaders like the Microsoft Store, TechBullion, and Sourceforge. It serves as a comprehensive “safety net,” capable of retrieving everything from accidentally deleted desktop files to formatted SD cards.
- Versatility: It recovers photos, videos, audio, compressed files (ZIP/RAR), and even system files like EXEs.
- Accidental deletion from your computer desktop.
- Files lost after emptying the Recycle Bin.
- Data loss from disk formatting.
- Accidental deletion or formatting of SD cards/U disks.
- Simple for Beginners: You don’t need to know a single line of code. It’s a “point-and-click” experience.
- File Repair: It can often fix files that are “corrupted” or “unreadable” during the recovery process.
- Privacy First: All recovery happens locally on your machine, so you don’t have to worry about your private data leaking to the web.
🚨 Important Warning: Do not install this on the same drive where the lost files were. Use an external USB drive to keep the data safe from being overwritten.
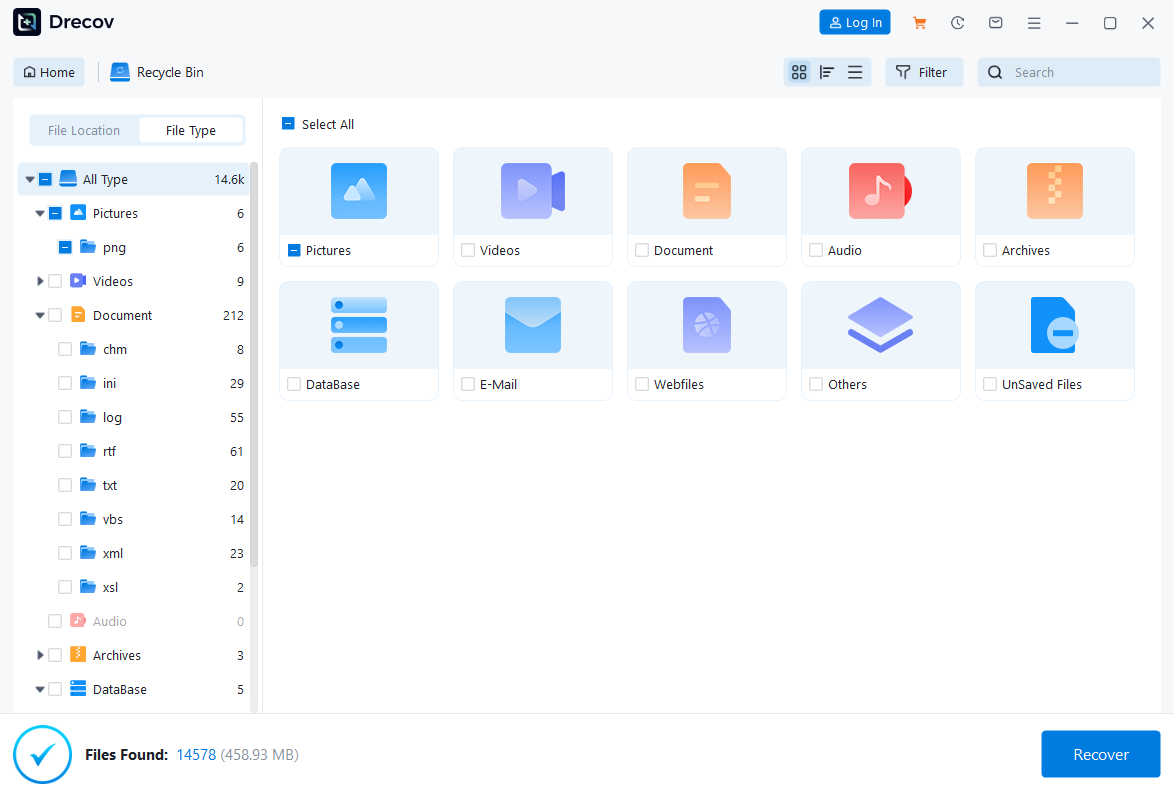
- Step 1: Choose the specific drive partition (usually C:) where the Recycle Bin lives.
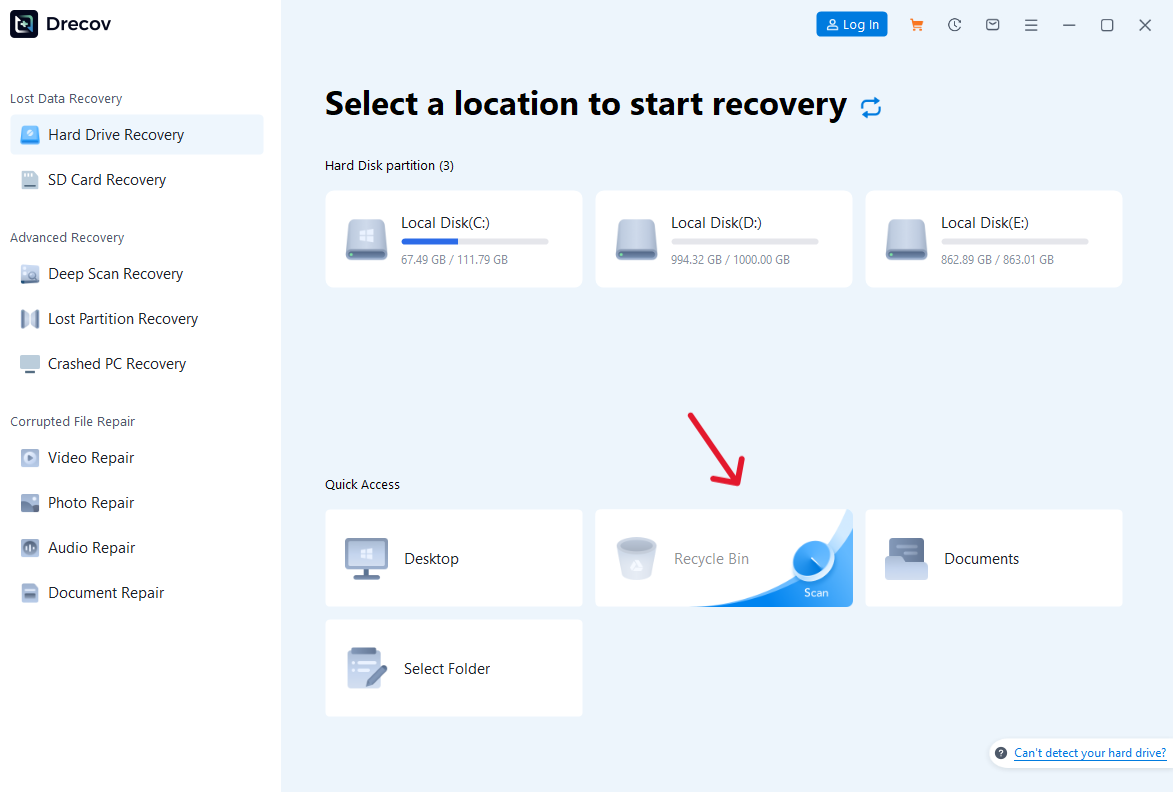
- Step 2: Initiate the Scan. The software utilizes “signature-based recovery” to find the actual patterns of a PDF, JPG, or DOCX file.
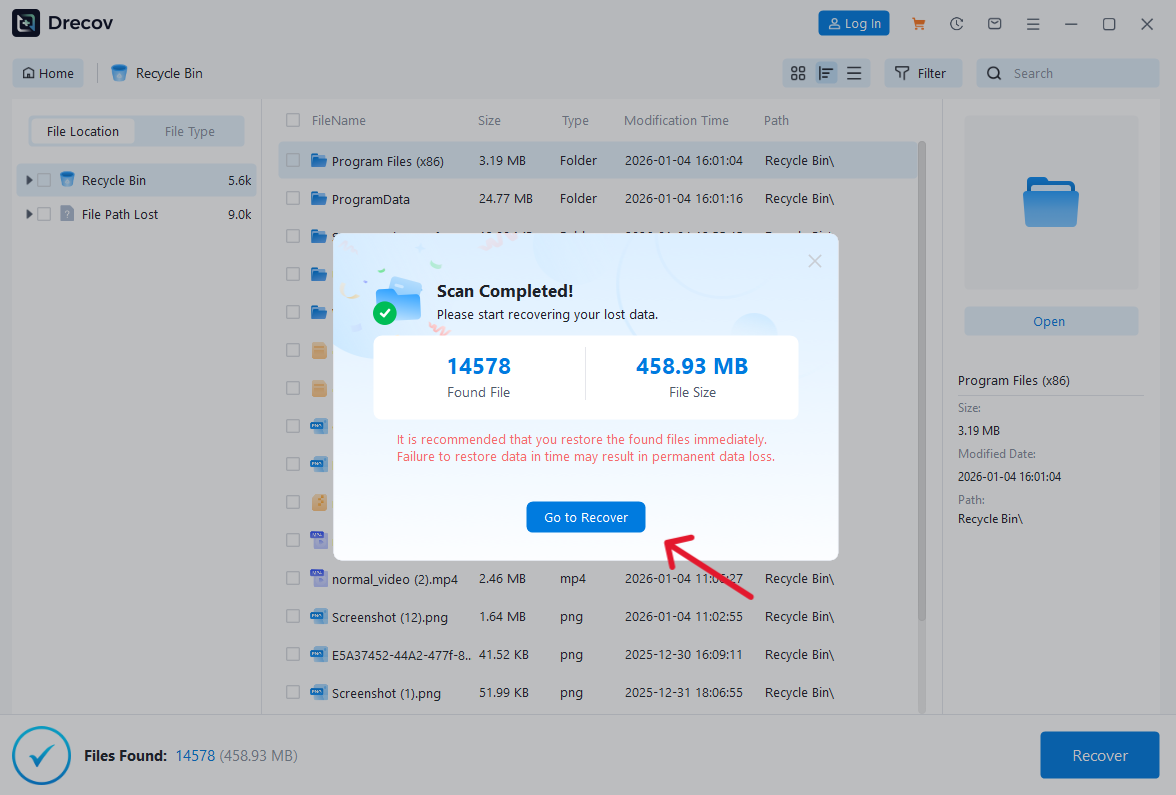
- Step 3: Once results appear, use the File Type filter to skip system files and go straight to your personal data.
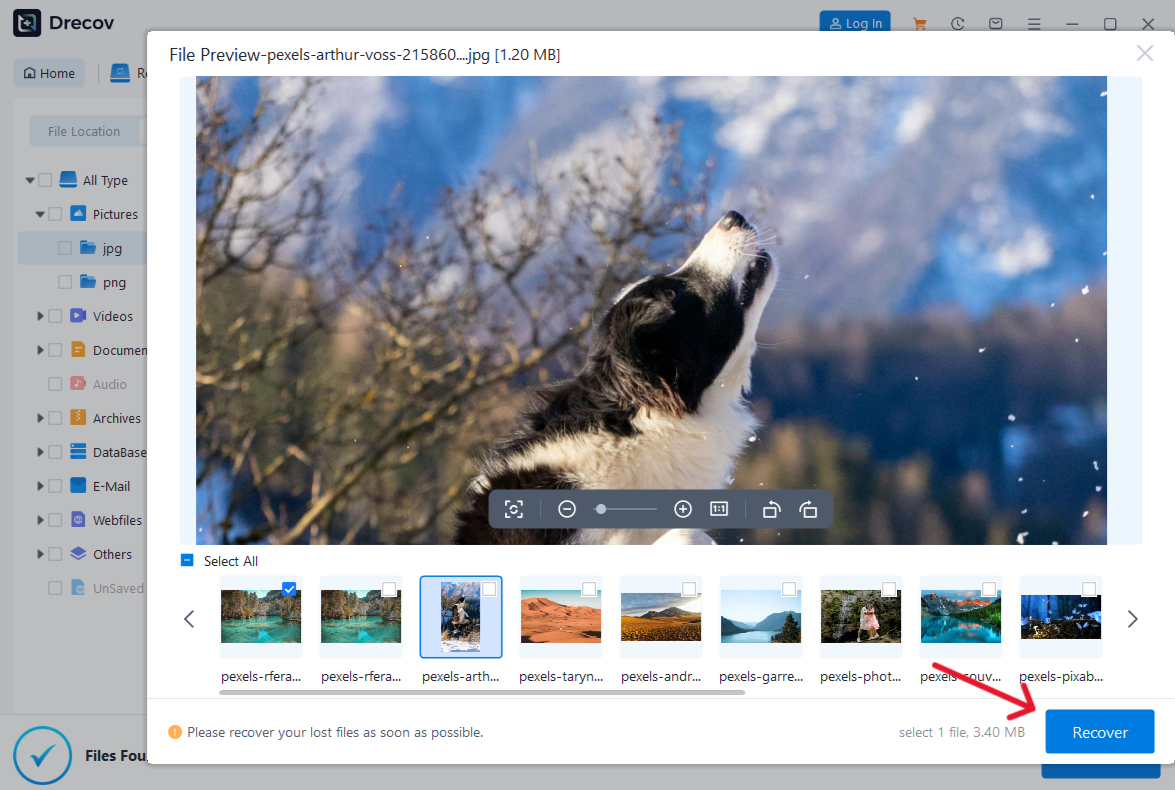
- Step 4: Select your items, click Preview to verify integrity, and then click Recover.
Method 3: Command Prompt (The ATTRIB Command)
Occasionally, files are not truly deleted but are hidden or moved by a system glitch. The ATTRIB command can “force” Windows to show these files again.
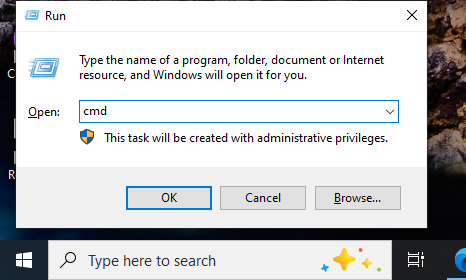
- Step 1: Click the Start button, type cmd, and select Run as Administrator.
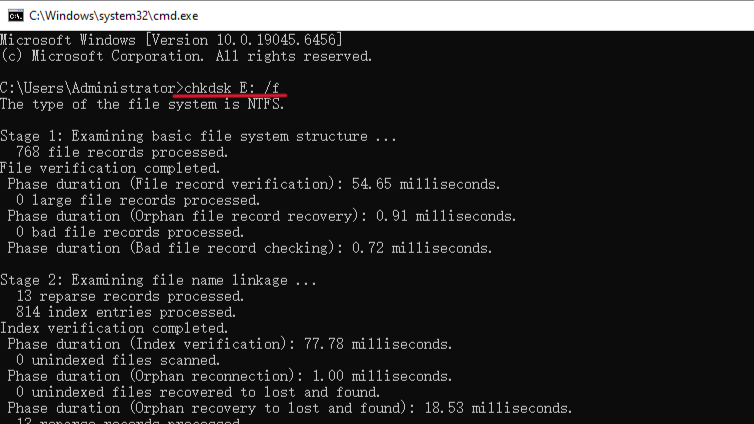
- Step 2: Type:
chkdsk X: /f(Replace X with your drive letter) and press Enter to repair the file table.
- Step 3: Type the following command:
attrib -h -r -s /s /d X:\*.*and press Enter.
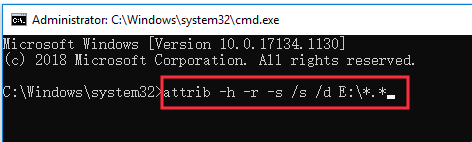
- Step 4: This removes the Hidden (h), Read-only (r), and System (s) attributes from all files on the drive, potentially revealing your “missing” data.
Part 4: Tool Comparison Guide
Choosing the right method depends on your technical comfort and how much time has passed since deletion.
| Recovery Method | Success Rate | Speed | Difficulty | Best For |
| File History | High (if enabled) | Very Fast | Easy | Recent deletions with backups |
| PandaOffice Drecov | Very High | Fast | Easy | Empty bins without backups |
| CMD (ATTRIB) | Low | Fast | Professional | Hidden files or system glitches |
A Guide on How to Recover Files from Emptied Recycle Bin FAQs:
1. Can I recover files if my Recycle Bin was set to “Remove files immediately when deleted”?
Yes. This setting simply skips the “holding area.” Since the files were never in the bin, the recovery process is identical to the one we use for an emptied bin. You should use PandaOffice Drecov immediately.
2. Why do some recovered photos look “greyed out” or cut in half?
This indicates “partial overwriting.” It means that after you emptied the bin, your computer saved new data (like a browser cookie) on top of a portion of your photo. This highlights why you must stop using the PC immediately.
3. Does emptying the bin on a USB flash drive work differently?
Yes! When you delete a file on a USB drive, Windows usually does not put it in a Recycle Bin—it deletes it immediately. To recover these, you almost always need specialized software like PandaOffice Drecov.
4. Is it safe to use “Free” recovery tools found on random websites?
Be very cautious. Many “free” tools are actually bloatware that can write more data to your drive during installation, which is exactly what you want to avoid.
Conclusion: Your Survival Toolkit
Successfully learning A guide on how to recover files from emptied recycle bin transforms a potential catastrophe into a manageable task. By combining the “Shadow Copy” features of Windows with the surgical precision of PandaOffice Drecov, you maximize your chances of success. However, the best recovery strategy is always proactive. Moving forward, ensure your File History is toggled “ON” and consider a secondary cloud backup. Your data is your digital legacy—treat it with the care it deserves!


